Pin Modification
74 posts
• Page 4 of 5 • 1, 2, 3, 4, 5
Thanks for the picture FarmerFreak, I thought it was upside down...
Re: Pin Modification
FF's picture shows the correct orientation.
Before sending a couple challenge locks out I beta tested two (only two!) pins in chambers 3 and 4 of a mortise cylinder. I panicked for a minute thinking I had just locked myself out of the cylinder I had intended to use. The non-stop springy feedback really threw me for a loop. Until you get the deep false set on the inner pins it's very difficult to know if you are proceeding down the right path. Now multiply this by 5 or 6 pins!
Hats off to rerun12 and Farmerfreak for successfully opening their locks. Incredible!
Huzzah!
Re: Pin Modification
flywheel wrote:This was before they fell into the wood chipper...
By the way, wood chippers are great for pin modification.
It has been a while, but thought I should post of what that particular LFIC looked like after the 'wood chipper' treatment. But first, in typical 'me' fashion, gotta tell it in stages.
Fifth, ended up with this...
Oh, wait. MIssed a few picking stages there, didn't I?
With the first 'set', it looked like this.
The next set was deeper. Gotta be a false set. A tiny bit more work with the pick, and got here!
OK, now to get out of that false set. Here we go! Yeah... another false set... deeper yet.
More picking, and WTF? How deep a false set can you get???
Another five minutes with the pick, and still not a single pin is budging. No counter rotation at all. No spring at all.
Oh... uhhh...
LFIC. Picked to control.
OK, pushed the control tab back out, and we are back to the first picture.
Much better. Yeah, I meant to do that. Knew it was at control the whole time. (You do believe me, don't you?)
OK, what is inside? Dumped the pins into this nifty Keypicking.com pinning tray (3D printed by Anarchy_won).
And the pins are beautiful.
Bit of an improvement from the original at the top of this post, isn't it?
Suggested improvement - countermilling or threading the pin channels to catch those beautiful stepped spool pins.
This was a fun pick, and caught my attention primarily because of deeper and deeper false set. After three progressively deeper false sets, thought control was yet another false set. Appreciate the fun, Flywheel.
Gordon
Just when you think you've learned it all, that is when you find you haven't learned anything yet.
Re: Pin Modification
After picking open the first time, and thinking it was too easy, I decided to give the long serrated pins a slight taper so there would be more intermediate T-pin binding.
Besides being in great shape, that LFIC is the only one I've come across so I was reluctant to thread the chambers without the proper tools.
All in all a fun pick with all the sharp clicks and never ending false sets. Glad you enjoyed it!
Besides being in great shape, that LFIC is the only one I've come across so I was reluctant to thread the chambers without the proper tools.
All in all a fun pick with all the sharp clicks and never ending false sets. Glad you enjoyed it!
Re: Pin Modification
Oooh nice pinning! I like the tray too!
femurat: They're called restricted for a reason...
Innerpicked: The more keys you carry, the more important you look
GWiens2001: Great video! Learned a lot about what fun can be had with a forklift and a chainsaw.
pmaxey83: but i first have to submit the proper forms for a new hobby to my wife
Innerpicked: The more keys you carry, the more important you look
GWiens2001: Great video! Learned a lot about what fun can be had with a forklift and a chainsaw.
pmaxey83: but i first have to submit the proper forms for a new hobby to my wife
Re: Pin Modification
Damn Fly:
I can't believe I'm just finding this thread now. I love those PiP using nails I usually just bang nails into wood! I never thought of them as lock components. Maybe I can re-purpose some stuff kicking around also , although I'm not nearly as creative as some of my fellow KPer's. The ingenuityy here amazes me.
So many challenges so little time. I need to get my shed done and tools setup so I can go out there and get lost in locksmithery for hours at a time.
Great work Mate.
The other, other, other, other Mike
(21:55:20) HAL 9001RC:: Heh heh uh heh uh heh uh uh heh PhoneMan said ass
Re: Pin Modification
Flywheel you have out done yourself friend. I have collected several tiny screws to used a pins for challenge locks but the pin-in-nailpins are AMAZING. Im just super amazed WOW great work bud.
If that pin-in-nailpin lock is still around, I would love to take a stab at it. thanks
Re: Pin Modification
Papa Gleb wrote:If that pin-in-nailpin lock is still around, I would love to take a stab at it. thanks
Re: Pin Modification
Nothing new. Here are the challenge lock pins I sent to bosnianbill a couple weeks ago. I was really nice and gave him a wide open keyway and gentle bitting. The driver and key pins are not paired properly and the final order differs also.
Here is the plug before reassembly. This is what BB will have to pick through.
Here we go. This is the final order with pin one on the right and six on the left.
Here is the plug before reassembly. This is what BB will have to pick through.
Here we go. This is the final order with pin one on the right and six on the left.
You do not have the required permissions to view the files attached to this post.
Re: Pin Modification
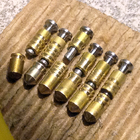
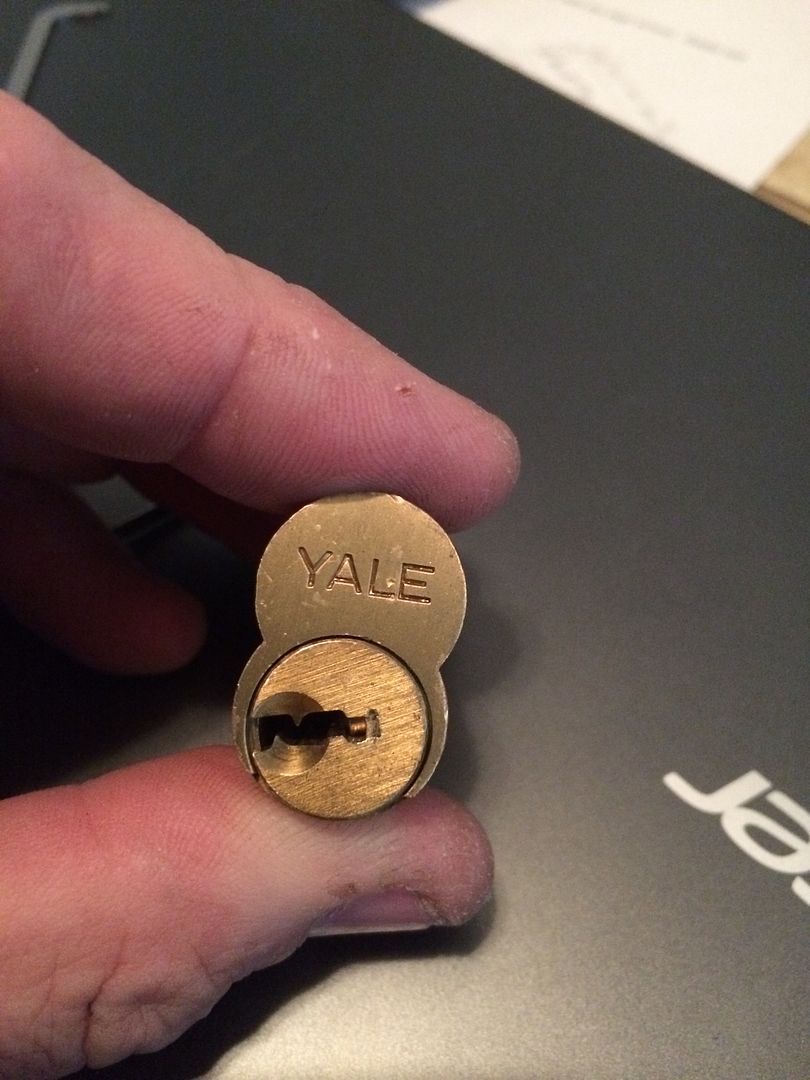
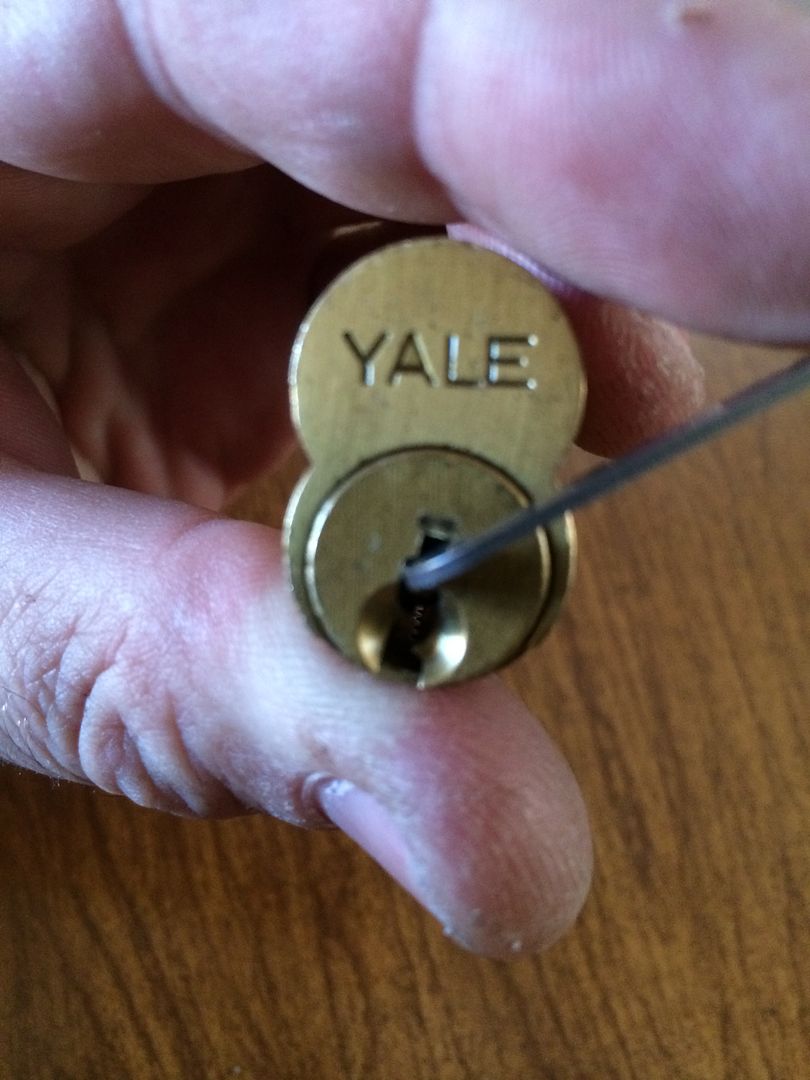
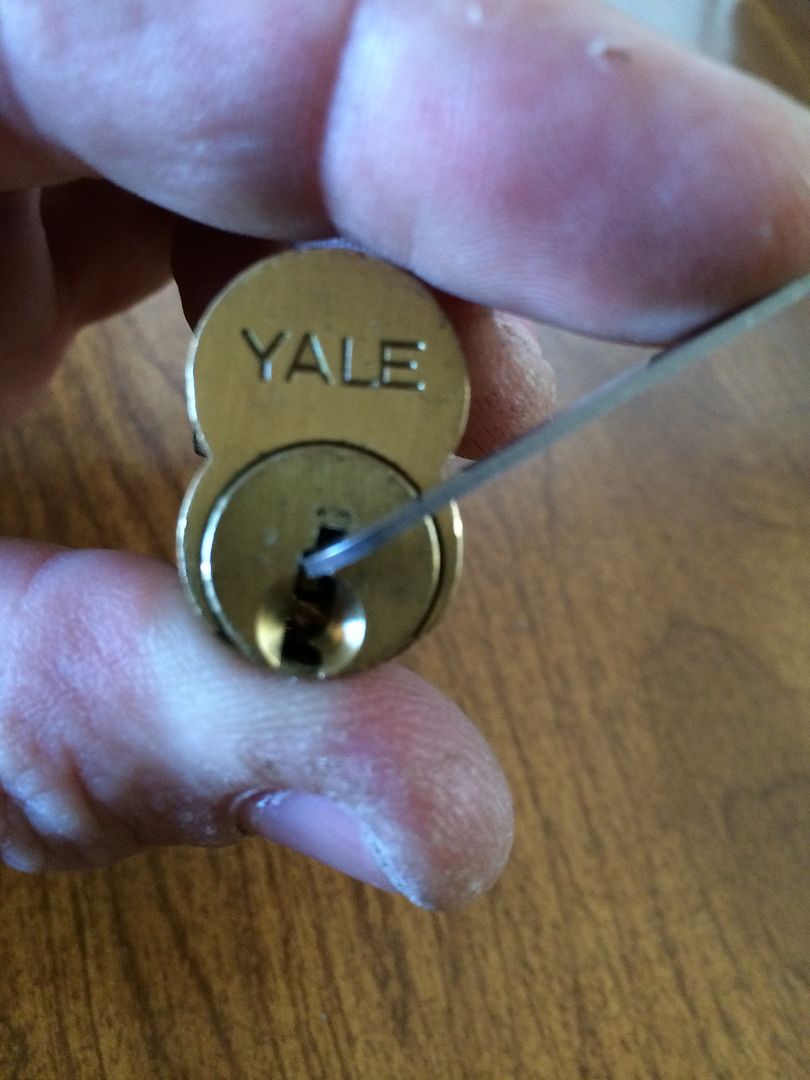
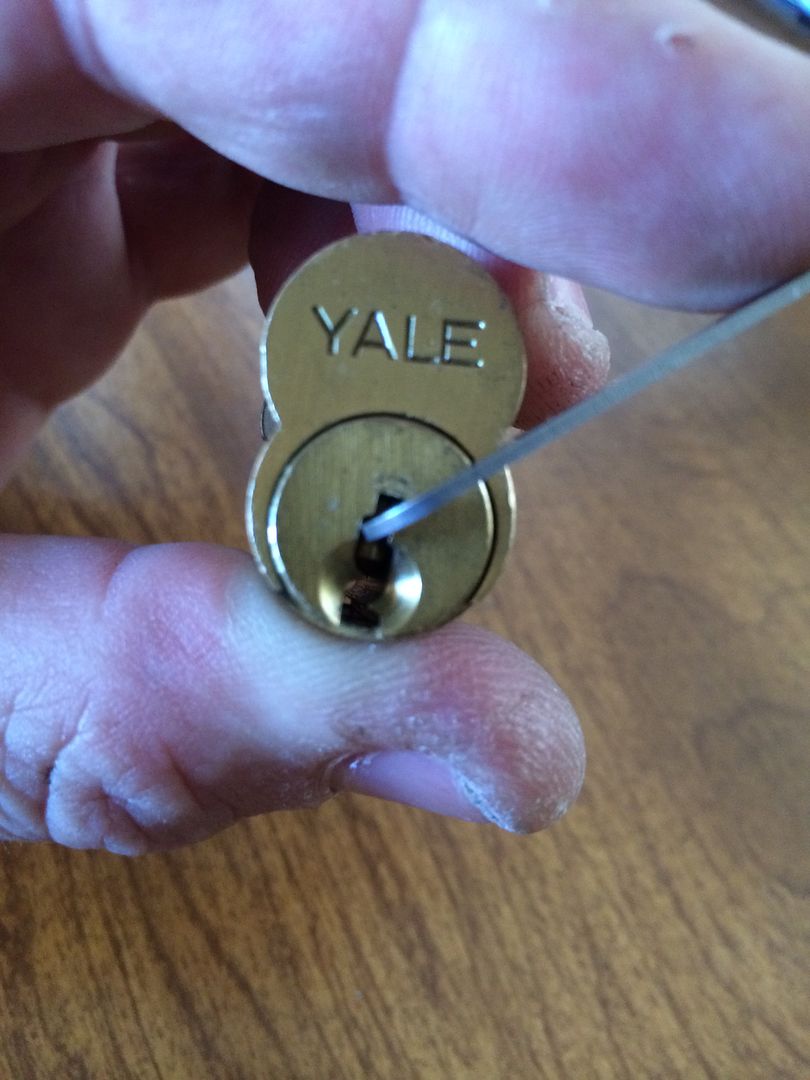
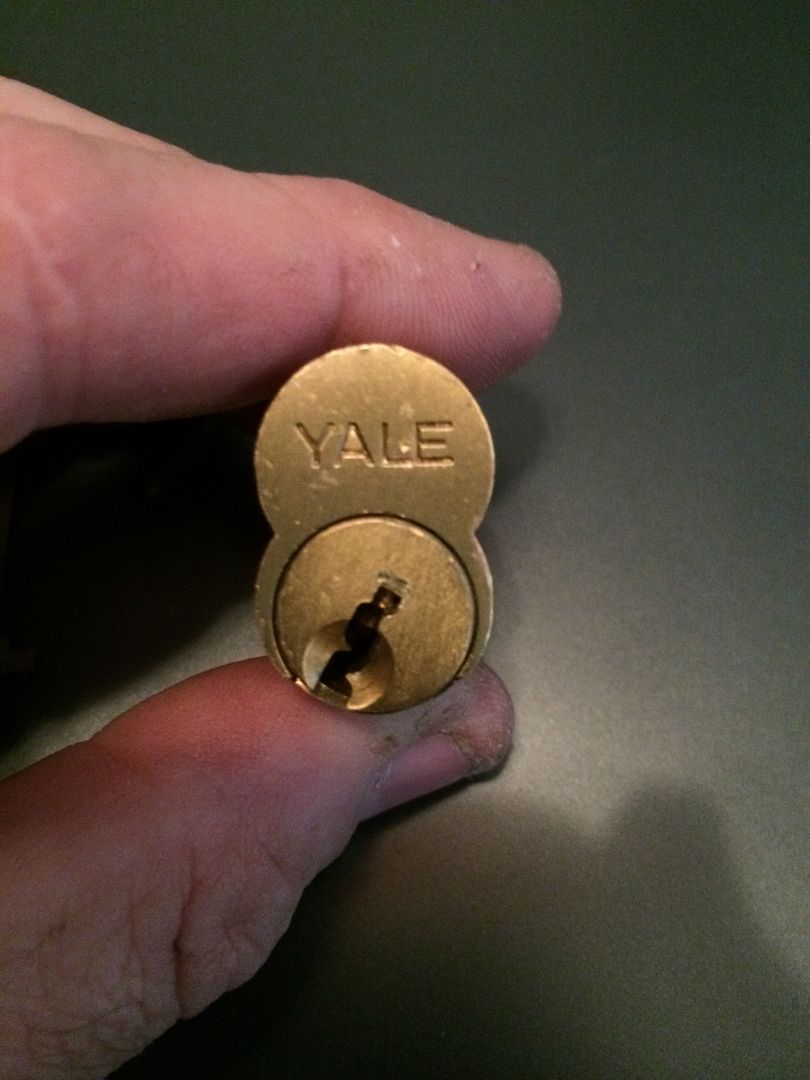
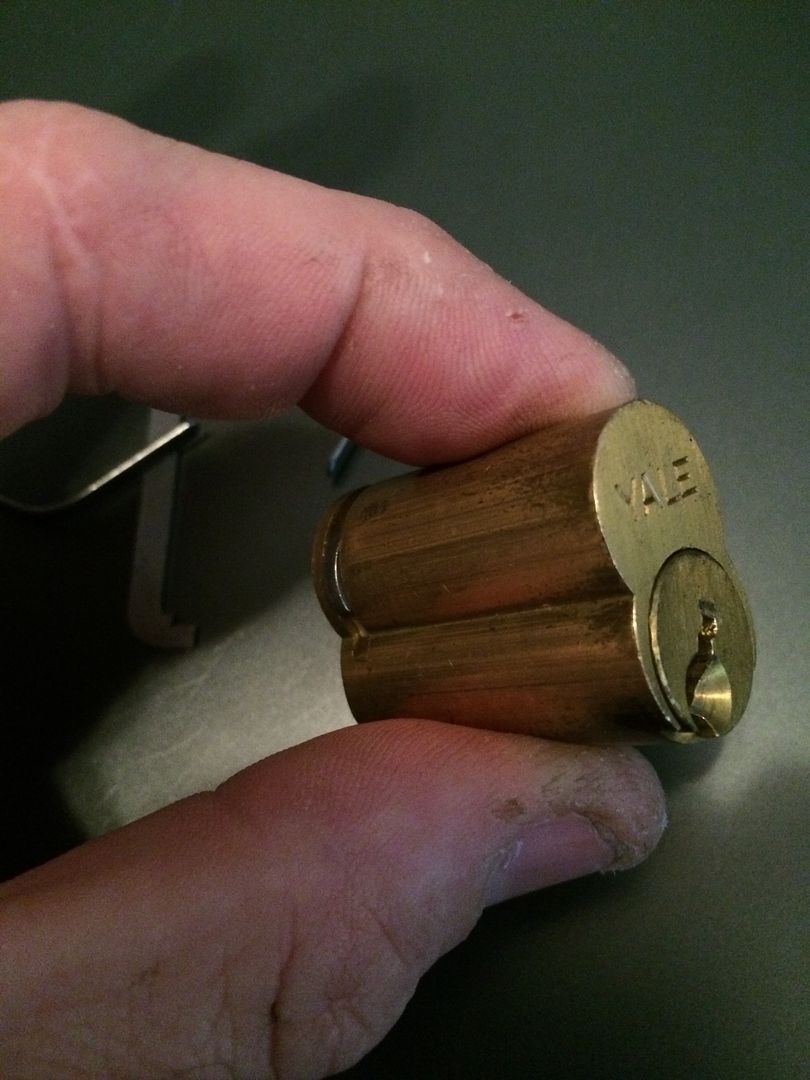
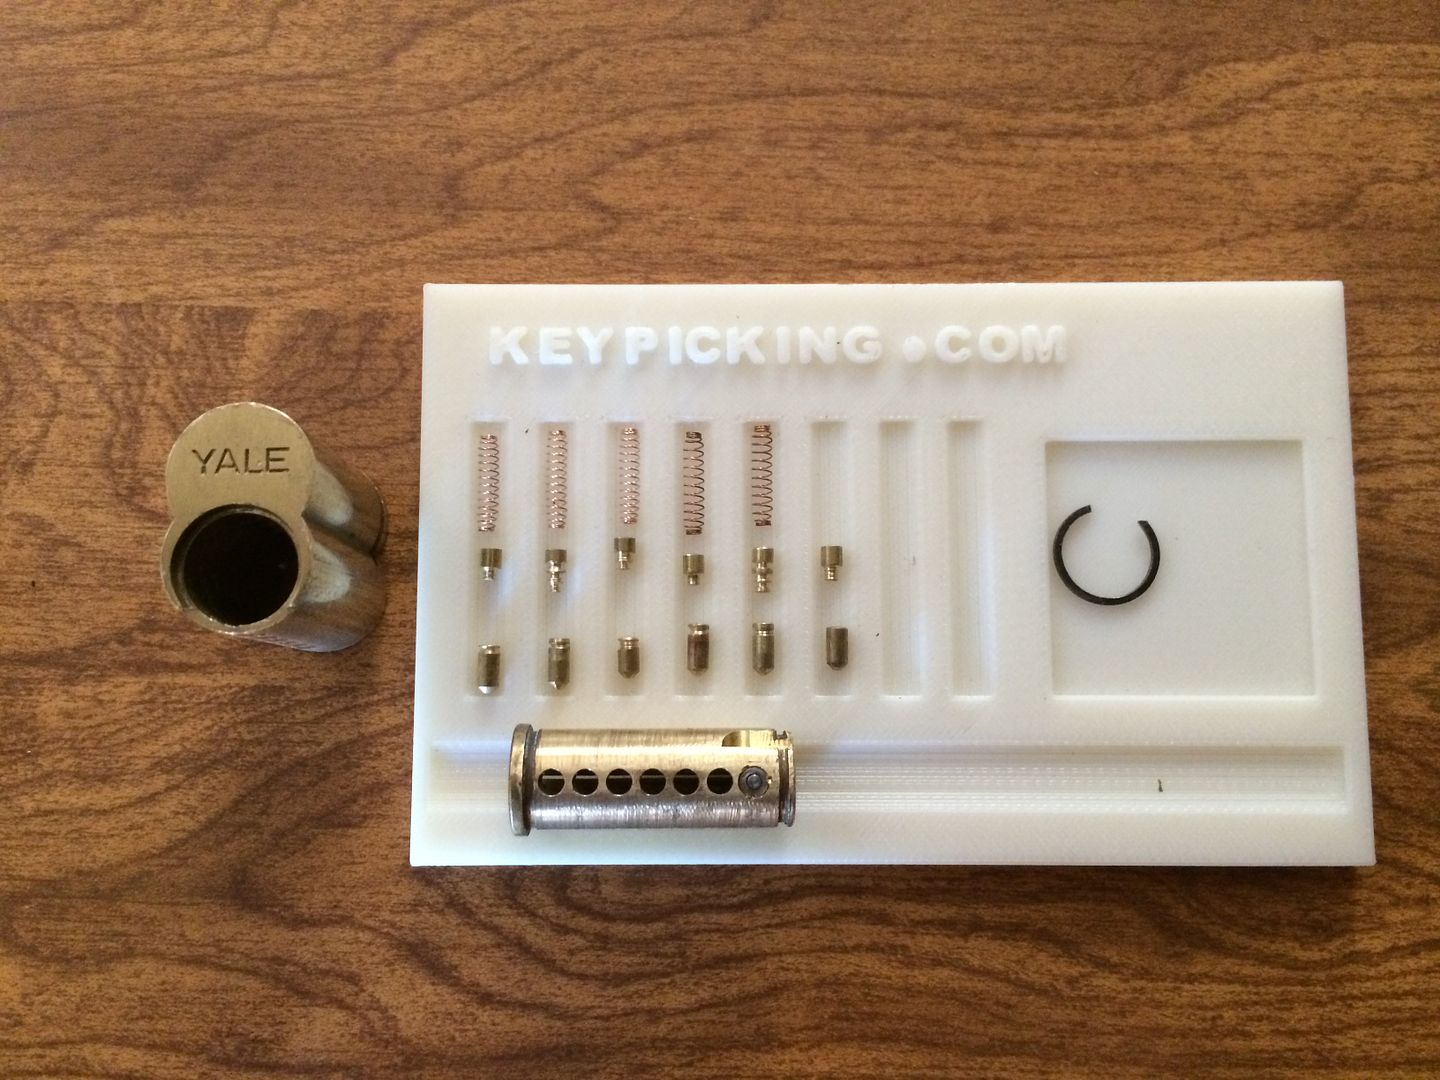
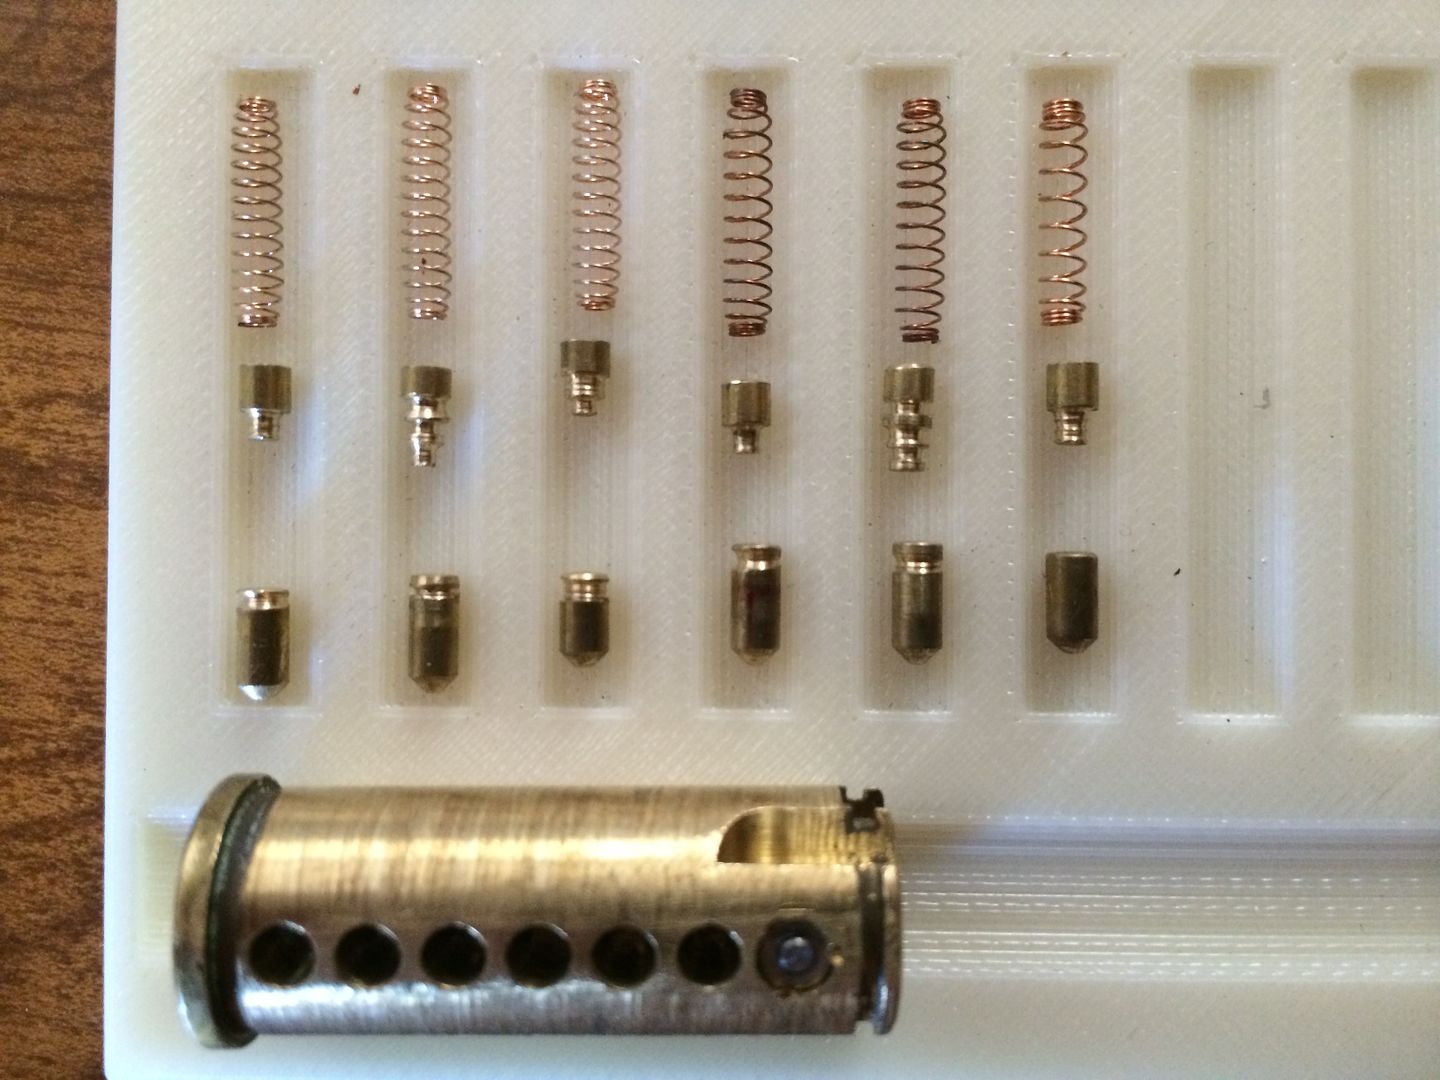
flywheel wrote:Nothing new. Here are the challenge lock pins I sent to bosnianbill a couple weeks ago. I was really nice and gave him a wide open keyway and gentle bitting. The driver and key pins are not paired properly and the final order differs also.
Here is the plug before reassembly. This is what BB will have to pick through.
Here we go. This is the final order with pin one on the right and six on the left.
Holy Mother of God!
Flywheel, you've done some nice work there, those look incredible.
So basically nothing but misleading feedback from the top row? Have you had any success picking them? Any hints?
Can't wait to see the video, well that is if Bill can figure out how to pick it that is
Thanks for the pin porn - quite inspiring really - DIY rocks!
Cheers,
Sean
edit - for brain malfunctions....cccannnt ttttypppe....
Last edited by VancouverSpecial on Wed Apr 01, 2015 9:05 pm, edited 1 time in total.
OldddffAASSTT the Spin Master Extraordinaire and American Lock Slayer
Posts: 4412
Joined: Thu Mar 31, 2011 9:16 am
Location: Michigan
Re: Pin Modification
*shakes his head* WICKED BEAUTIFUL.
I haven't been keeping up on the tube lately....
but I may have to keep an eye out for Bill's vid. lol
In fact, if you remember... post the link to it here when it comes out will you?
I haven't been keeping up on the tube lately....
but I may have to keep an eye out for Bill's vid. lol
In fact, if you remember... post the link to it here when it comes out will you?
" Enjoy the journey AS MUCH as the destination."
Re: Pin Modification
I was contacted via YT by someone asking for a challenge lock swap. I was happy to help and sent him some standard stuff. Should be arriving on his doorstep today.
One little nasty trick though. Pin 4 is already at the shear line. It will be overset if lifted at all. After this picture was taken I knocked a few thousandths off the diameter to help facilitate oversetting. Oh, that and the short pin behind it.
This next lock was pinned to a "T". Key pins are serrated as force of habit but I now realize that oversetting them probably isn't a problem with such aggressive T-pins.
Most of the alterations rest below the shear line leaving very little slop in the plug.
All in all some nice 5-pin distractions.
Have a great day KPers!
You do not have the required permissions to view the files attached to this post.
Re: Pin Modification
incredible work man just incredible. If you ever get around to make any more of those pin in pin challenge locks keep me in mind. Ill be more than happy to swap or trade or whatever lol
Re: Pin Modification
GWiens2001 wrote:
Suggested improvement - countermilling or threading the pin channels to catch those beautiful stepped spool pins.
This was a fun pick, and caught my attention primarily because of deeper and deeper false set. After three progressively deeper false sets, thought control was yet another false set. Appreciate the fun, Flywheel.
Gordon
Hey Fellahs,
So, I think I understand how to go about threading the plug with a tap+die setup but countemilling pin chambers has me stumped?
Ideas for how can one countermill the pin chambers in the plug? I'd love to be able to cut a ledge out below the lip (like some of the Scandinavian-made locks often have). My only thought so far is to find a small enough dremel cutting bit with a squared off cylinder shape (not rounded) - but no idea if this would work, plus I haven't yet found the right bit (I have one the right shape but too big).
Keep up the great work Flywheel
Sean
Re: Pin Modification
VancouverSpecial71 wrote:So, I think I understand how to go about threading the plug with a tap+die setup but countemilling pin chambers has me stumped?
Ideas for how can one countermill the pin chambers in the plug? I'd love to be able to cut a ledge out below the lip (like some of the Scandinavian-made locks often have). My only thought so far is to find a small enough dremel cutting bit with a squared off cylinder shape (not rounded) - but no idea if this would work, plus I haven't yet found the right bit (I have one the right shape but too big).
I've tried with a hand drill and dremel but there is just not enough stability plus standard drill bits only chamfer the edge. Probably need a drill press and bits used for milling.
74 posts
• Page 4 of 5 • 1, 2, 3, 4, 5
Who is online
Users browsing this forum: No registered users