![]() Sun Feb 16, 2014 10:52 am
Sun Feb 16, 2014 10:52 am
Disassembly and Decoding of a Chicago Lock Padlock
Disassembly and Decoding of a Chicago Lock padlock
Yes, Oldfast, there are gut shots.
Got two of these in the mail recently, only one of which has a key. Will have to make a key for one, and thought you might want a primer on disassembly and decoding of these locks.
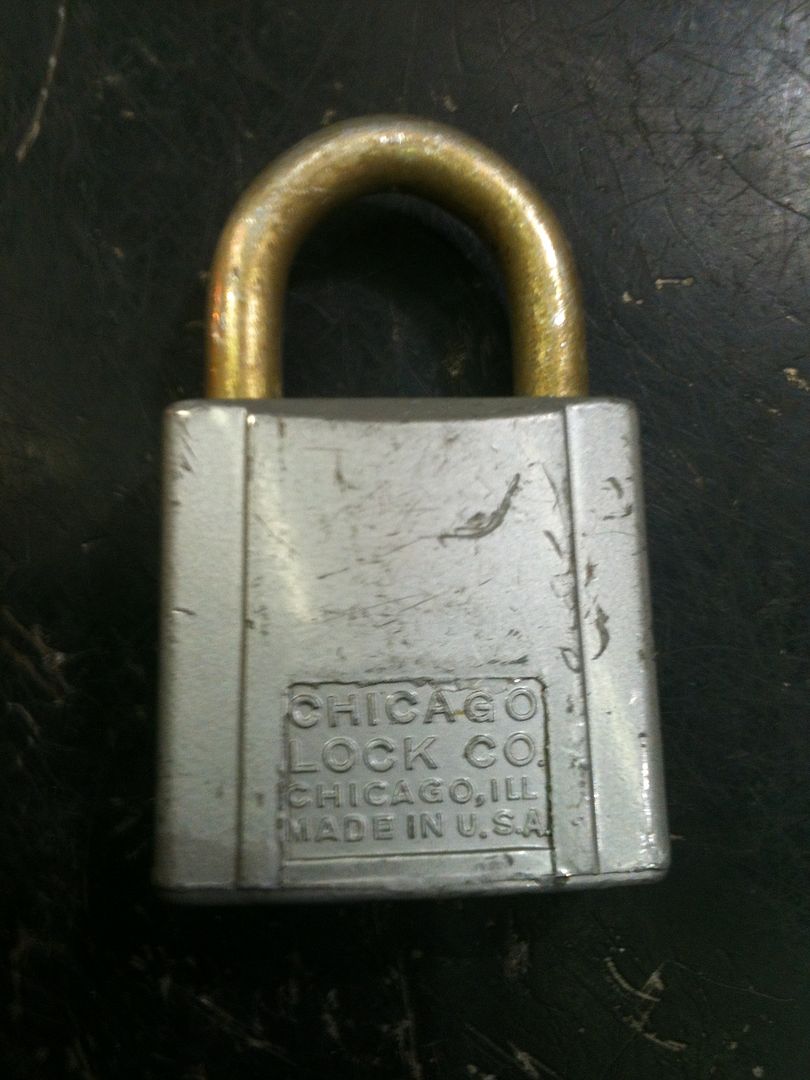
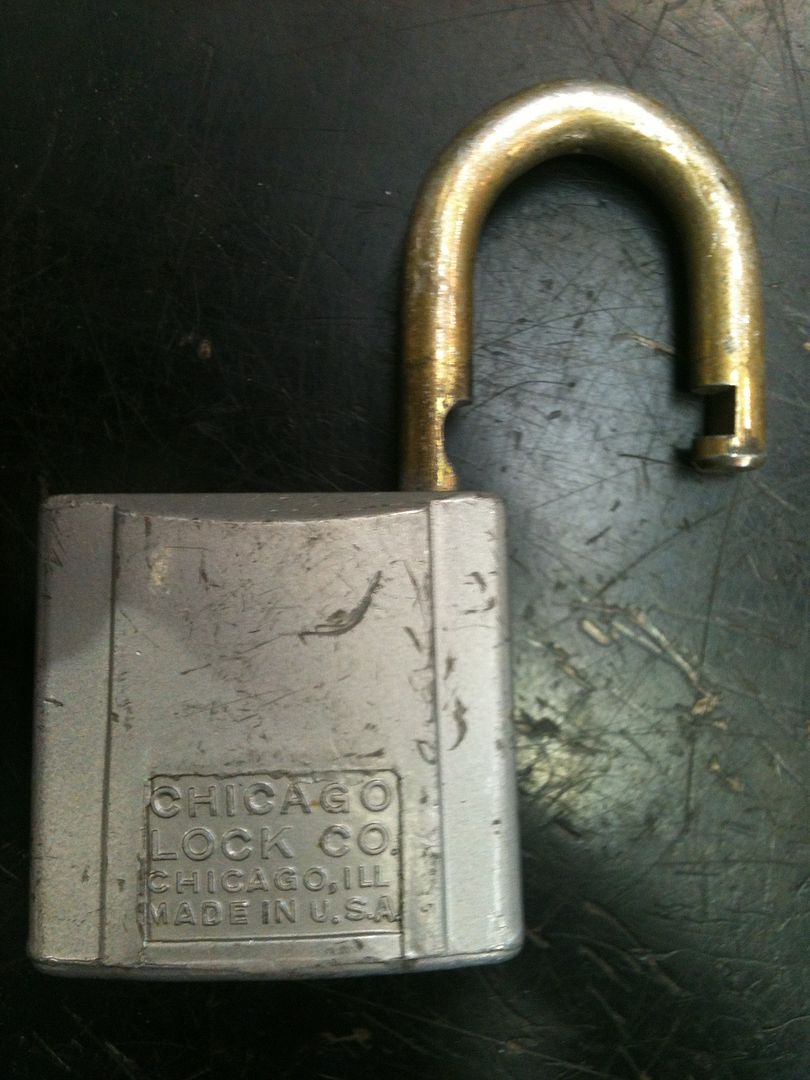
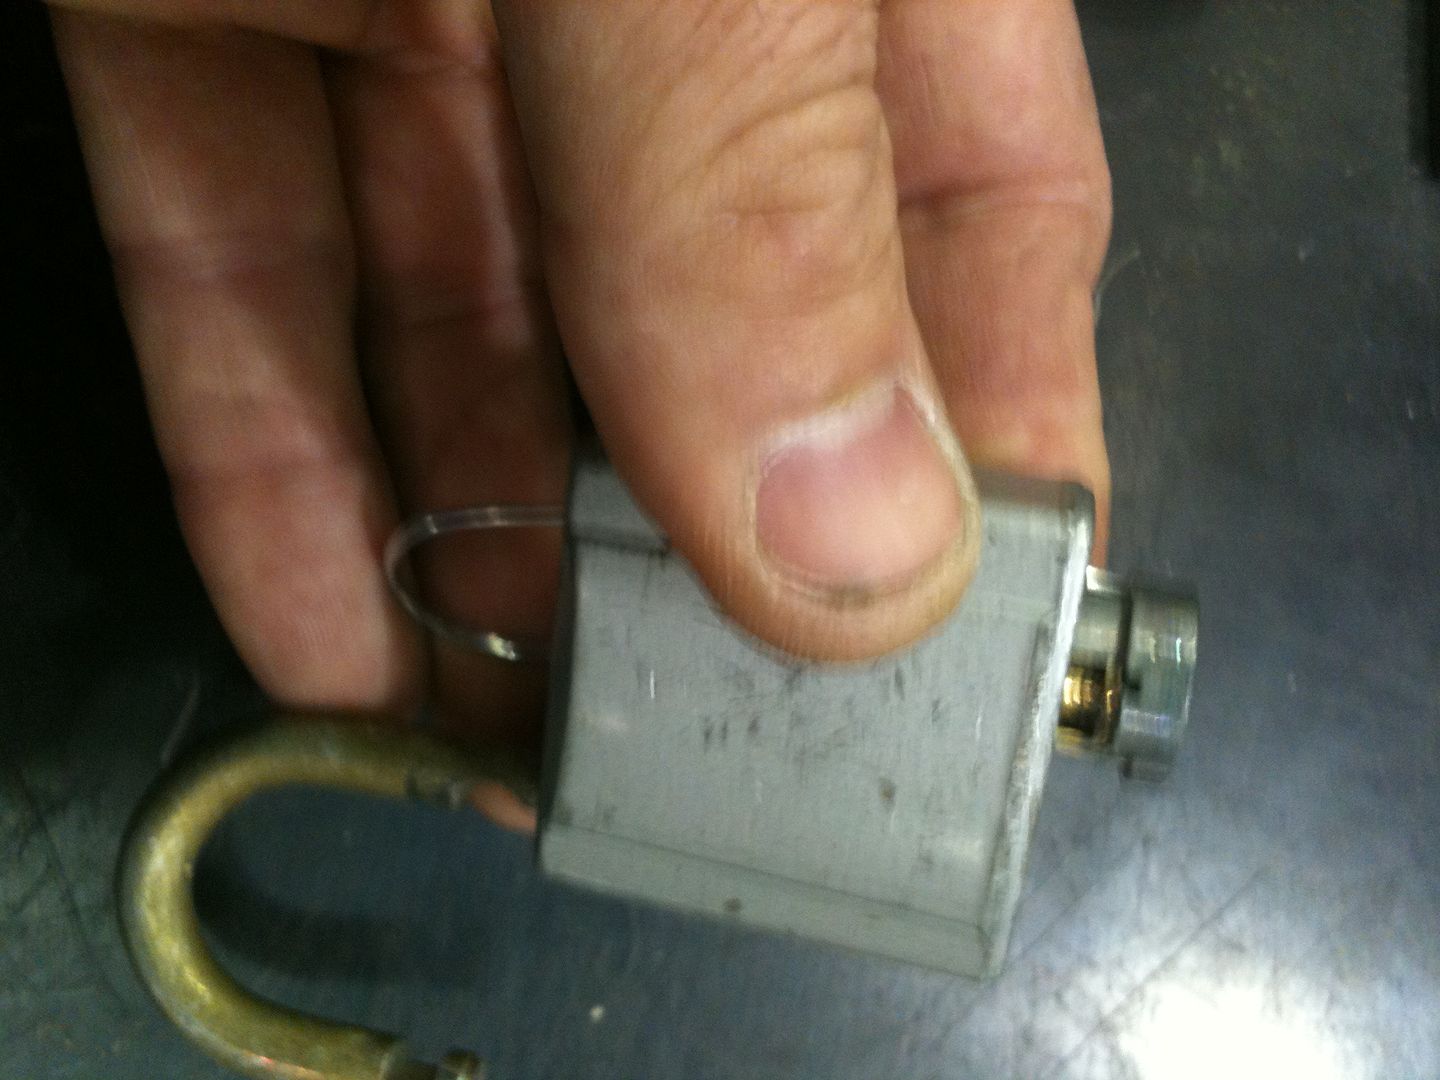
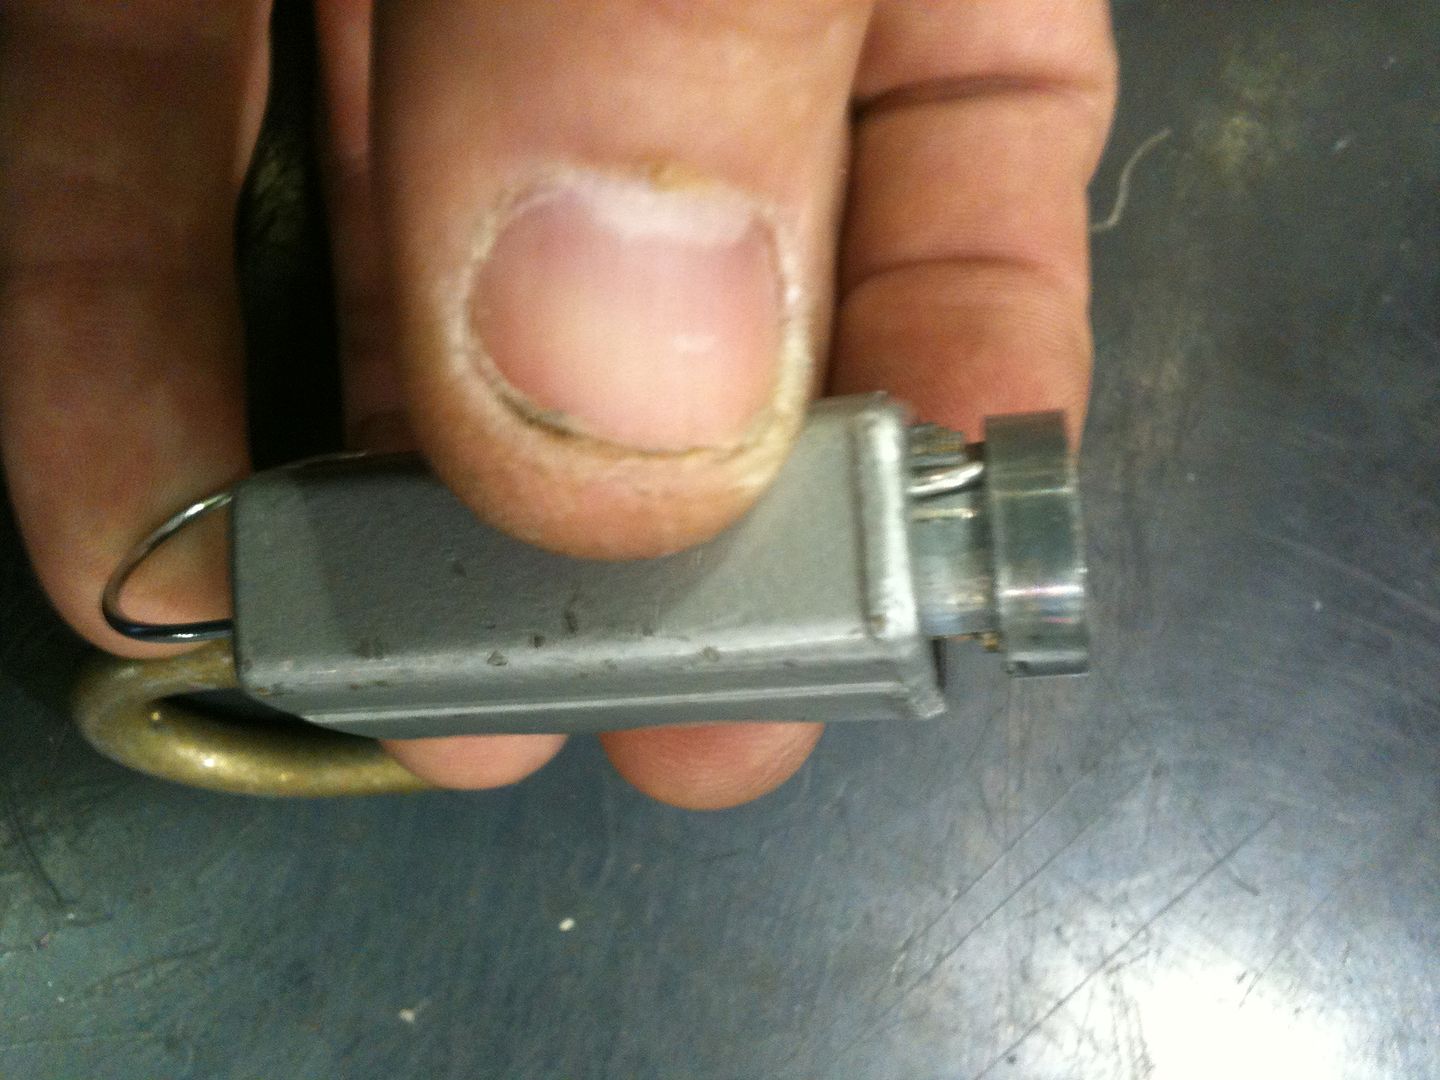
This is the lock:
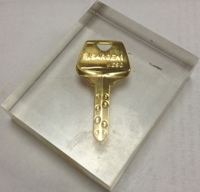
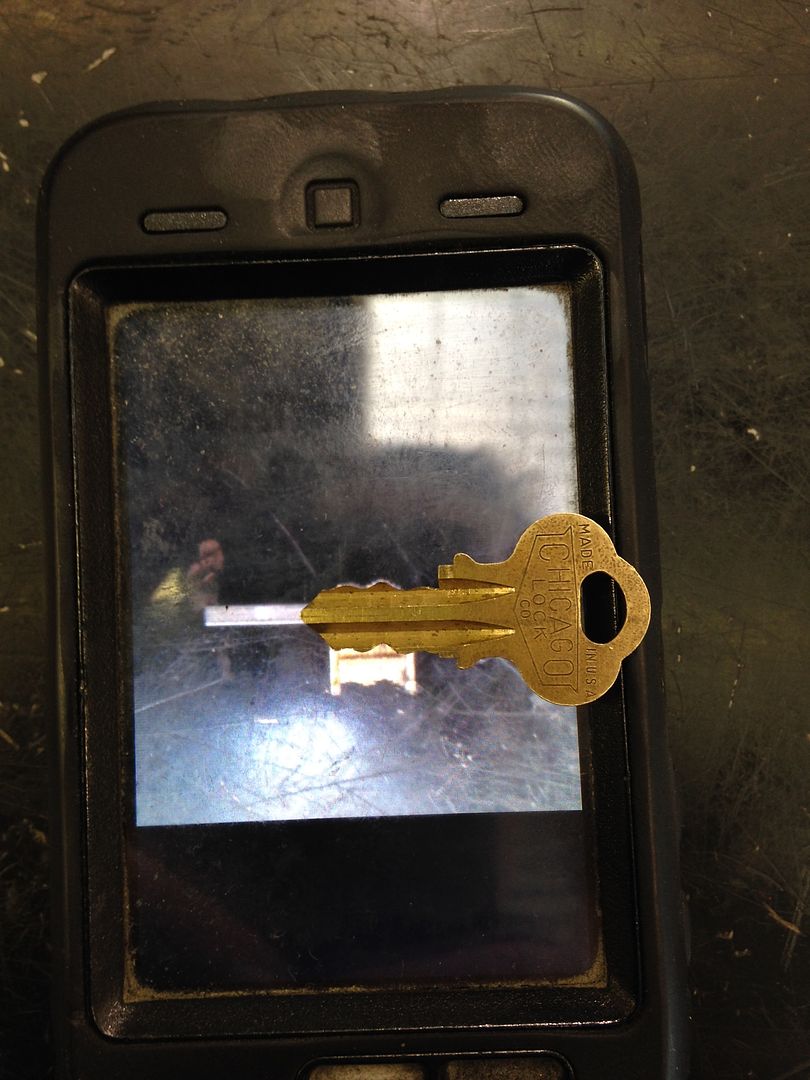
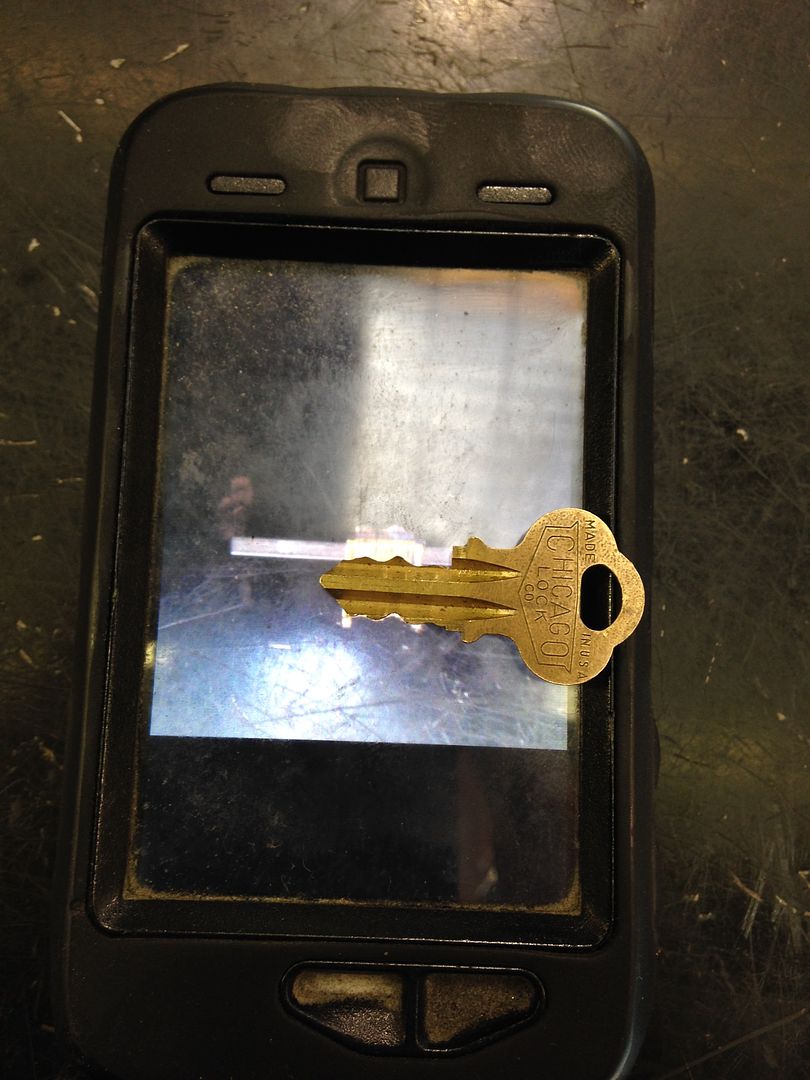
The key looks like this:
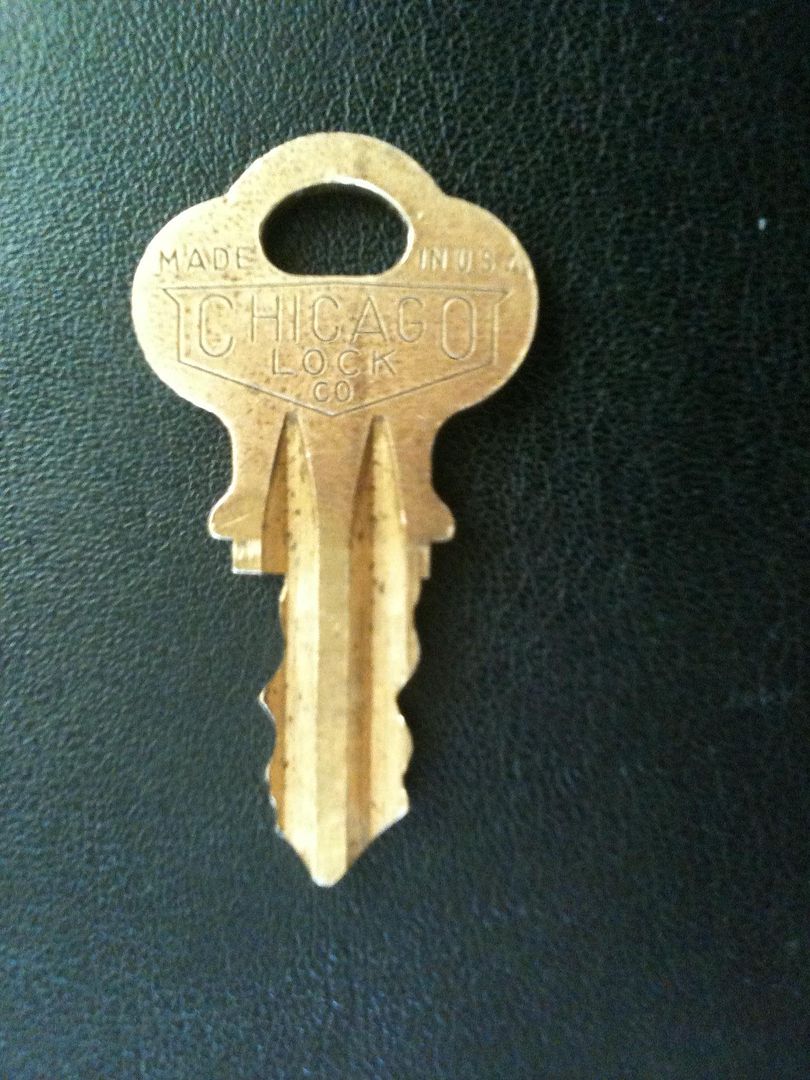
If you look at the key above, you can see that when one side’s cuts get deeper, the other side opposite goes shallower - the overall width of the key stays at about 7.5mm, shifting side to side. The problem with that for key making is that the full width of the blank will not fit into the lock, as the key blank is about 10mm wide. That means you can not simply impression a key for this lock. We will cover how to take care of that later.
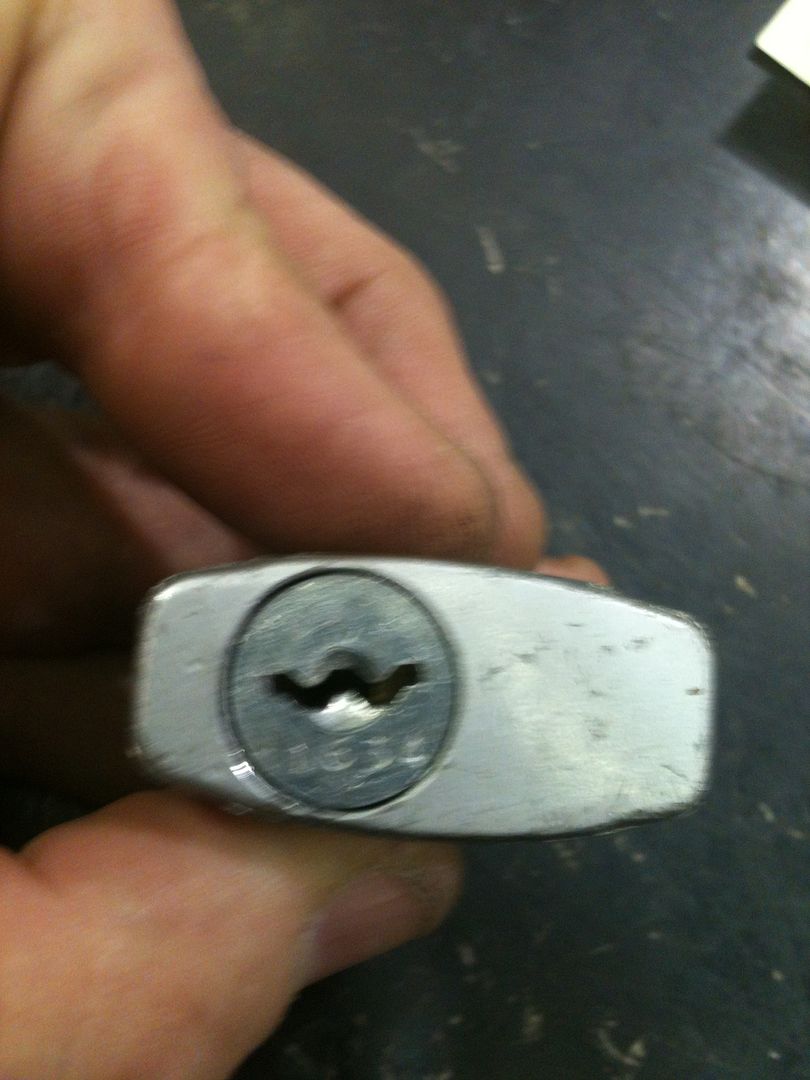
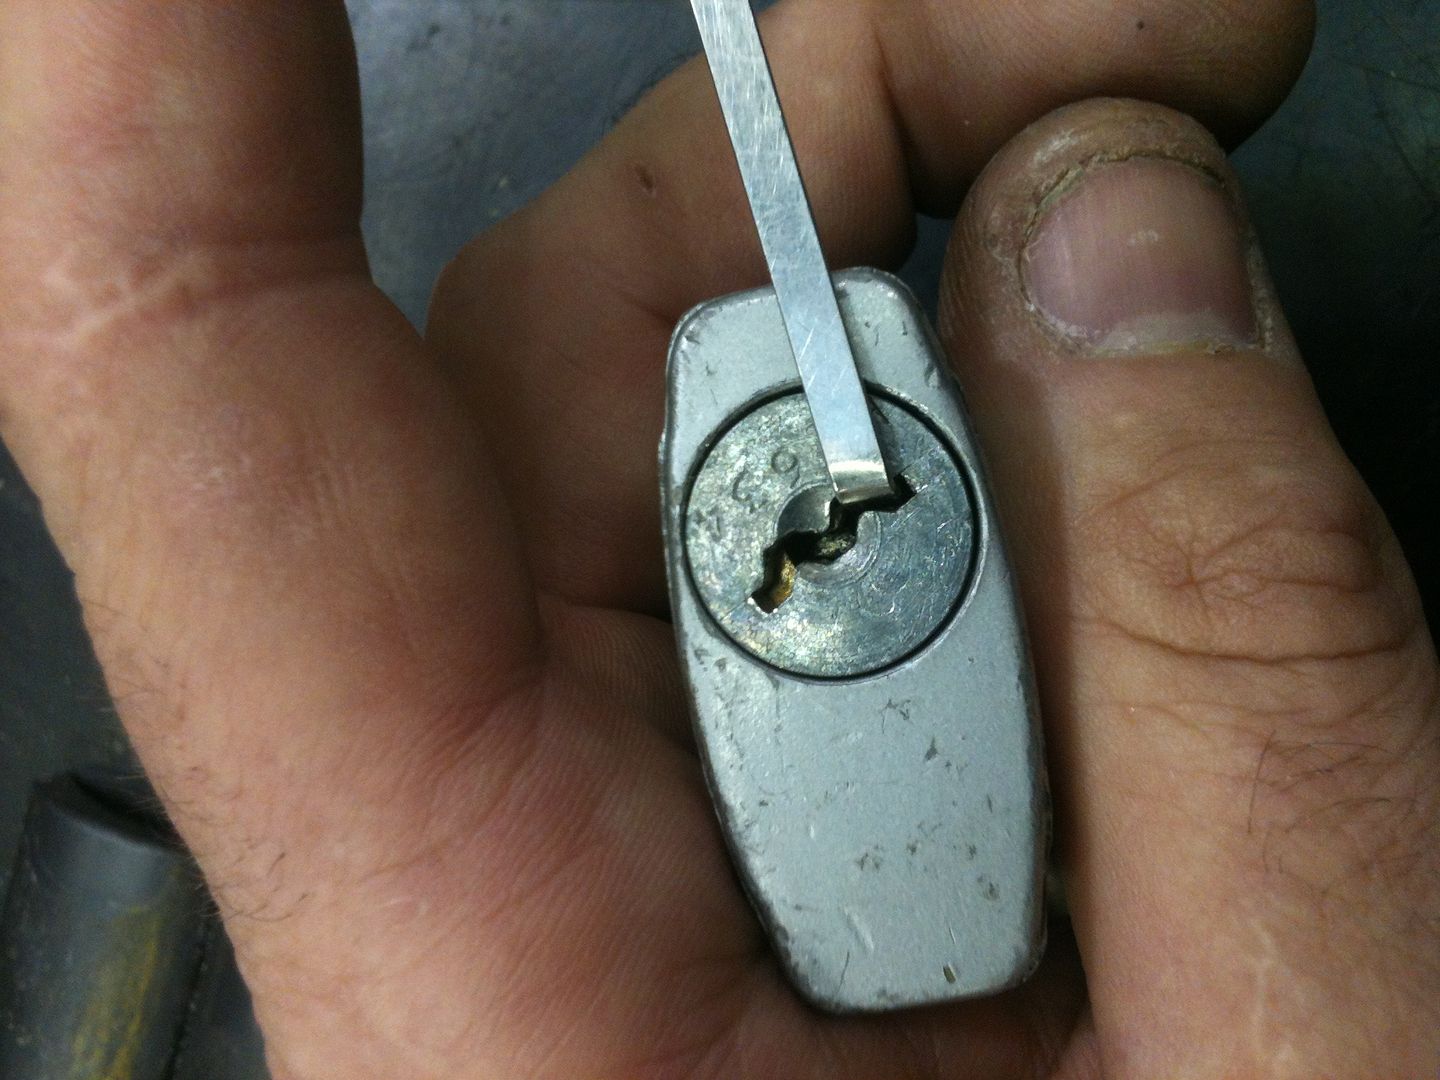
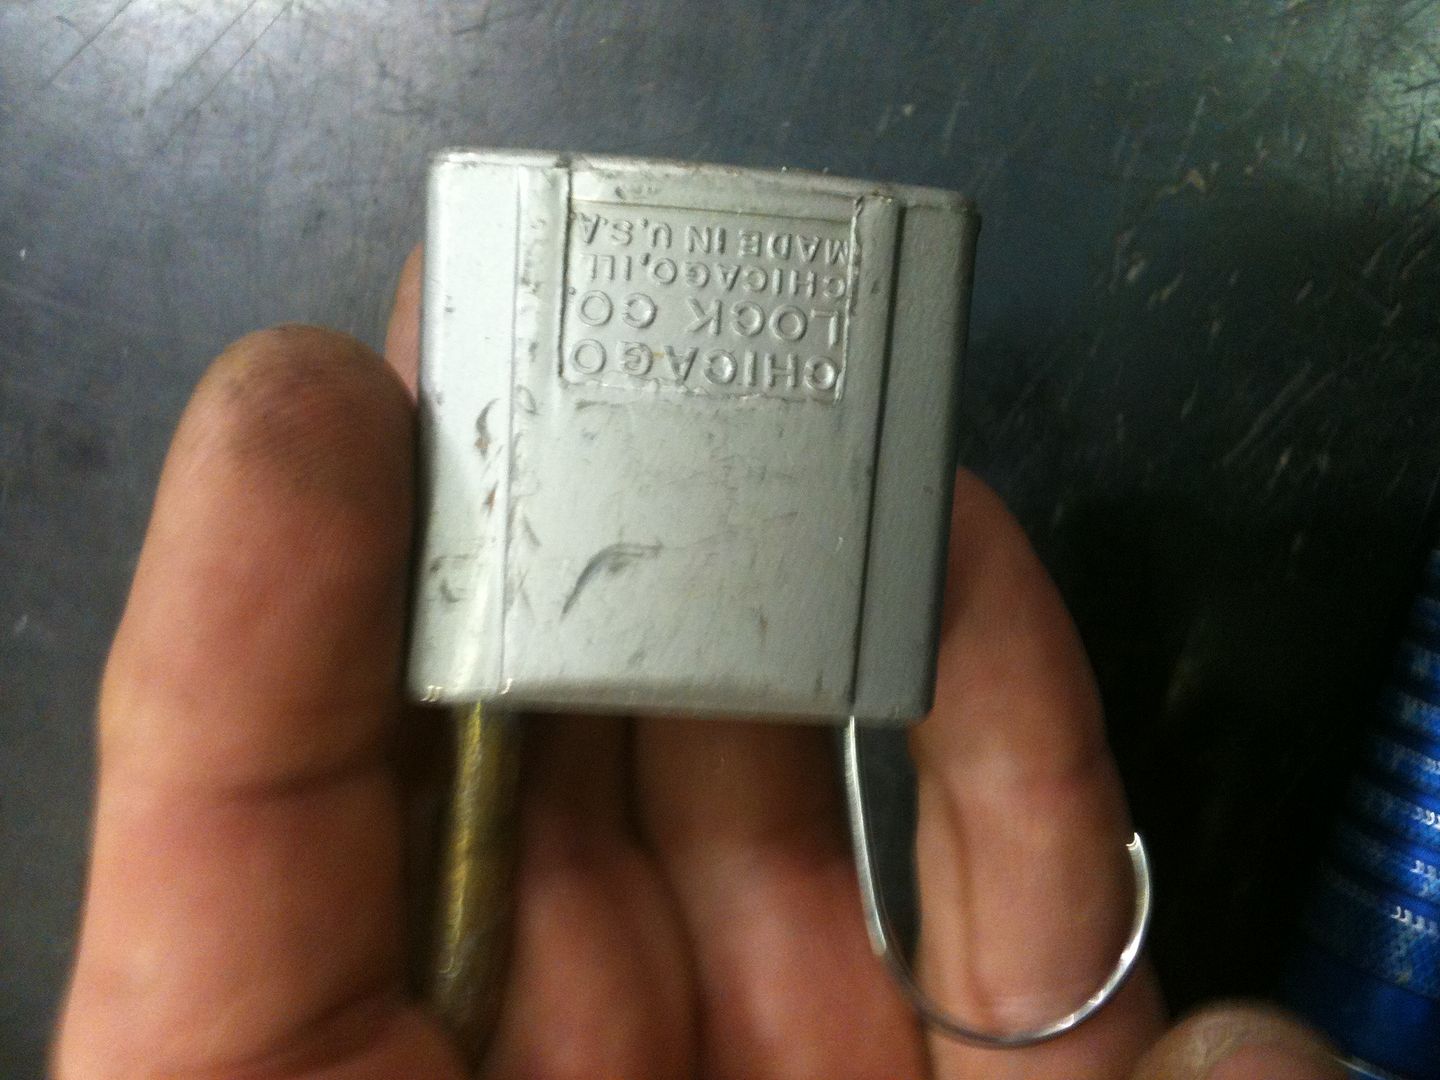
First, open the lock. Use the key if you have it, or for more fun and excitement, pick it. (Very easy to do). Turn the plug just enough to unlock the shackle.
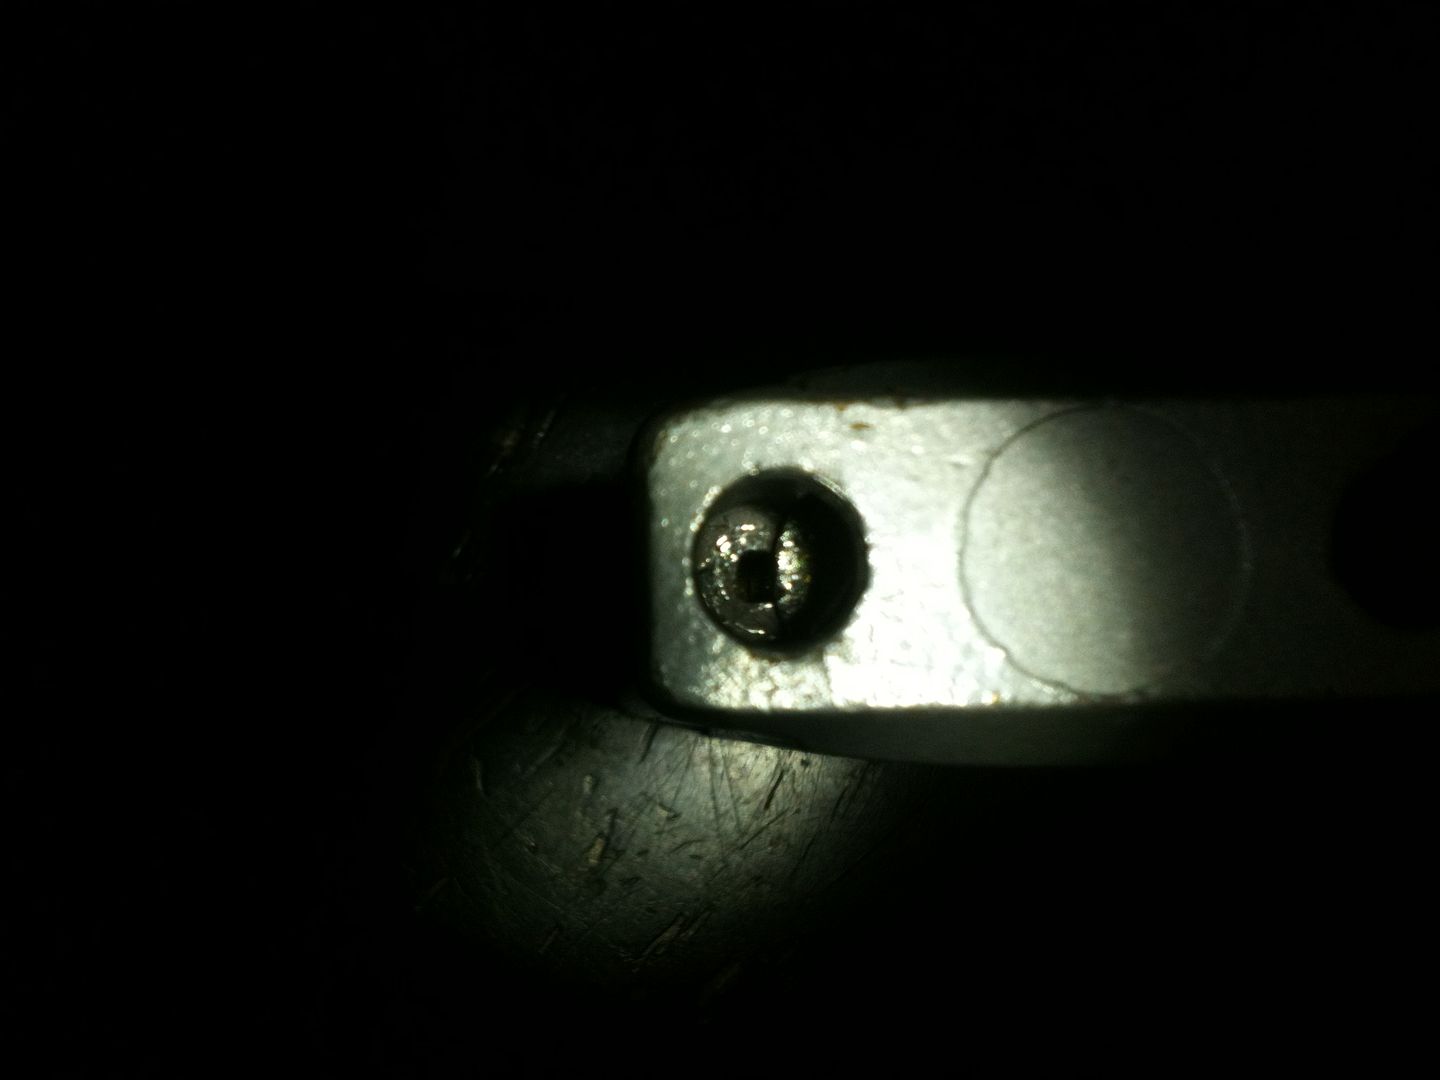
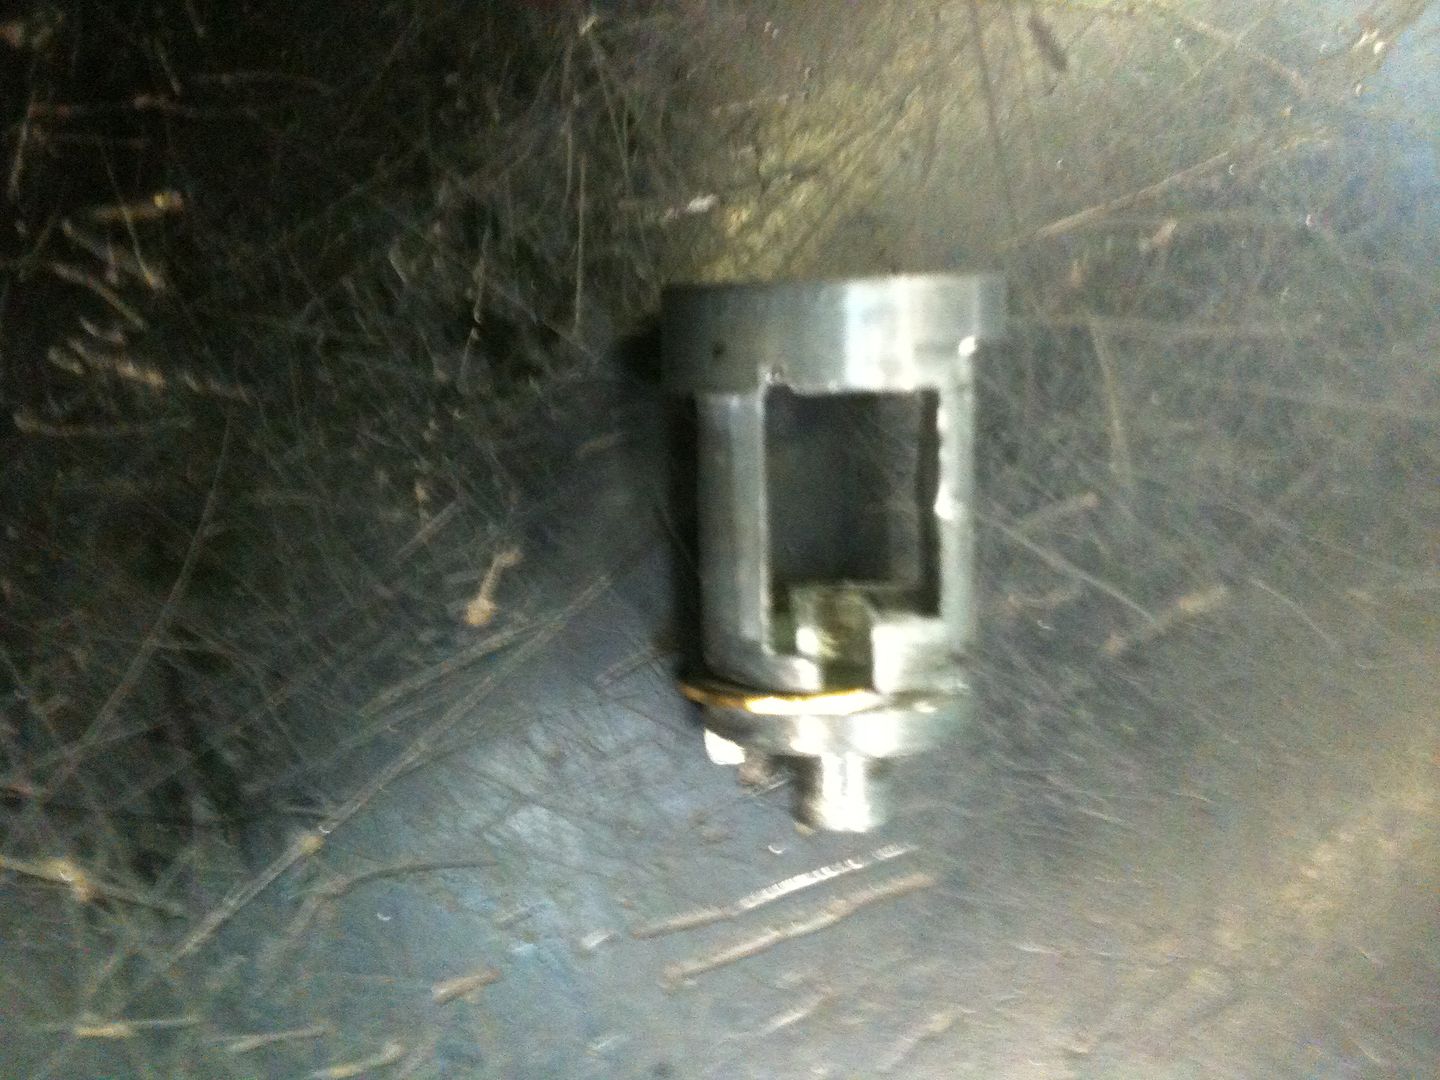
Now look into the hole where the toe of the shackle goes. You will see a square hole.
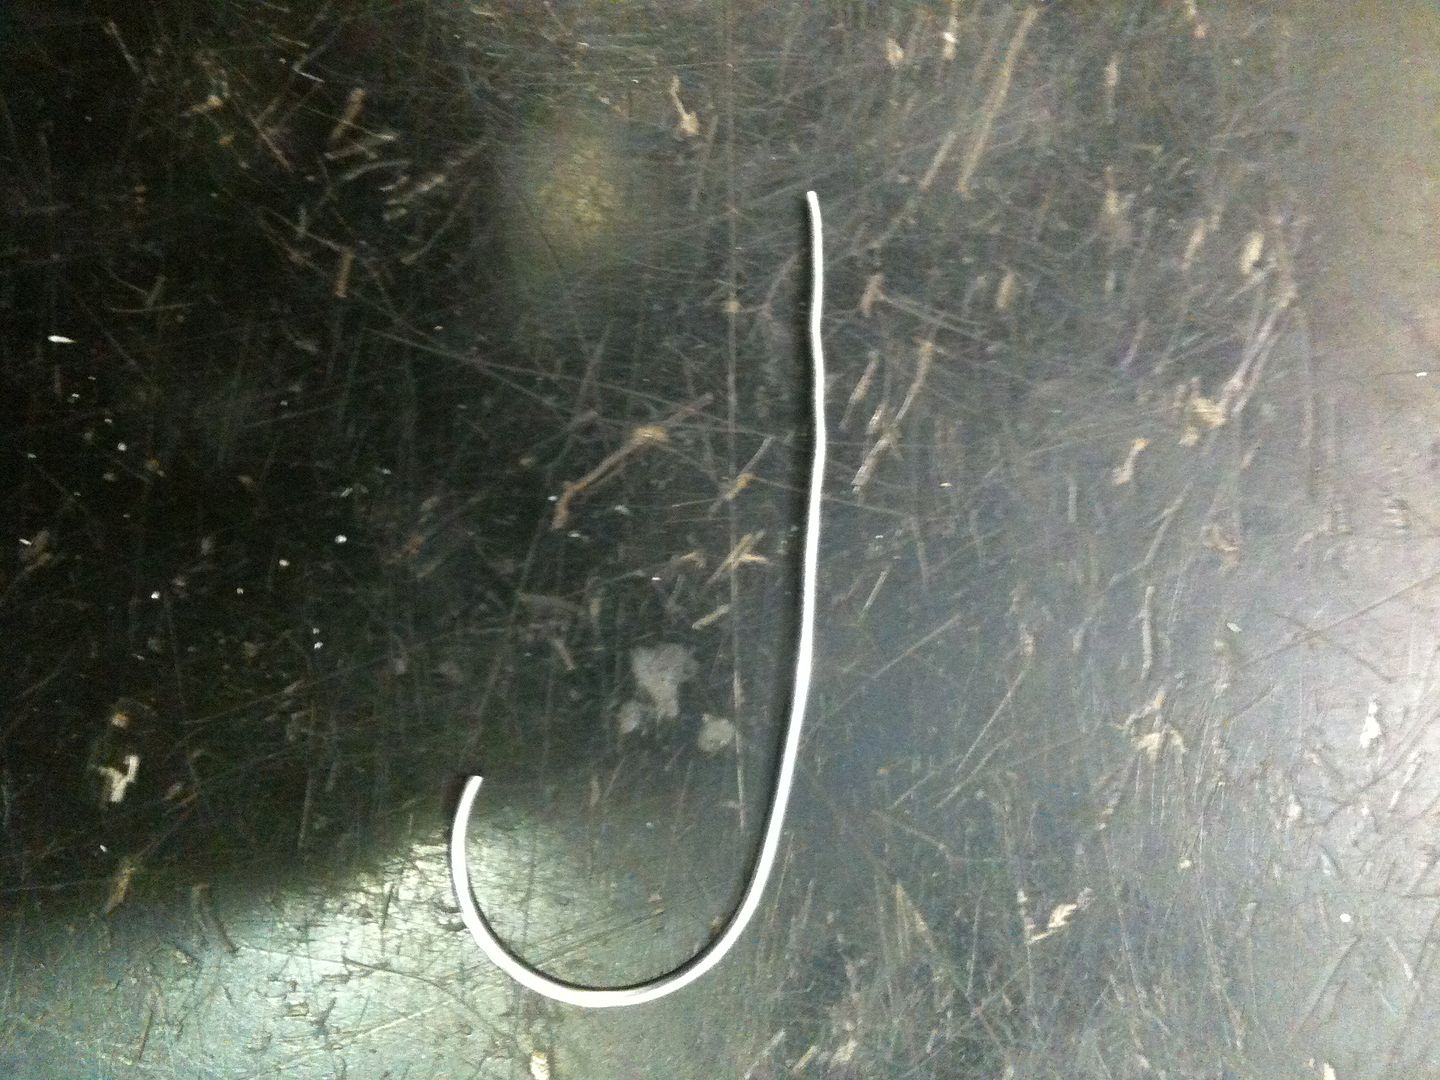
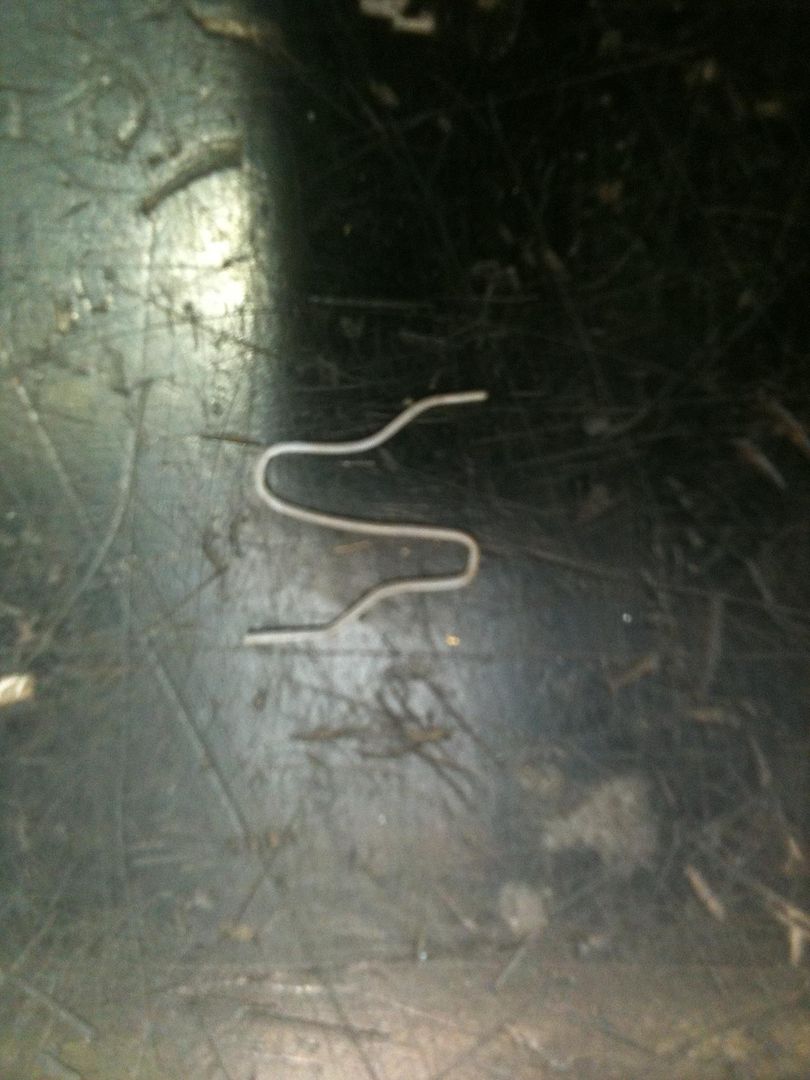
Now you will need a specialized tool. The wire diameter should be close to the size of the hole. Mine is made from a straightened out key ring.
Turn the plug back almost to the locked position. Insert the tool into the hole until it reaches the bottom of the lock, then lift it slightly. You can put it in shorter and try pushing in the clip (which you will see soon), but it is much easier to do it this way.
Now turn the plug with a tension wrench (or key). If the plug will not turn, pull the wire tool outwards a tiny bit and try again. At the end of the turning (this plug only turns clockwise to open), you will feel the plug become slightly springy.
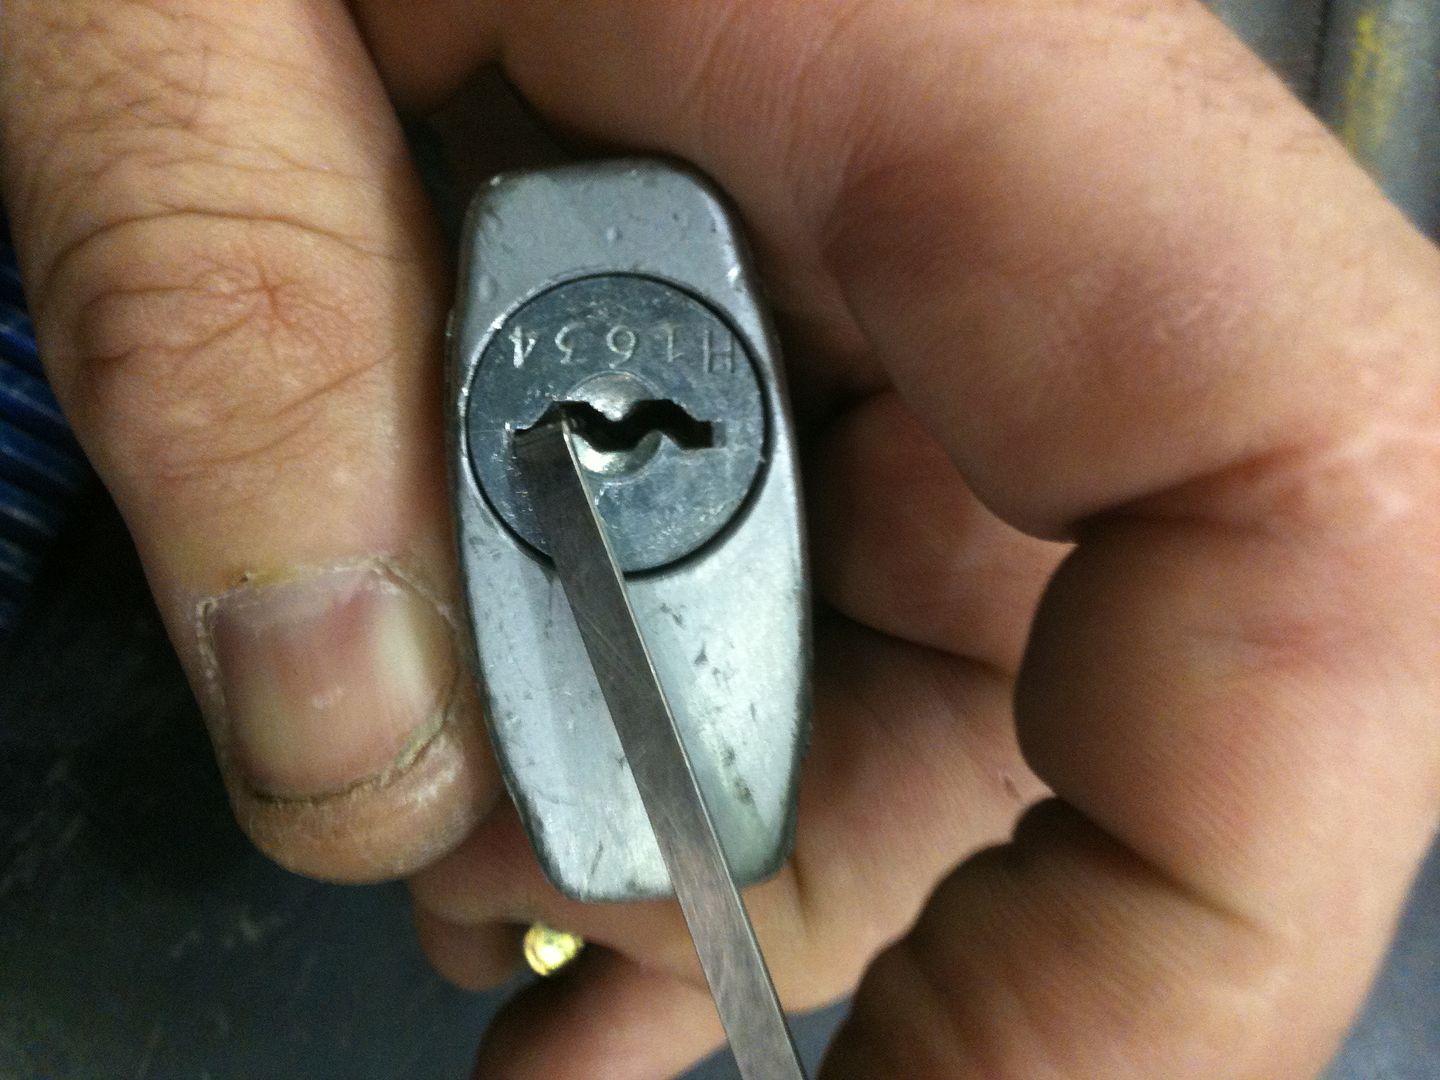
Once you feel the turning become springy, push in with medium pressure on the tool to press on the shoulder of the plug. Keep turning the plug, and the wire will push the plug.
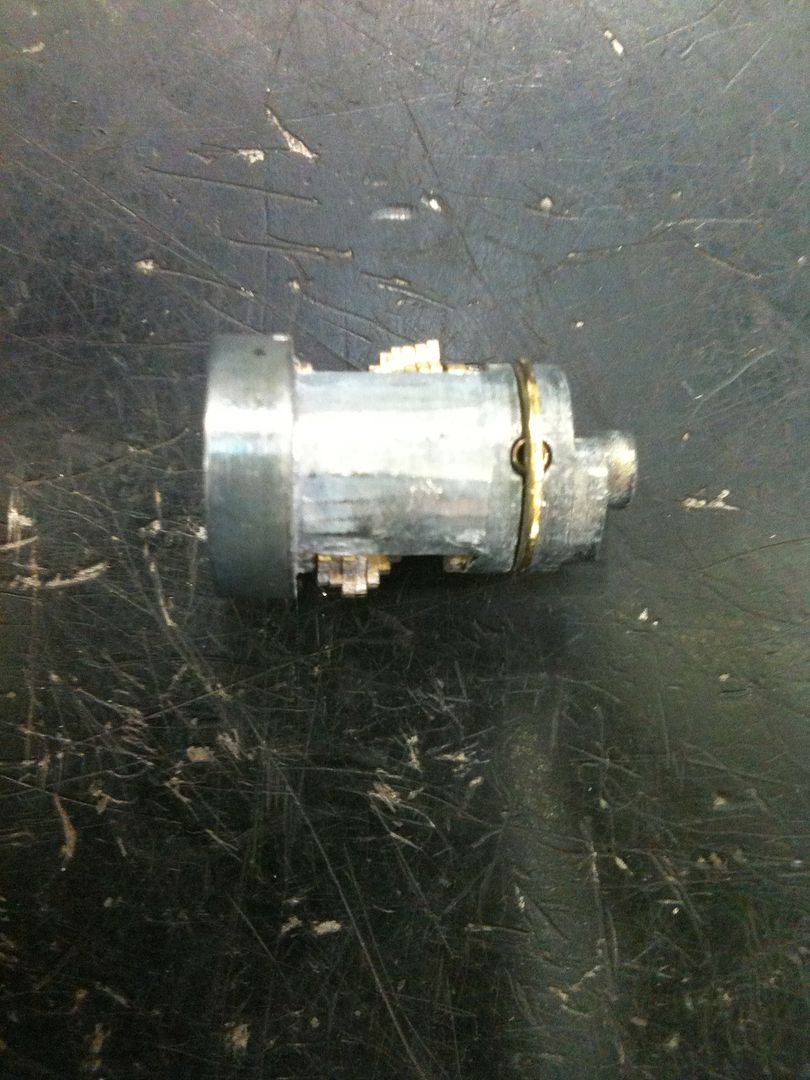
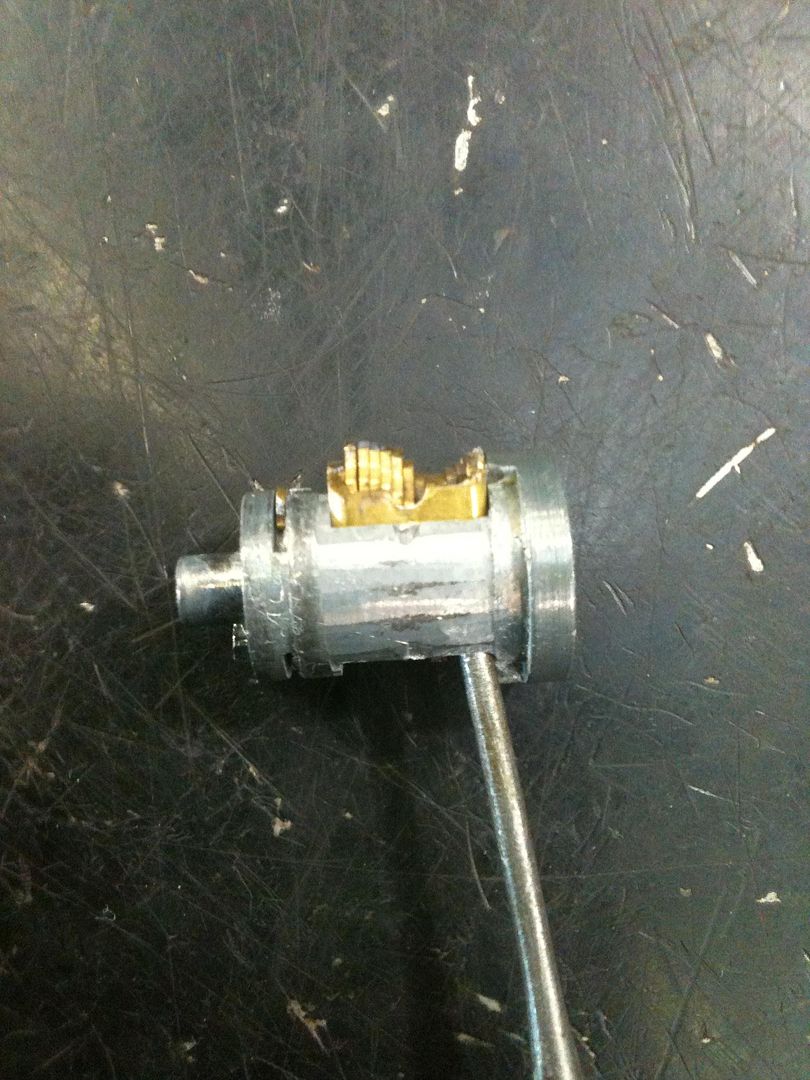
Ta-dah! The plug can now be removed.
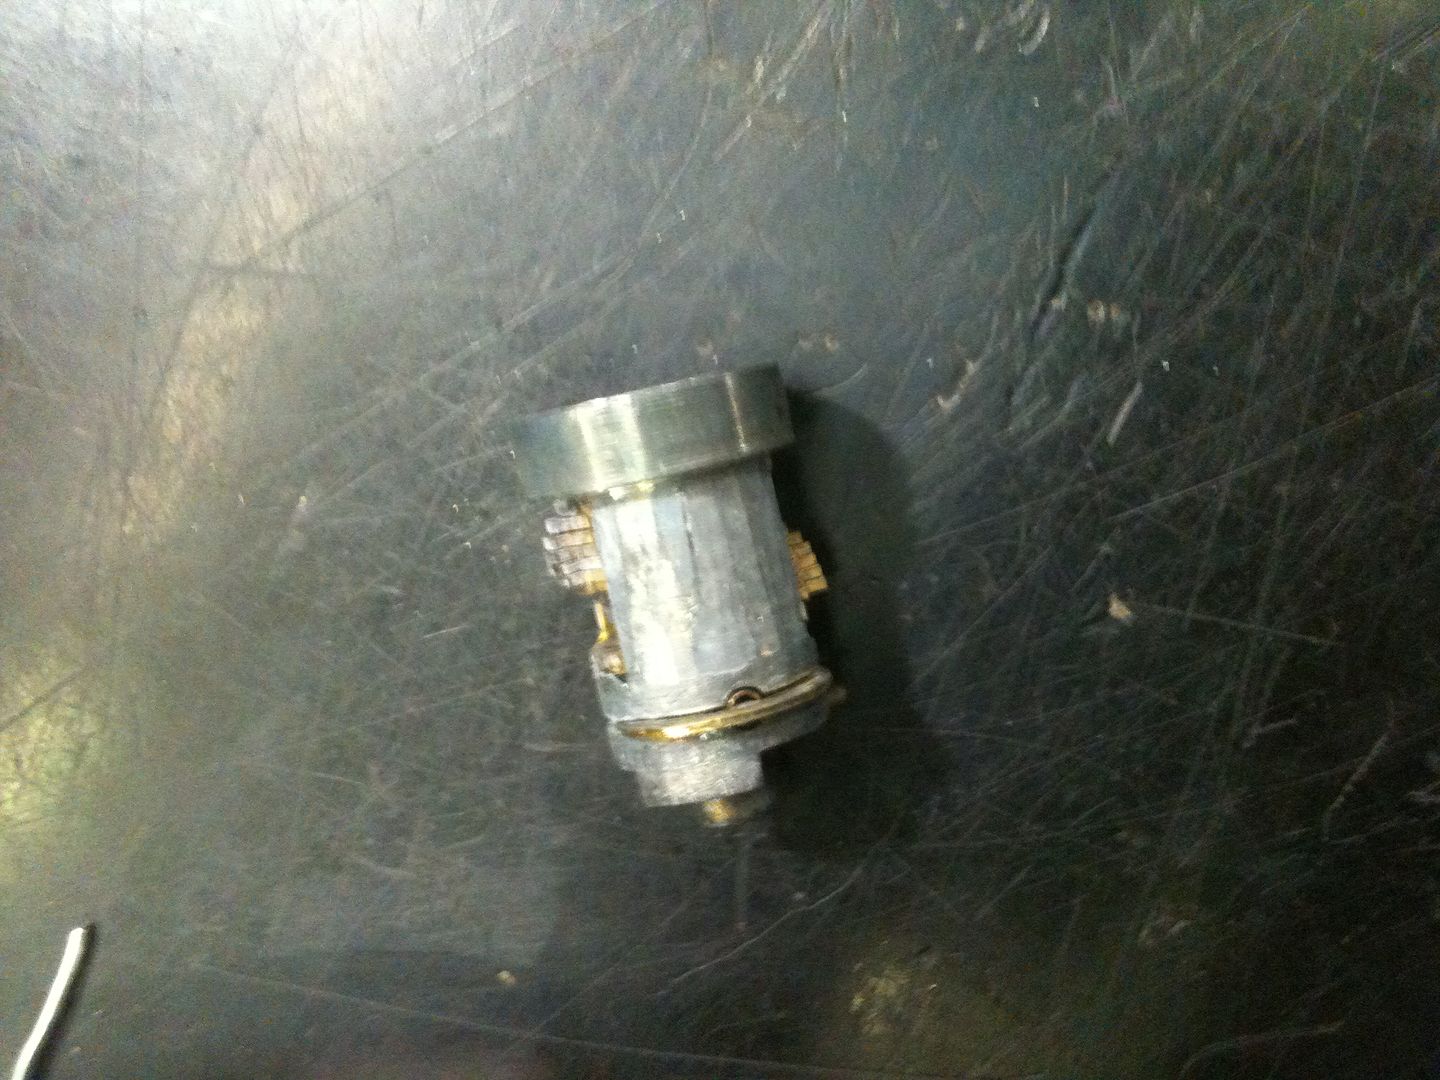
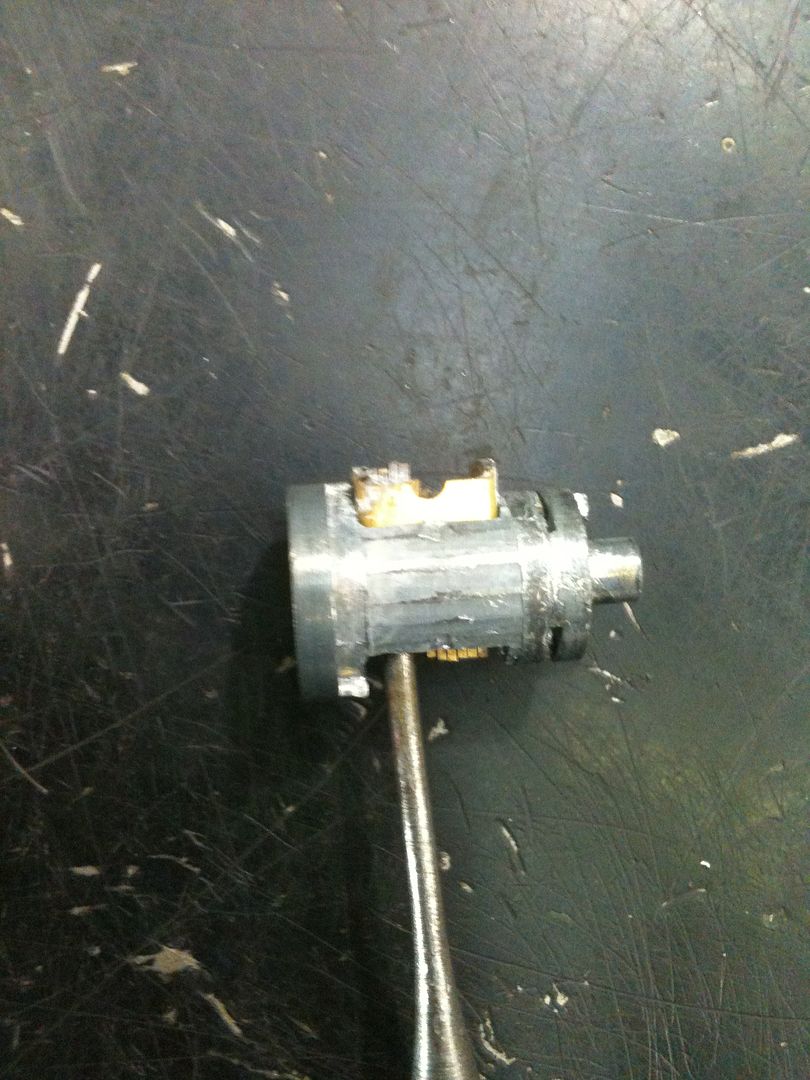
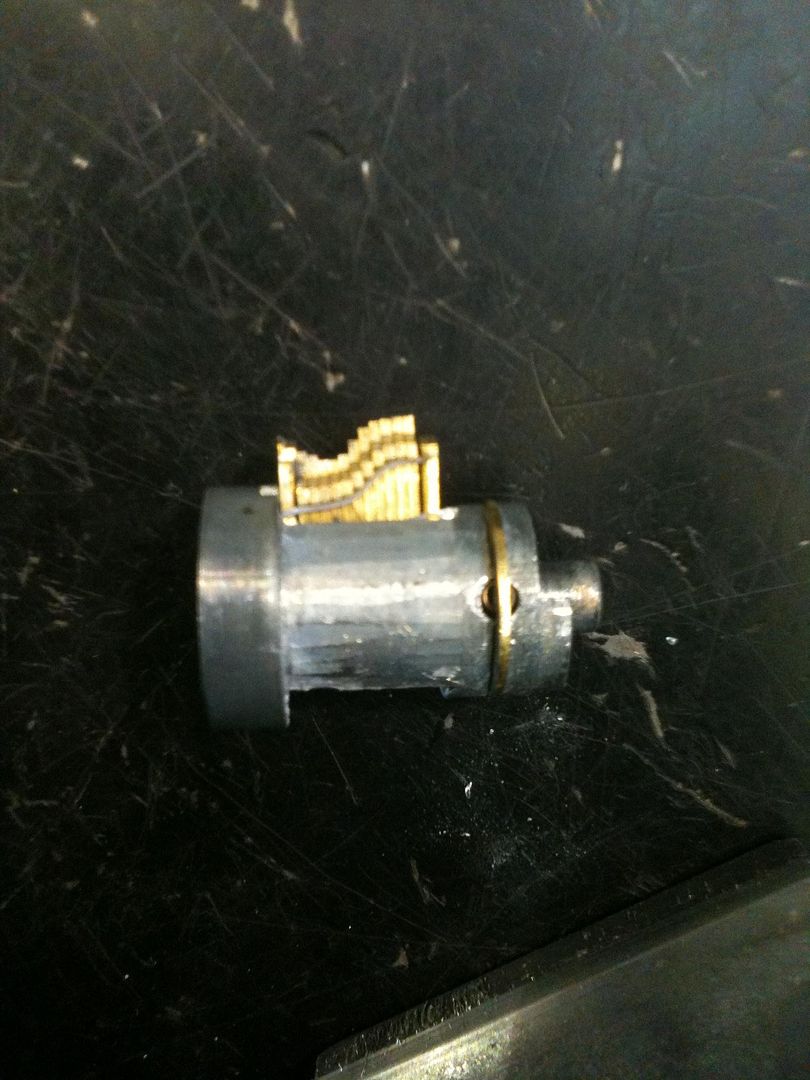
Here is the plug:
This is the spring loaded plug retaining clip. This is what needs to be moved in to remove the plug.
And pushed in… (fgarci - stop laughing! )
)
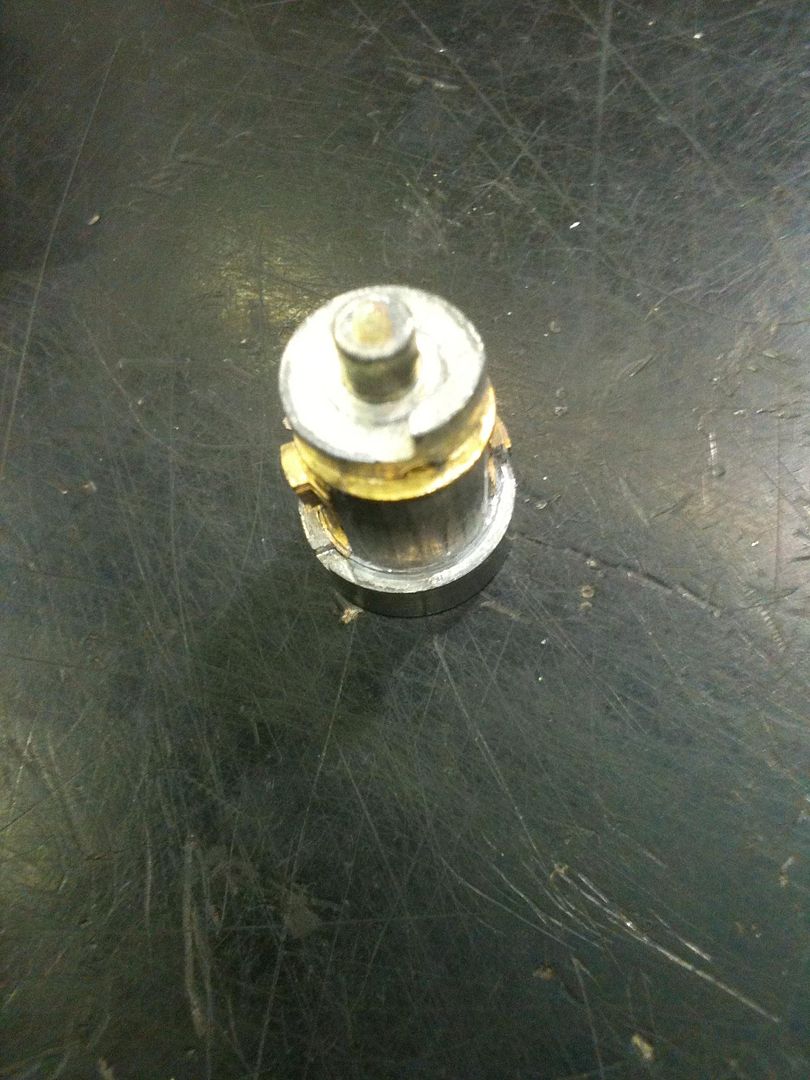
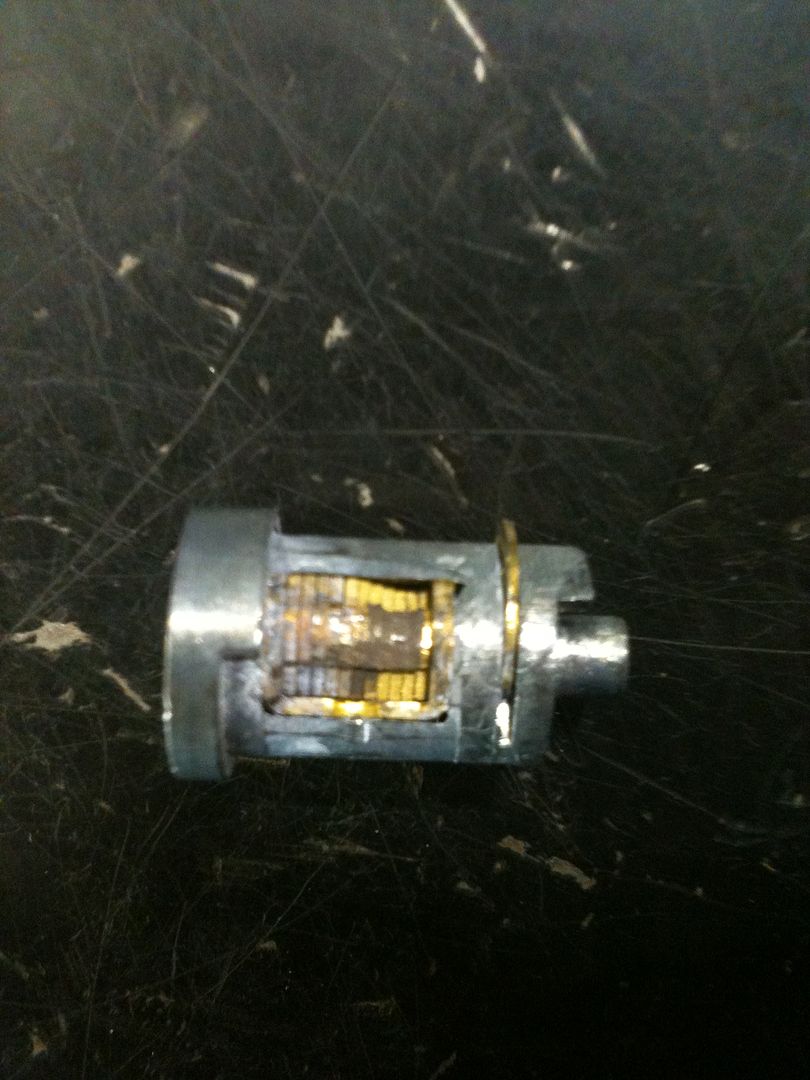
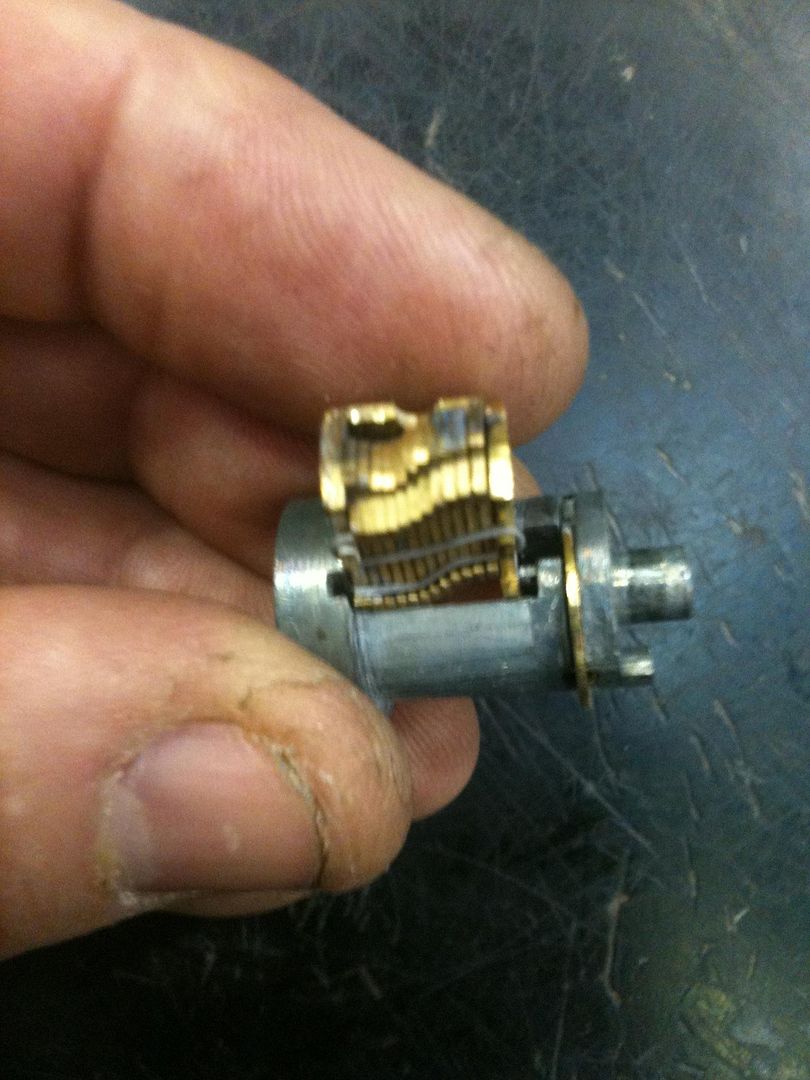
From the top, the plug looks like this: Note how the wafers are higher than the sheer line on one half of the plug, and lower on the other. That will be explained shortly.
On any wafers that are raised (or lowered) above (or below) the sheer line, can be pushed to the other side as the key would do from the inside. They are spring loaded, so will return when you remove pressure.
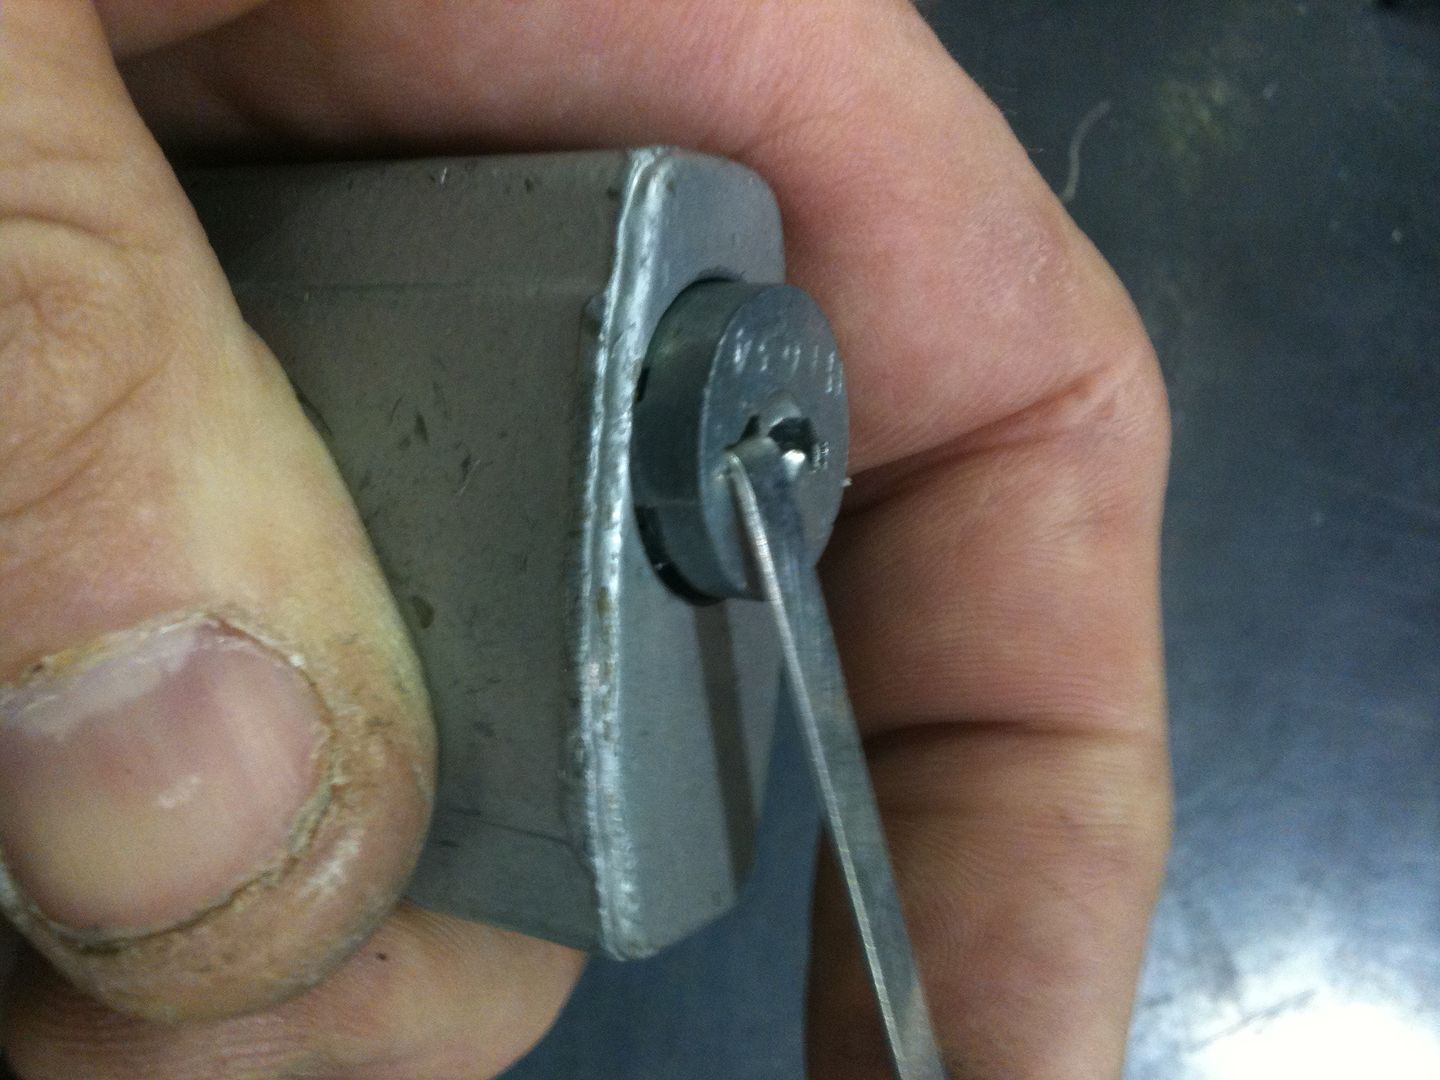
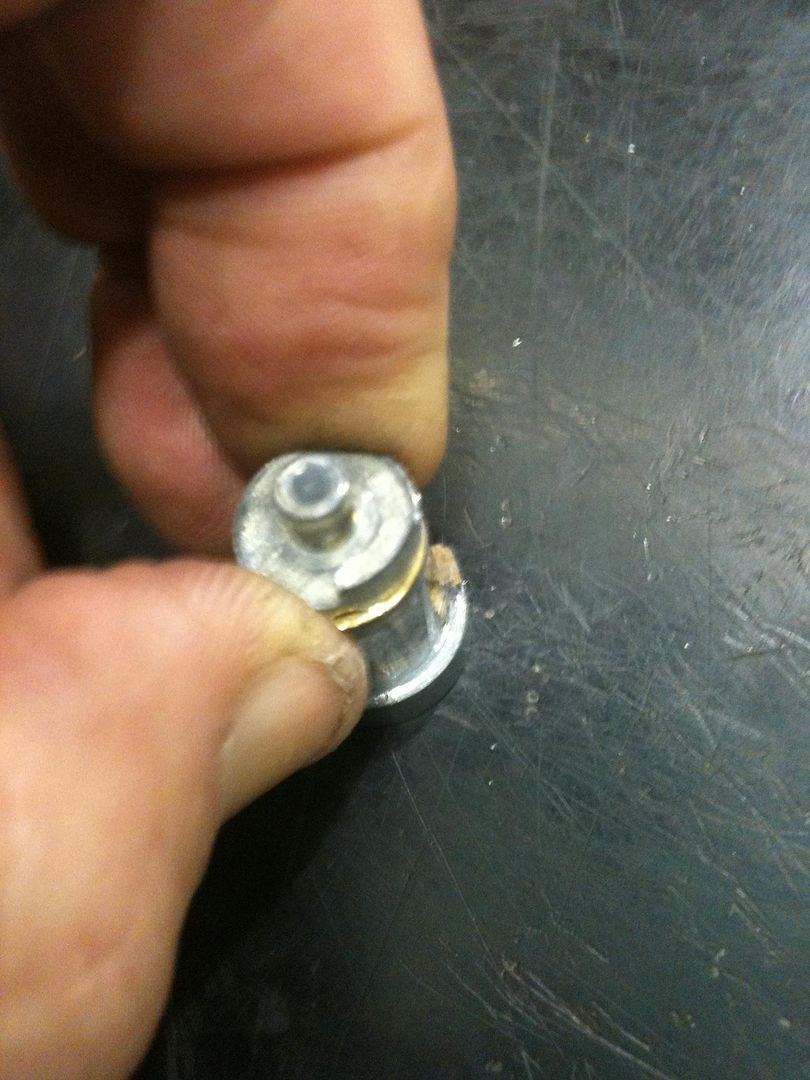
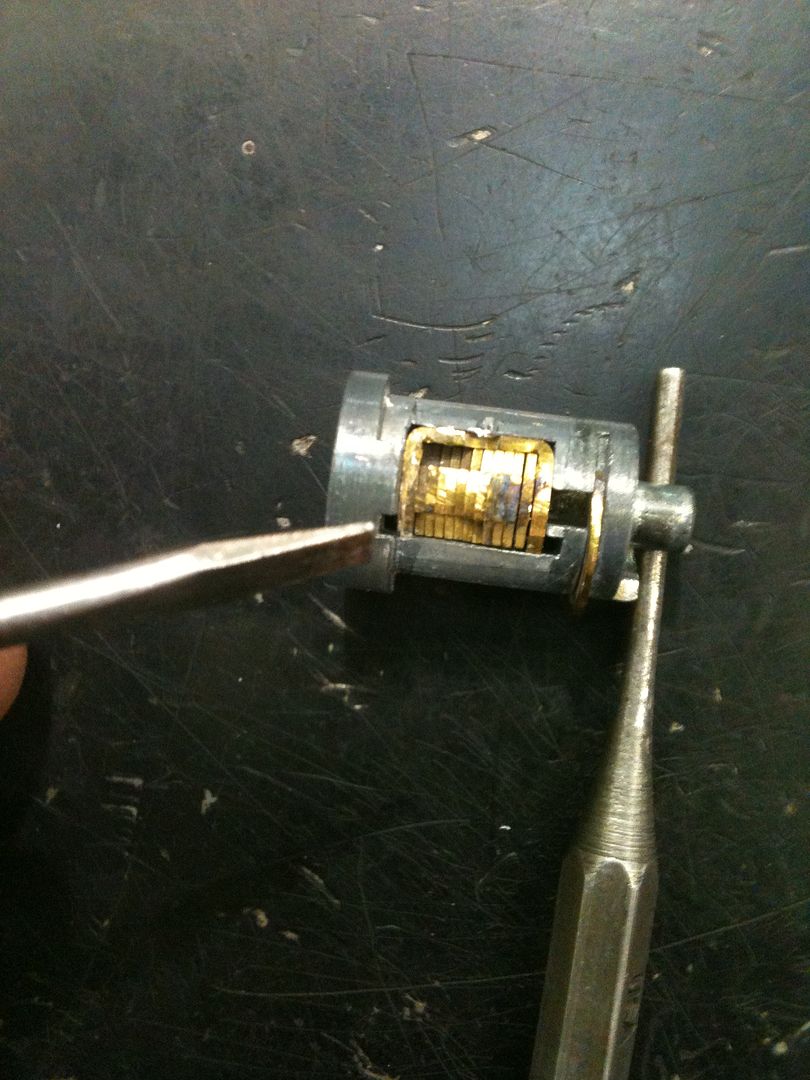
And the top or bottom view of the plug. Note the tiny stake crimp in the center of the plug. You will need to use a small screwdriver to move that back outwards to continue.
On one side of the plug (we will call this side the top), you will see two notches to the front and rear of the wafer carrier. Those are where the spring can fit when removing the carrier.
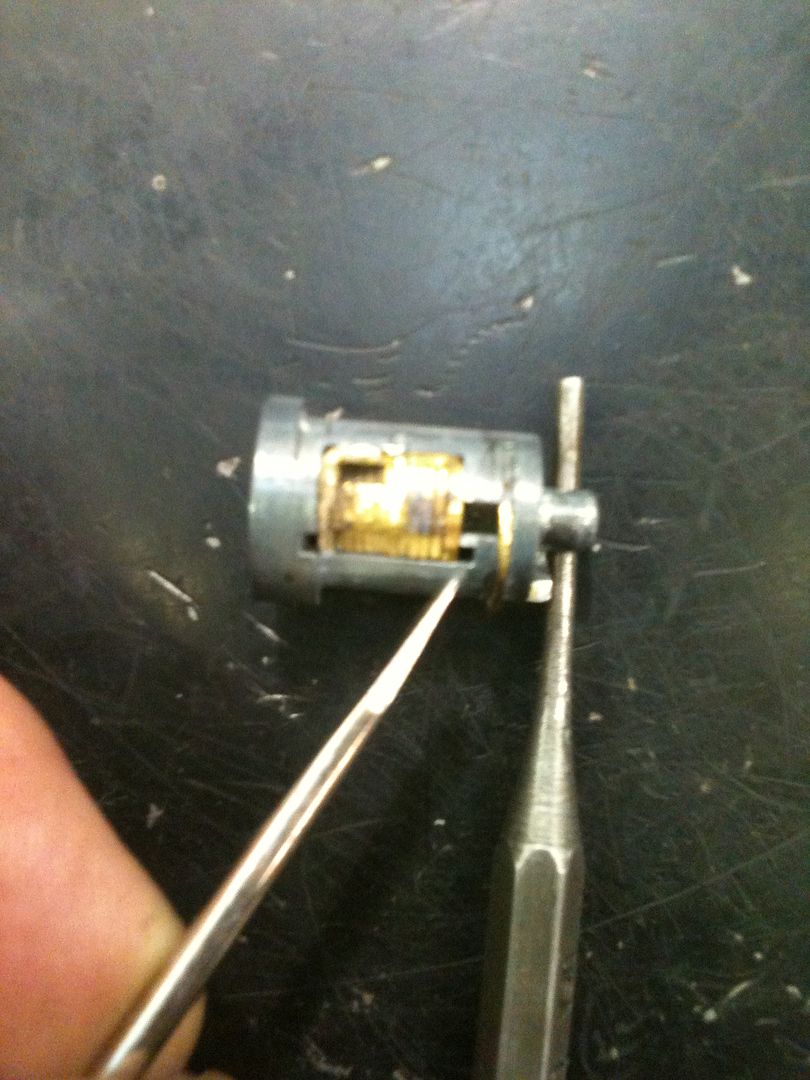
From the bottom of the plug, use a punch or small screwdriver to push the wafer carrier up (towards the side with the notches).
A bit further up, and you can start to see the spring.
Most of the way out. Now you can see all of the spring, and how the ends fit into those slots pointed out above.
The empty plug
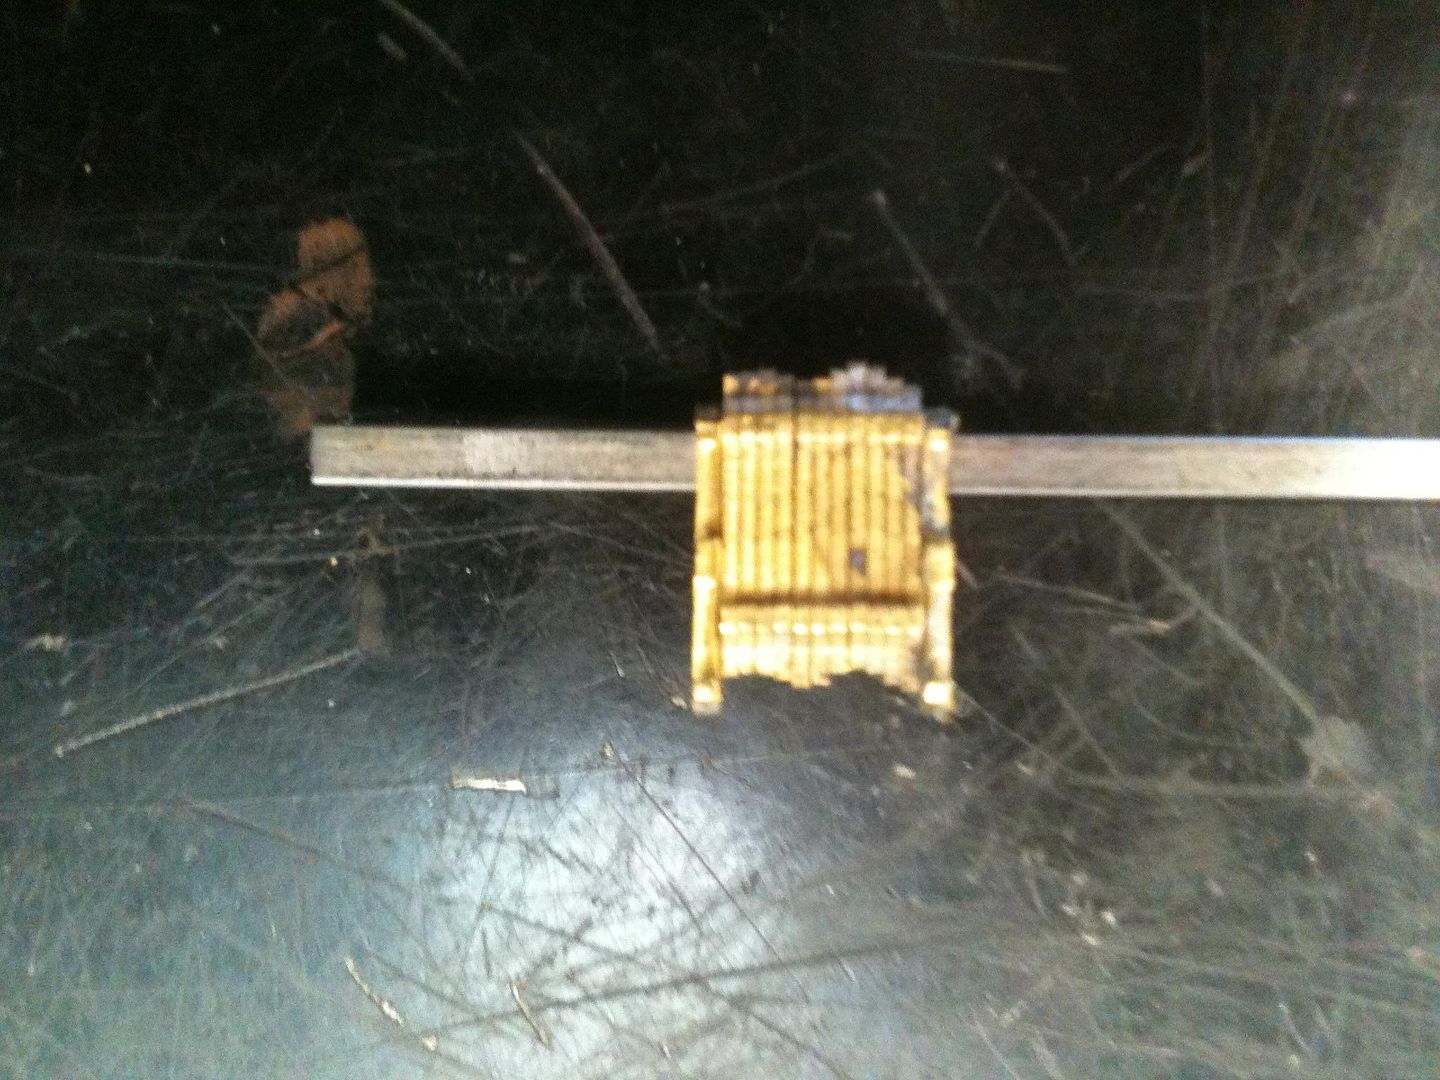
The wafer carrier, wafers and spring. The spring shape shows why half the wafers are up and the other half are down.
One side of the wafer carrier has the keyway profile that matches the plug keyway profile. This side goes towards the outside of the plug (against the plug keyway profile).
The other side of the wafer carrier, like the wafers themselves, has a simple slot cut in it.
Inside the lock body, you can see the cam that turns to unlock the padlock. This does not move a locking dog - it has a lip that meshes with the shackle, so this lock can not be shimmed open.
Now remove the spring from the wafer carrier/wafers.
Now to decode. This is much easier than you might think! Use a flat piece of metal (the back of a pick, or in this case simply a piece of wiper insert) inside the keyway to push everything down from the inside of the keyway. Be sure that, from the outside edges, you push up the wafers so all the wafers sit against the wiper insert on the inside of the wafers.
Now you simply trace the pattern of the wafers and cut them onto a blank! Could not take a picture with my phone and lay the key on the picture of the wafers at the same time, so a co-worker loaned me their phone so I could take the next two shots.
Have a key for this particular lock, so you can see how this method shows you the cuts of the key with out any fuss.
Since the wiper insert is not centered in the keyway, you can see the wafer carrier sticking out the bottom of the picture above. And had to have a little of the wafers sticking out above/below the key so you could see how accurately the wiper insert/flat pick method of decoding the key works. You can trace the pattern onto paper, and glue it to a blank, then cut or file the key.
To install the plug, put the plug into the hole, and turn it clockwise so the post that stops the plug from turning forces the retaining clip into the plug. The plug will then drop into the lock. Keep pressing the plug inwards until it stops just short of fully being seated. Then turn the plug more (clockwise) while pressing in the plug, and it will drop the rest of the way, the retaining clip popping into place auto-magically. Then reassembly is done!
Hope this answers some of your questions. If not, then ask!
Gordon
Yes, Oldfast, there are gut shots.
Got two of these in the mail recently, only one of which has a key. Will have to make a key for one, and thought you might want a primer on disassembly and decoding of these locks.
This is the lock:
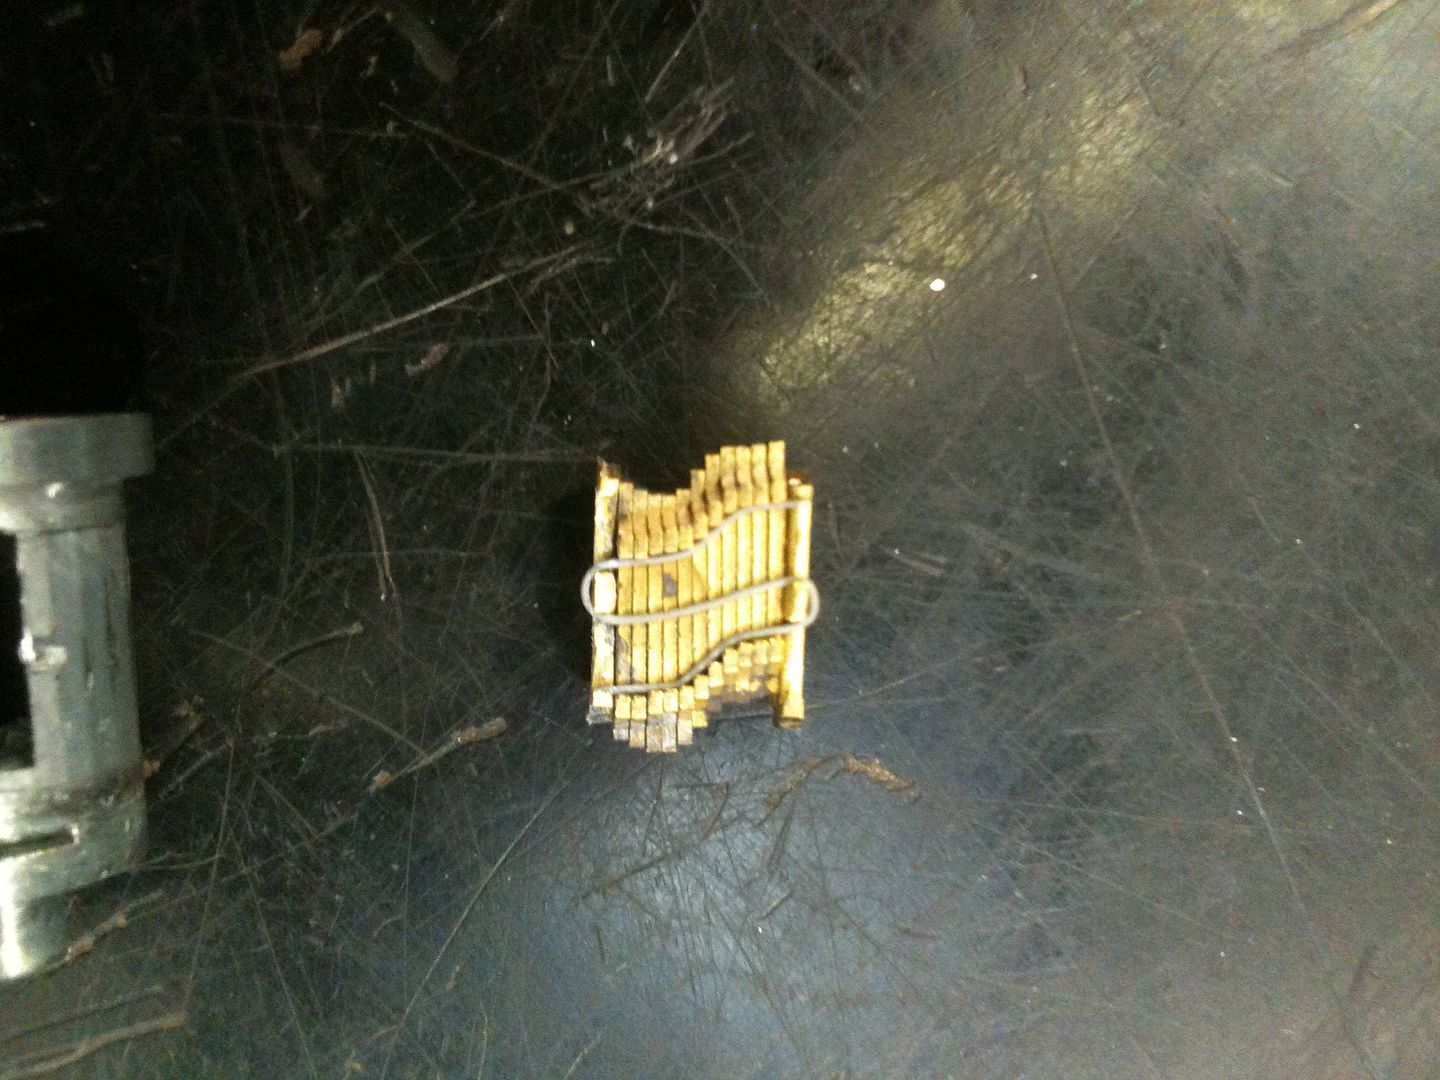
The key looks like this:
If you look at the key above, you can see that when one side’s cuts get deeper, the other side opposite goes shallower - the overall width of the key stays at about 7.5mm, shifting side to side. The problem with that for key making is that the full width of the blank will not fit into the lock, as the key blank is about 10mm wide. That means you can not simply impression a key for this lock. We will cover how to take care of that later.
First, open the lock. Use the key if you have it, or for more fun and excitement, pick it. (Very easy to do). Turn the plug just enough to unlock the shackle.
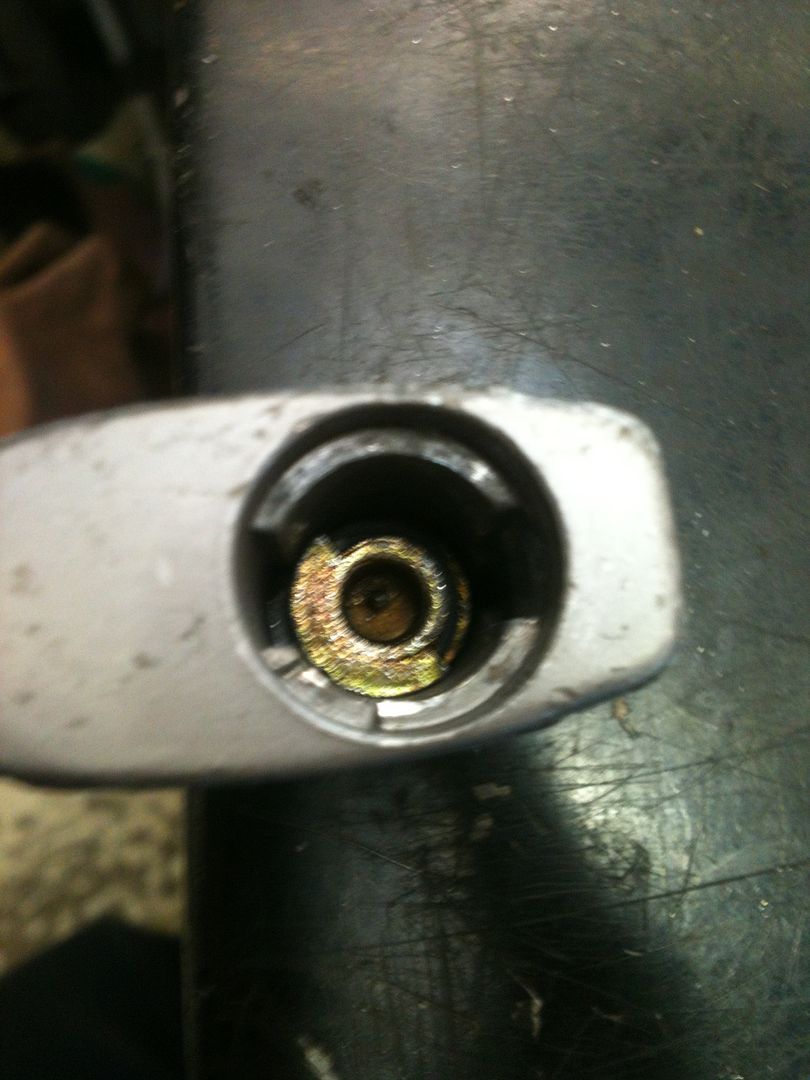
Now look into the hole where the toe of the shackle goes. You will see a square hole.
Now you will need a specialized tool. The wire diameter should be close to the size of the hole. Mine is made from a straightened out key ring.
Turn the plug back almost to the locked position. Insert the tool into the hole until it reaches the bottom of the lock, then lift it slightly. You can put it in shorter and try pushing in the clip (which you will see soon), but it is much easier to do it this way.
Now turn the plug with a tension wrench (or key). If the plug will not turn, pull the wire tool outwards a tiny bit and try again. At the end of the turning (this plug only turns clockwise to open), you will feel the plug become slightly springy.
Once you feel the turning become springy, push in with medium pressure on the tool to press on the shoulder of the plug. Keep turning the plug, and the wire will push the plug.
Ta-dah! The plug can now be removed.
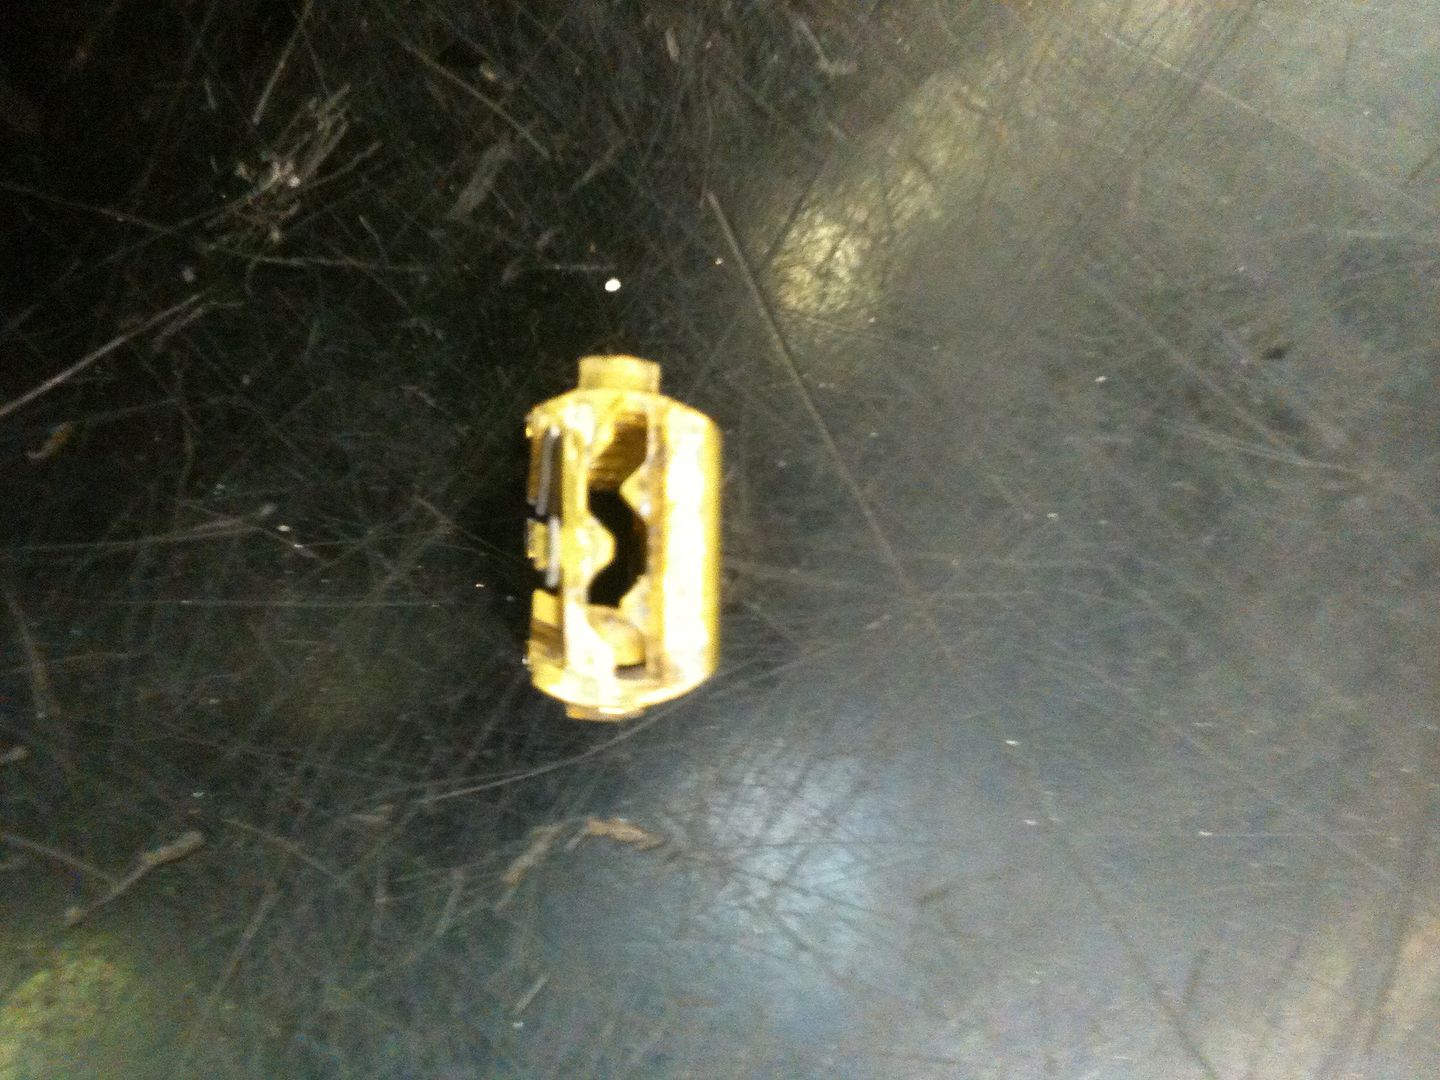
Here is the plug:
This is the spring loaded plug retaining clip. This is what needs to be moved in to remove the plug.
And pushed in… (fgarci - stop laughing!
From the top, the plug looks like this: Note how the wafers are higher than the sheer line on one half of the plug, and lower on the other. That will be explained shortly.
On any wafers that are raised (or lowered) above (or below) the sheer line, can be pushed to the other side as the key would do from the inside. They are spring loaded, so will return when you remove pressure.
And the top or bottom view of the plug. Note the tiny stake crimp in the center of the plug. You will need to use a small screwdriver to move that back outwards to continue.
On one side of the plug (we will call this side the top), you will see two notches to the front and rear of the wafer carrier. Those are where the spring can fit when removing the carrier.
From the bottom of the plug, use a punch or small screwdriver to push the wafer carrier up (towards the side with the notches).
A bit further up, and you can start to see the spring.
Most of the way out. Now you can see all of the spring, and how the ends fit into those slots pointed out above.
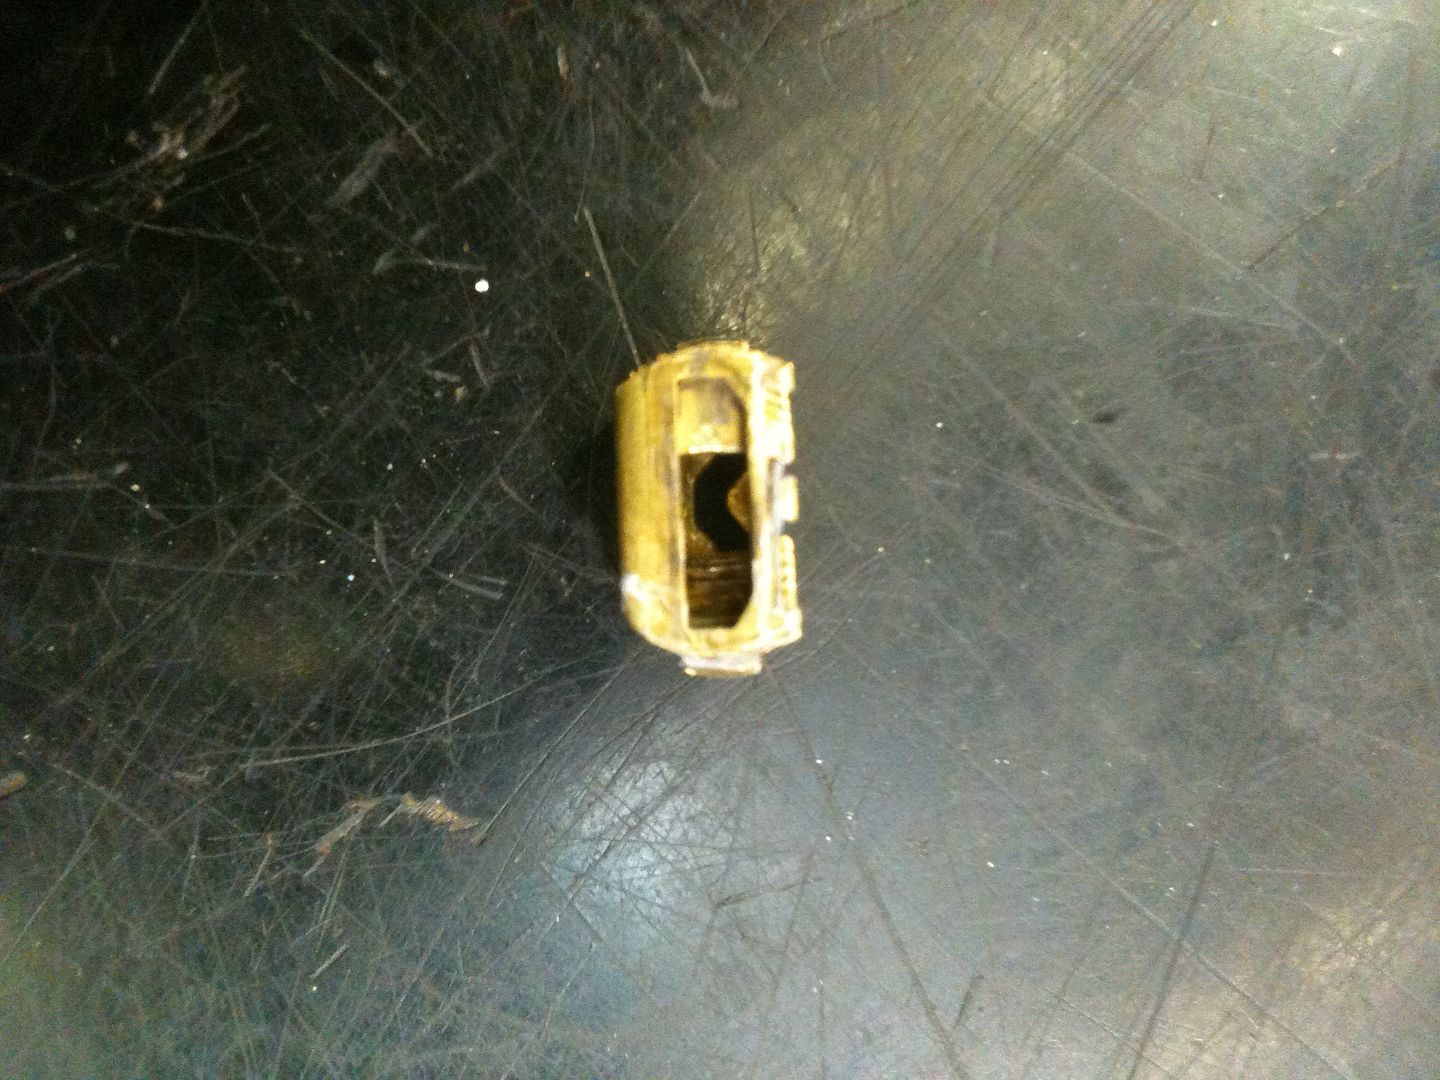
The empty plug
The wafer carrier, wafers and spring. The spring shape shows why half the wafers are up and the other half are down.
One side of the wafer carrier has the keyway profile that matches the plug keyway profile. This side goes towards the outside of the plug (against the plug keyway profile).
The other side of the wafer carrier, like the wafers themselves, has a simple slot cut in it.
Inside the lock body, you can see the cam that turns to unlock the padlock. This does not move a locking dog - it has a lip that meshes with the shackle, so this lock can not be shimmed open.
Now remove the spring from the wafer carrier/wafers.
Now to decode. This is much easier than you might think! Use a flat piece of metal (the back of a pick, or in this case simply a piece of wiper insert) inside the keyway to push everything down from the inside of the keyway. Be sure that, from the outside edges, you push up the wafers so all the wafers sit against the wiper insert on the inside of the wafers.
Now you simply trace the pattern of the wafers and cut them onto a blank! Could not take a picture with my phone and lay the key on the picture of the wafers at the same time, so a co-worker loaned me their phone so I could take the next two shots.
Have a key for this particular lock, so you can see how this method shows you the cuts of the key with out any fuss.
Since the wiper insert is not centered in the keyway, you can see the wafer carrier sticking out the bottom of the picture above. And had to have a little of the wafers sticking out above/below the key so you could see how accurately the wiper insert/flat pick method of decoding the key works. You can trace the pattern onto paper, and glue it to a blank, then cut or file the key.
To install the plug, put the plug into the hole, and turn it clockwise so the post that stops the plug from turning forces the retaining clip into the plug. The plug will then drop into the lock. Keep pressing the plug inwards until it stops just short of fully being seated. Then turn the plug more (clockwise) while pressing in the plug, and it will drop the rest of the way, the retaining clip popping into place auto-magically. Then reassembly is done!
Hope this answers some of your questions. If not, then ask!
Gordon
Just when you think you've learned it all, that is when you find you haven't learned anything yet.