Making a Key for a Gougler
Key made for Gougler (not entirely) Keyless Padlock
Received a couple of these locks a while back - one without a keyway, and one with. (Thanks, MBI!). It seems that keys are hard to come by, so the lock went into my 'project lock' box. Finally took it out!
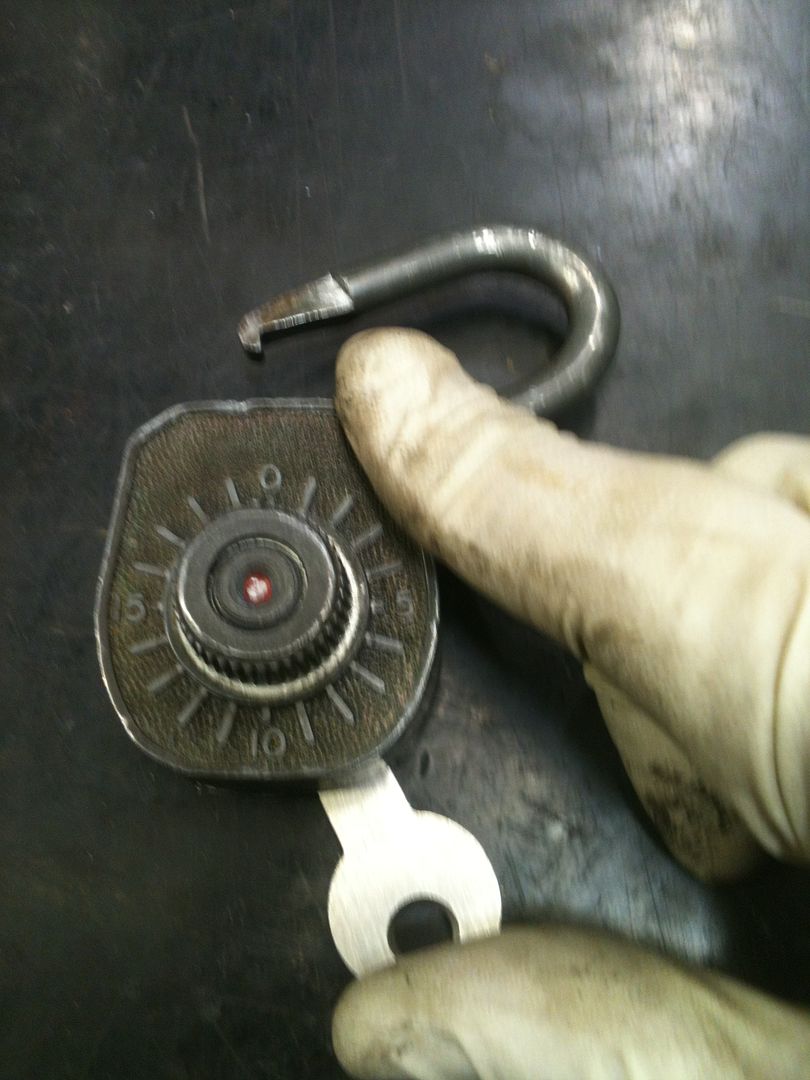
The lock looks like this:
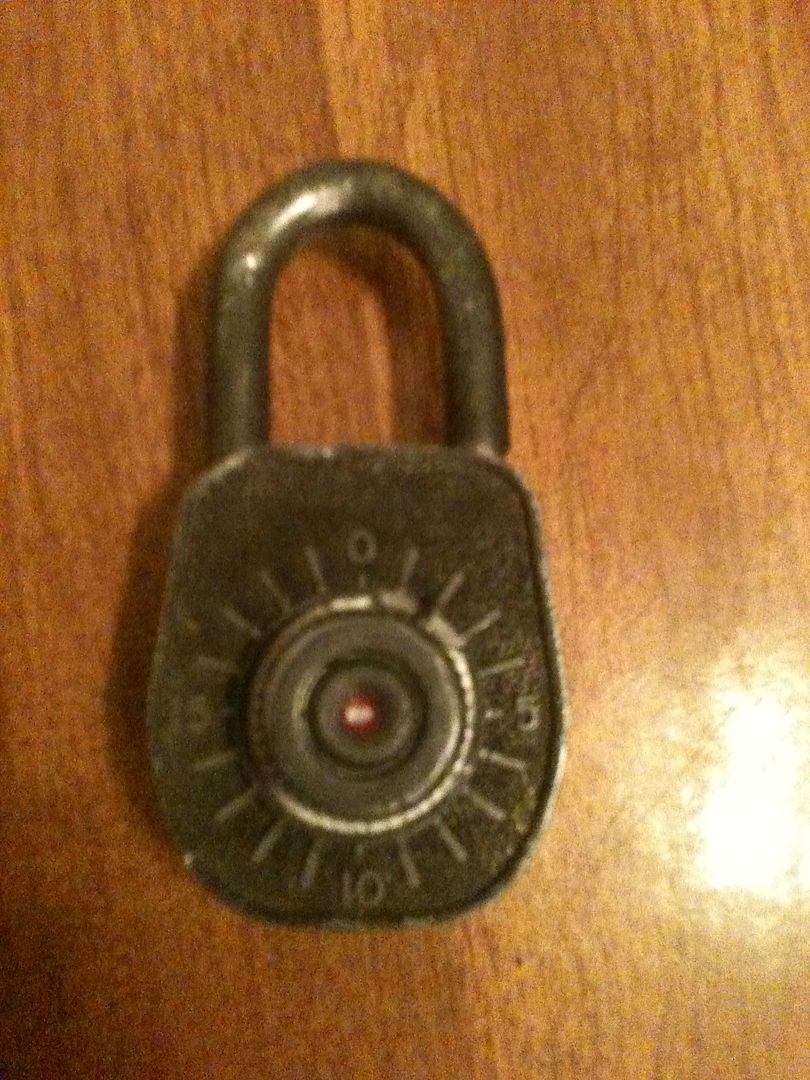
Fascinating lock in and of itself, but we will limit ourselves to the keyed part of this keyless padlock.
Why would a 'keyless' lock have a key? This lock was used by schools. Kids could have their own combination for their locker, but the school could still access the lockers if needed.
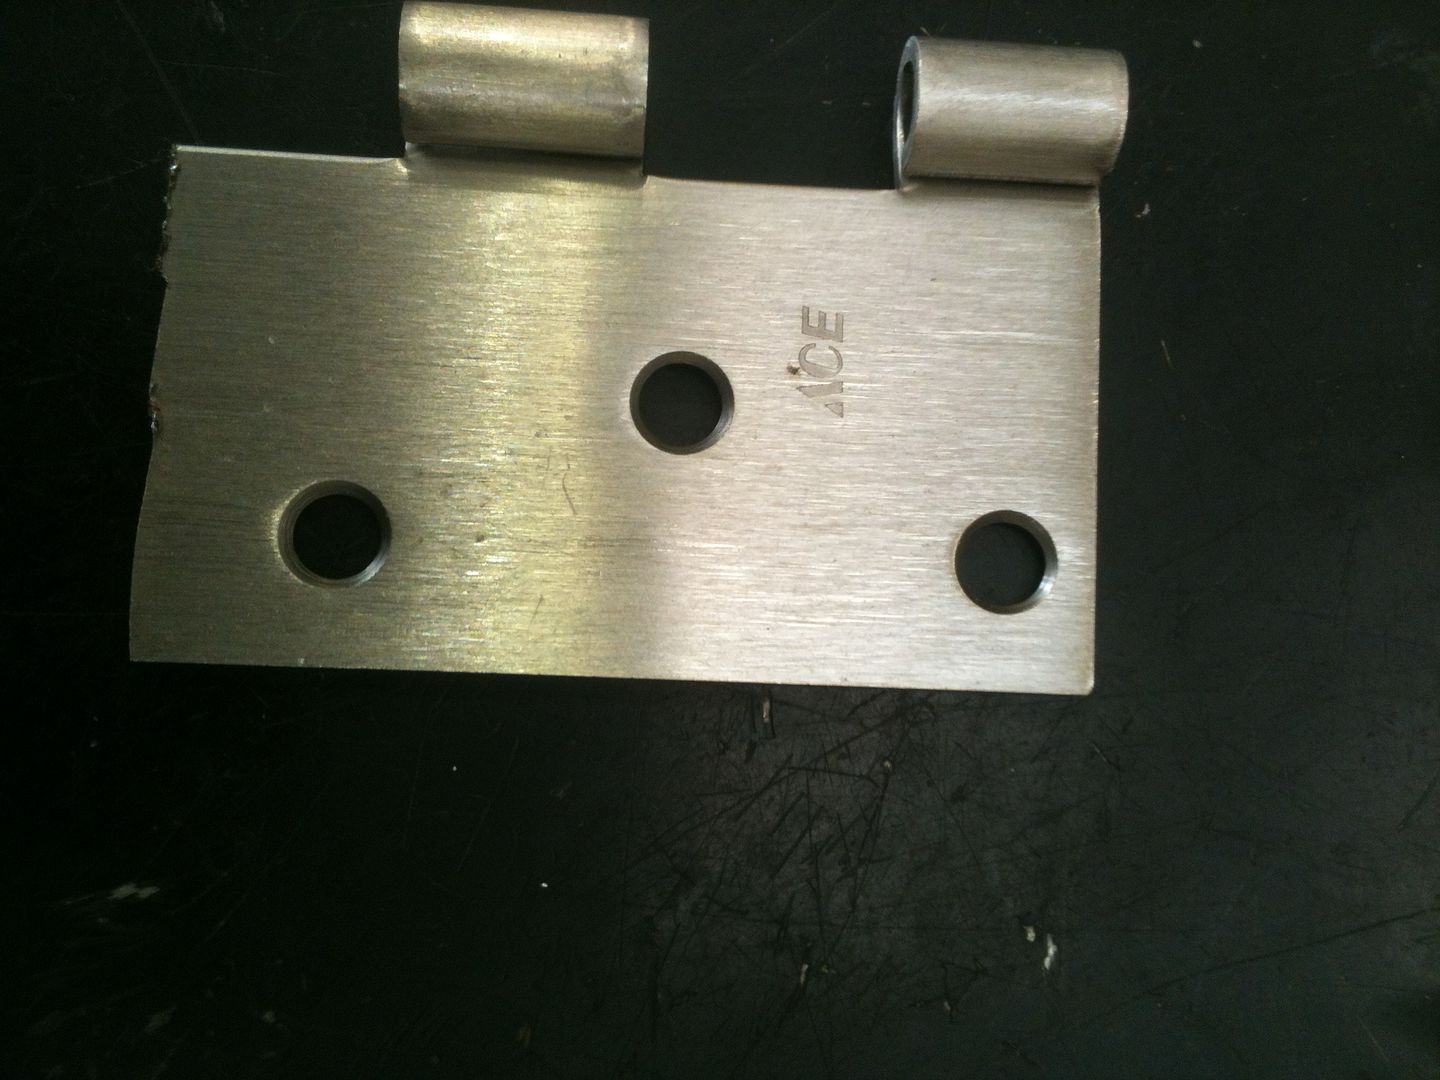
Found this picture of a key...
...and it helped me a lot in determining how to make the key. Other information - especially a fantastic file on these locks from Oldbiscuit - helped to understand how the lock itself works, and more specific to this write-up, how the keyed part works.
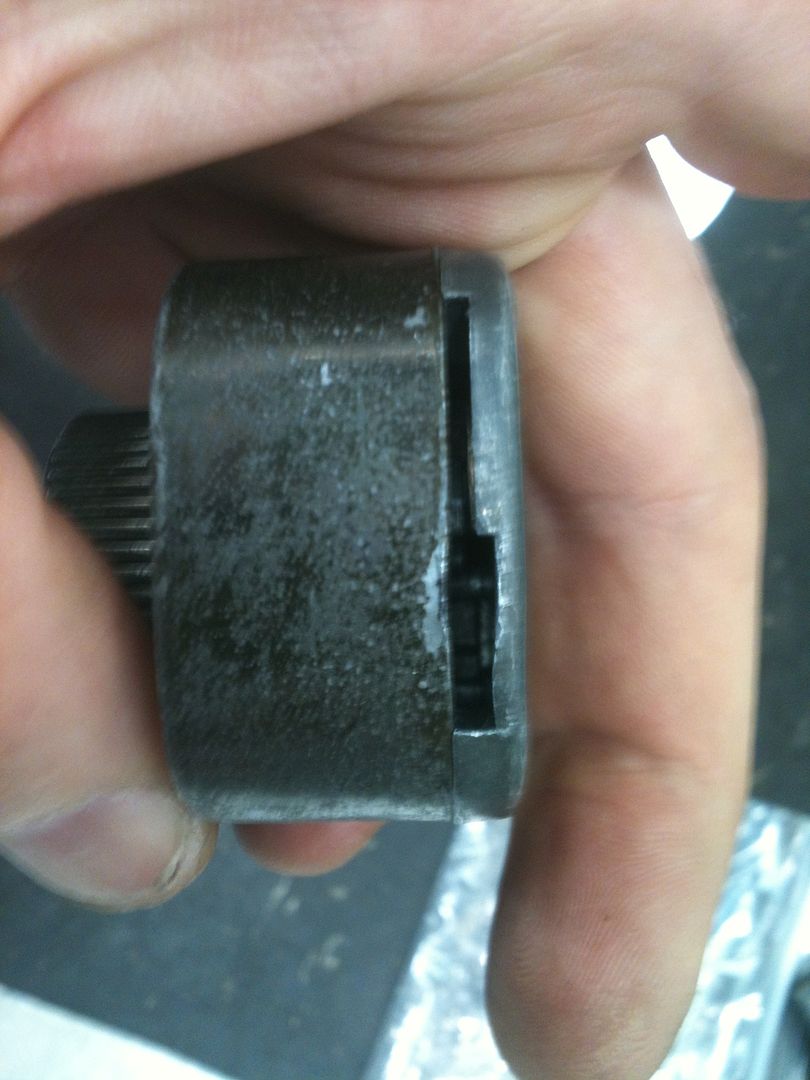
OK, enough small talk. They keyway looks like this:
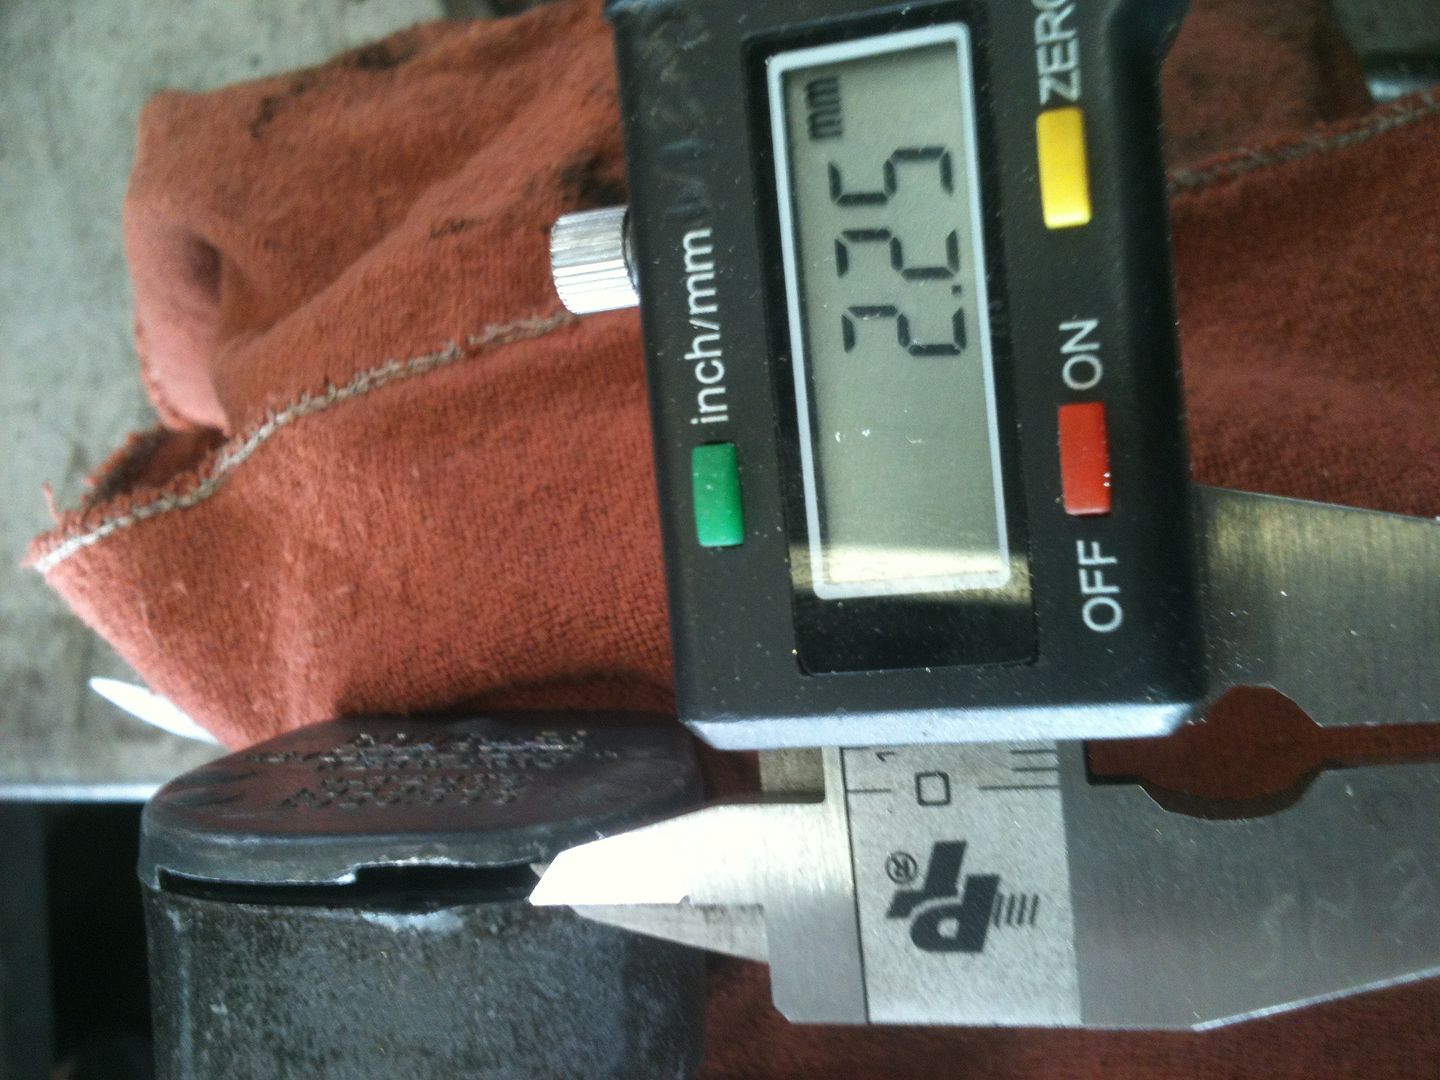
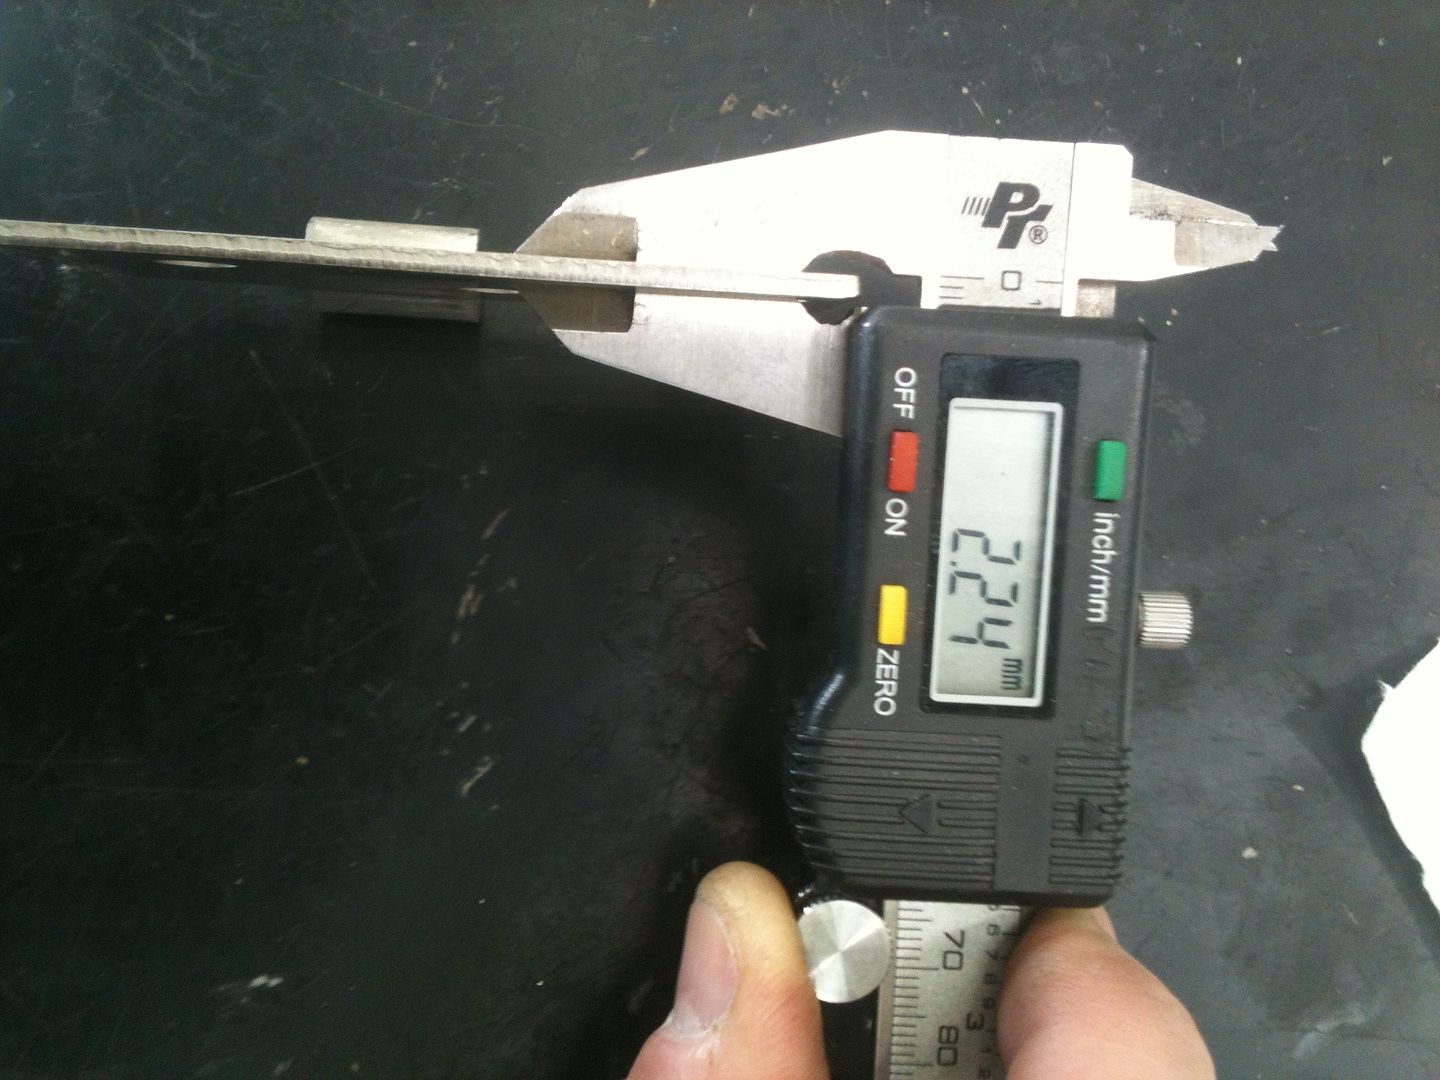
Measured the thickest part of the keyway, which gives the thickness the blank needs to be.
That measurement looked very familiar after another recent key making experiment.
Oh, yeah. Here is the metal used. Perfect thickness!
So this whole thing hinges on making a key, right? Yeah, bad joke. But it will have to suffice.
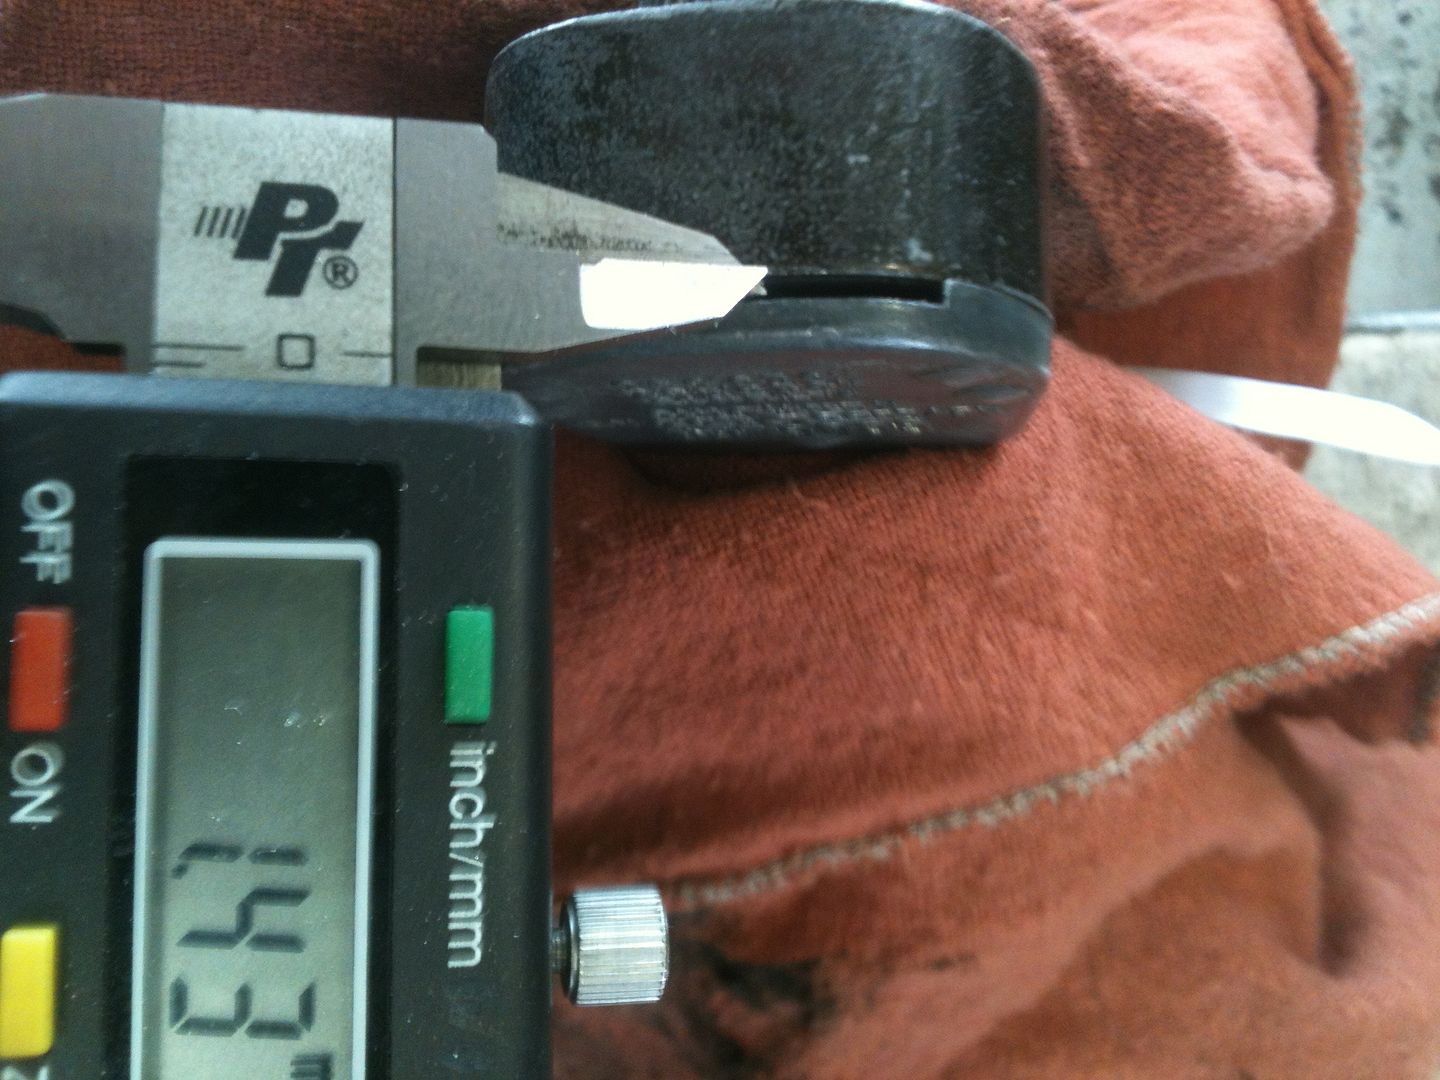
And the thin part of the keyway, so I know the depth the wards need to be cut.
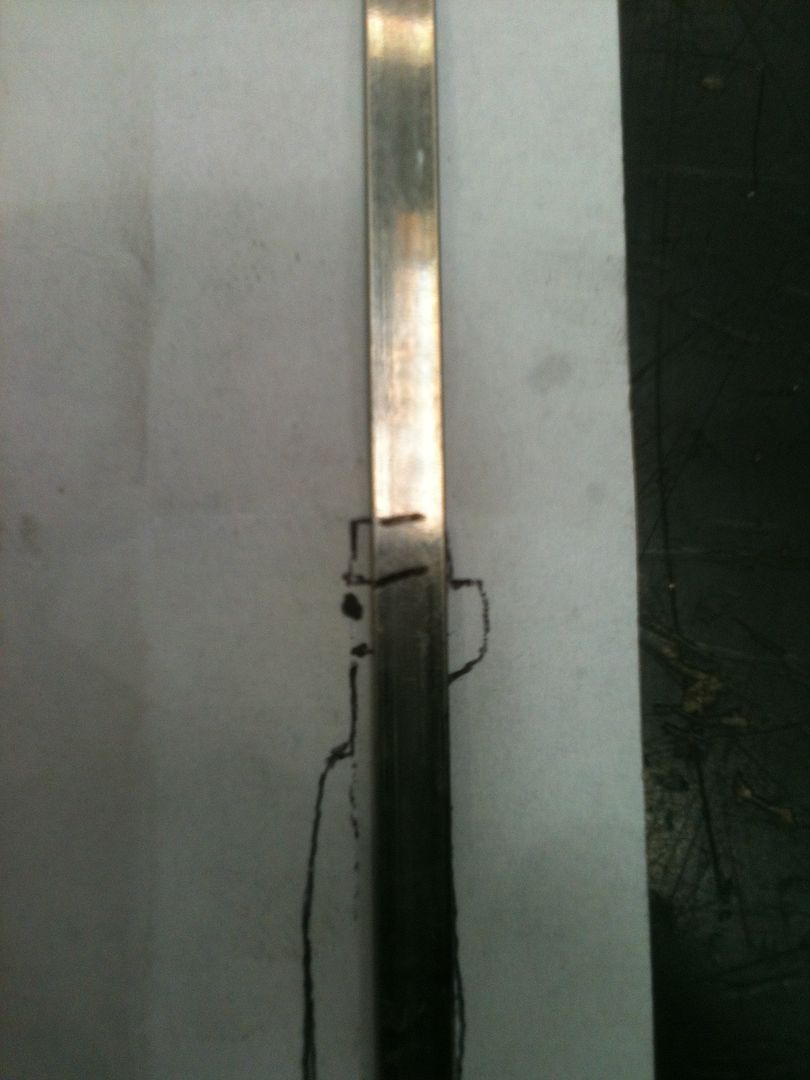
Found that this wiper insert fit perfectly in the notch where the key tip needed to go. So it gave me a key blade height, at least for the tip. It also gave me a depth of key to the outer edge of the lock body. A little shifting around of the wiper inset, and could feel the ledge on the cam the key fits into. You can see the 'depth' marks on the wiper insert.
In this next picture, you can see the wards in the lock at the top and bottom edges of the keyway. At the far left, you can see a large, round post.
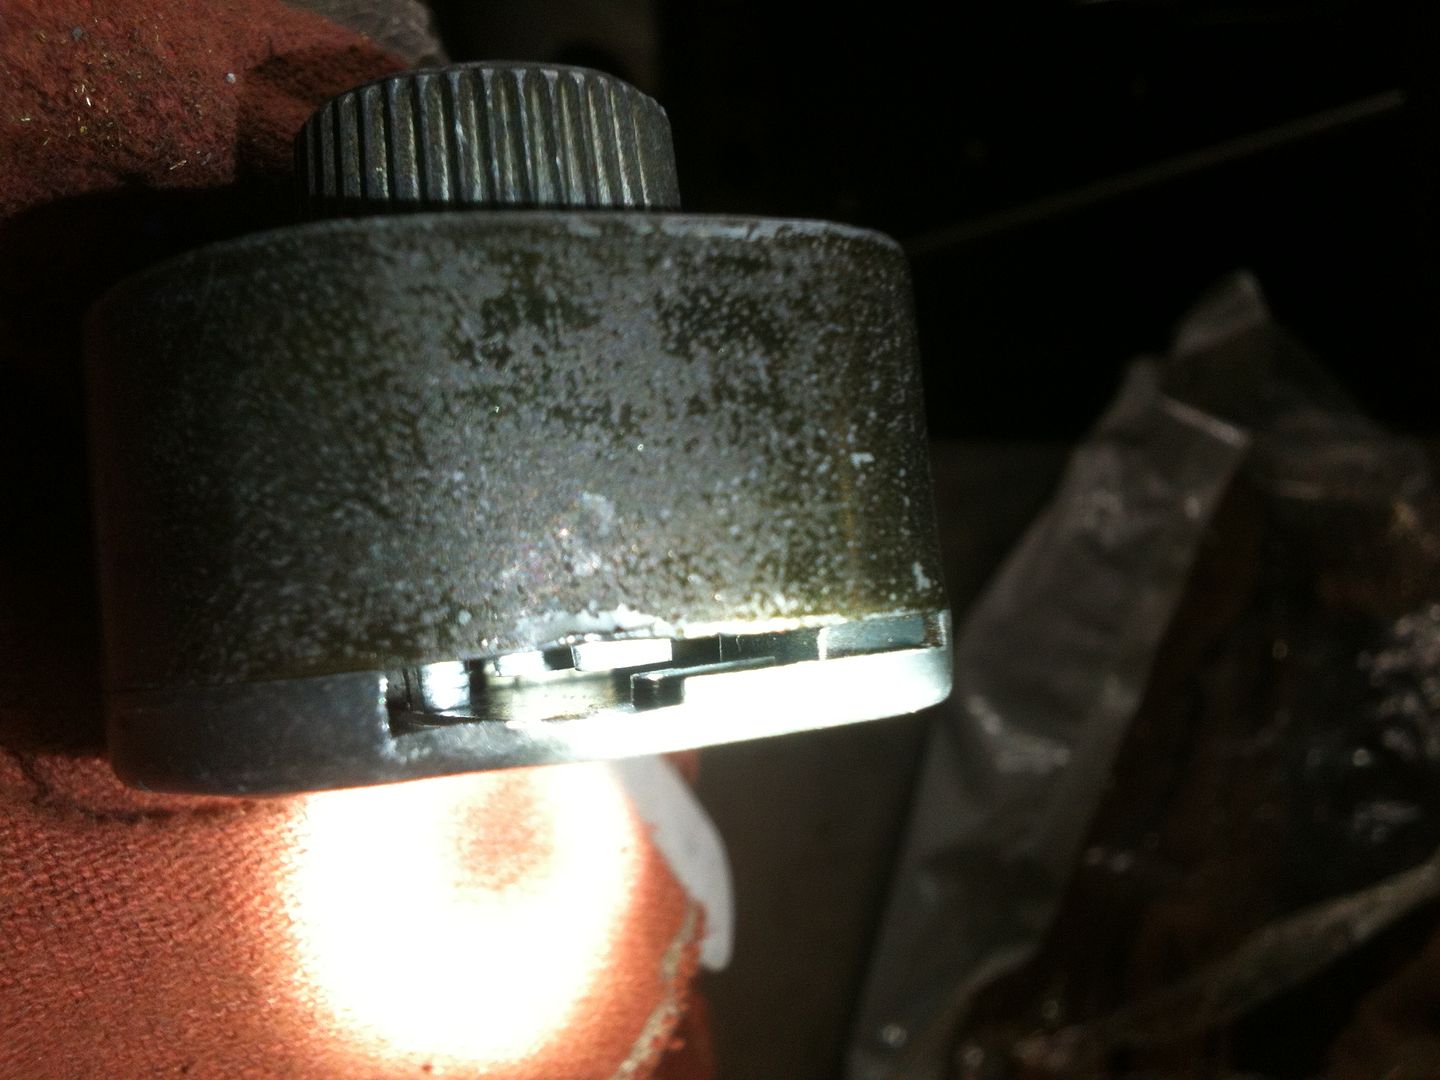
This post is to prevent something like a wiper inset from being used to turn the cam - it blocks the key from being turned unless the key has that section cut away. That explains the funny looking squiggly key shape at the tip.
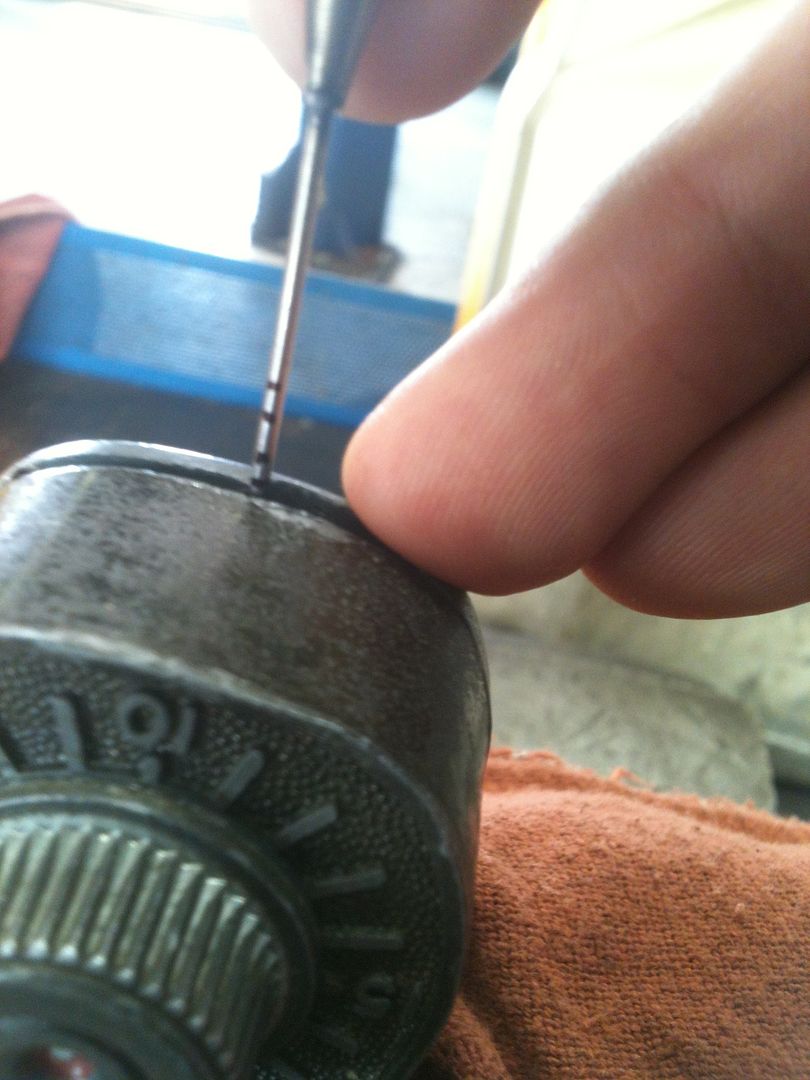
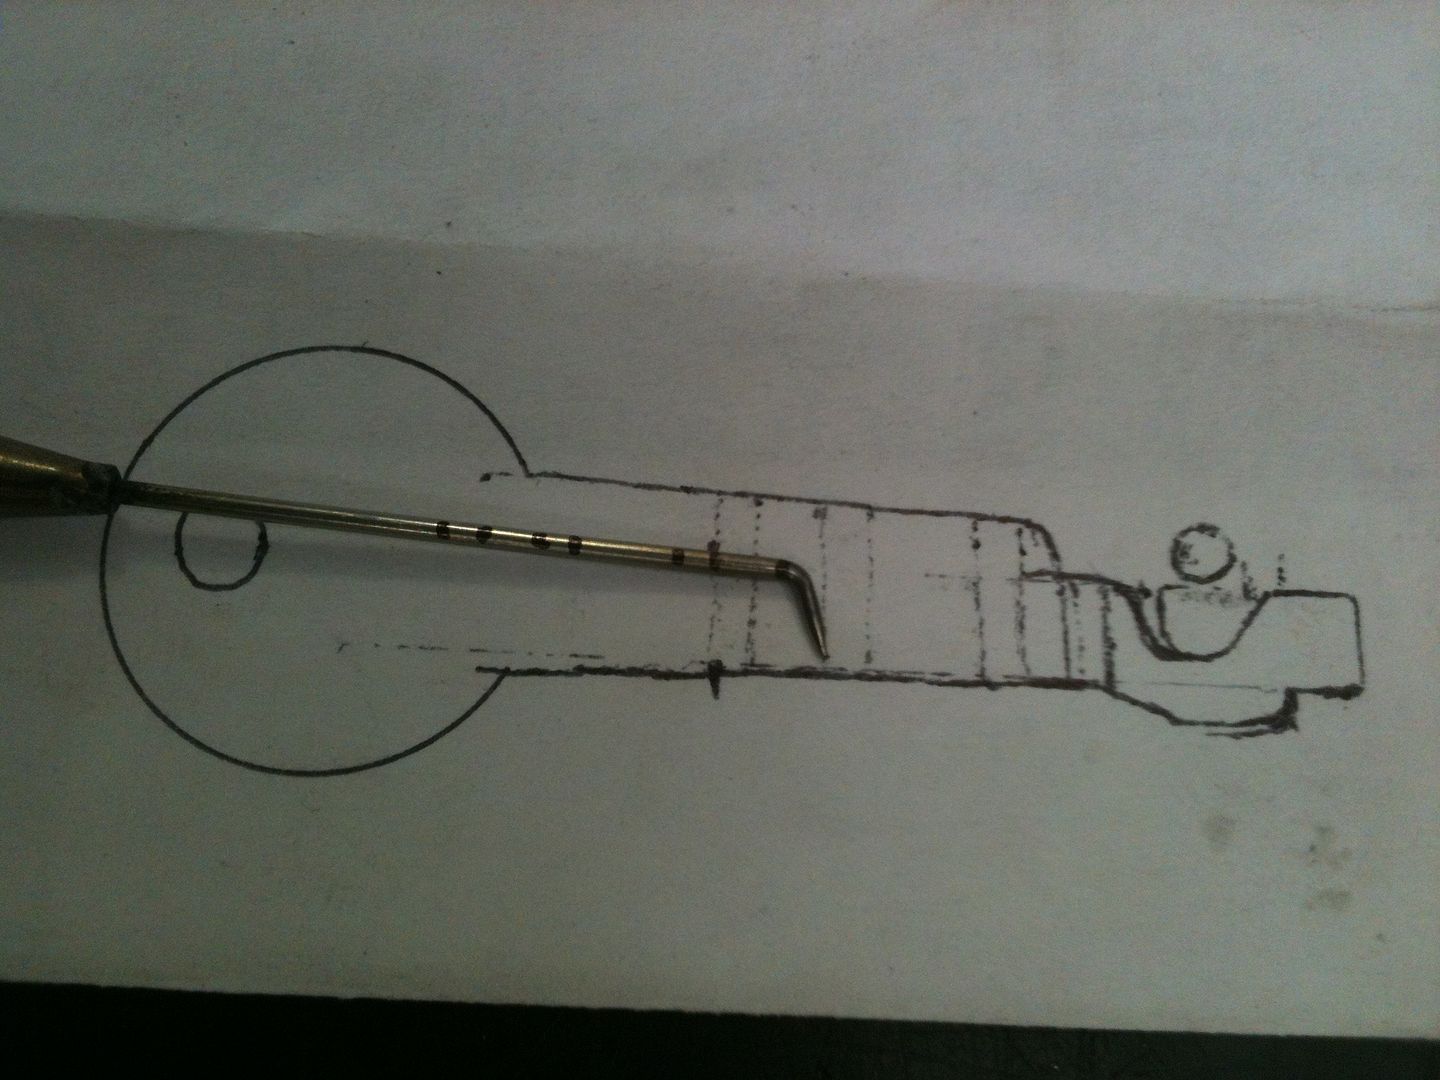
Used a dental pick with a 90 degree bend and a fine point marker to mark the top and bottom depths of each ward, as well as the post.
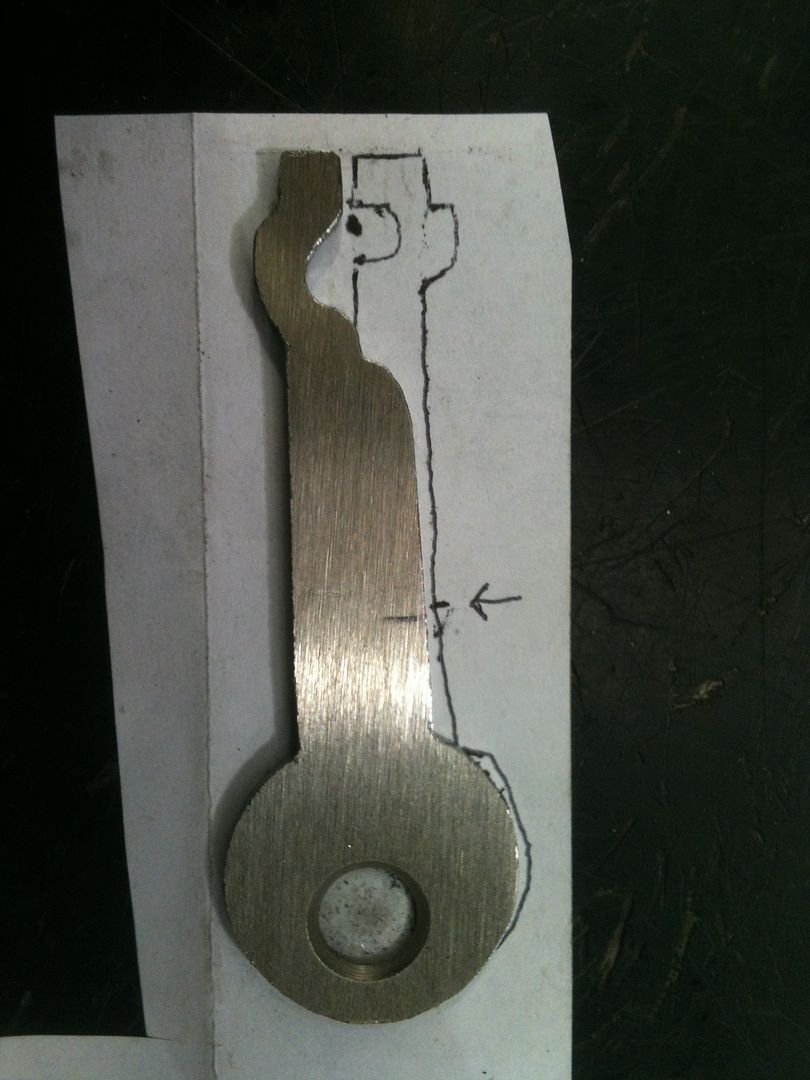
Using the picture of the key above, and the measurements already made, drew a rough sketch of the key. Tried to keep it looking similar to the original for the fun of it.
The arrow on the drawing points to the mark showing the length the key blade needs to be from the tip to the outside of the lock body.

Now turn the wiper insert around, and use the marks to mark the depth of the key tip - where it will need to start 'shifting' to the side to fit around the post.
Now start marking rough locations for the wards.
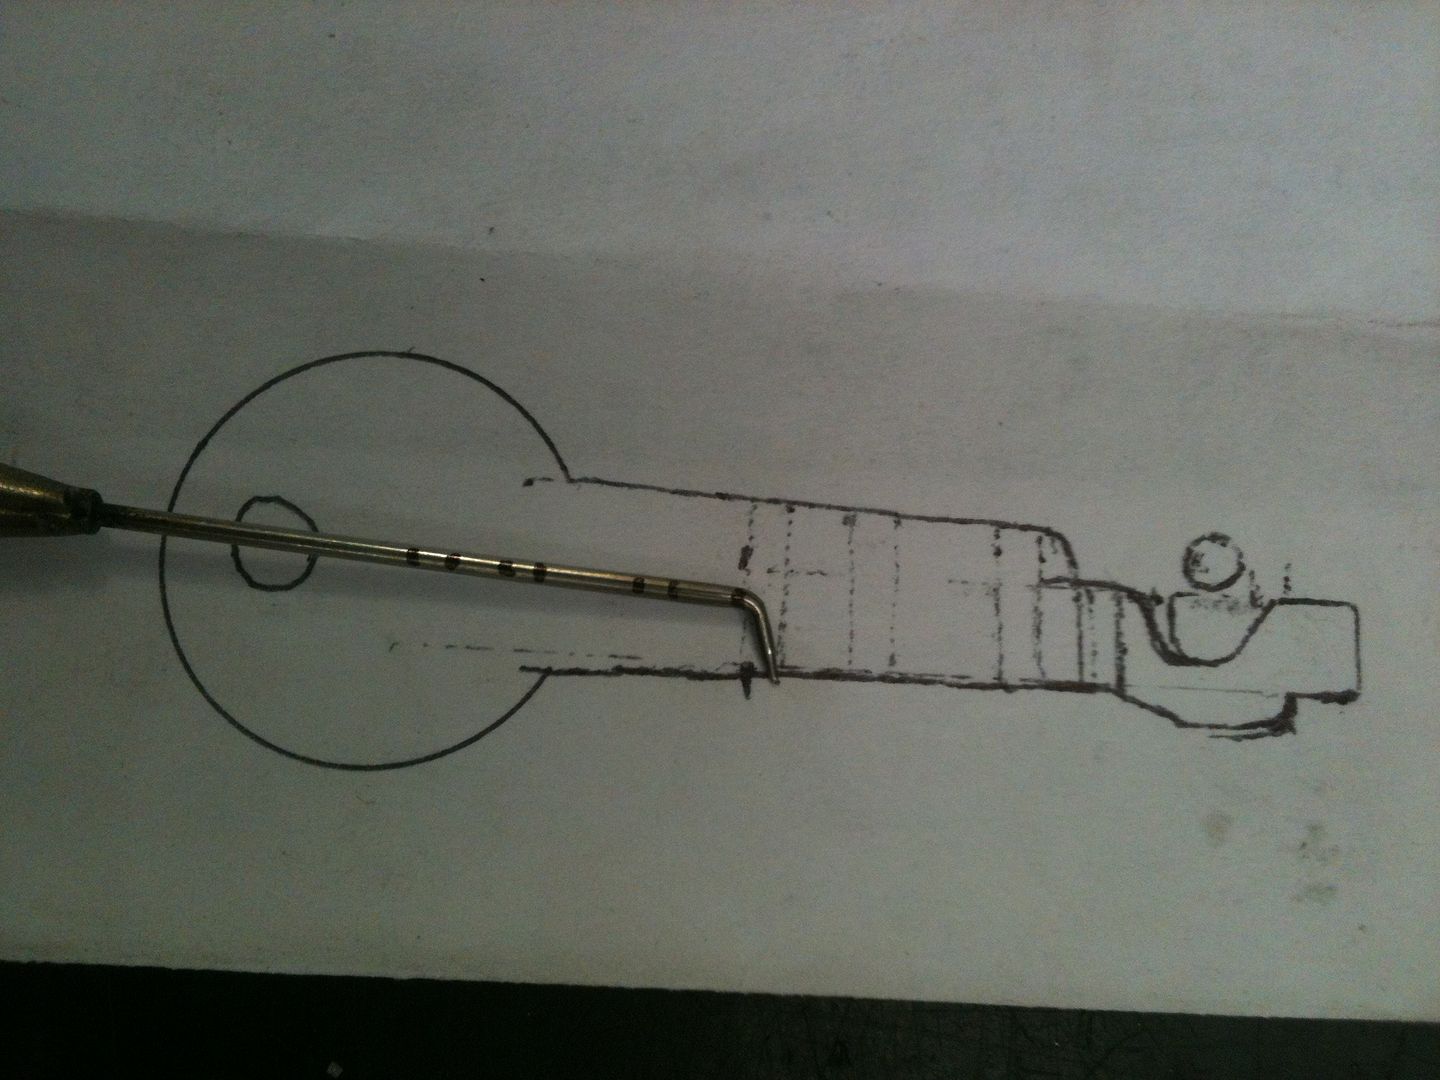

Etcetera. A little white out helps to clean up the sketch.
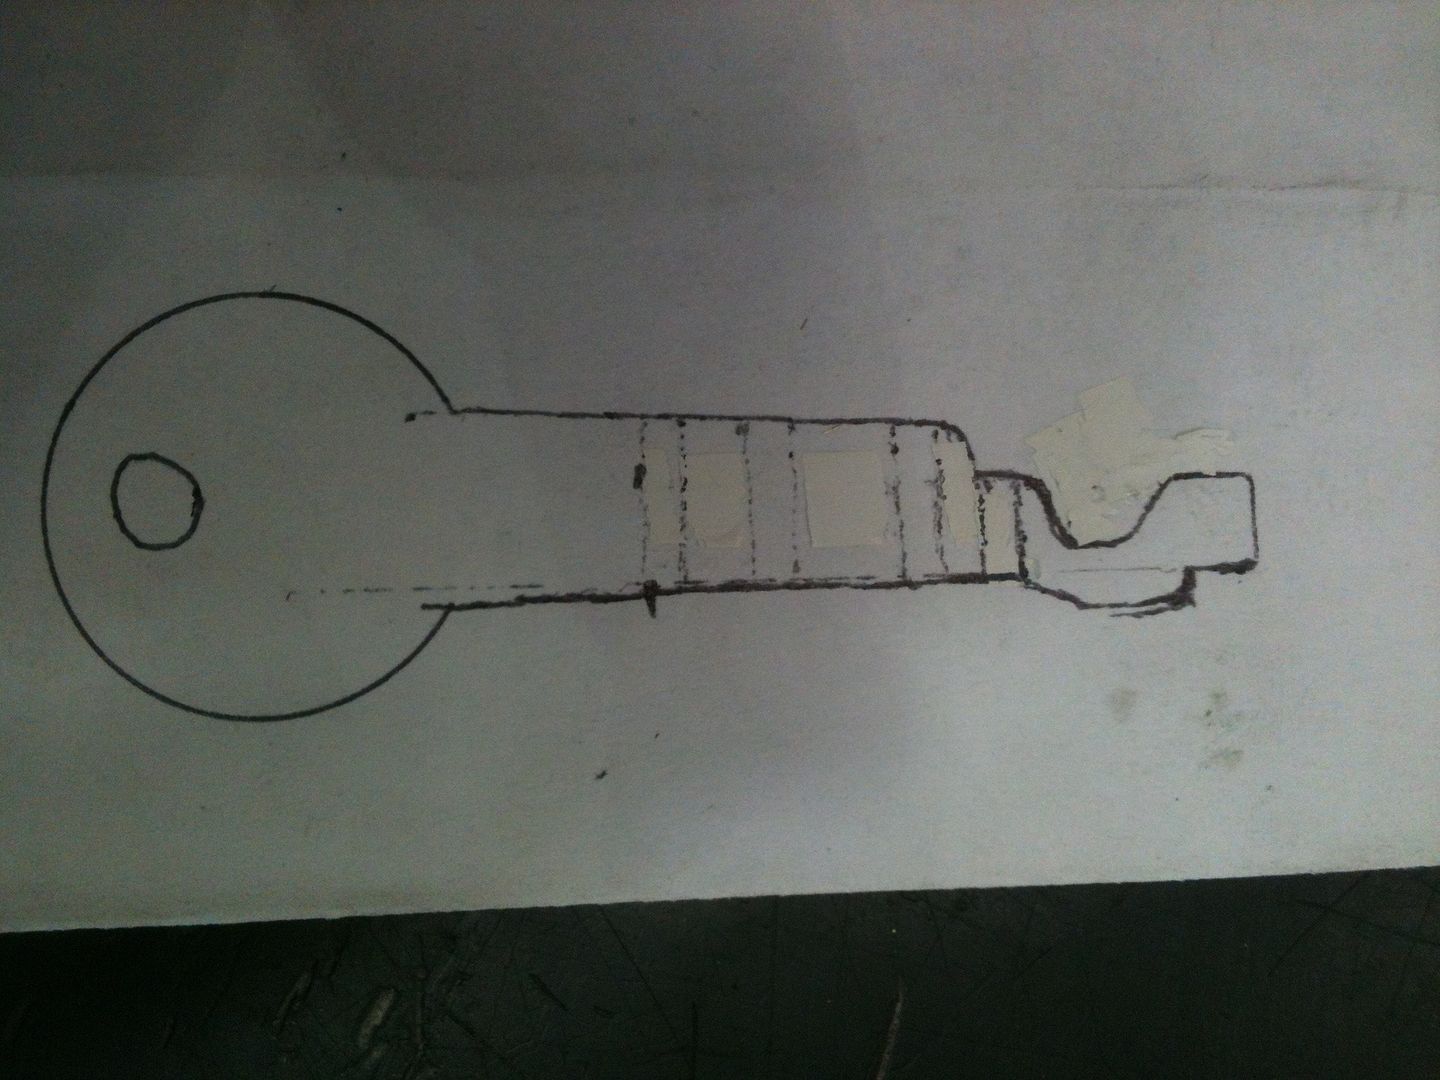
Took a Sharpie marker and blackened the entire surface of my template. Then made 10 copies on a copier, so I could have extras in case I screwed up. :-)
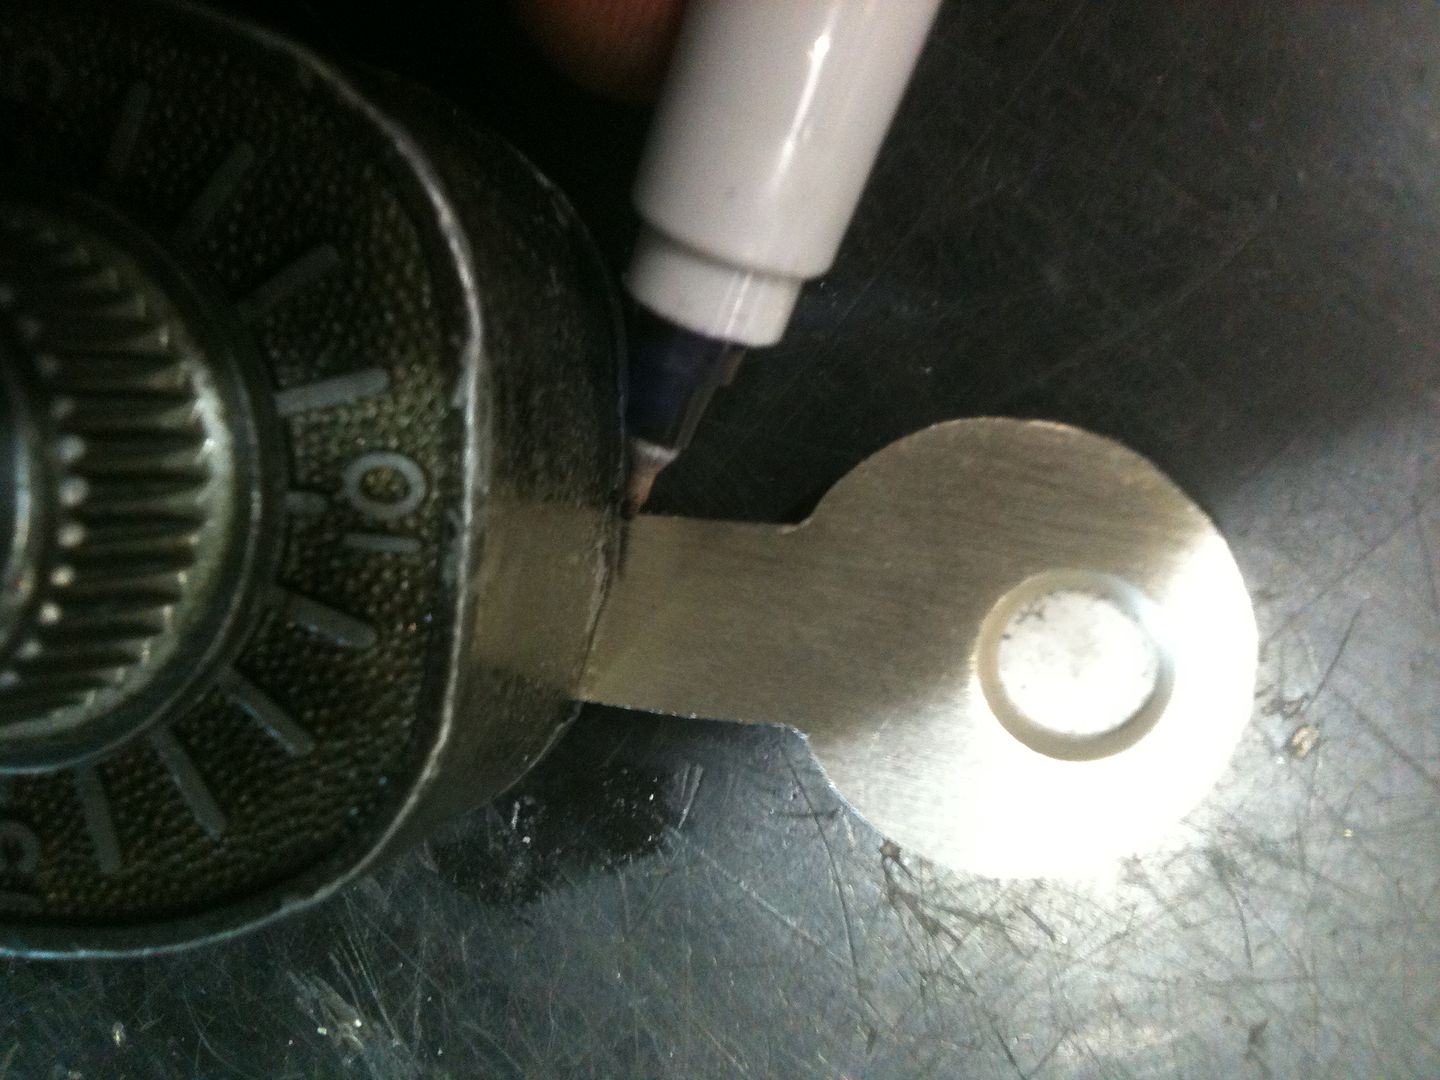
Cut out the template, and taped it onto the metal. Why waste holes already drilled?
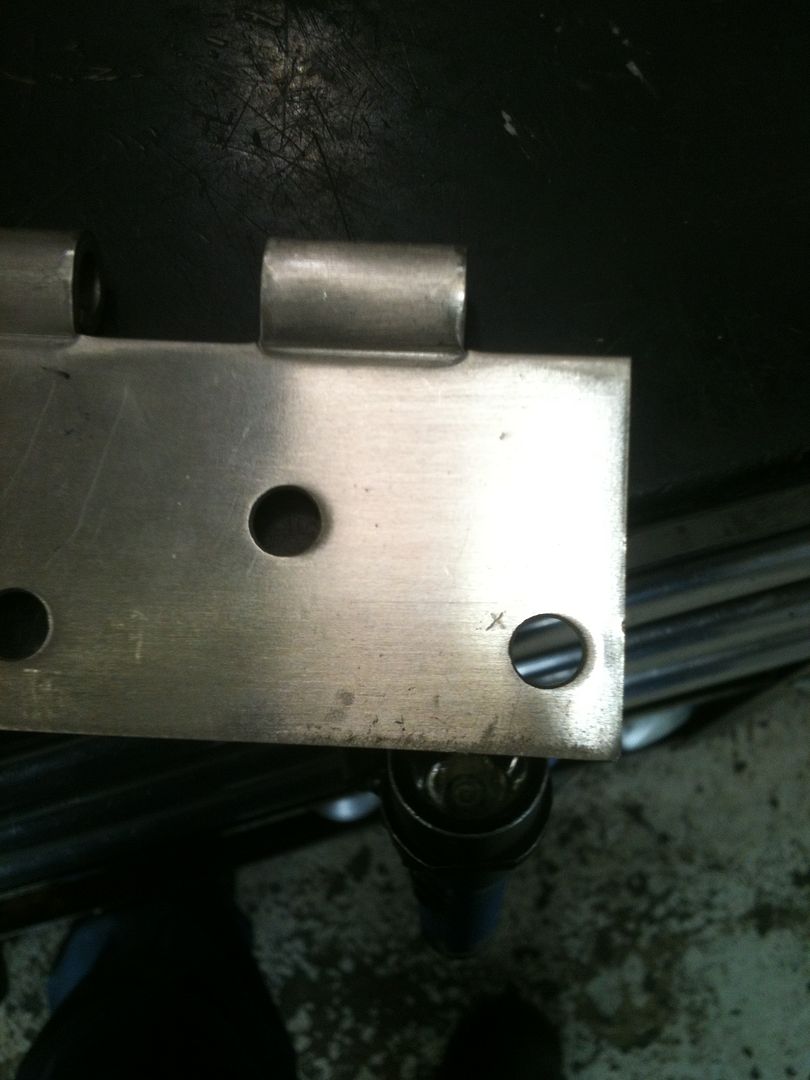
TIP: Shine a light from underneath when you place your template over the hole. Then you can correctly center the hole in the key bow!
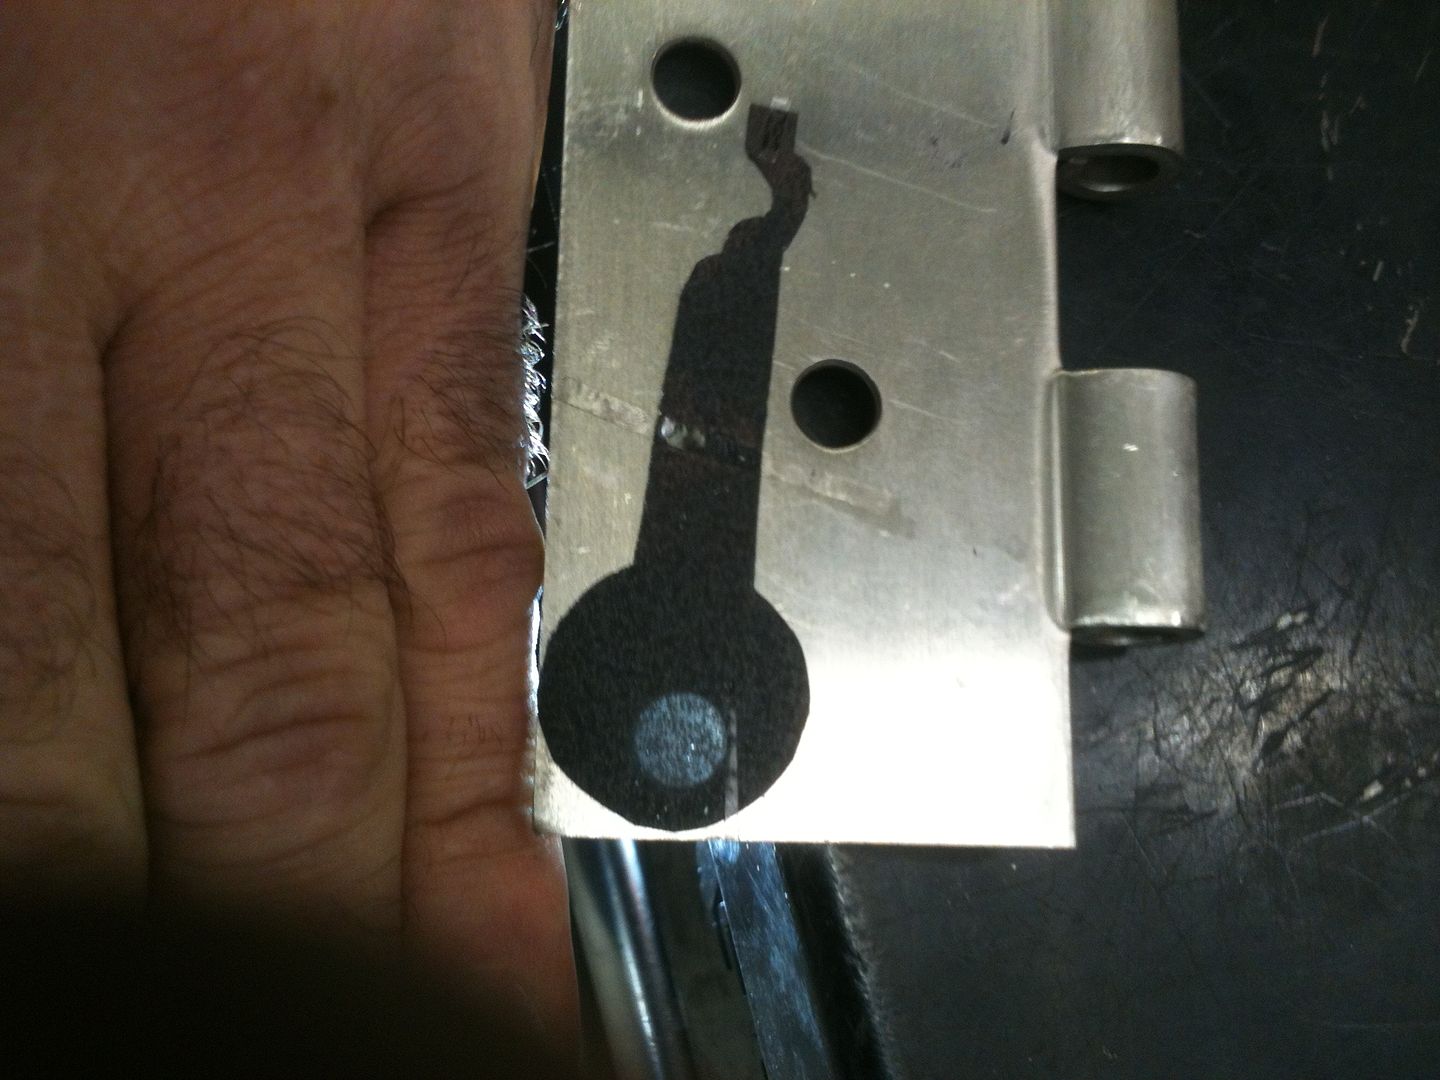
Once it was located correctly, used spray adhesive to attach the template to the metal.
TIP: If you use spray adhesive, spray it onto another sheet of paper, then use latex gloves and your fingertip to dab up a little adhesive while it is still wet, and wipe a very thin layer onto the back of half of your template (the other half stays taped in the correct location). Put the half with adhesive down onto the metal, and lift up the other half of the template and repeat. No mess on your work! This also works for pick templates!
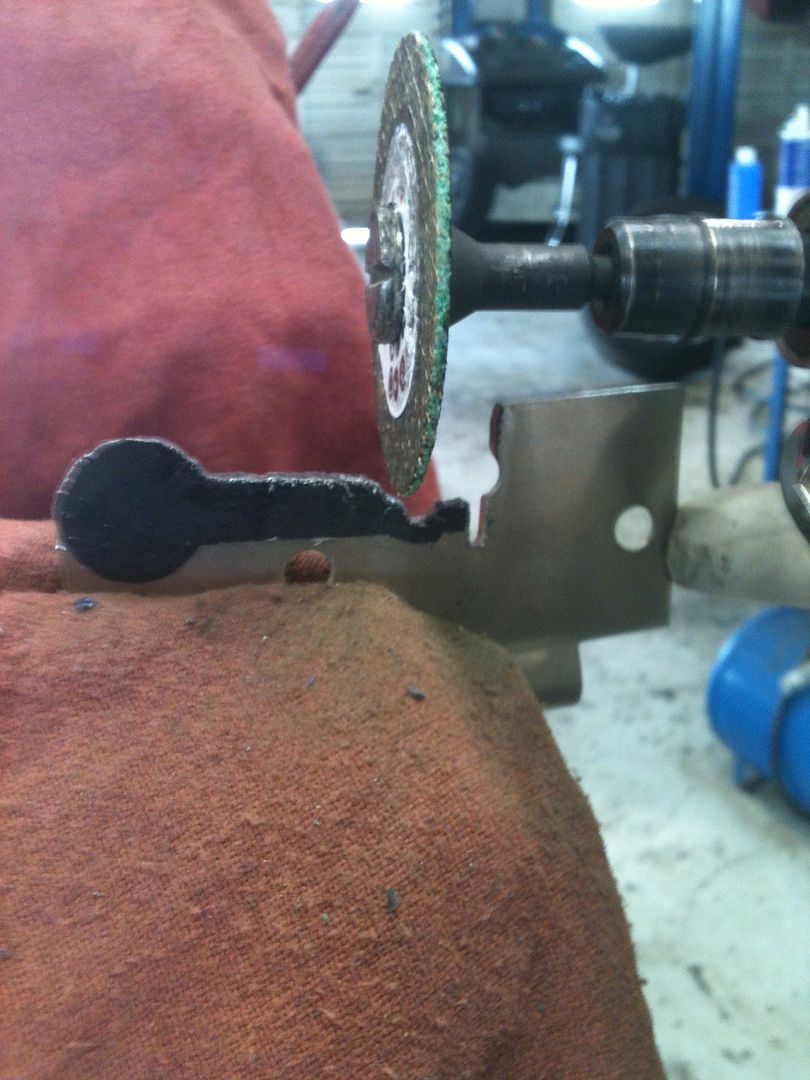
Now here is where the work starts to show.
Use an angle grinder with a cutoff wheel to cut down close to (but not precisely at) the edge of your template. Do half the key at a time.
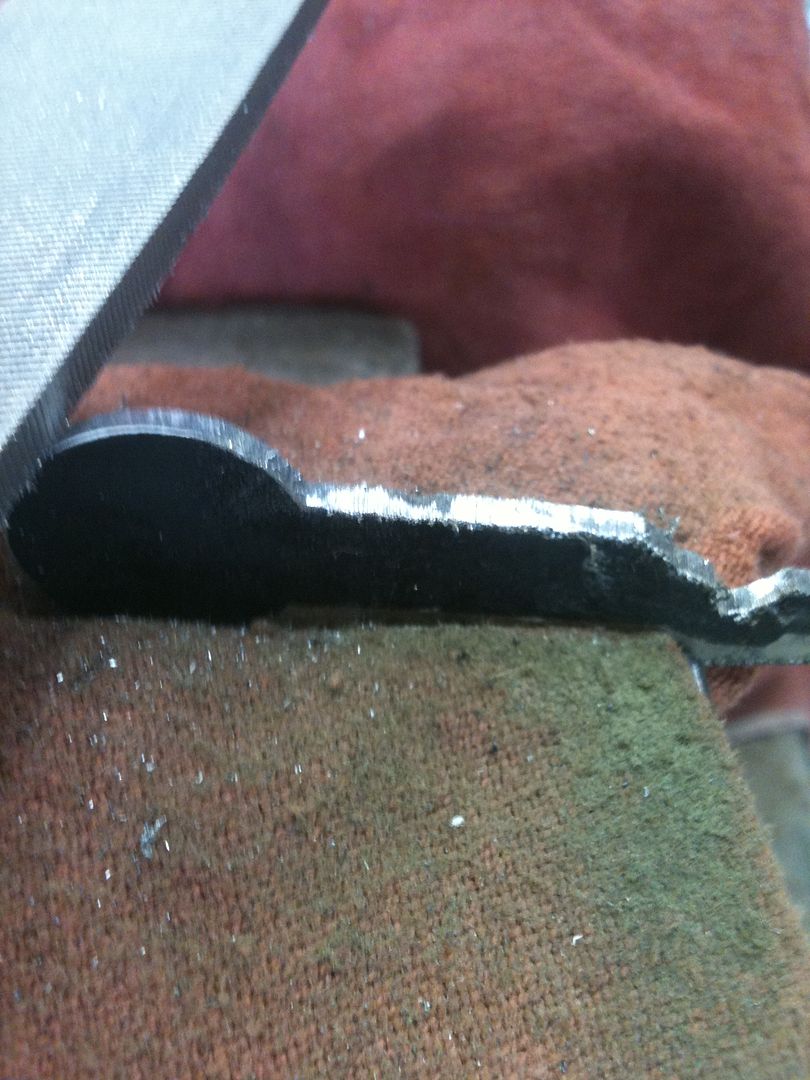
Now use a file to get right to the edge of the template.
Flip the key blank over and repeat.
TIP: Aluminum angle metal (at a 90 degree angle) can be cut to fit your vice so the teeth in the vice do not bit into the key blank, leaving ugly marks. It did not matter when holding metal that would not be part of the key, but it will make a difference now.
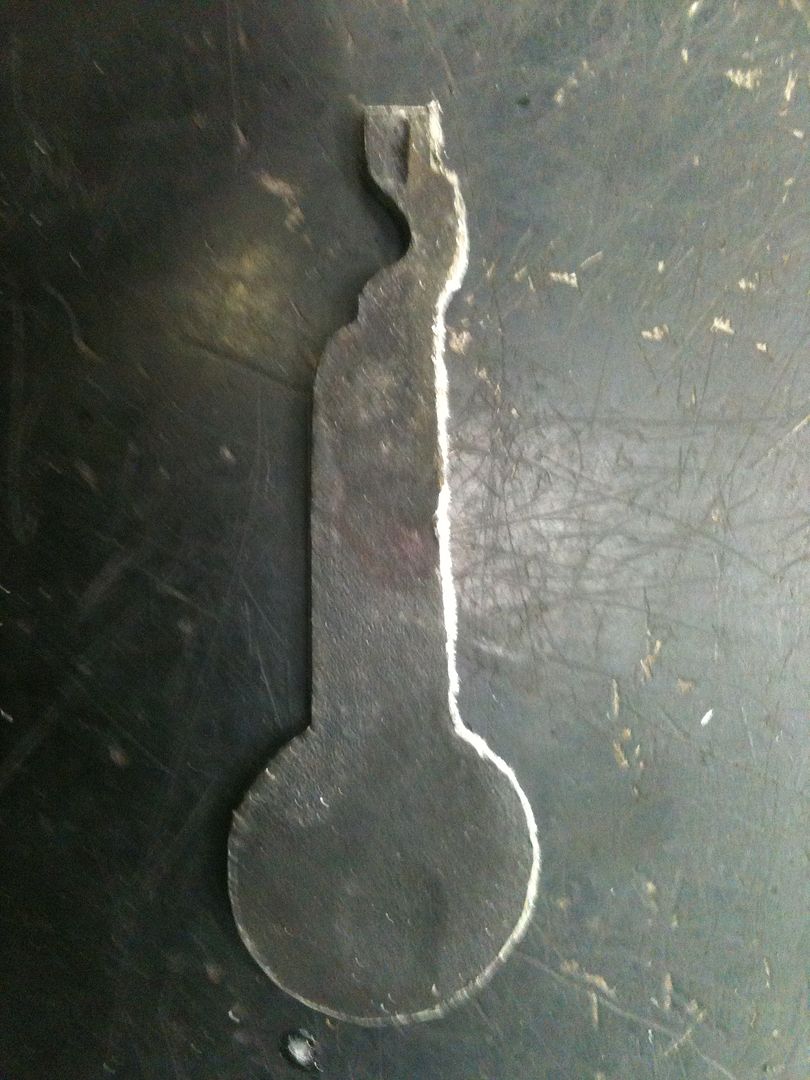
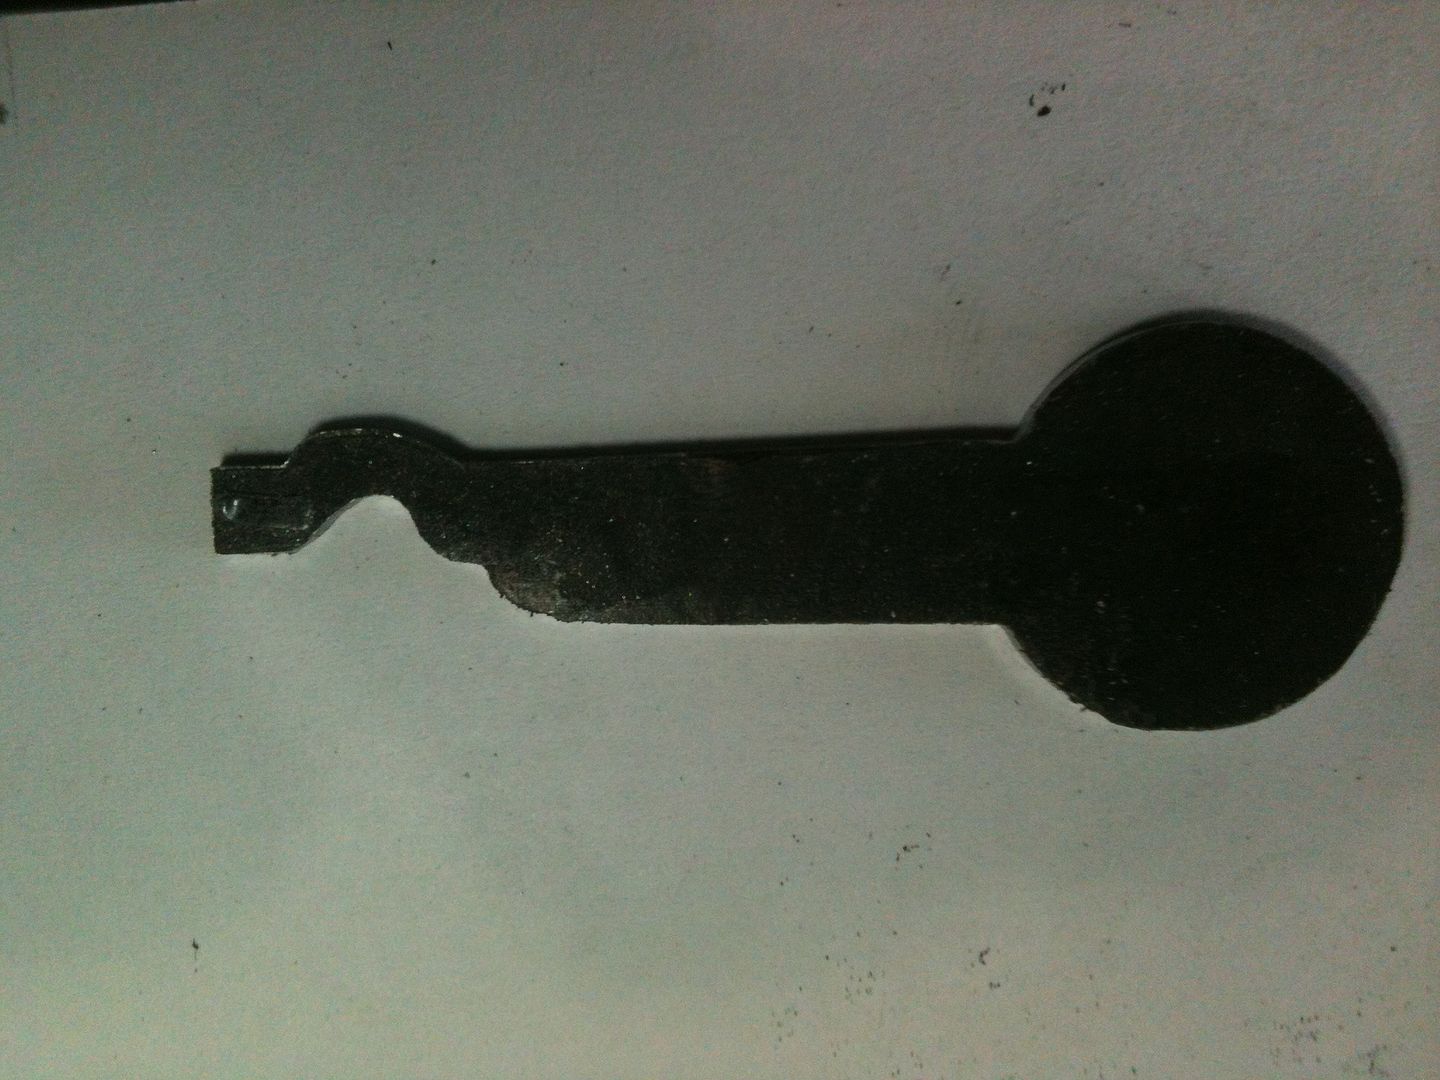
Now peel off your template.
TIP: (Yes, another one. Sorry!) I use automotive trim adhesive - similar to rubber cement, but more heat resistant and stronger.
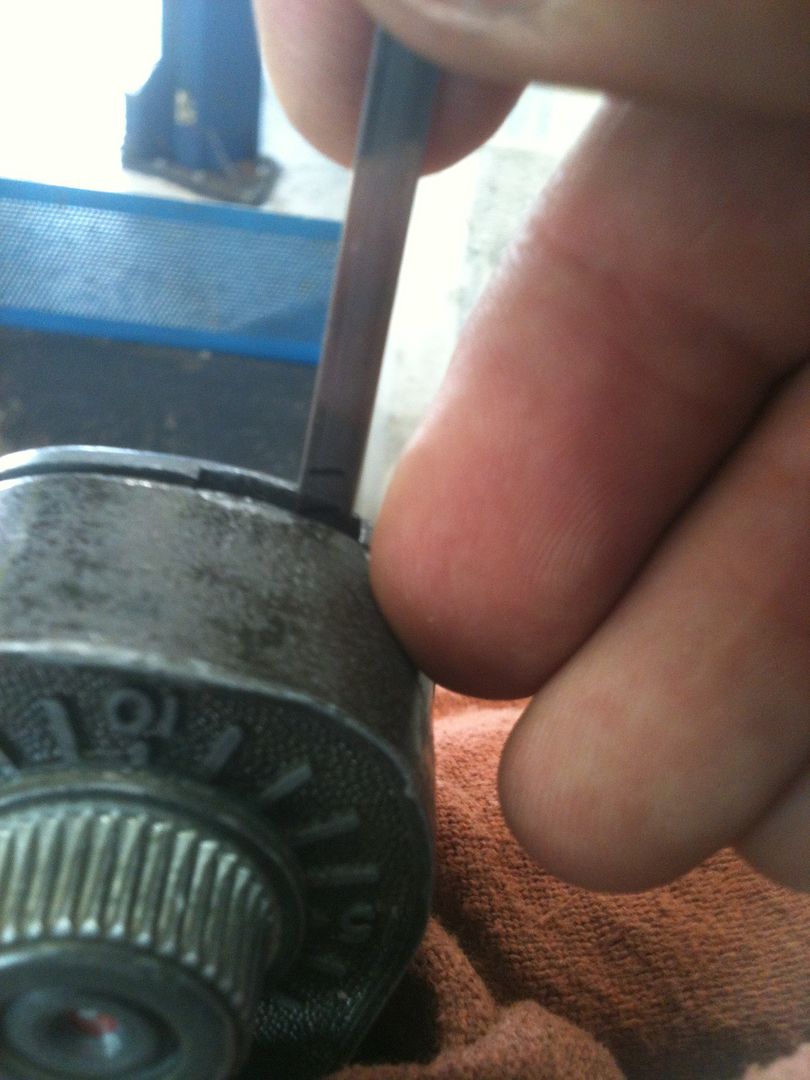
Put the key blank into the lock and verify the depth for the lock body.
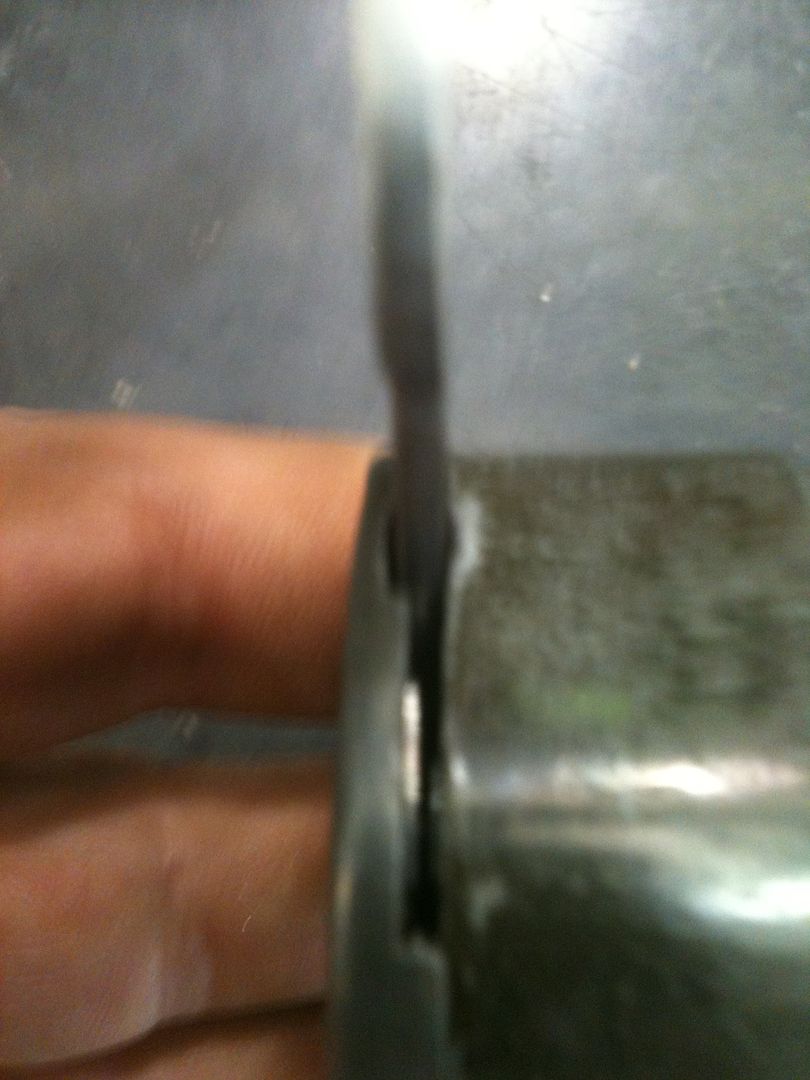
Close enough!
The next part is like impressioning. Mark the leading edge of the key blade (the part that will hit the wards first) with a marker, the put in the key blank. Turn it towards the skinny part of the keyway. One of the wards will make an impressioning mark first. Use a Dremel with a fine cutting wheel to cut the wards across the key blank. Keep in mind that the key will be pivoting at the tip, so the cuts will be curved. The cut at the outside of the lock body will curve both ways, due to the changing shape of the lock body. Also, once the wards were cut, found that my cutout at the key tip for the blocking post was not deep enough. It made impressioning marks, so filed it further, as needed.
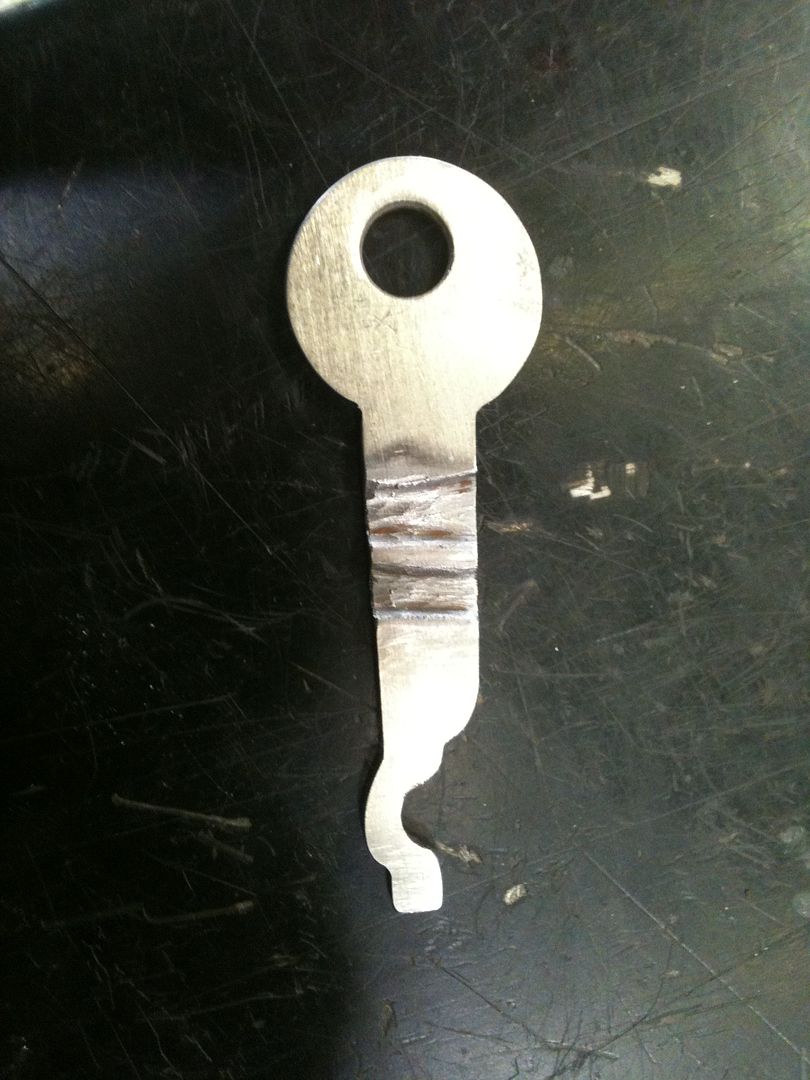
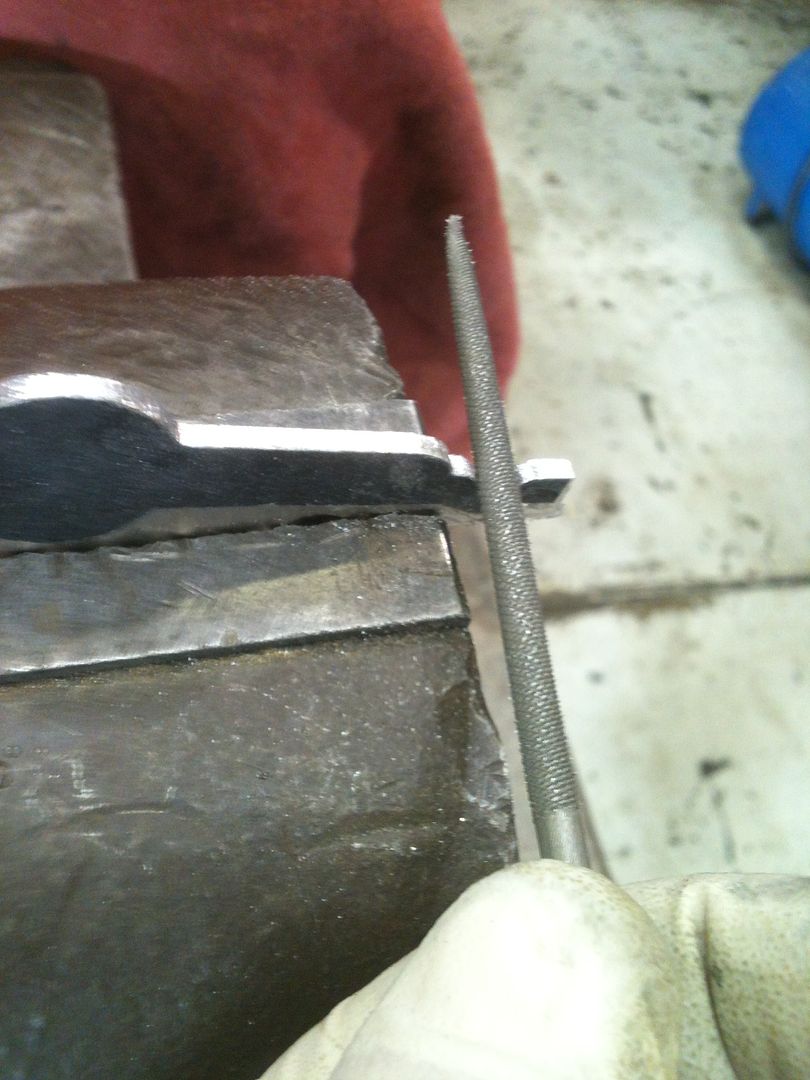
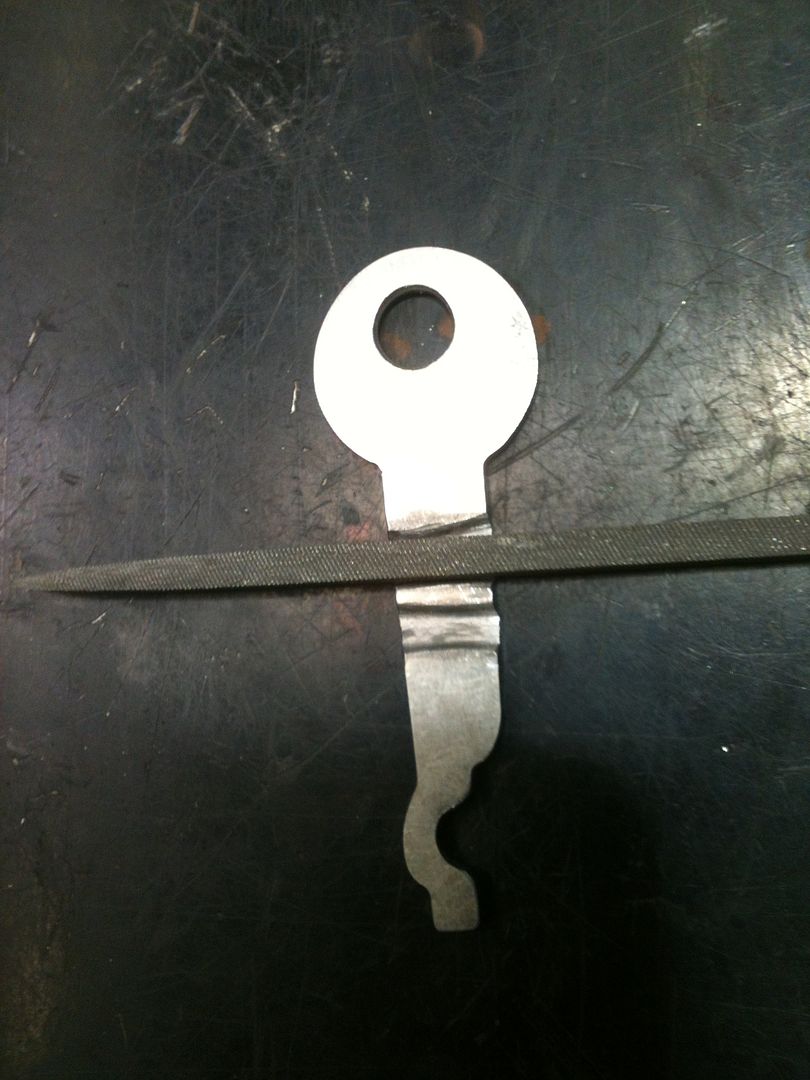
Clean up the cuts with a file, and give a nice bevel to the edges of the cuts to make them look nice.
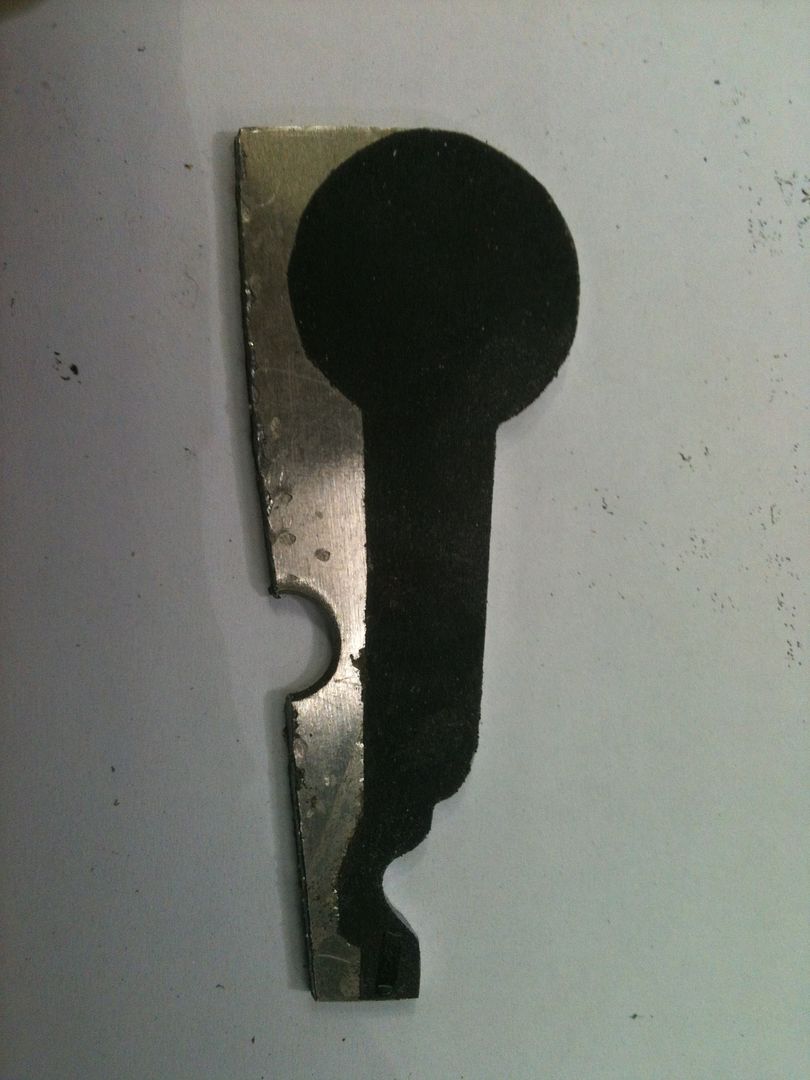
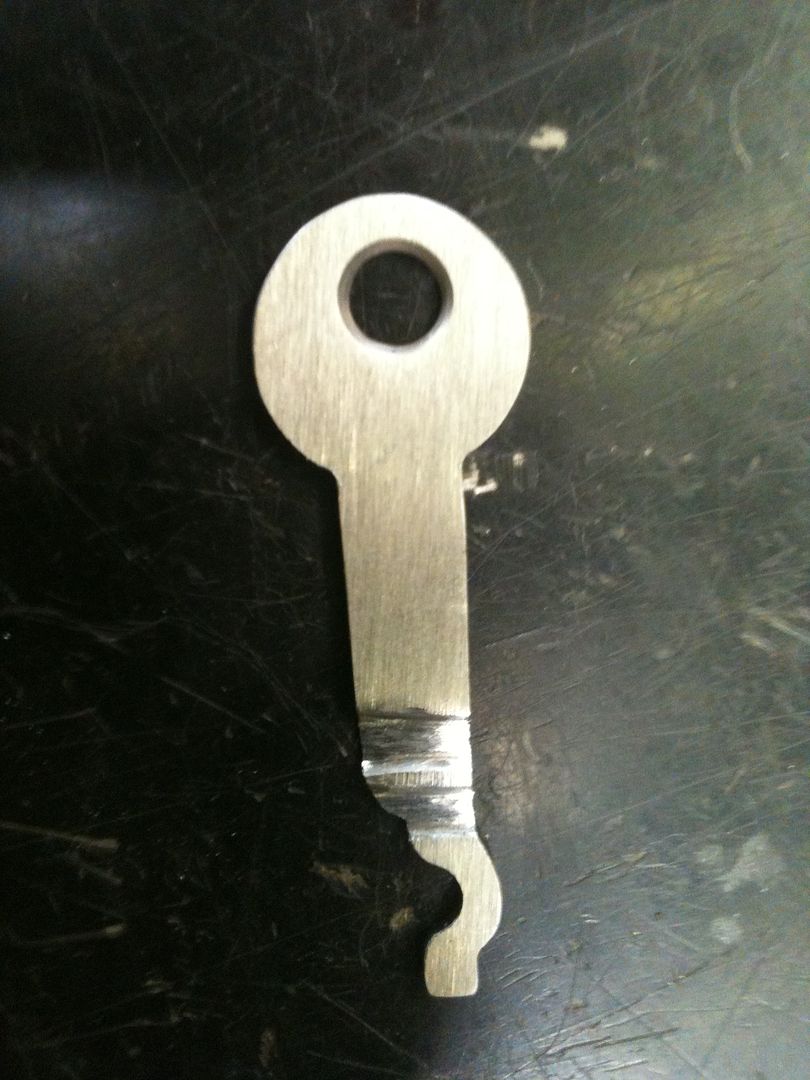
Decided I wanted clean, not-quite-sharp edges to my key, so used sandpaper to clean up the file marks on the outside edges of the key. The look works for me, but do as you think looks best!
And the proper test...
There is spring tension on the cam the key turns, so have to hold it in place. There is also no spring on the shackle, so you have to manually lift the shackle.
That's all, folks. Have 9 more of my 'templates', but not likely to be making more of these keys. Have a great day!
Gordon
P.S. Sorry, Oldfast... no gut shots.
Received a couple of these locks a while back - one without a keyway, and one with. (Thanks, MBI!). It seems that keys are hard to come by, so the lock went into my 'project lock' box. Finally took it out!
The lock looks like this:
Fascinating lock in and of itself, but we will limit ourselves to the keyed part of this keyless padlock.
Why would a 'keyless' lock have a key? This lock was used by schools. Kids could have their own combination for their locker, but the school could still access the lockers if needed.
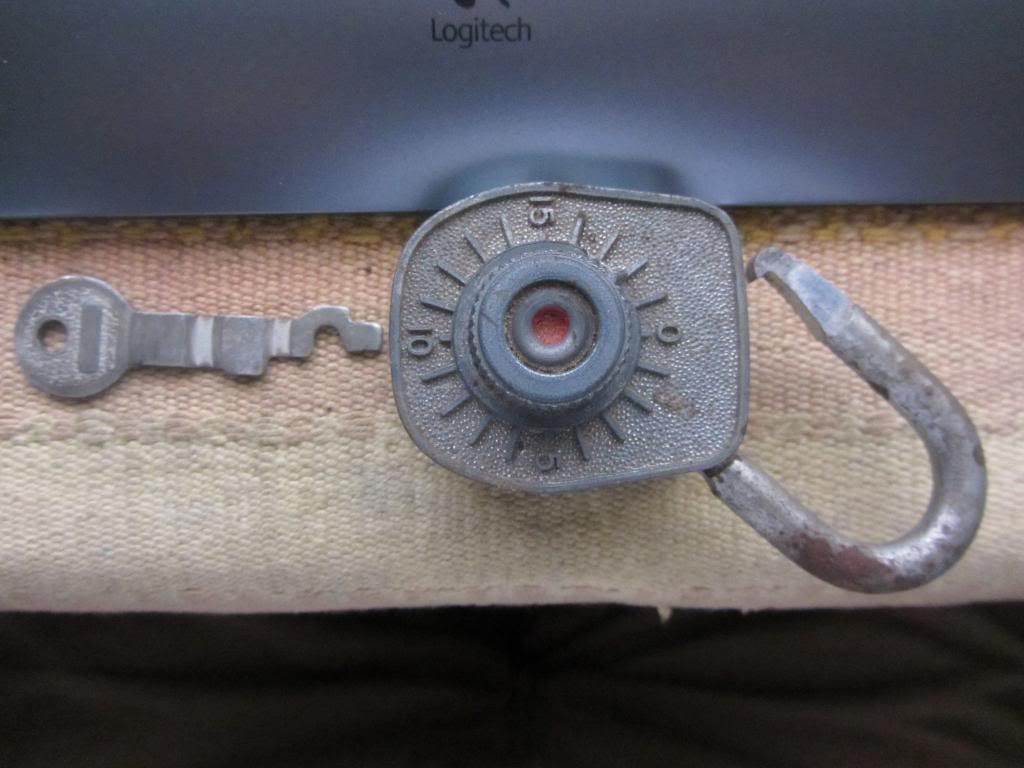
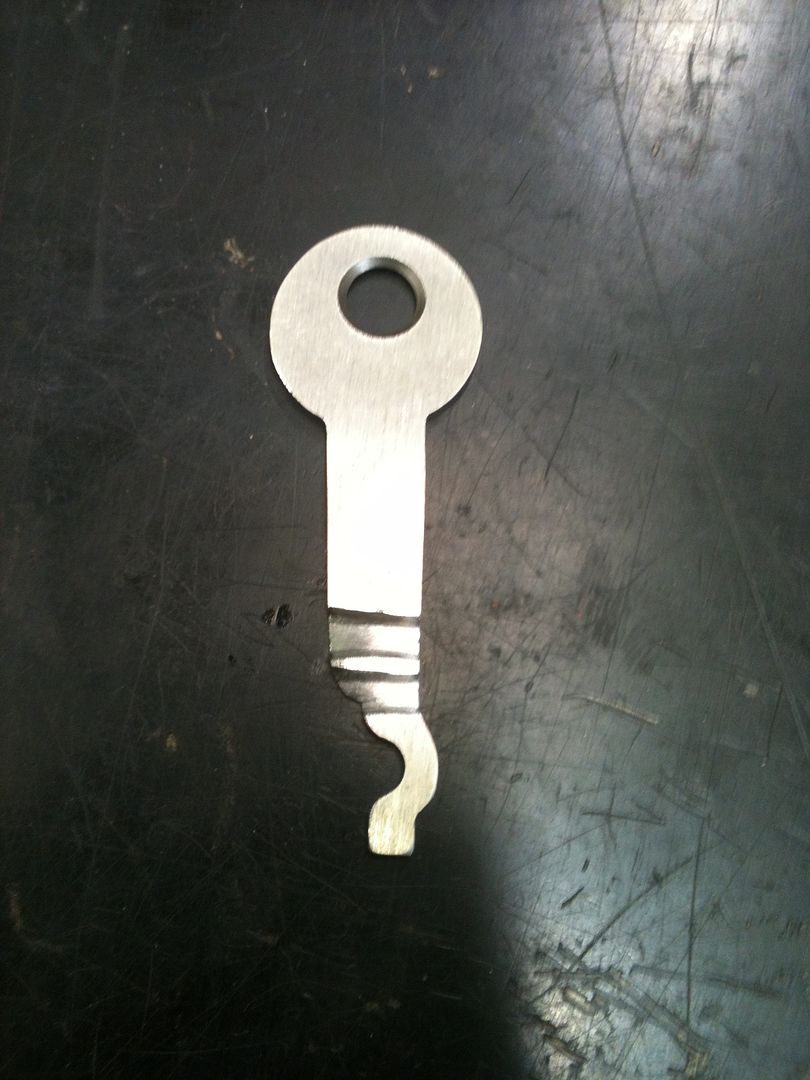
Found this picture of a key...
...and it helped me a lot in determining how to make the key. Other information - especially a fantastic file on these locks from Oldbiscuit - helped to understand how the lock itself works, and more specific to this write-up, how the keyed part works.
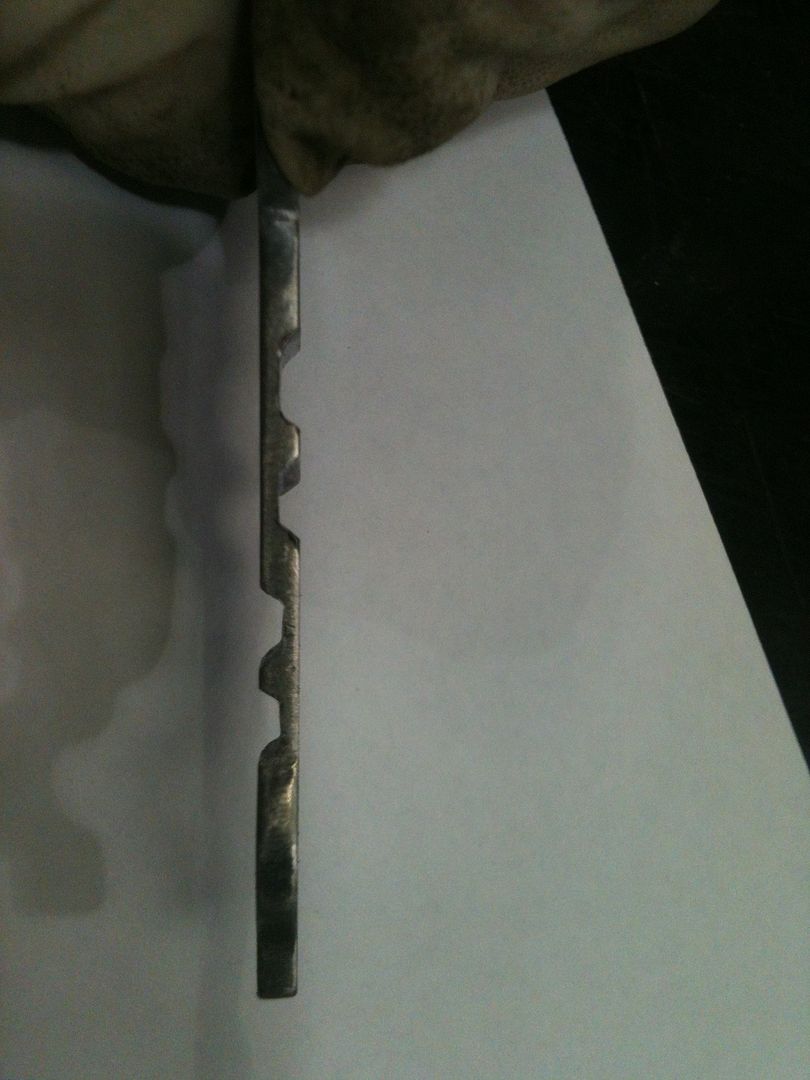
OK, enough small talk. They keyway looks like this:
Measured the thickest part of the keyway, which gives the thickness the blank needs to be.
That measurement looked very familiar after another recent key making experiment.
Oh, yeah. Here is the metal used. Perfect thickness!
So this whole thing hinges on making a key, right? Yeah, bad joke. But it will have to suffice.
And the thin part of the keyway, so I know the depth the wards need to be cut.
Found that this wiper insert fit perfectly in the notch where the key tip needed to go. So it gave me a key blade height, at least for the tip. It also gave me a depth of key to the outer edge of the lock body. A little shifting around of the wiper inset, and could feel the ledge on the cam the key fits into. You can see the 'depth' marks on the wiper insert.
In this next picture, you can see the wards in the lock at the top and bottom edges of the keyway. At the far left, you can see a large, round post.
This post is to prevent something like a wiper inset from being used to turn the cam - it blocks the key from being turned unless the key has that section cut away. That explains the funny looking squiggly key shape at the tip.
Used a dental pick with a 90 degree bend and a fine point marker to mark the top and bottom depths of each ward, as well as the post.
Using the picture of the key above, and the measurements already made, drew a rough sketch of the key. Tried to keep it looking similar to the original for the fun of it.
The arrow on the drawing points to the mark showing the length the key blade needs to be from the tip to the outside of the lock body.
Now turn the wiper insert around, and use the marks to mark the depth of the key tip - where it will need to start 'shifting' to the side to fit around the post.
Now start marking rough locations for the wards.
Etcetera. A little white out helps to clean up the sketch.
Took a Sharpie marker and blackened the entire surface of my template. Then made 10 copies on a copier, so I could have extras in case I screwed up. :-)
Cut out the template, and taped it onto the metal. Why waste holes already drilled?
TIP: Shine a light from underneath when you place your template over the hole. Then you can correctly center the hole in the key bow!
Once it was located correctly, used spray adhesive to attach the template to the metal.
TIP: If you use spray adhesive, spray it onto another sheet of paper, then use latex gloves and your fingertip to dab up a little adhesive while it is still wet, and wipe a very thin layer onto the back of half of your template (the other half stays taped in the correct location). Put the half with adhesive down onto the metal, and lift up the other half of the template and repeat. No mess on your work! This also works for pick templates!
Now here is where the work starts to show.
Use an angle grinder with a cutoff wheel to cut down close to (but not precisely at) the edge of your template. Do half the key at a time.
Now use a file to get right to the edge of the template.
Flip the key blank over and repeat.
TIP: Aluminum angle metal (at a 90 degree angle) can be cut to fit your vice so the teeth in the vice do not bit into the key blank, leaving ugly marks. It did not matter when holding metal that would not be part of the key, but it will make a difference now.
Now peel off your template.
TIP: (Yes, another one. Sorry!) I use automotive trim adhesive - similar to rubber cement, but more heat resistant and stronger.
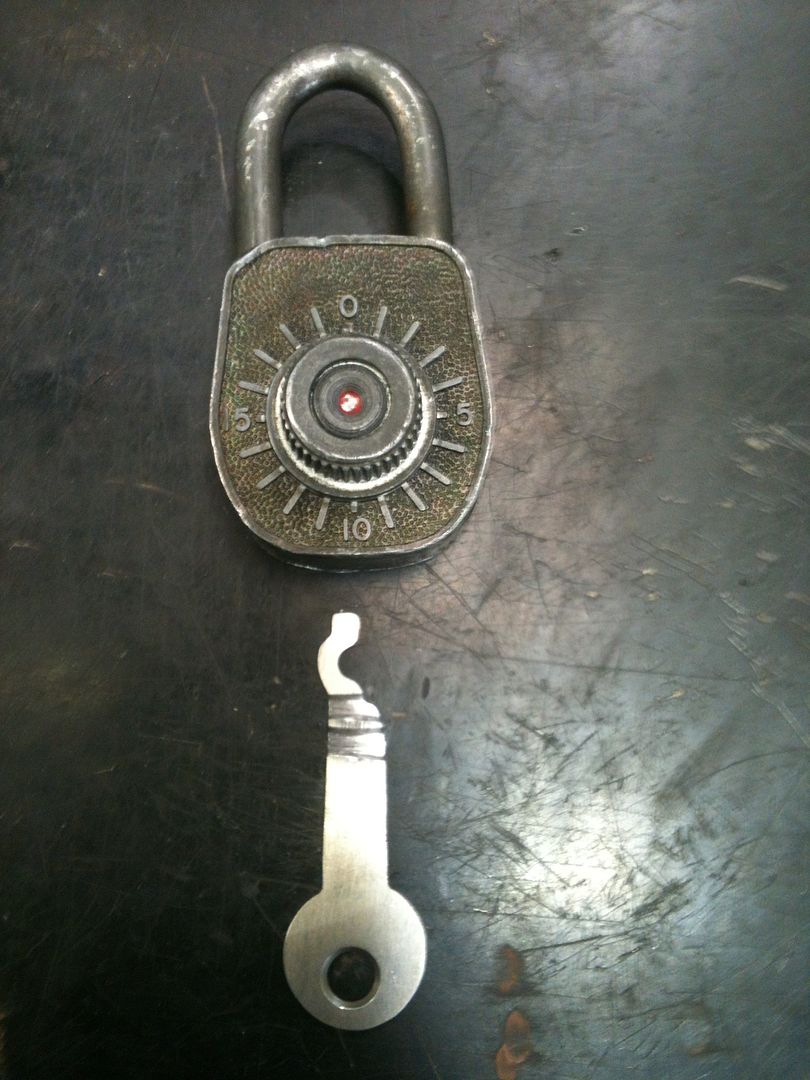
Put the key blank into the lock and verify the depth for the lock body.
Close enough!
The next part is like impressioning. Mark the leading edge of the key blade (the part that will hit the wards first) with a marker, the put in the key blank. Turn it towards the skinny part of the keyway. One of the wards will make an impressioning mark first. Use a Dremel with a fine cutting wheel to cut the wards across the key blank. Keep in mind that the key will be pivoting at the tip, so the cuts will be curved. The cut at the outside of the lock body will curve both ways, due to the changing shape of the lock body. Also, once the wards were cut, found that my cutout at the key tip for the blocking post was not deep enough. It made impressioning marks, so filed it further, as needed.
Clean up the cuts with a file, and give a nice bevel to the edges of the cuts to make them look nice.
Decided I wanted clean, not-quite-sharp edges to my key, so used sandpaper to clean up the file marks on the outside edges of the key. The look works for me, but do as you think looks best!
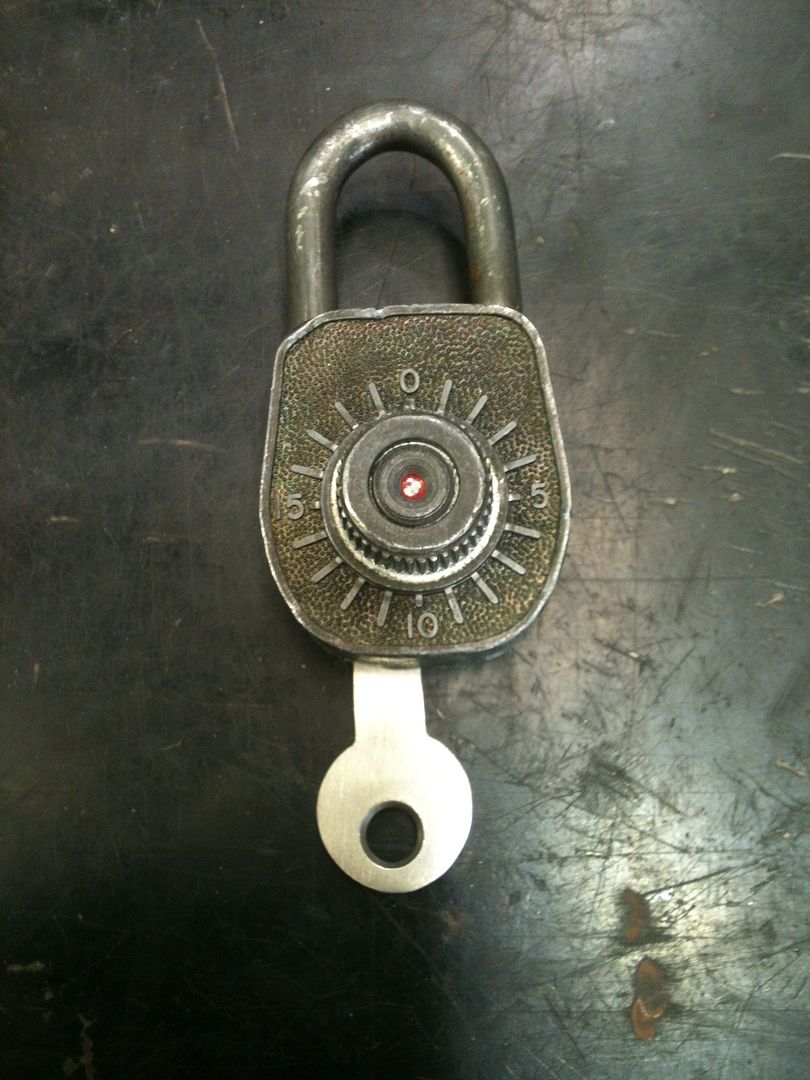
And the proper test...
There is spring tension on the cam the key turns, so have to hold it in place. There is also no spring on the shackle, so you have to manually lift the shackle.
That's all, folks. Have 9 more of my 'templates', but not likely to be making more of these keys. Have a great day!
Gordon
P.S. Sorry, Oldfast... no gut shots.
