LocksportSouth's Stash
Hey all *waves*
Just my lil collection
Ok so first, here's the safe that I currently keep them all in:
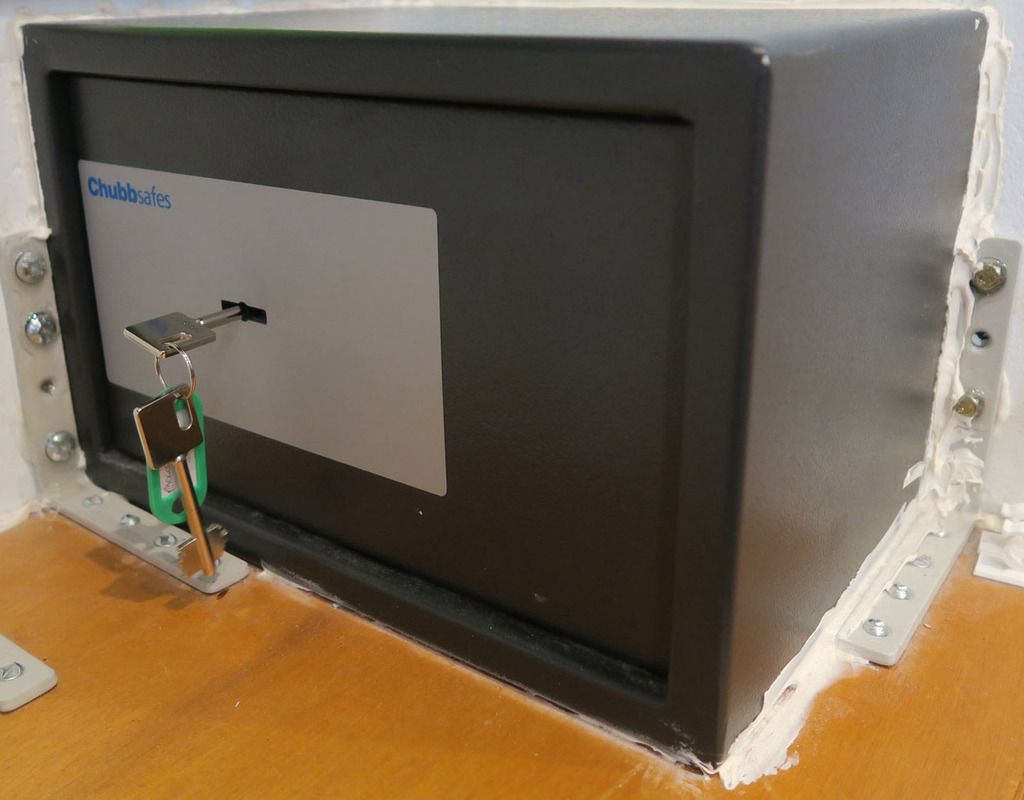
It's getting a little cramped!!
Safe door open:
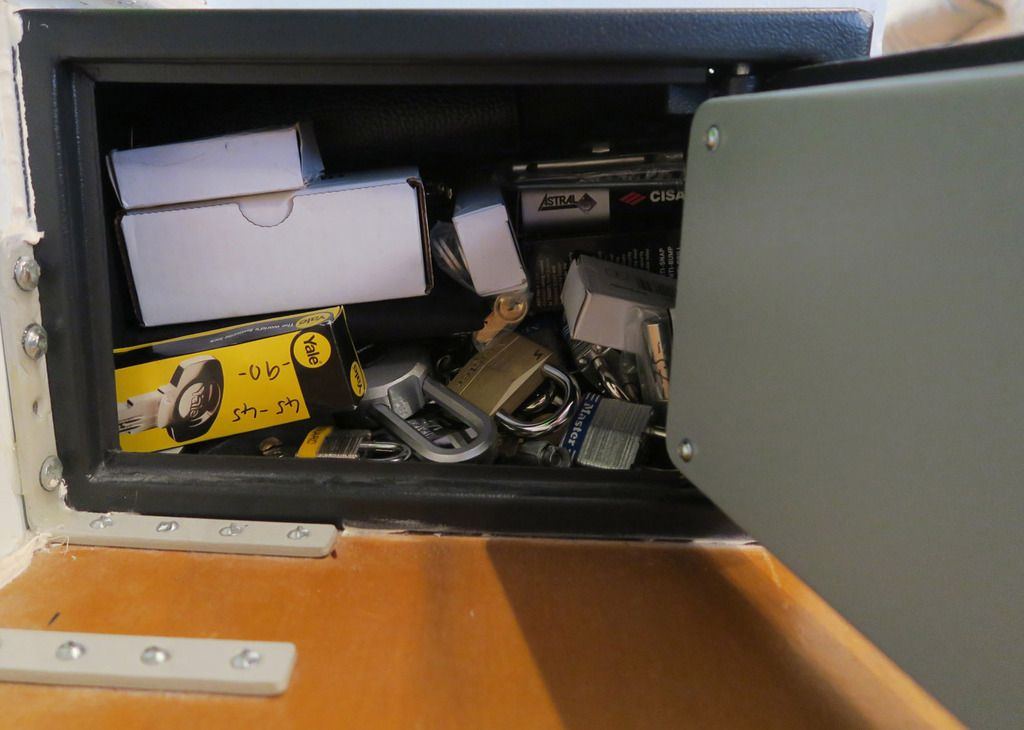
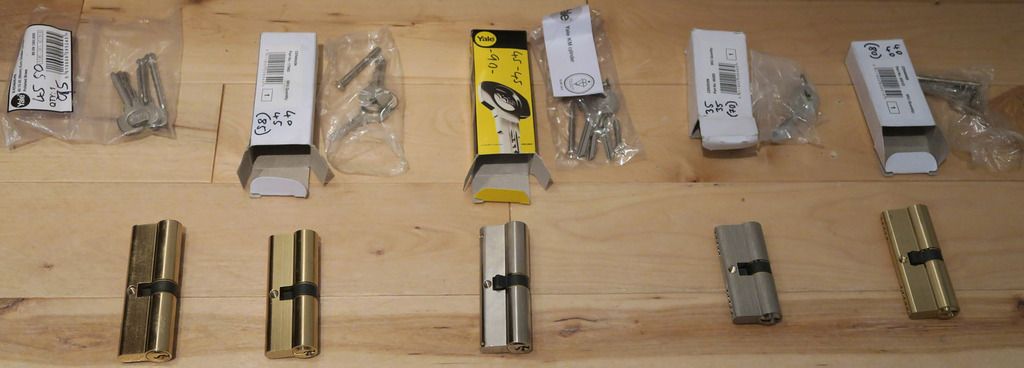
A big pile of Euro cylinders These are cheapie ones which I got for about £5 to £10 each from a local hardware place, spanning smaller sizes (30/30) up to larger sizes. I bought them primarily to match against some I currently have installed as I've been trying to figure out how they are measured (conflicting info on the Internet) but will be re-purposing them as practice locks for picking. I found another one later too, that I forgot to include in this pic:
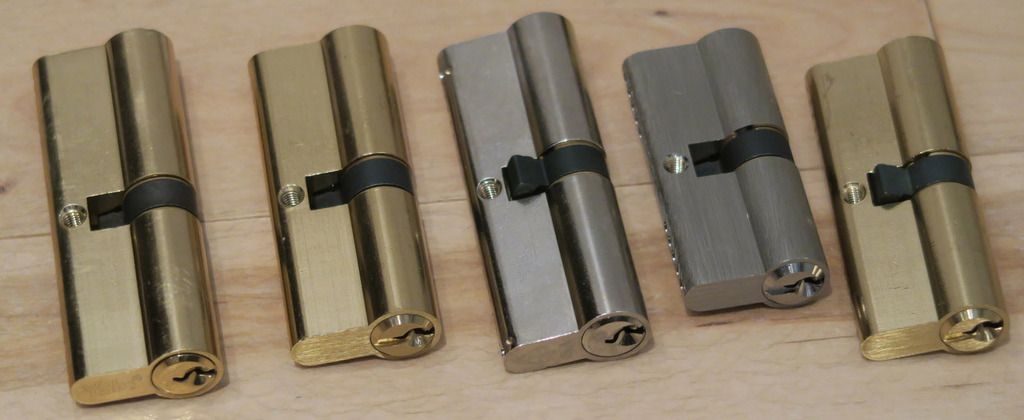
Close-up of said cylinders. Some Yale and some mostly unbranded:
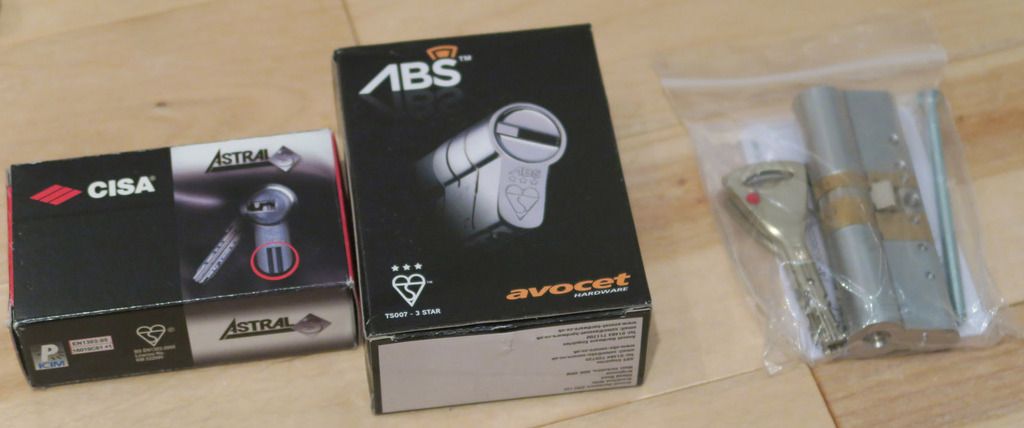
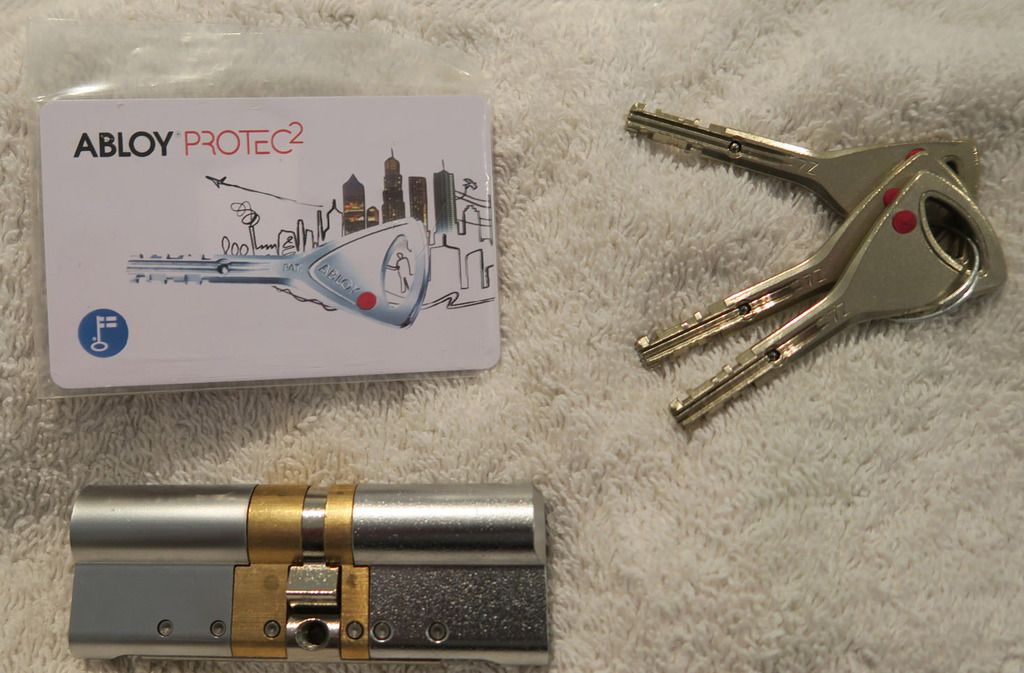
Three fancy ones that I bought for another project (helping family choose new door locks) - an Abloy Protec2, a CISA Astral S and an Avocet ABS. None of these will be needed now but will make some nice collectibles and "emergency locks"!:
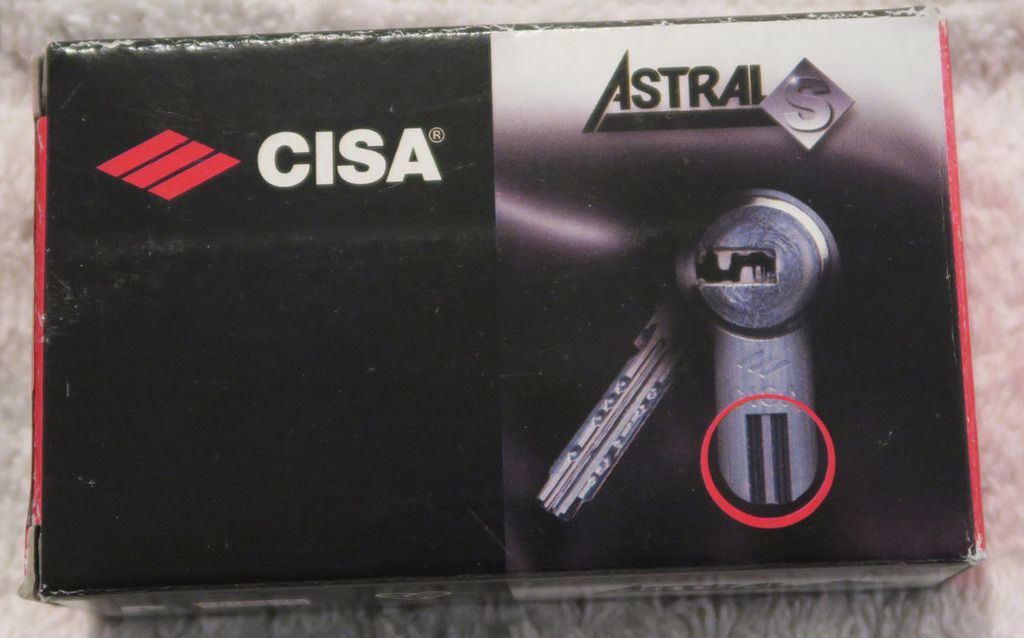
Close-up of the Cisa Astral S box:
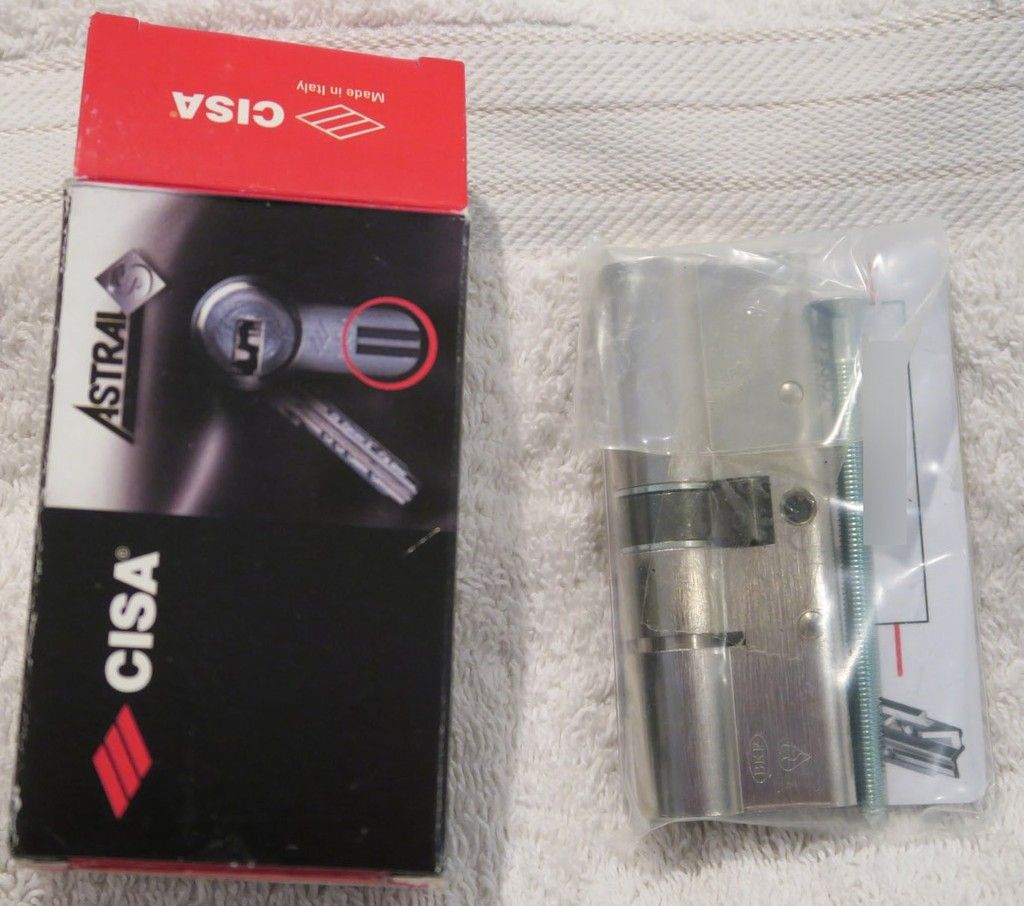
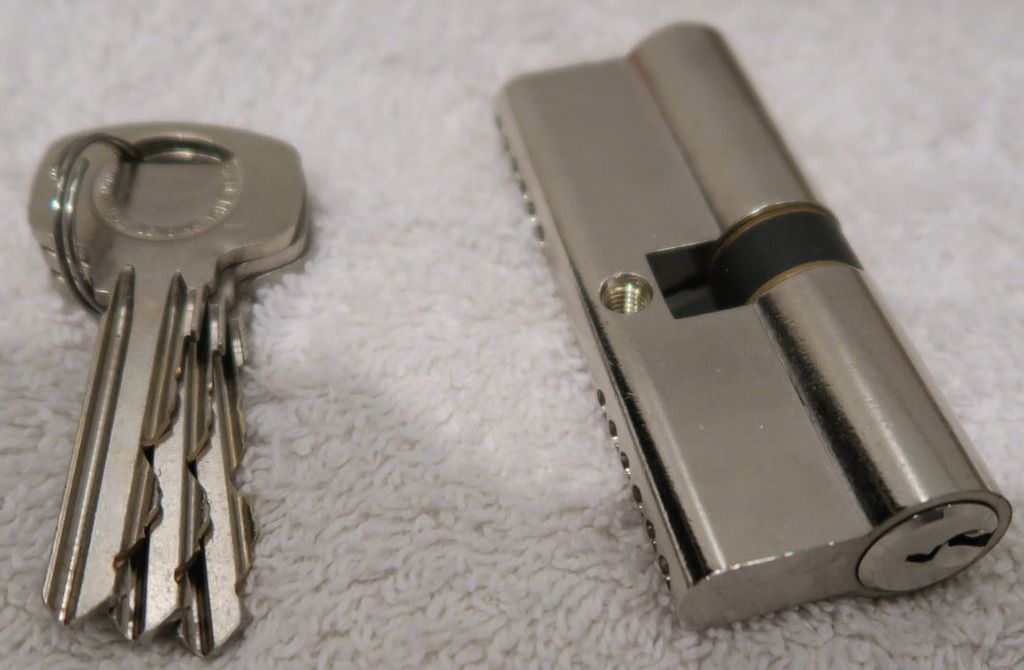
Out of it's packaging:
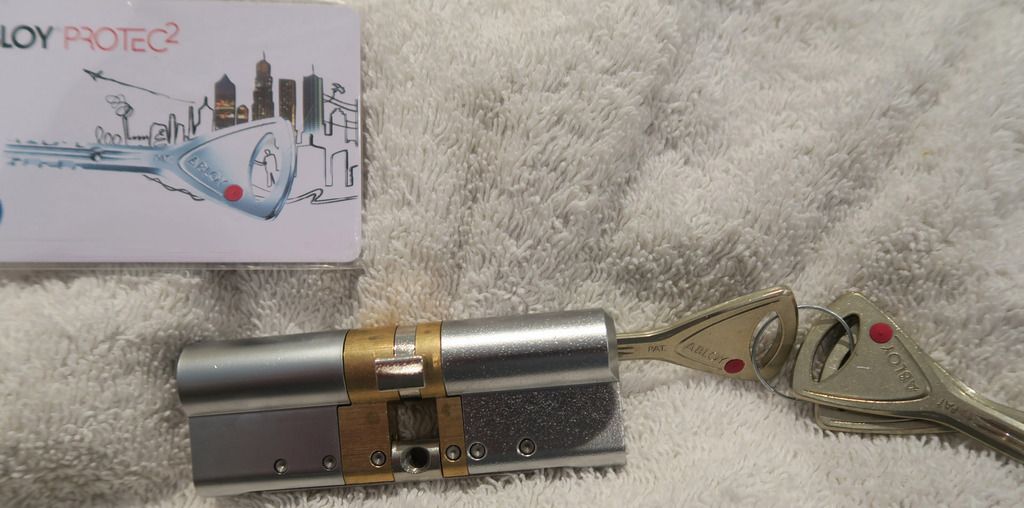
Laid out next to the keys and the security card:
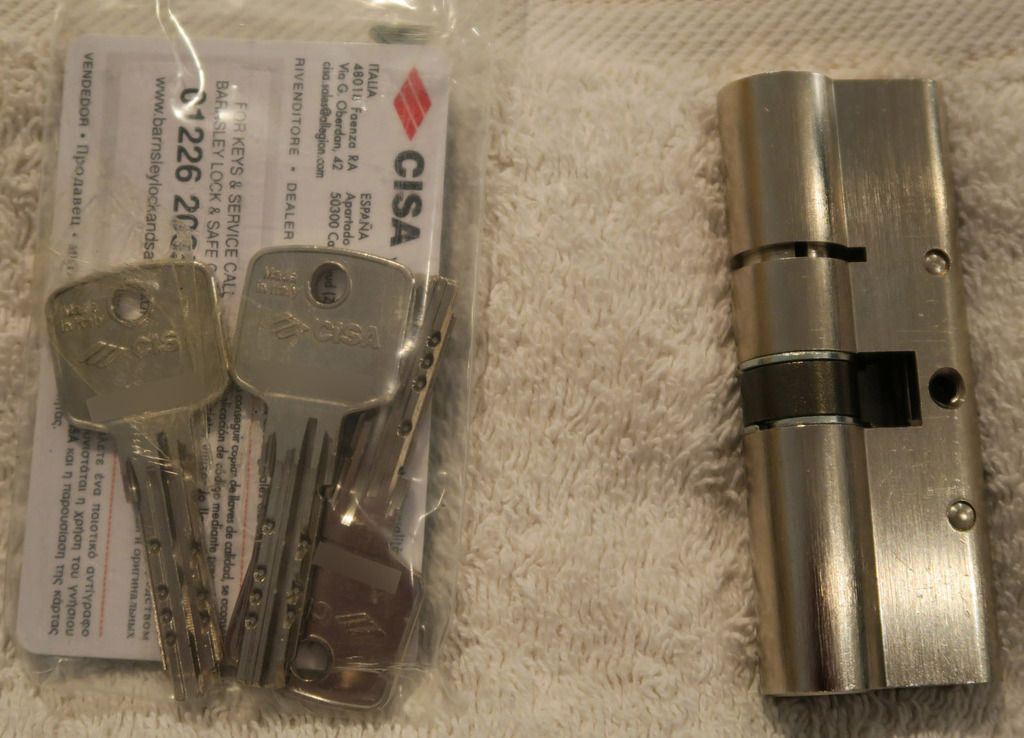
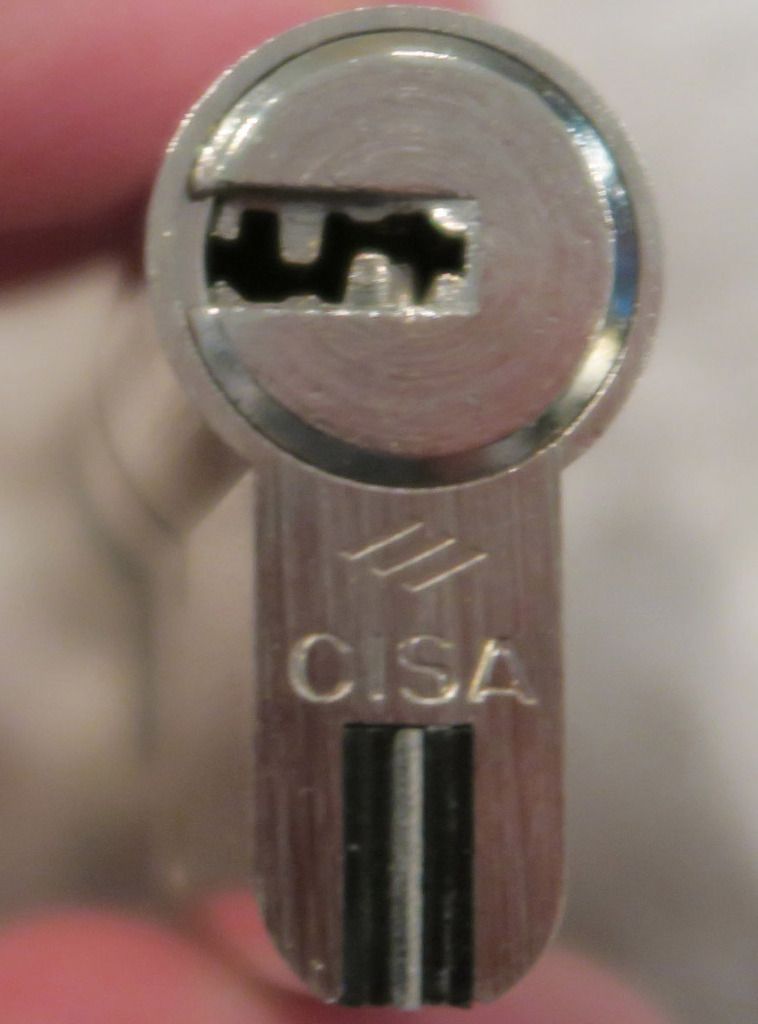
Keyway - look at that warding!:
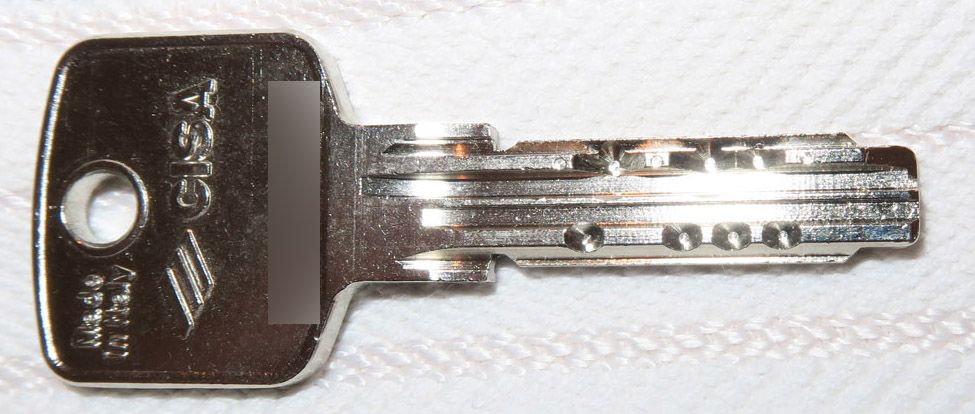
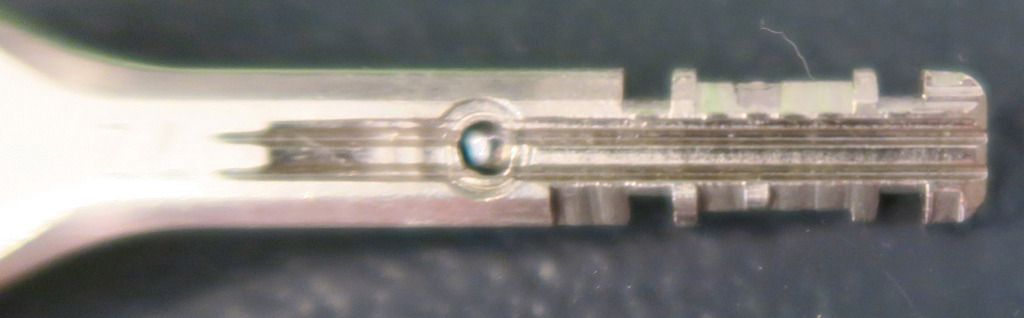
The key itself. Blanked the number on the key out as I'm not sure if that's a security issue. Crazy number of grooves (or maybe that's standard for these dimple keys? Not sure):
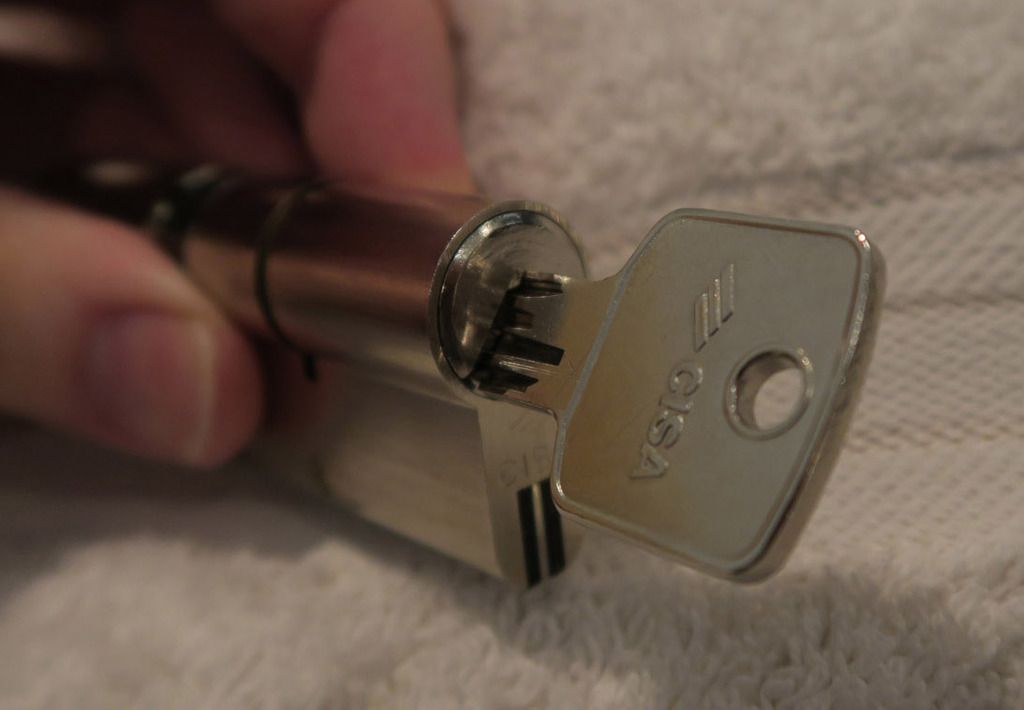
Key in the lock:
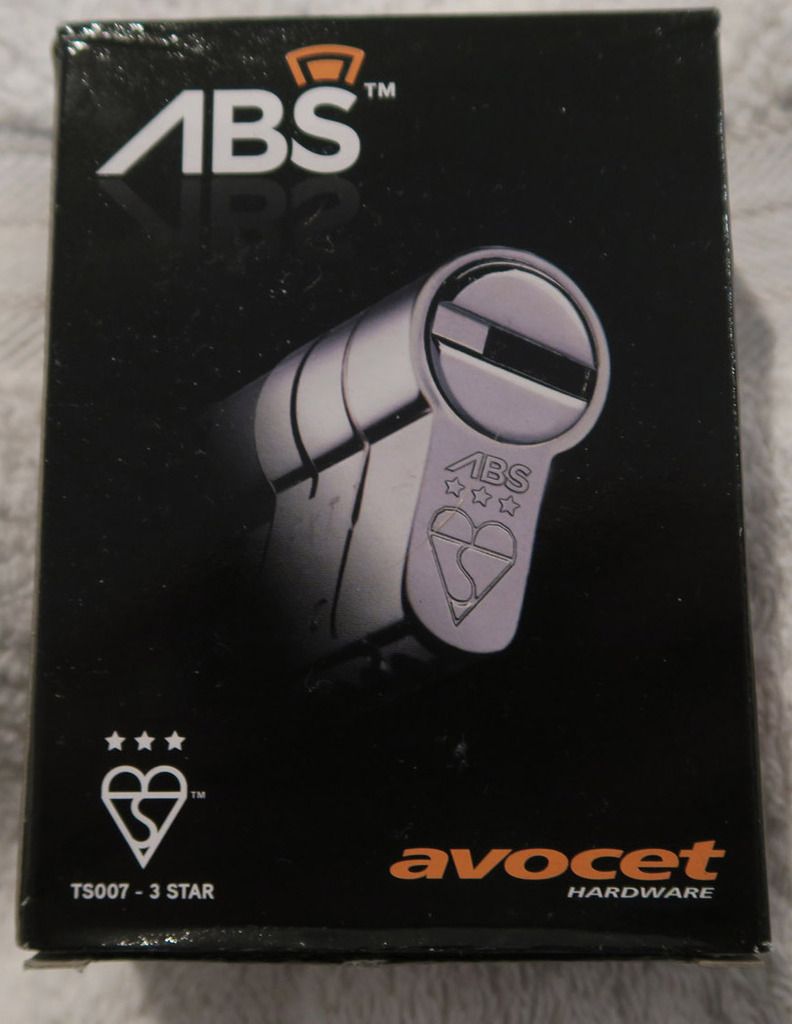
Onto the Avocet ABS. Box:
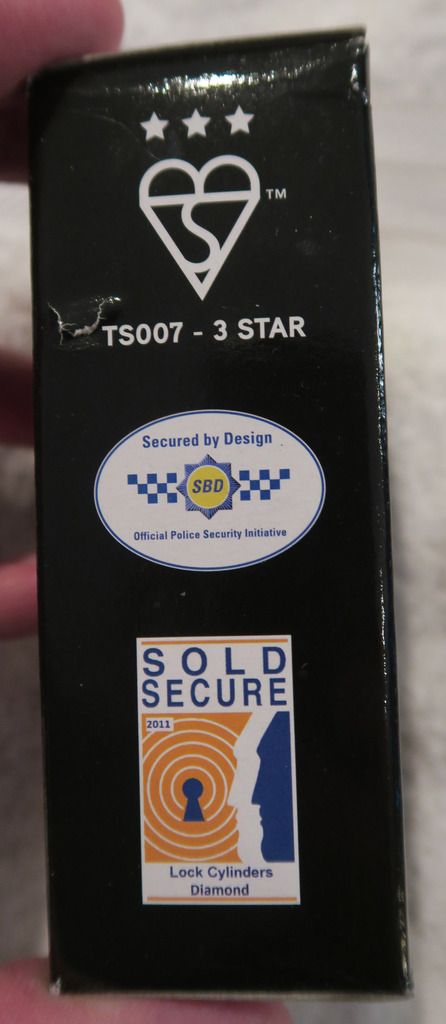
Side of the box. It's BS 3-star approved (the highest rating) as well as "Sold Secure" and "Secure by design" (not sure how legit/important those two are, but British Standard is the.. well... standard for most UK stuff so I trust that rating):
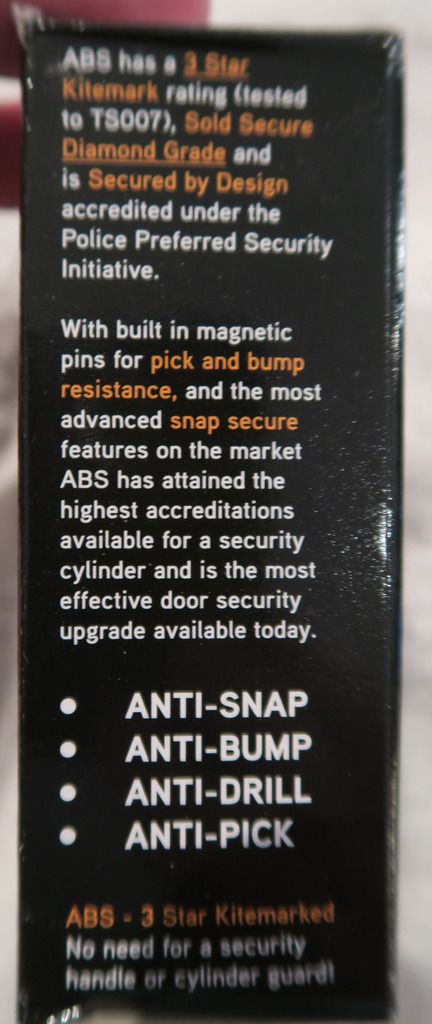
Some features from the other side of the box:
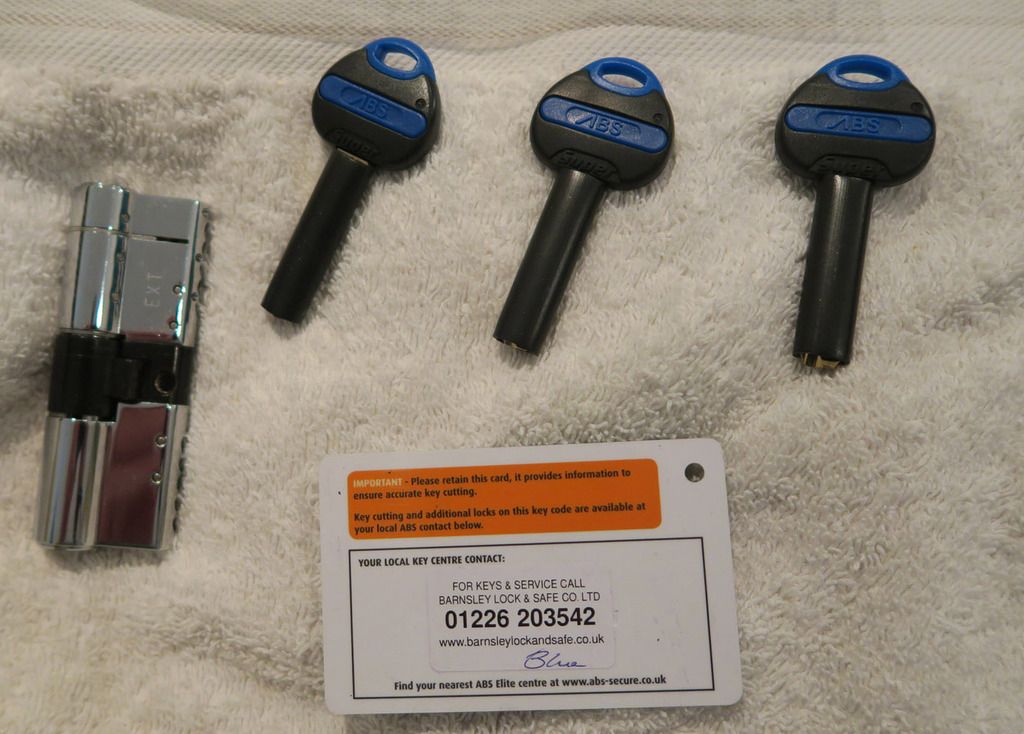
The cylinder, keys and security card. Notice the cute little rubber sleeves they put on every key! You can see the sacrificial front part of the cylinder too, which helps to protect against snapping:
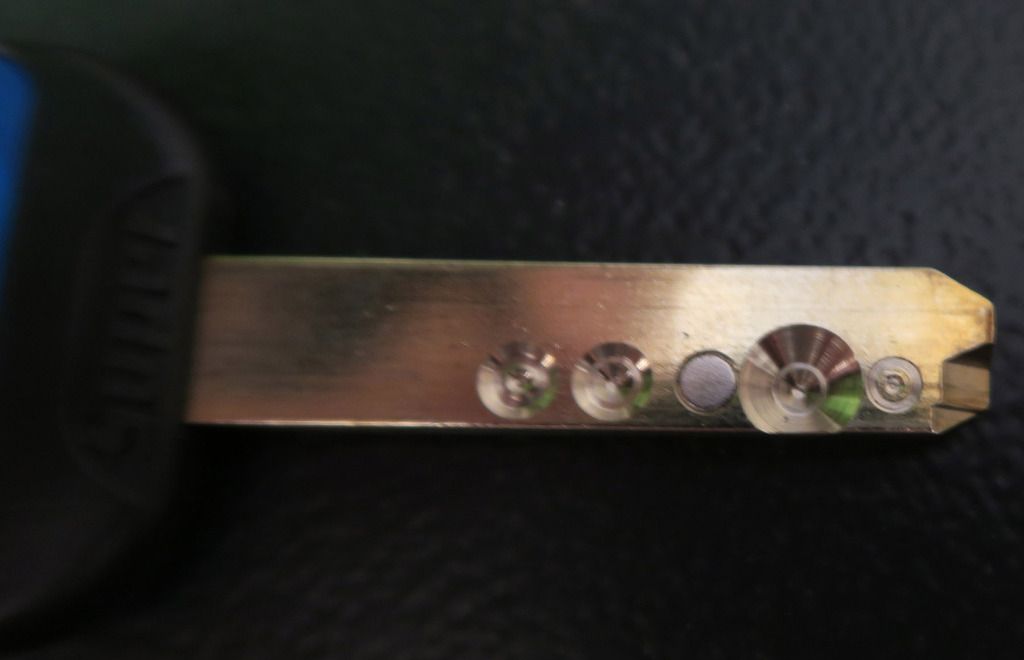
The key bitting. Some kind of crazy pin-in-pin stuff and a magnetic pin too:
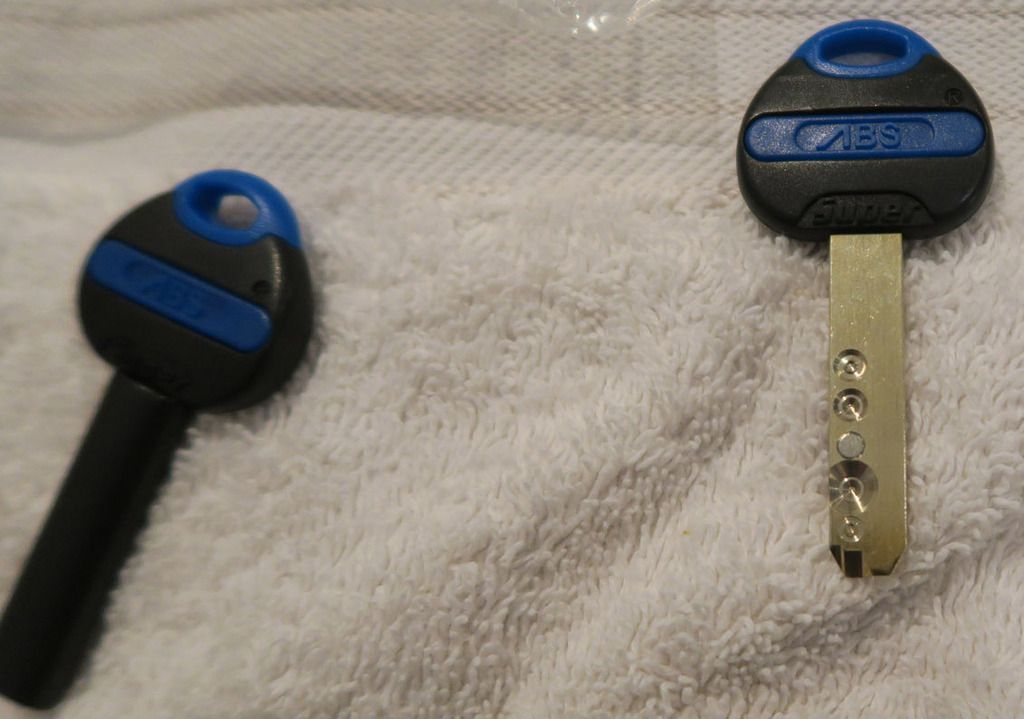
Key bitting close up. I have another of these locks in use elsewhere and can confirm that the location of the magnetic pin does move from lock to lock (was in the end in the other lock so thought maybe it was always in the same place, which seemed like a security flaw):
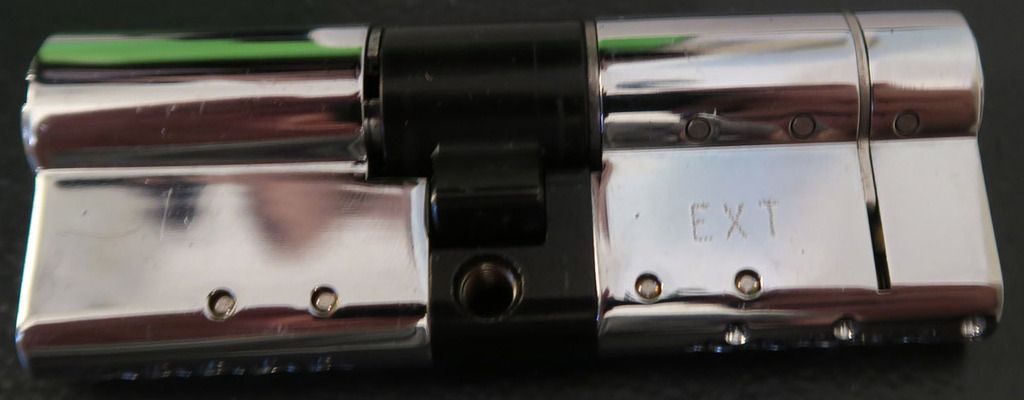
The cylinder itself. Nice of them to mark the external section:
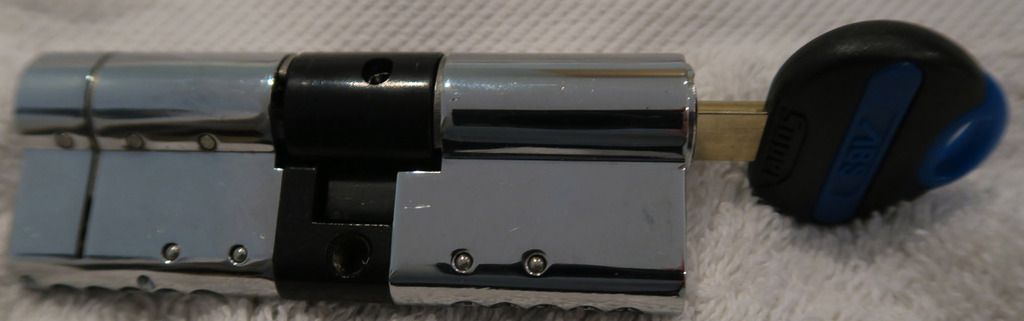
The lock with the key in it:
My pride and joy - the Abloy Protec2. Cost a pretty penny and they're hard to track down but boy is it a beautiful lock:
The bitting, and the active element that in my understanding makes up most of the change from the original Protec:
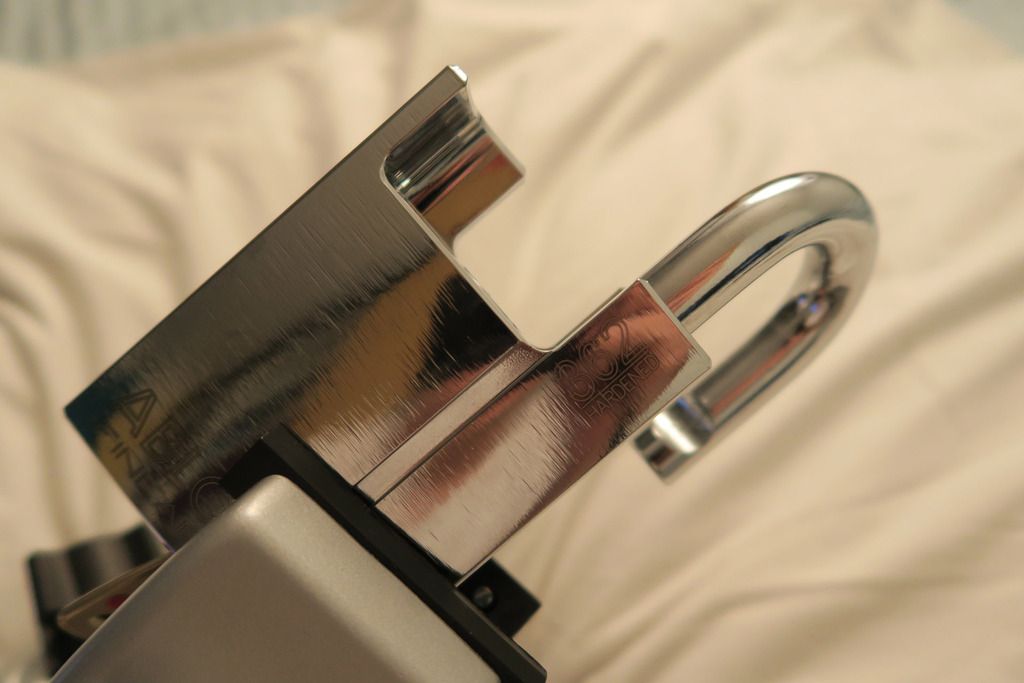
The external face. It's the hardened variety (got a bit scared after watching that one YouTube video where they use a dedicated Protec drill bit to drill the "regular" cylinder out in a couple of seconds!):

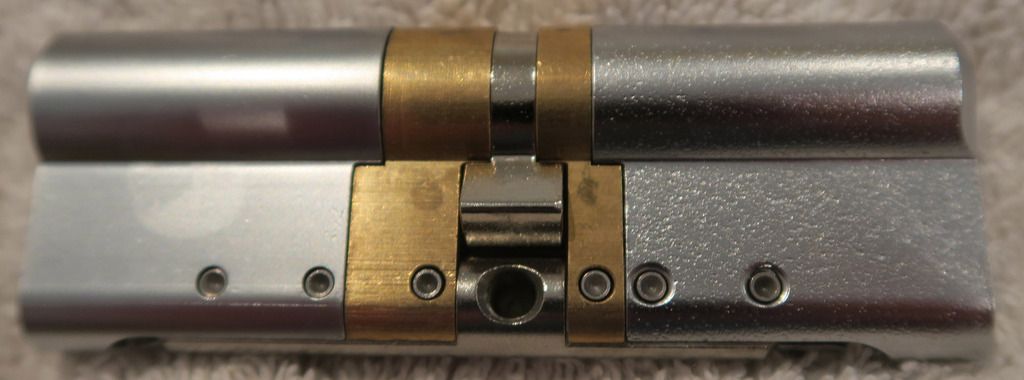
Side on. Notice how the two halves look different? The "wobbly" textured half (right hand side in this pic) is the hardened half. Looks like they only harden 1/2 of the double cylinder 'cos the other side doesn't say Hard on it. Seems a bit cheapskate for a £160 cylinder!!:
Key in lock:
Here's that one random cheapie Euro cylinder that I forgot to photograph earlier. Inserted here cos I was about to take all my locks out of the safe and then found this one!:
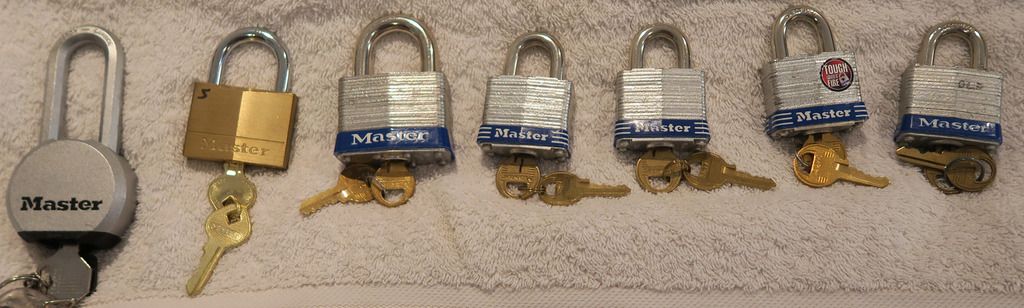
On to padlocks! A big bunch of Master 3s that I bought for picking (not having much luck, they all feel "gritty" and tight, not sure if that's my bad skill or just cos they are crappy locks). Also a bigger Master (No.5?), a brass one (I think 170 or something like that? Apparently it has security pins in it) and another, more secure one (Not sure of the model, I've been searching on Masterlock's site but haven't come across that exact one). Oh, turns out I do have some more Masters too but didn't see them until later, D'oh!:
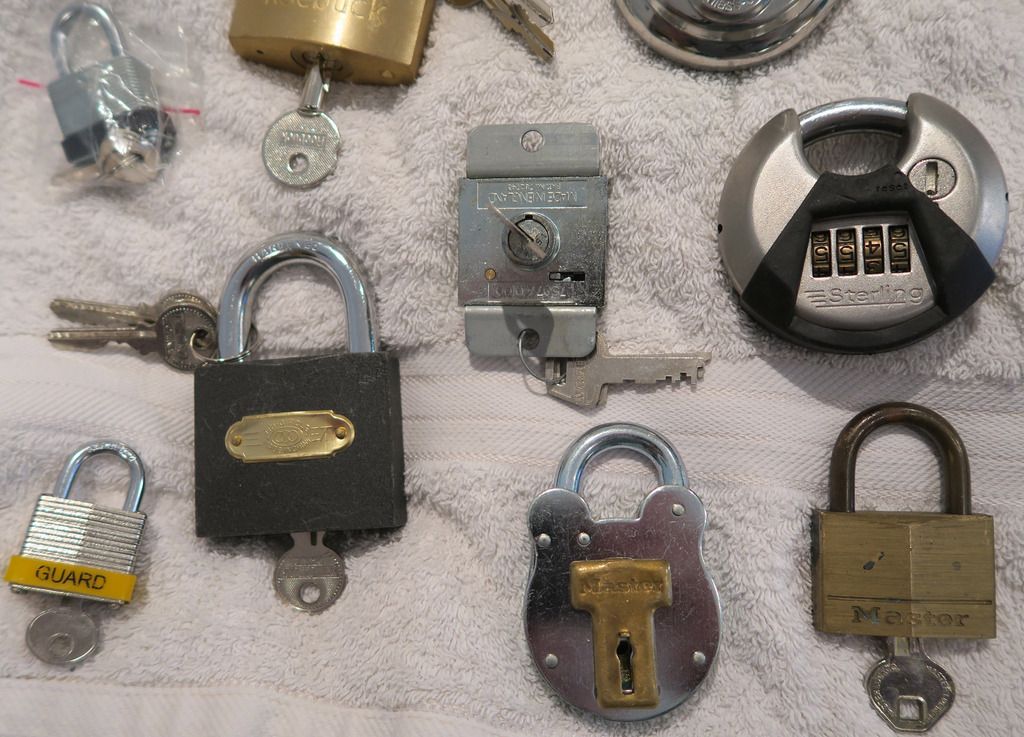
Most of my other locks, a random assortment!:
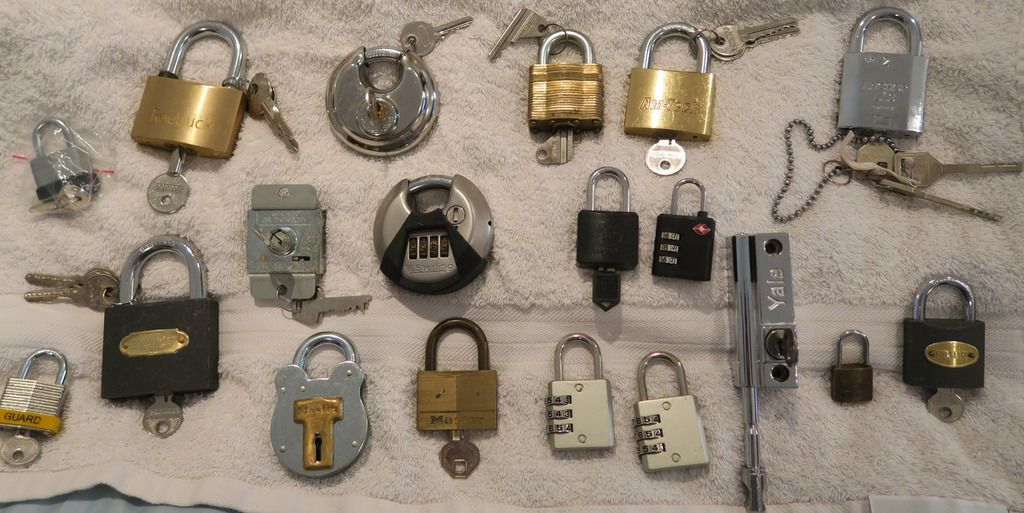
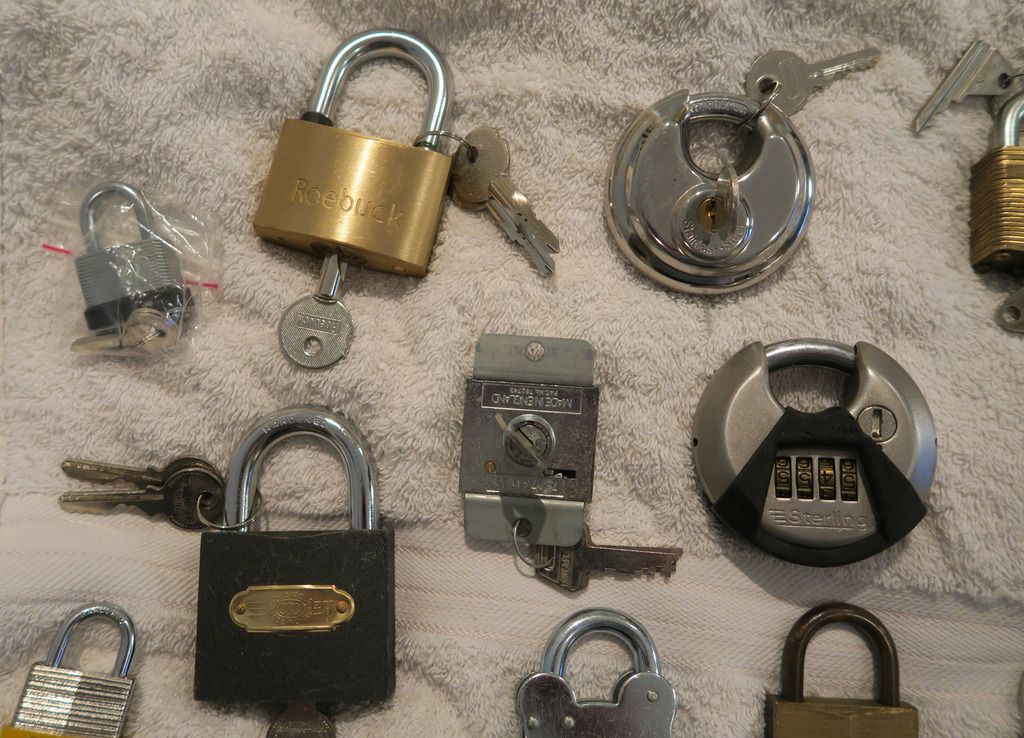
Those random locks, zoomed in. In this quarter, we have (from left to right):
Random laminated padlock, "Roebuck" solid brass lock with cruciform key (cross shaped - pretty cool looking), cheap disk lock, Tri-Circle cheap Chinese lock (you get a lot of those here in the UK!), An interesting cupboard type lock that I can't remember where I got it, seems to use some kind of wafer keys, and a "Sterling" disk lock that is 4-wheel combination operated:
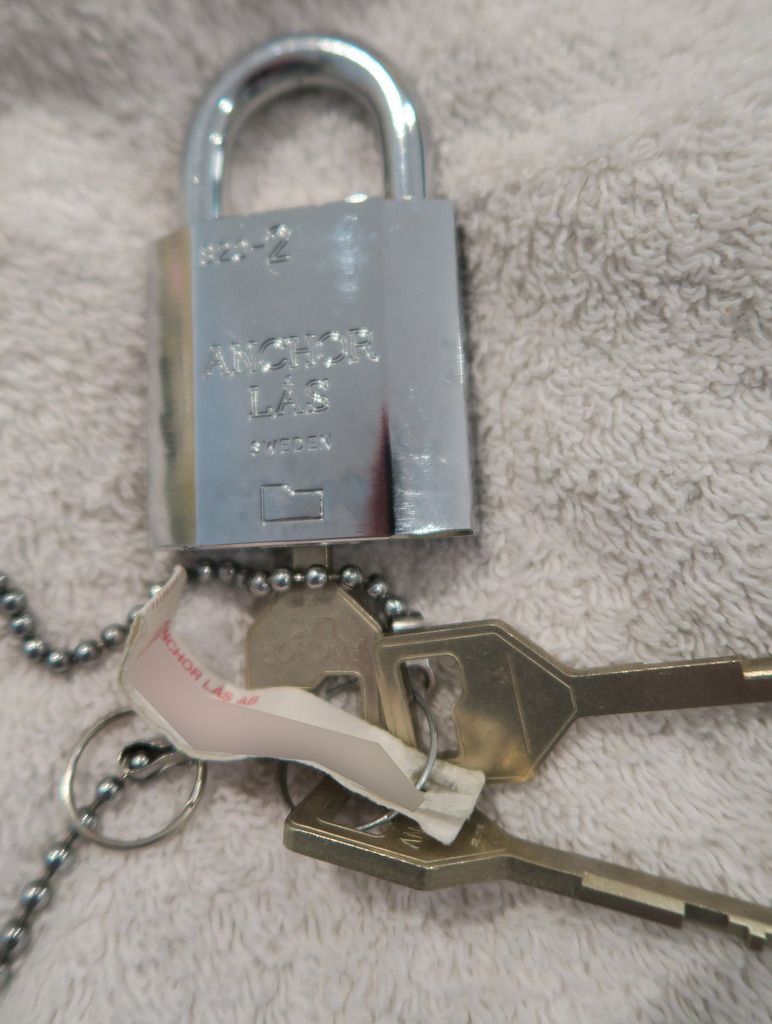
On to the top right corner of the pile . Again, left to right: A "Squire" laminated padlock (always been fascinated by Squire, you don't see them around much any more though sadly. Got this one at a local locksmiths), "Am-Tech" random brass padlock, my current fave owned padlock - an Anchor Las which uses an Abloy style disc detainer mechanism! Might be removable core but I haven't figured that out yet. One of the keys doesn't seem to work; wondering if it's supposed to be a disassembly key?, then a small black plastic lock, a TSA lock (for suitcases and such, it's combination operated but has a key override for customs), and a Yale deadbolt.
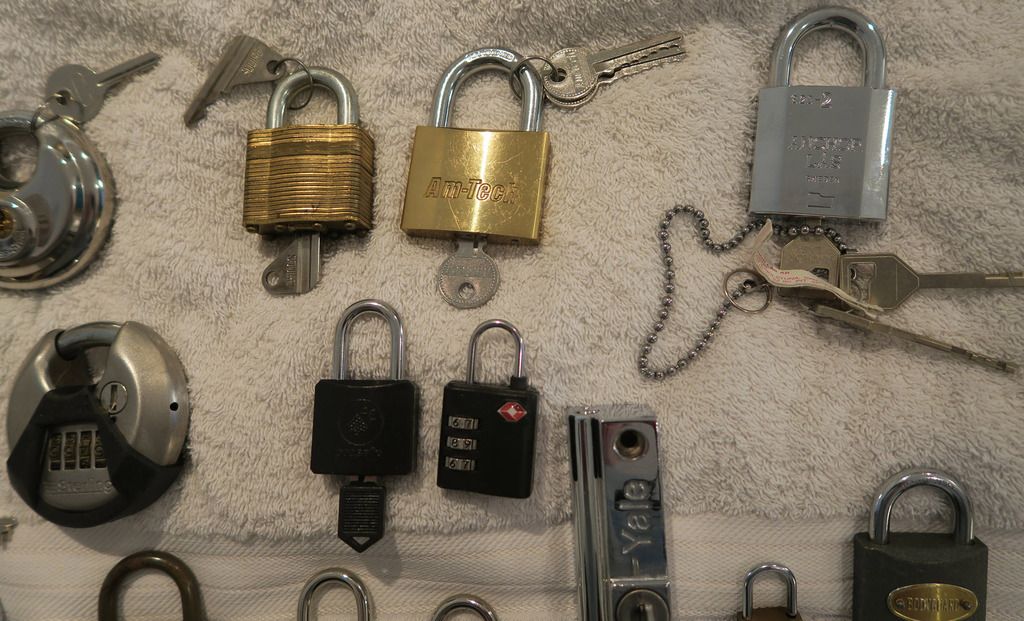
Close up of that lovely Anchor Las:
Bottom right: Random "Guard" laminated padlock, Master Lever operated lock (that's one of the Masters I missed the first time), and another brass Master lock (that's the other one!):
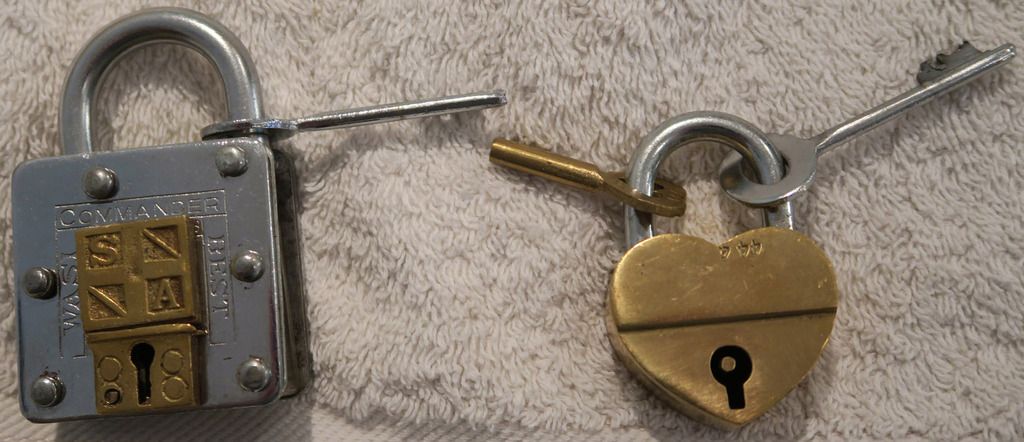
These aren't really locks in the traditional sense... They're puzzle locks. Designed specifically as a puzzle and sold as such. Nothing to stop you using them as a regular lock though! Although I suspect the key bittings are probably all the same:
Everything in one big pile. Yeesh!:

-------
Decided to take apart my lock safe lock
I've removed the cover from a couple of safes that I own before, however I (currently) don't know a great deal about safe locks which means two things:
1. My commentary probably won't be especially useful (as I can only guess as which part does what
2. I didn't want to fully disassemble the lock in case I couldn't figure out how to put it back together again - it is a "lock in use", even a fairly unimportant use.
That said, let's take a look!
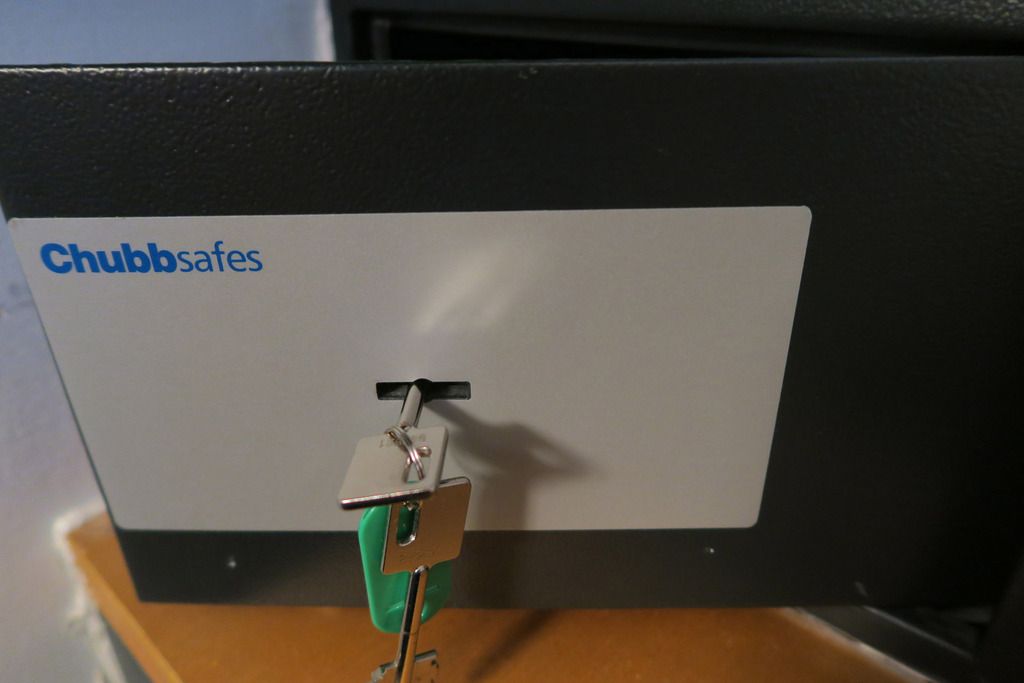
By the way, this safe model is a Chubbsafes Air 10K. You can currently buy them from just over £70 in the UK - check out safe dot co dot uk (that's where I got mine).
Here's the front, unlocked, with the keys in the door. It seems to use a lever lock system (we'll see more of that in a minute), which has bitting on both sides:
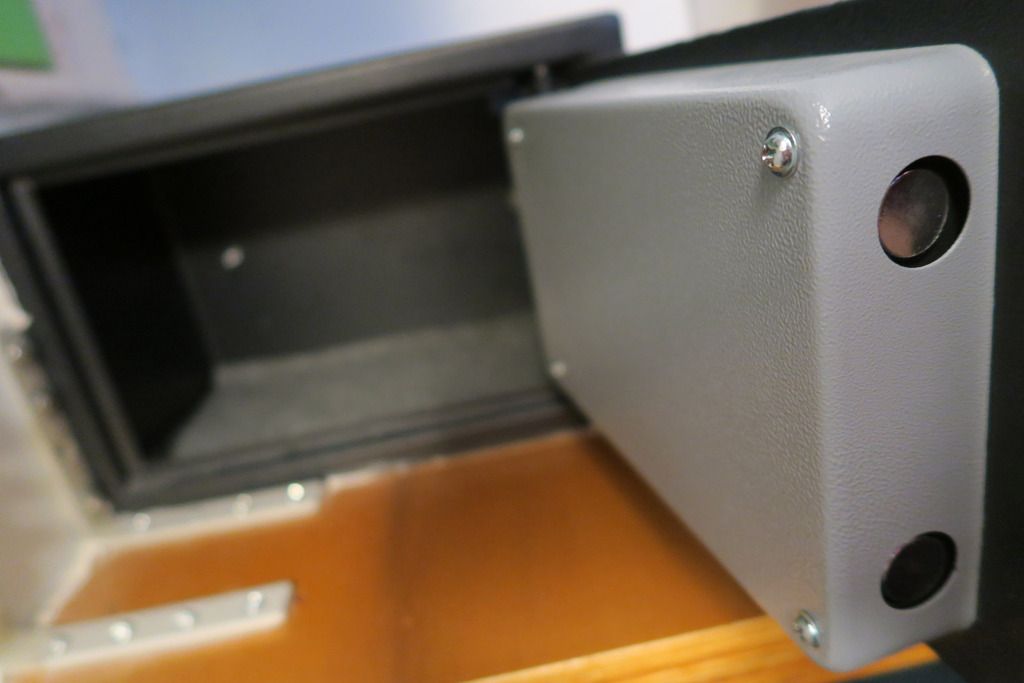
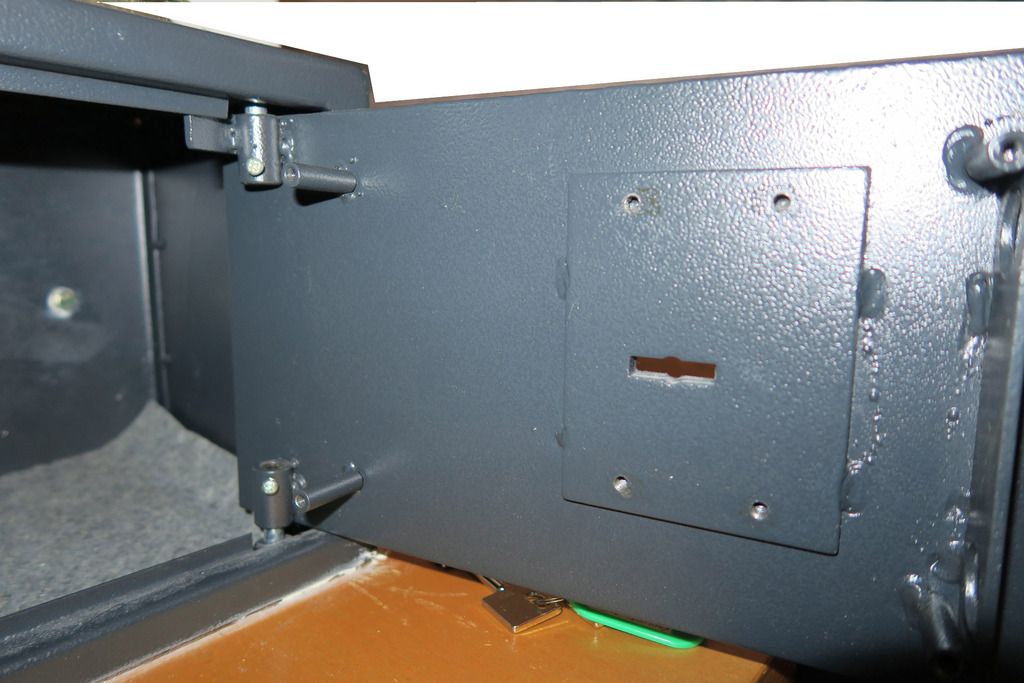
Here's the inside of the door. You can see that the door material itself is quite thin (4mm according to the website) and the lock mechanism is held inside this box which is made of even thinner material, similar to cheap petty cash boxes. It's fixed to the wall of the safe by means of 4 screw poles welded to the door. Unfortunately in my safe, the holes drilled in the inner lock-containing-box and the 4 screw poles are mismatched, which meant that the box was fitted on with some force, and took a lot of trouble to fit back on when reassembly was complete. You can also see the two locking bolts in this view, which look reasonable. However their weakness IMO is the way that they are fastened to the lock, which we'll see later:
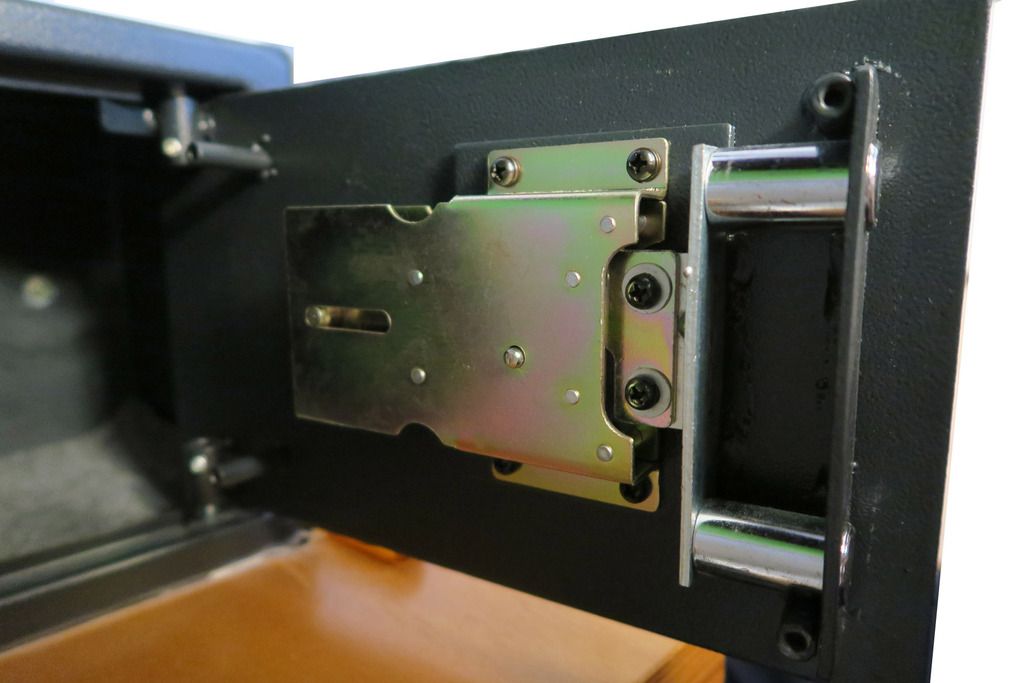
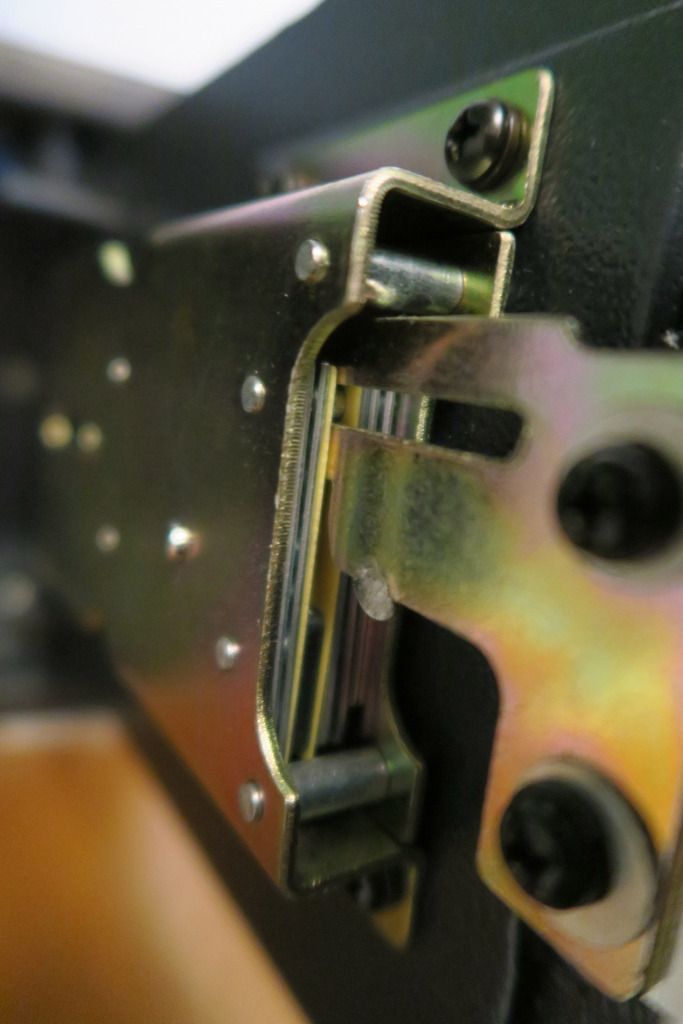
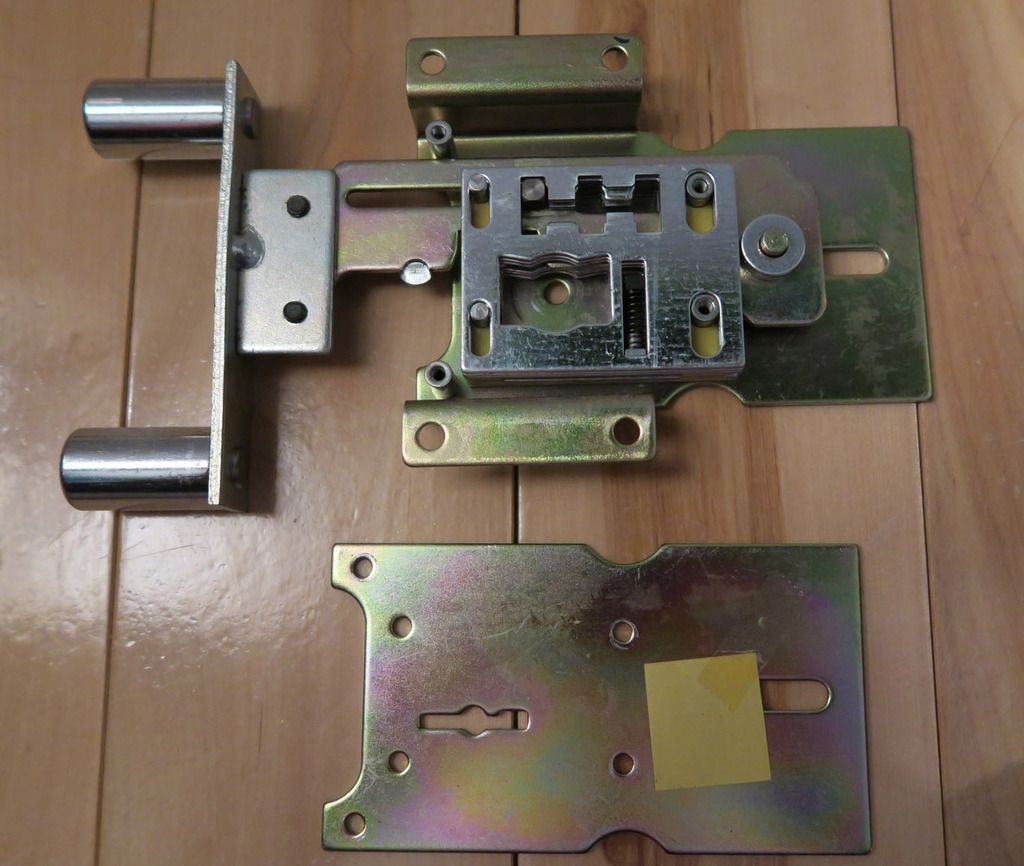
After removing the outer containing box, this is what you see. I found this quite unusual, as other safes that I have partially disassembled have put the locking levers right here, but on this Chubb safe they are hidden within their own lock unit rather than being completely loose. You can see that the two locking bolts are attached to a single piece of metal, which is attached with those two black screws on the middle-right of the picture to the locking mechanism. IMO that's the weak point of this lock as drilling through where the two screws are would likely cause the locking bolts to come loose and be easy to pull away with a wire...
The lock unit itself is screwed into the safe with the four bolts near the mid top and bottom of the picture. The bolts actually screw into a plate which is welded to the door, not into the door itself. I assume this provides a degree of simple drilling protection as well as giving the lock unit something to screw into.
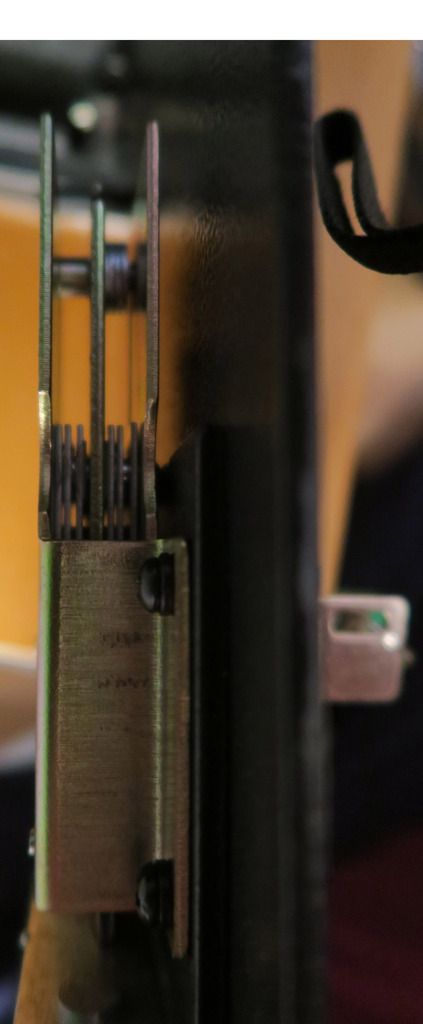
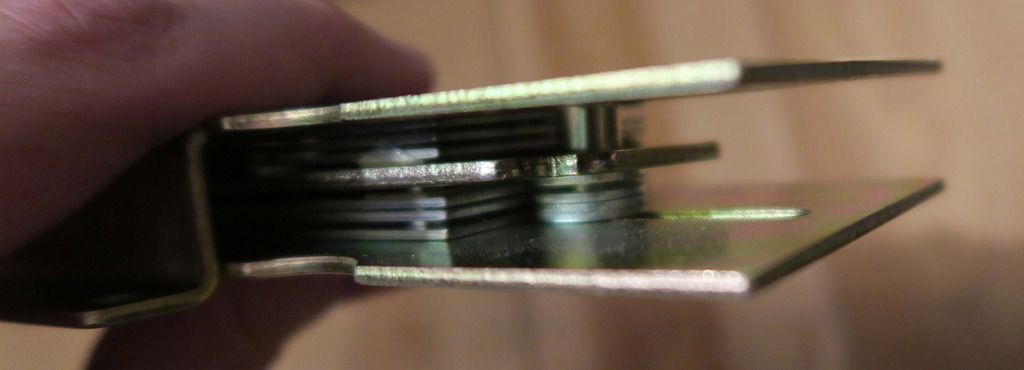
Here you can see a side profile of the lock, including all the levers:
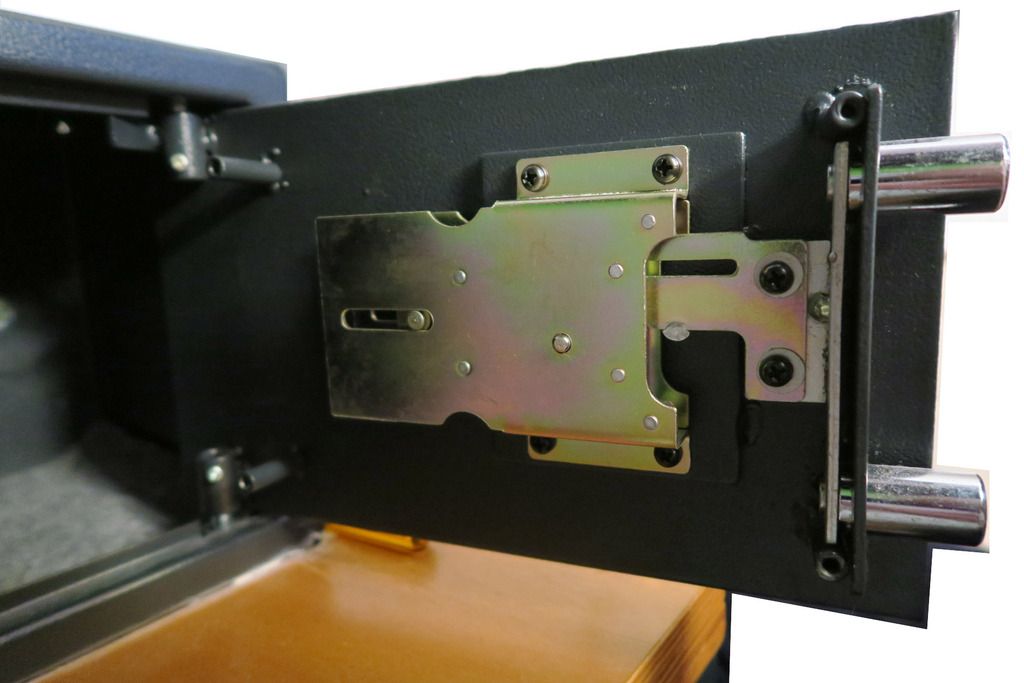
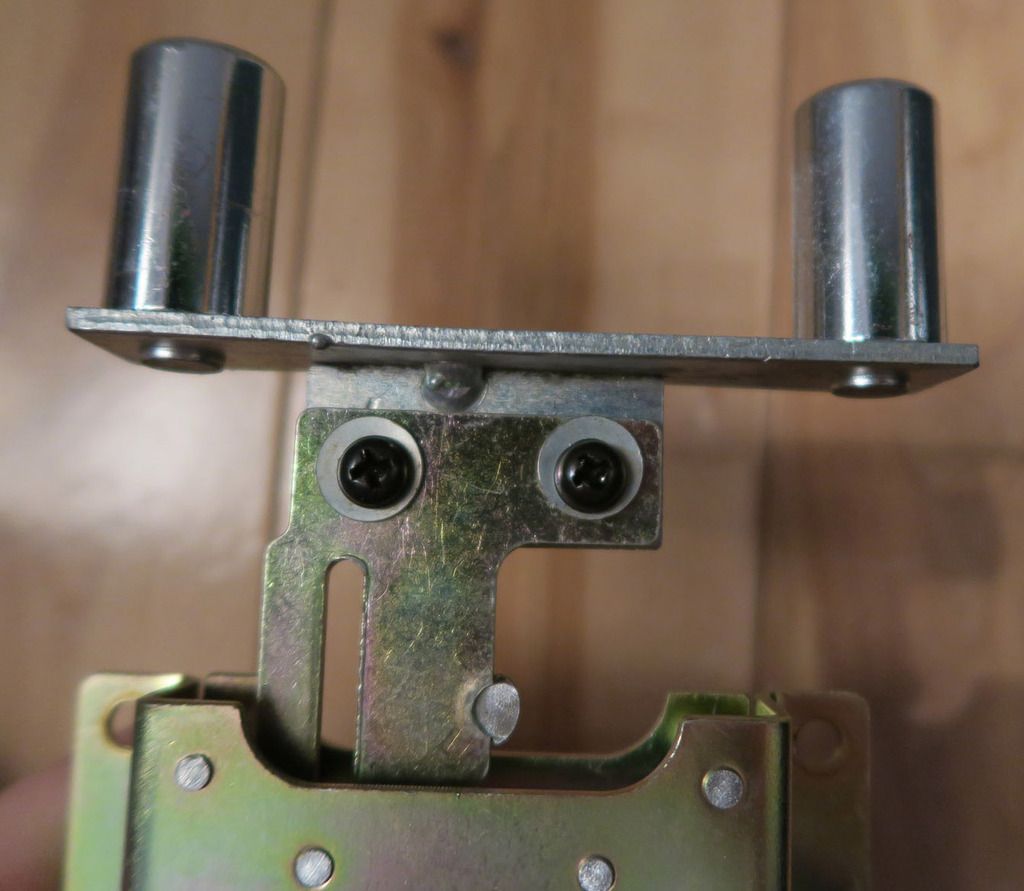
Here's that shot from earlier, but with the bolts fully extended. You can better see how the bolts connect to the lock unit, here.
Side view of the lock from the bolt edge:
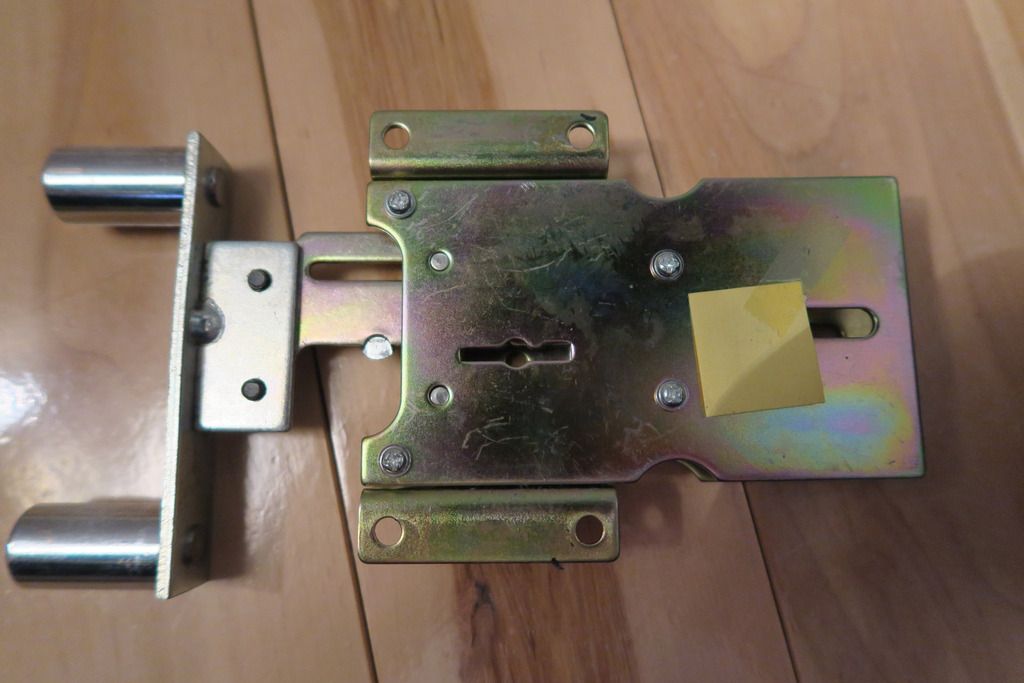
Here I've removed the lock unit from the safe. You can see again how the bolts attach to the lock unit. The two rectangular pieces of metal at the top and bottom with empty screw holes in form the back of the lock unit as seen in previous pictures, whereas the main plate in the middle is usually hidden against the door. See those four silver Phillips screws? That's what holds the front of the unit to the back.
Another side view of those levers:
Bolts and connecting plate attaching to the locking unit with those two screws...
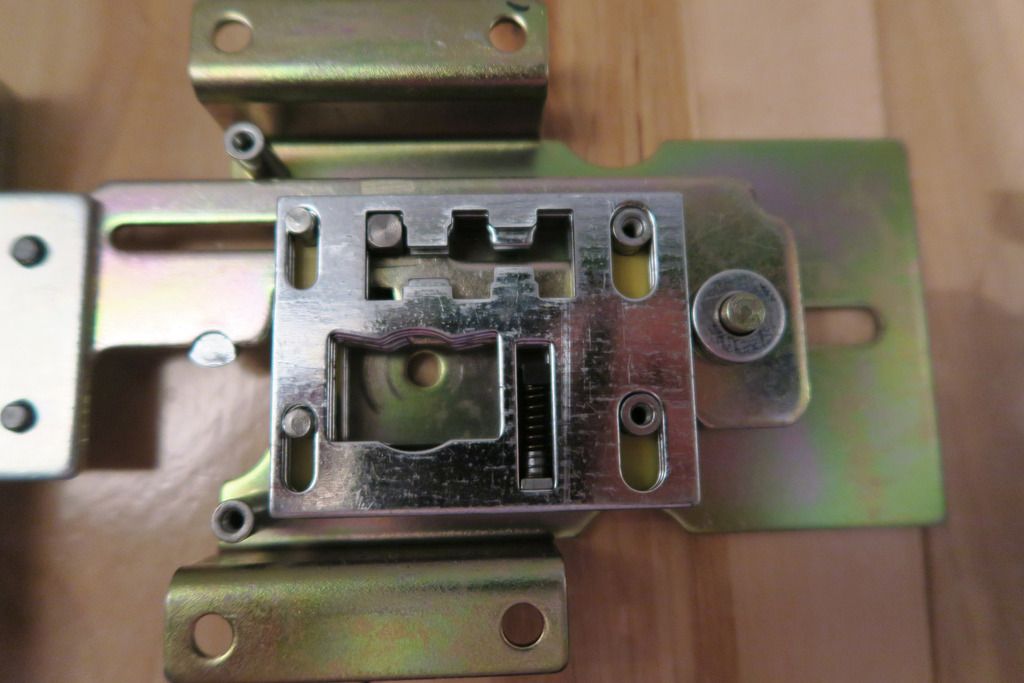
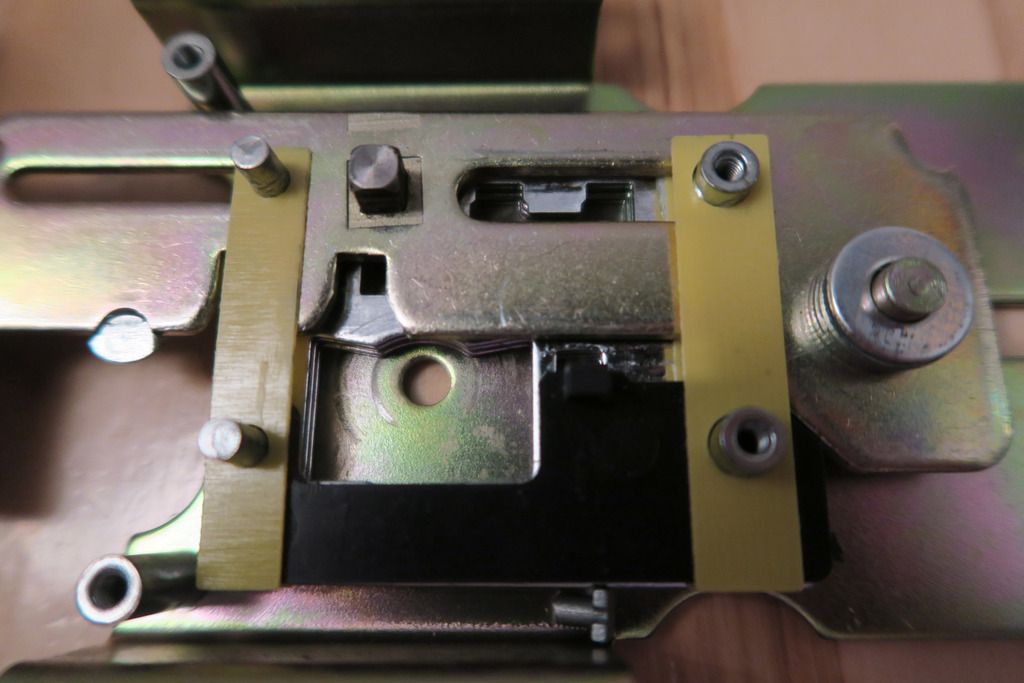
Here's the lock unit from the inside view again, with the cover removed. You can see how the main bolt driver thingy attaches to the rest of the unit. The silver plates in the middle are the levers where the keys go into. The key fits into the large exposed "wing" shape at the bottom of the lever plates, and the top section consists of all the warding which ensures that the correct key has been entered. As far as I can tell it's this part, not actually the area where the key enters, that represents the levers of this lock.
Closer view of the locking mechanism including the lever plates. Inside those plates are the key area (middle-bottom), the warding (middle-top) and the bolts (each corner) that hold the plates in place. They have long slots cut into them to allow the plates to move up and down as the key is turned. The big bolt at the top-left corner of the warding area is what passes through the gaps in the warding and allows the lock to open (or not). There's also a little spring connected to a plastic thingy (at the top) and little metal stub (at the bottom) in the middle-right section of the lever plates. This nearly tripped me up later as I didn't realise it was loose and the spring went pinging off! Luckily I was taking photos so was able to go back and figure out how to put it back together...
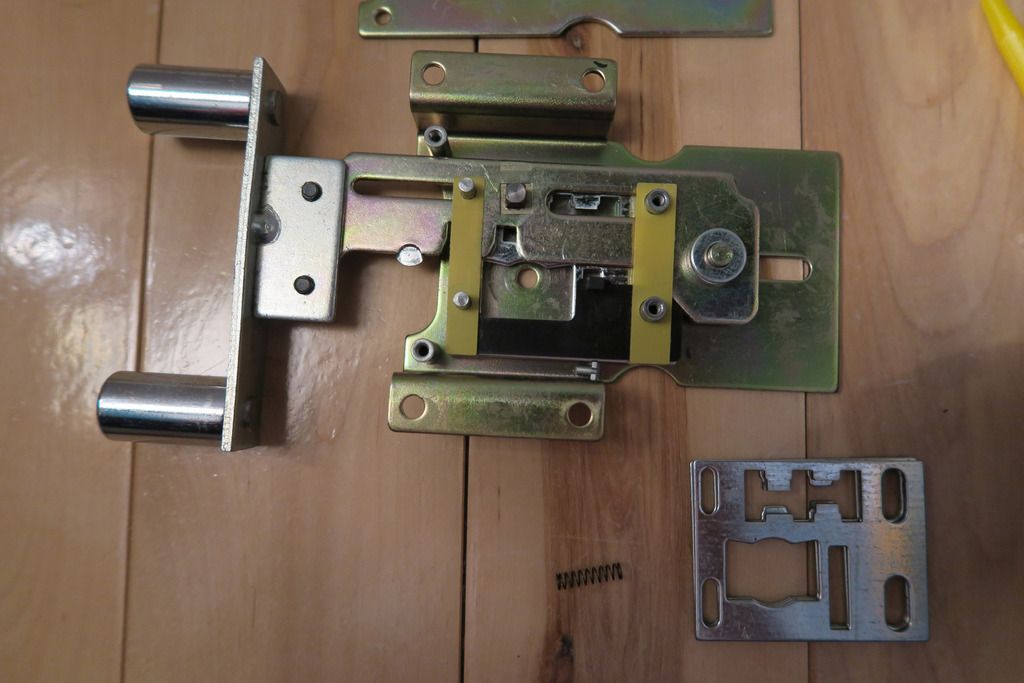
Lever plates removed, you can also see that loose spring and the metal stub it attaches to near the very bottom of the lock. Oops! With the levers removed, you can see a bit more of the mechanism. Unfortunately I didn't figure out much more than this (such as how the main bolt lever is actuated by the key levers or what's in the bottom part of the lock, such as those semi-exposed silver parts, as I was getting a bit worried about breaking something and decided to put it back together for now!
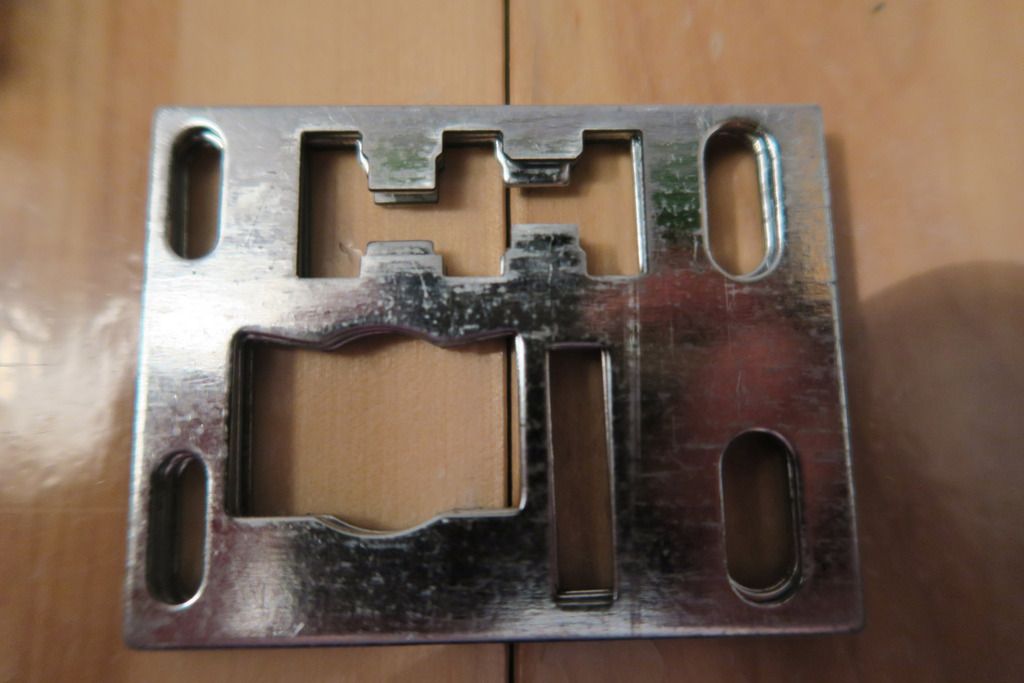
Close up of the levers and warding gate thingies:
Close up of the back half of the lock. Looks like there are even more levers hidden away back there! You can also see the black plastic plate that the spring attaches to better here. No idea what this is for, though.
Reassembling... Figured the little spring out luckily!

The back of the safe door - you can see the screw poles where the outer lock-holding tray screws in (four corners) and the small plate welded to the door with the screw holes in - that's where the lock screws in. Another easy place to attack if you wanted to drill and knew the measurements, I guess:
That's it for now! Sorry for the partial disassembly - if I get brave I might take the whole thing apart sometime. Hopefully this has been useful or at least interesting to some people.
---
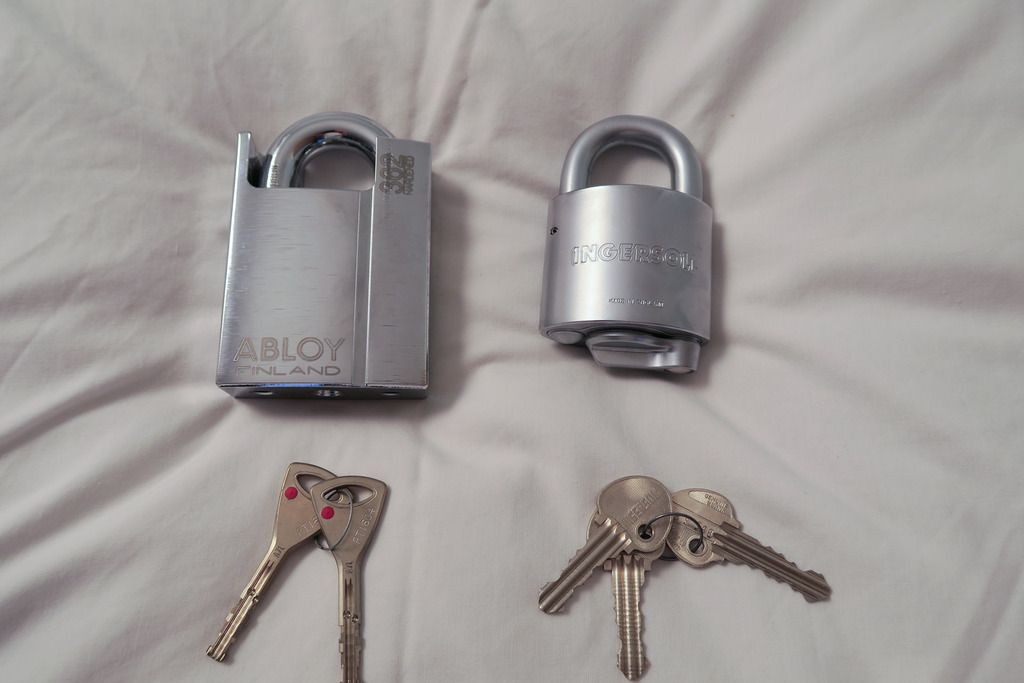
Oh! I got these new locks a couple of days back!
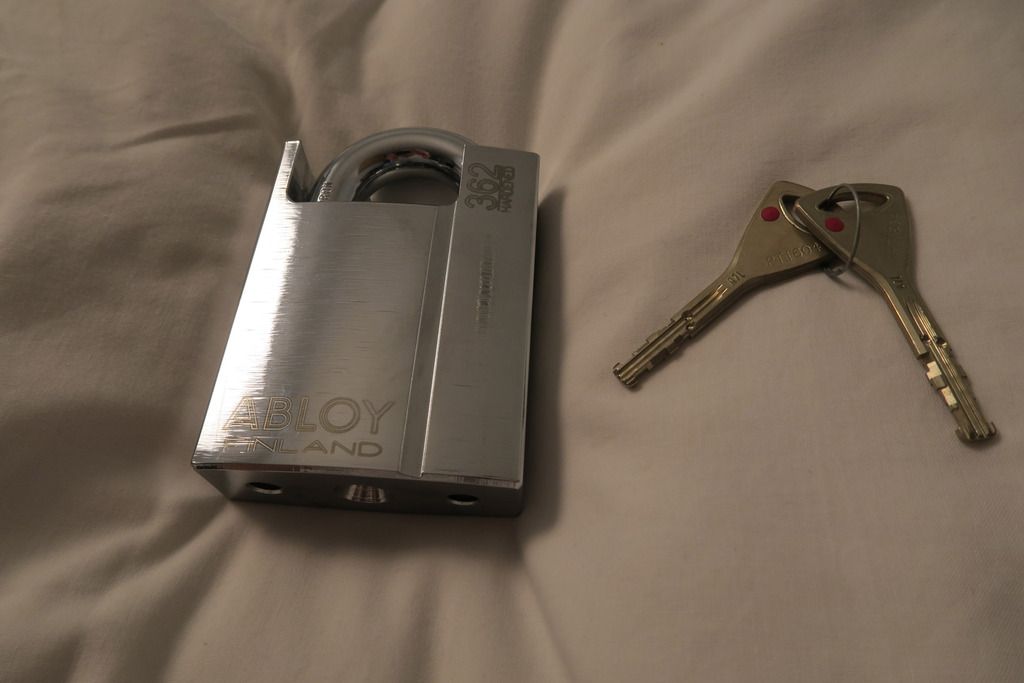
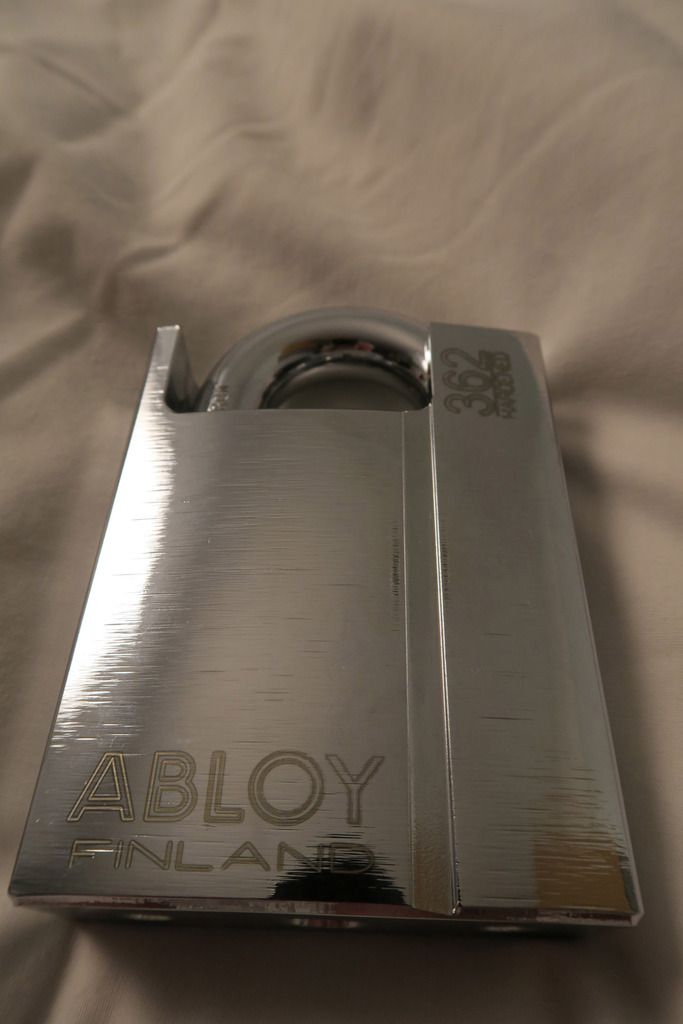
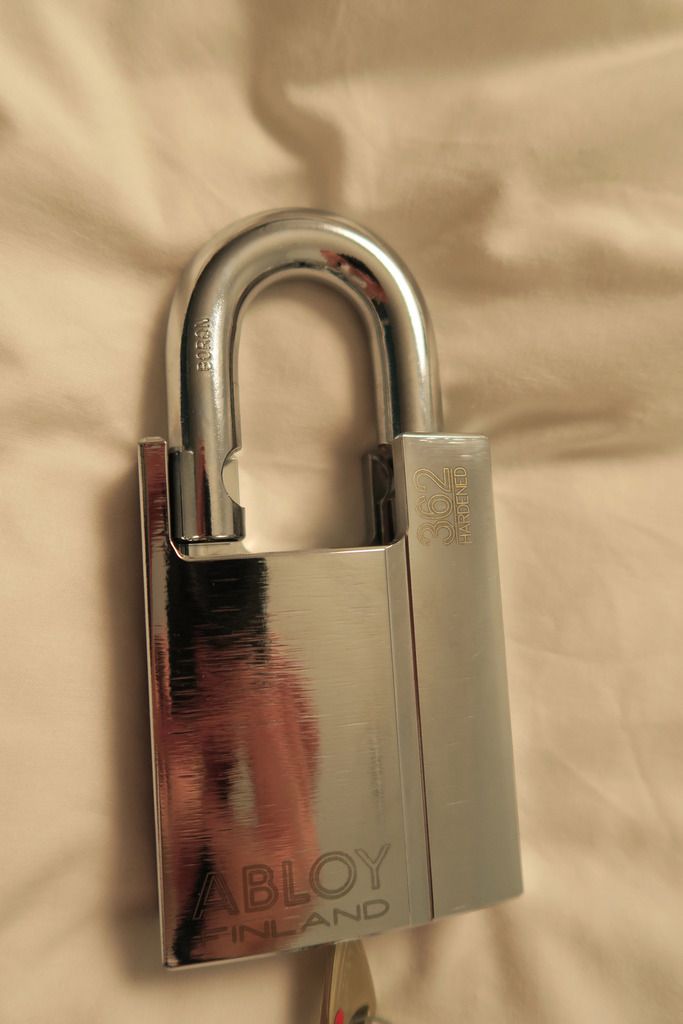
First up, is the stunning Abloy 362. Have to admit, when this arrived I just sat there grinning and unlocking/locking and pulling open and closing the shackle over and over. Anyone nearby would think I'd gone mad!
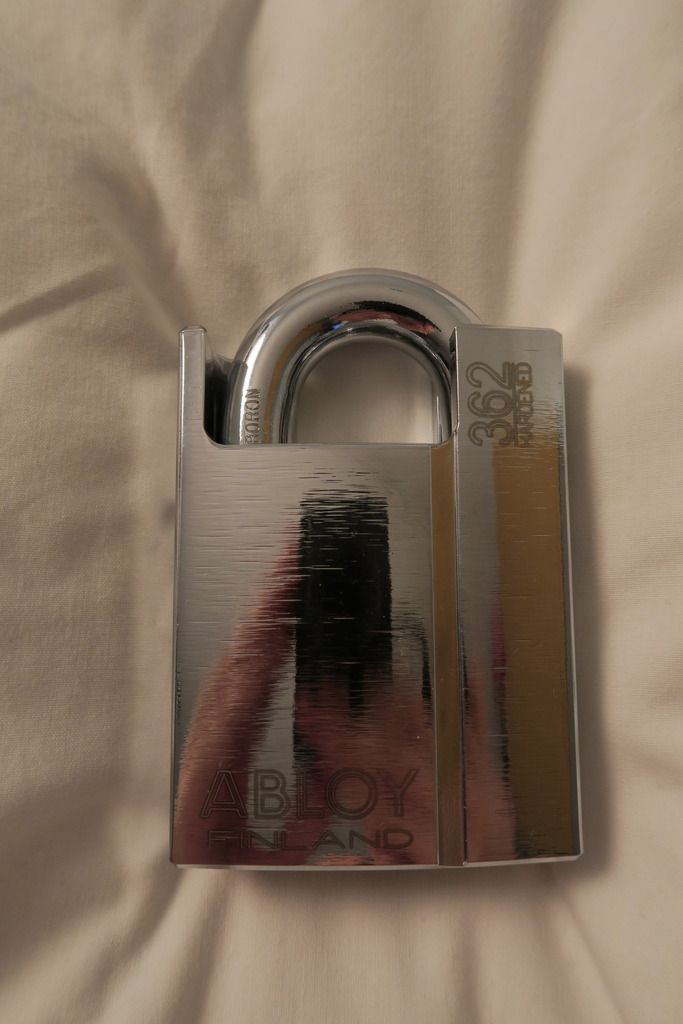
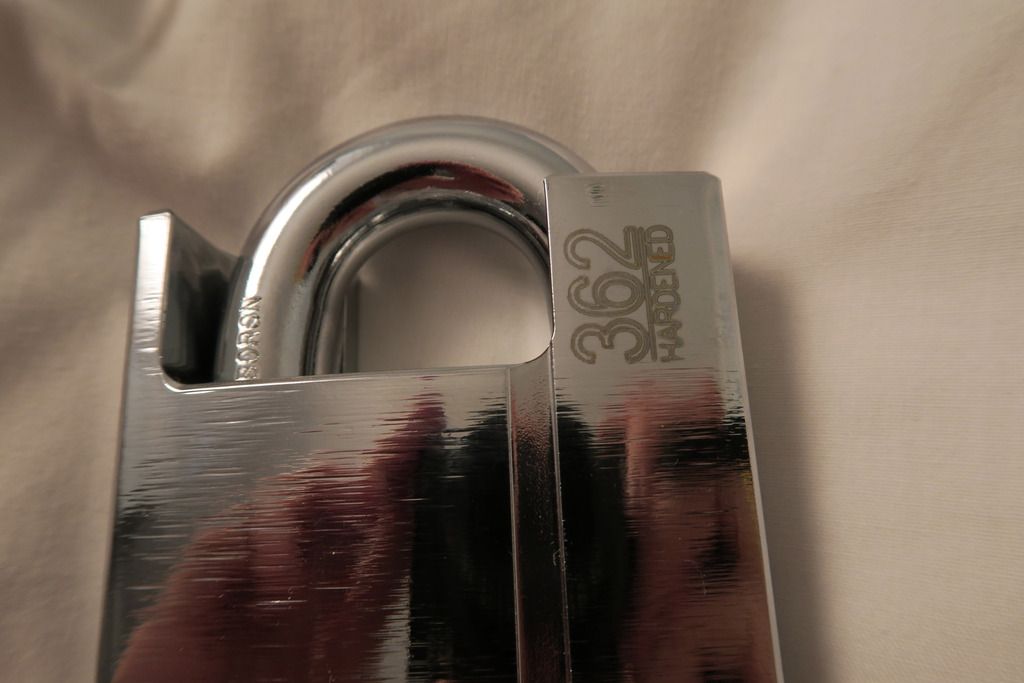
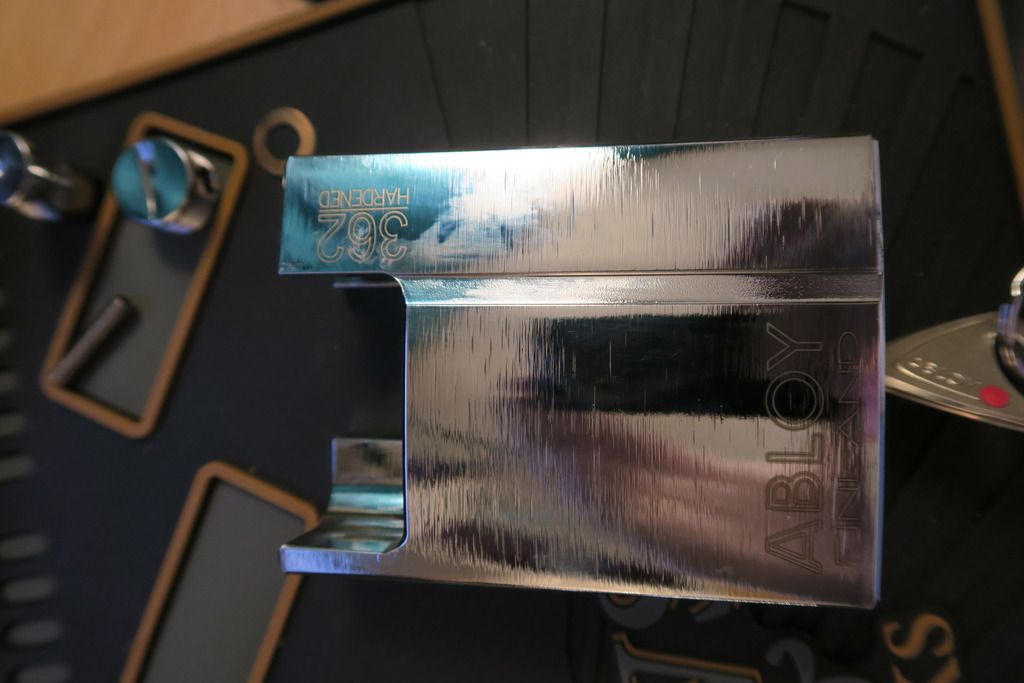
Focusing on the "362 Hardened" Stamp:
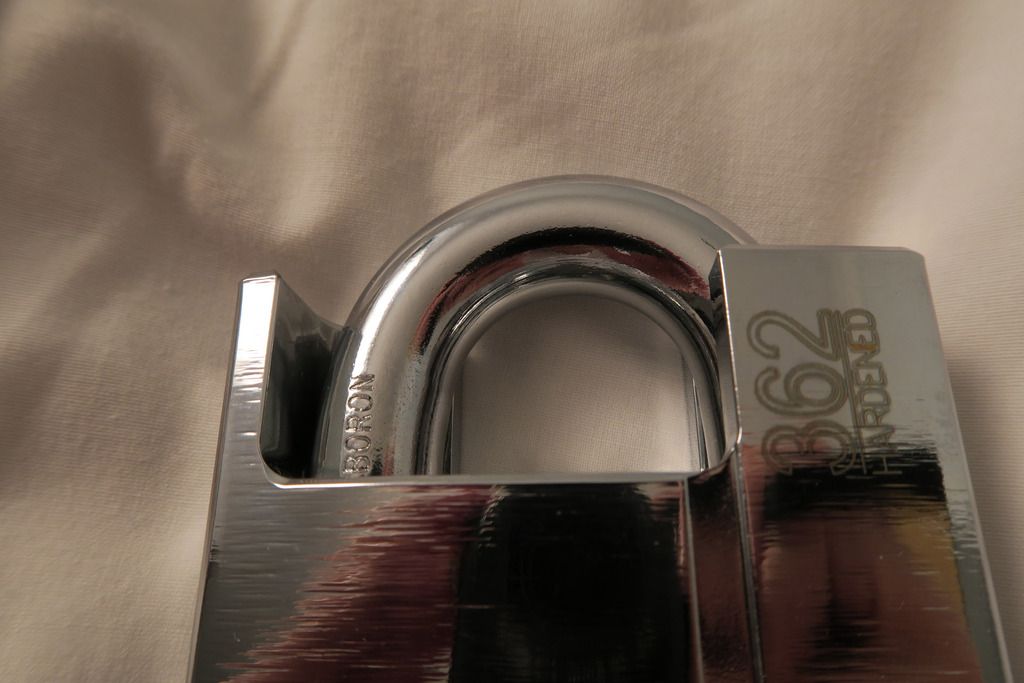
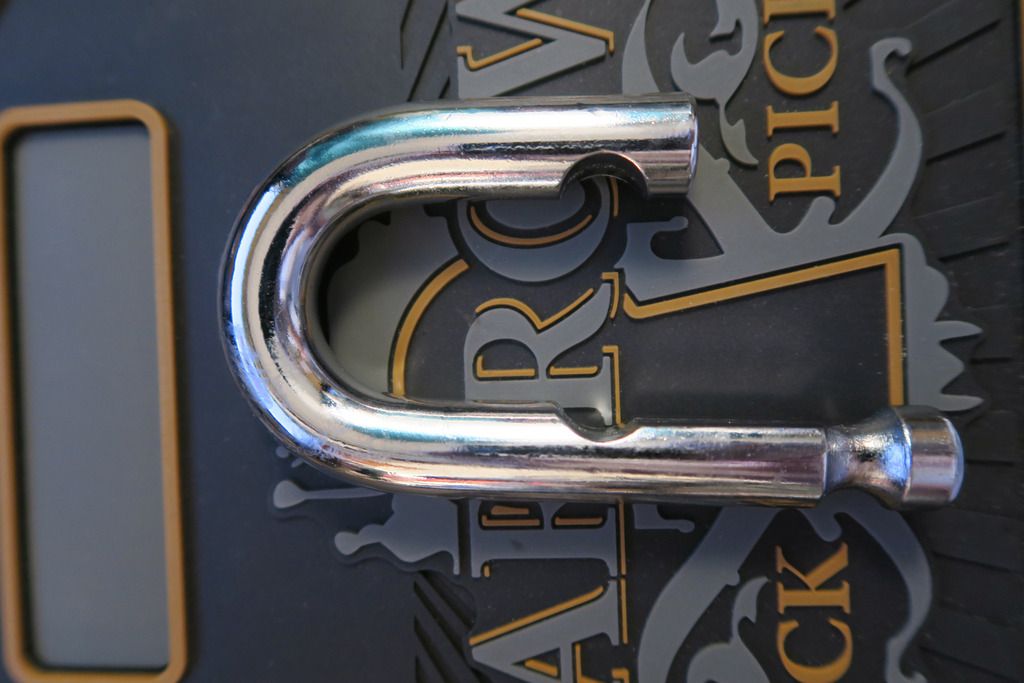
Focusing on "Boron" stamped into the shackle. Look at the size of that thing!
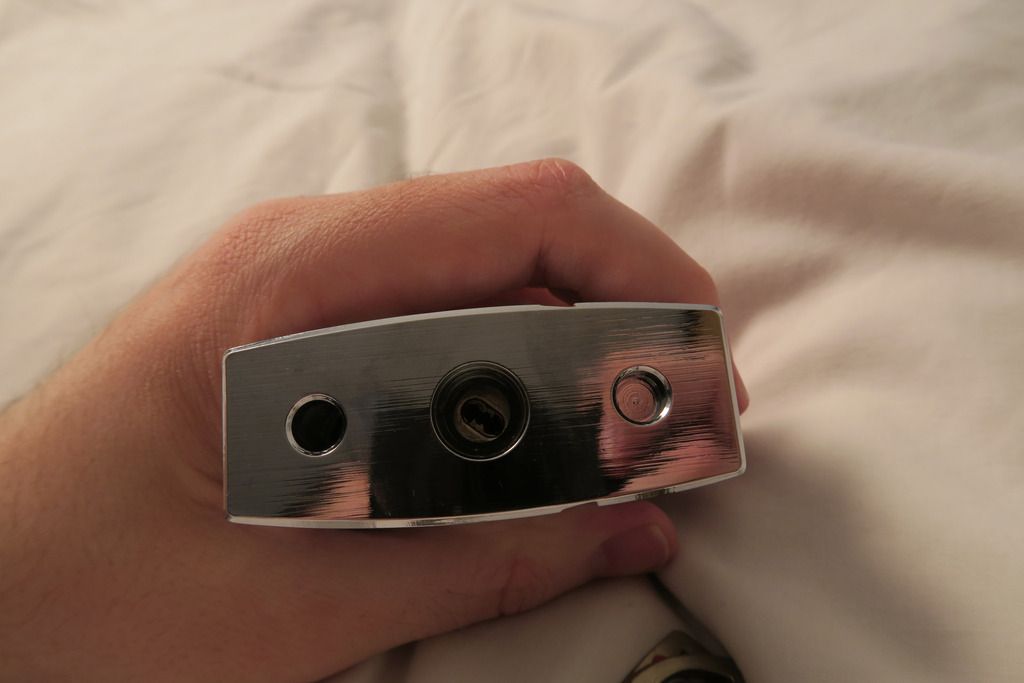
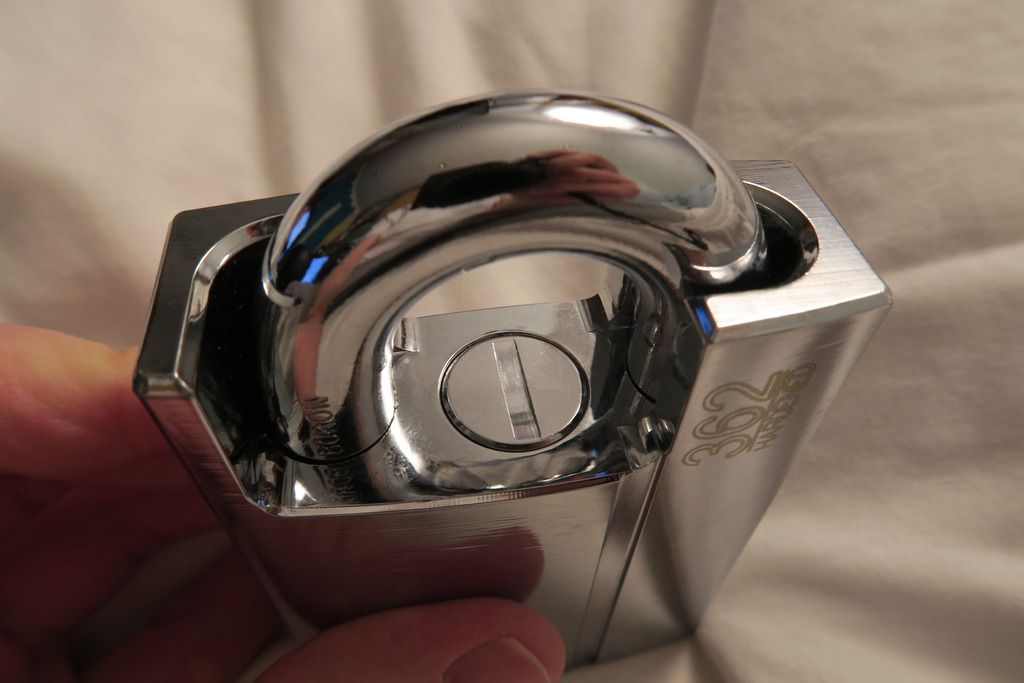
The bottom of the lock, and the keyway. It's a Protec, not a Protec2 unfortunately. Maybe some time I'll fit it with a Protec2 Ruby from SecuritySnobs. For now though it's still a gorgeous cylinder. The two other holes on the left and right sit under the shackle and are for drainage (It looks stopped up on the right hand side because that's where the non-opening side of the shackle sits - that's actually the very base of the shackle):
Look at the thickness on that closed shackle warding! Yowzers. The round plug in the middle with the slot shape in it is where you load the cylinder (more on that later):
Sorry for the bright orange:
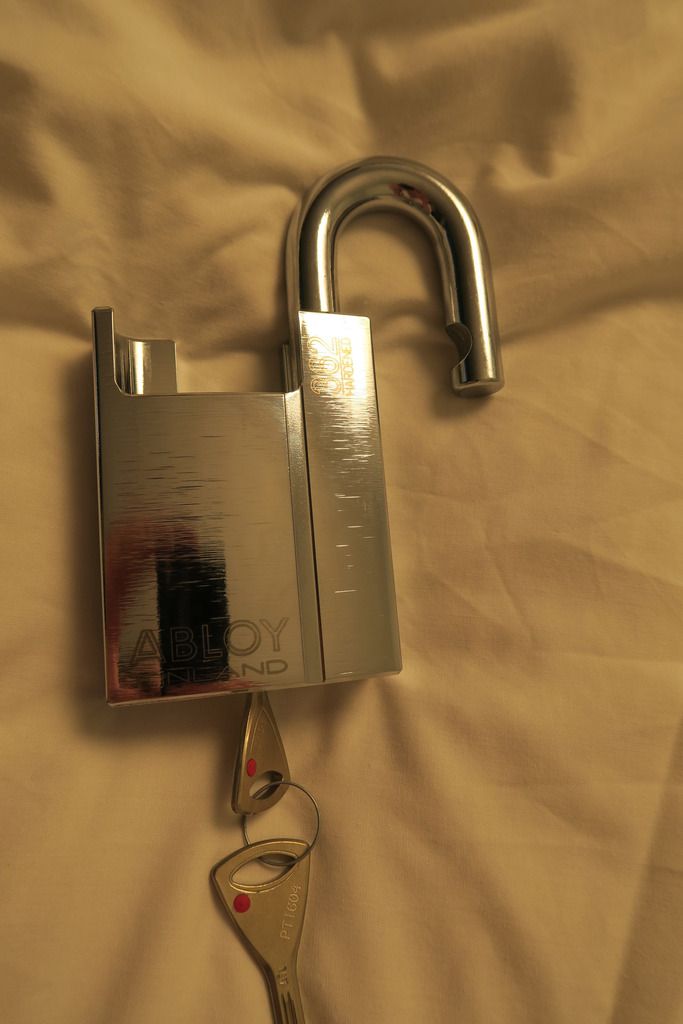
Shackle open:
Looking down at the inside of the shackle hole:
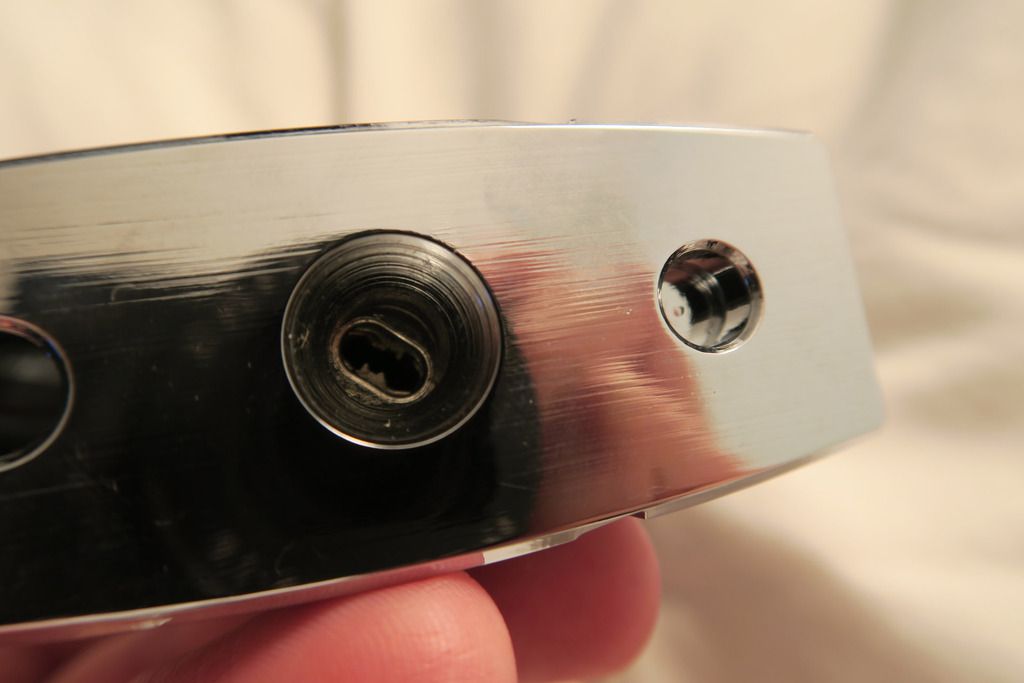
Clamped up in the vice. You see that little hole in the side? When the shackle is inserted, all you can see is the side of the shackle....
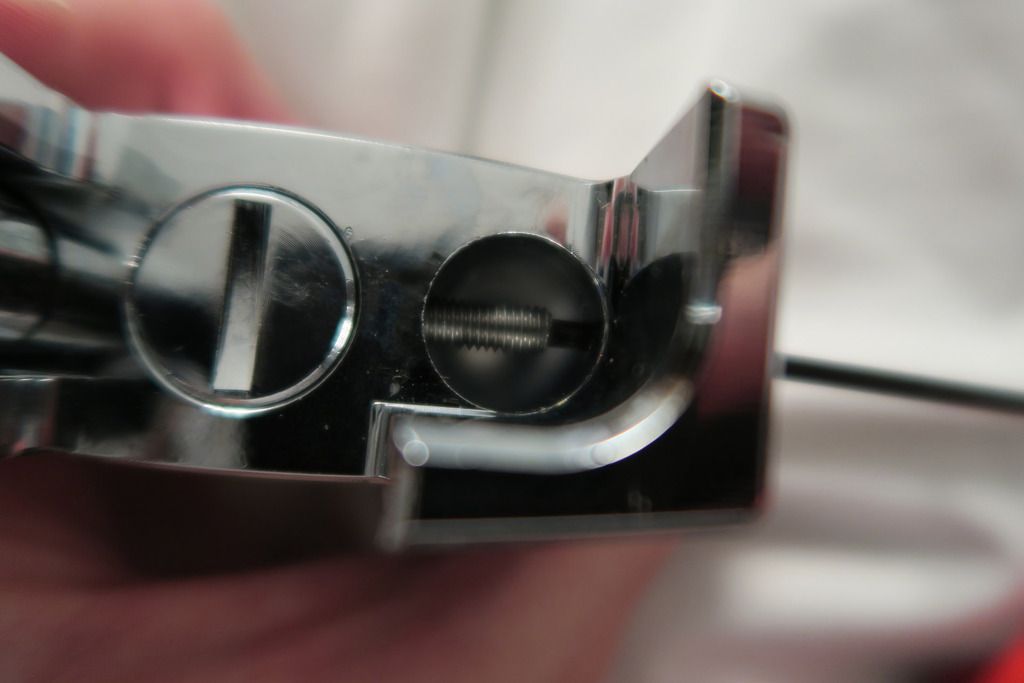
... But when it's removed, if you look through, you can see a hex grub screw on the other side of the shackle hole. This is how you unlock the middle plug:
A few more pretty shots


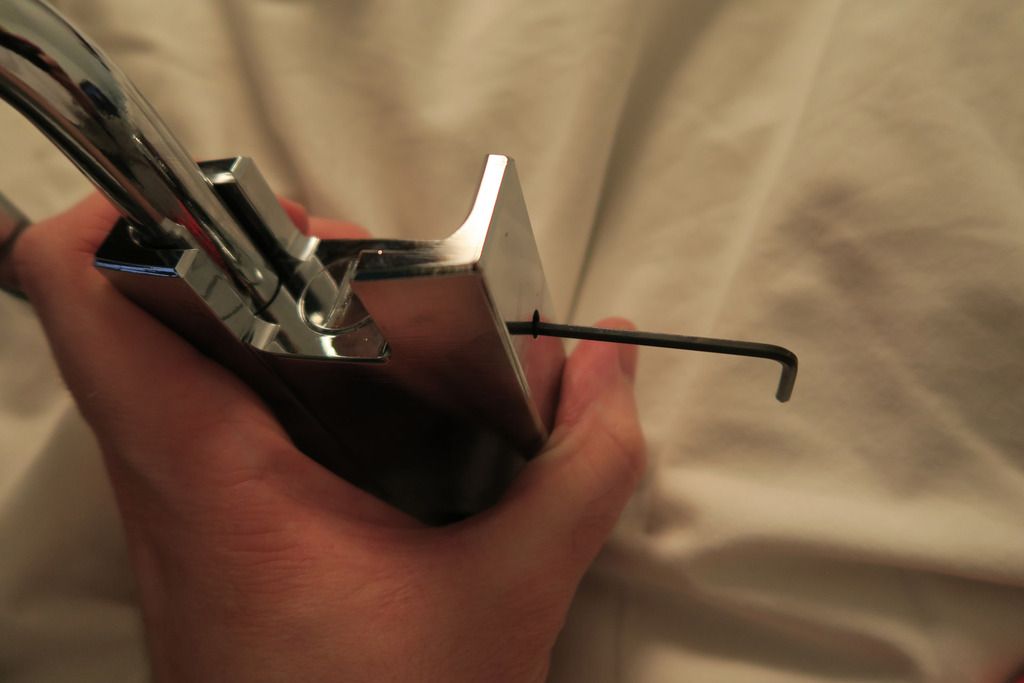
Unscrewing that little grub screw holding the centre plug. It's a LONG screw - it goes right through the plug and into the body at the other side!
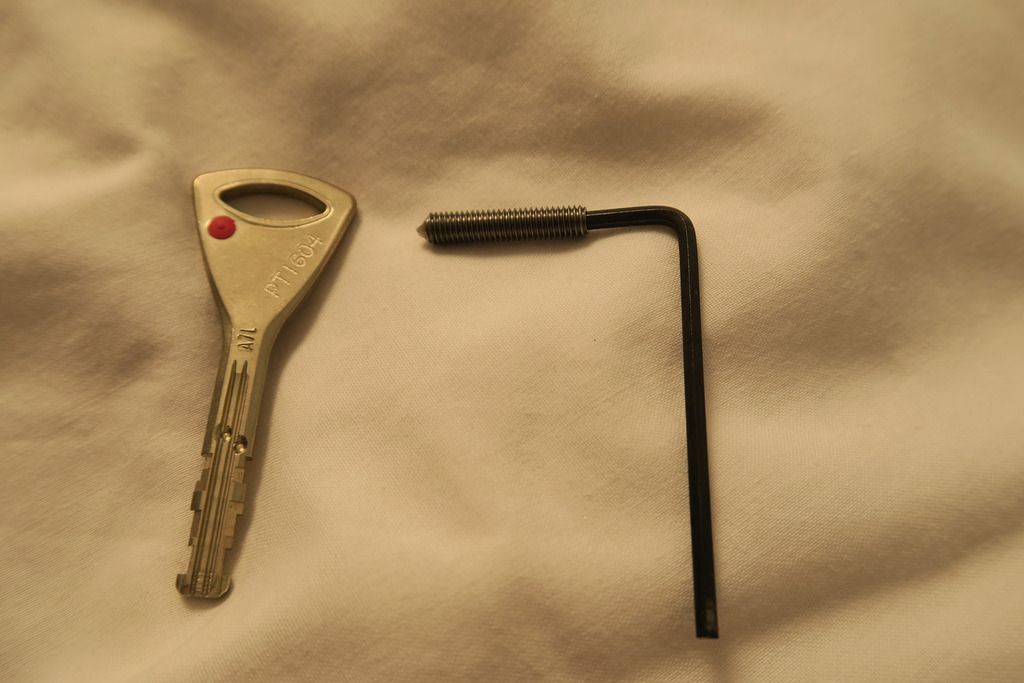
You can then unscrew the plug with a key bow or coin:
Man, LOOK at that thing!
With the plug removed you can see down inside, there's a little copper disk (Not sure of it's purpose, maybe as some kind of washer to stop the next part rubbing on the bottom of the top plug). and the top of the ball locking plug:

Ball locking actuator thingy (I'm sure it has a proper name!) removed. Very greasy! Wish I had some more lube to re-lube it along with the ball bearings.. Not sure what I need for that though:
Ball bearings removed:
Dat shackle 8)
Bits n bobs - the top cap, retaining screw and ball bearing actuator:
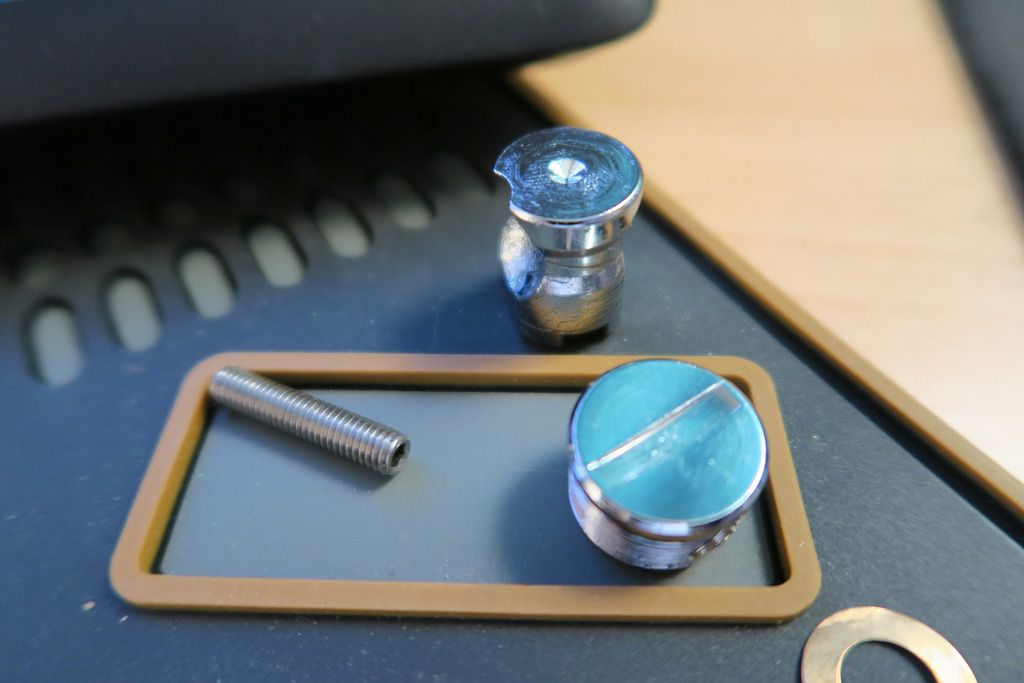
Body of lock, sans shackle:
Looking down inside the lock. What you're looking at is the top of the Protec cylinder, the rectangular notch on the top interacts with the bottom of the ball bearing retaining doodad, turning it and causing the ball bearings to be able to fall into the notch on the doodad, out of the shackle notches, thus opening the lock:
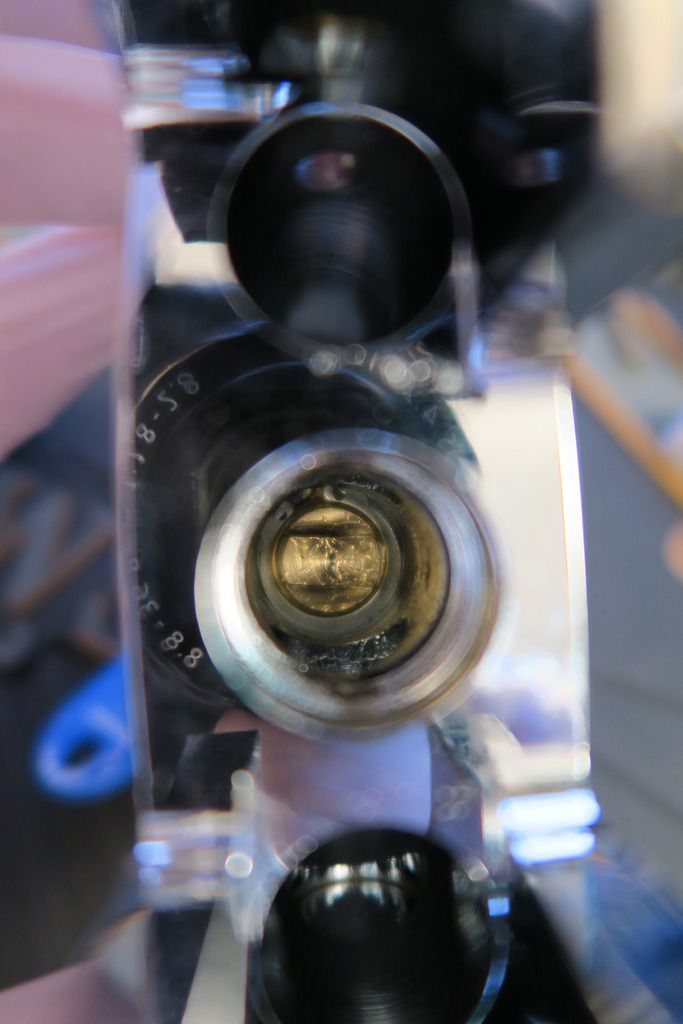
However, this was as far as I was able to go. Why? On the last photo, if you look carefully around the brass cylinder unit in the middle, you can see a C-clip circlip kinda thing - that's holding the cylinder in place, and after a brief Google of "Abloy 362 disassembly" I found out that it's very hard to remove, requiring special tools, and that the whole unit (complete with sidebar etc) is a nighmare to re-install, soo... That's it for this disassembly.
Aaaaand the second lock
*drumroll*
...
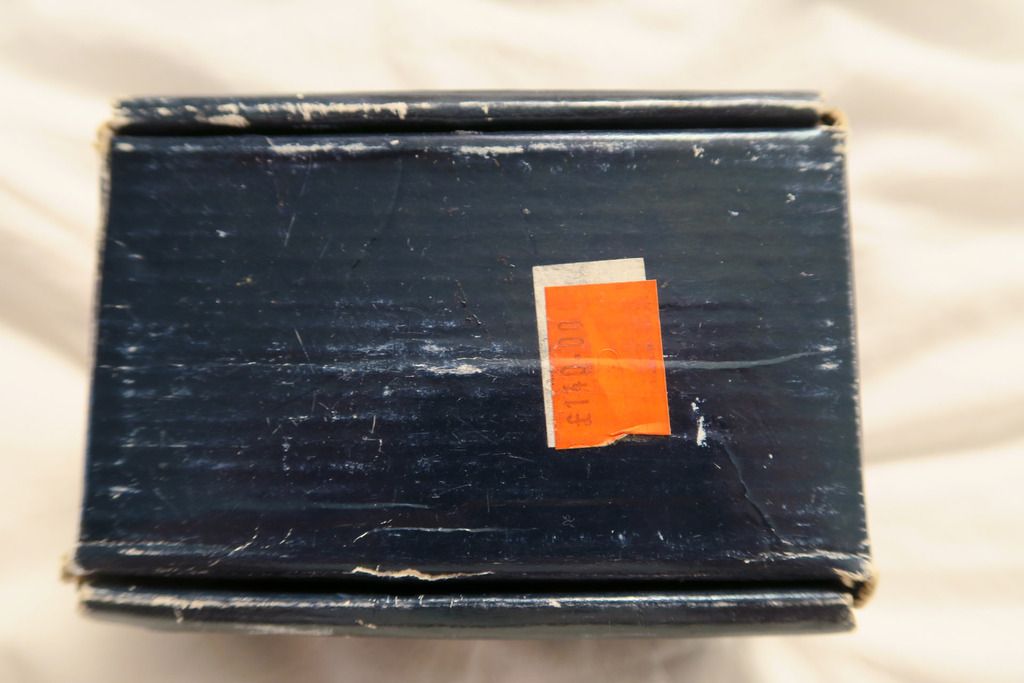
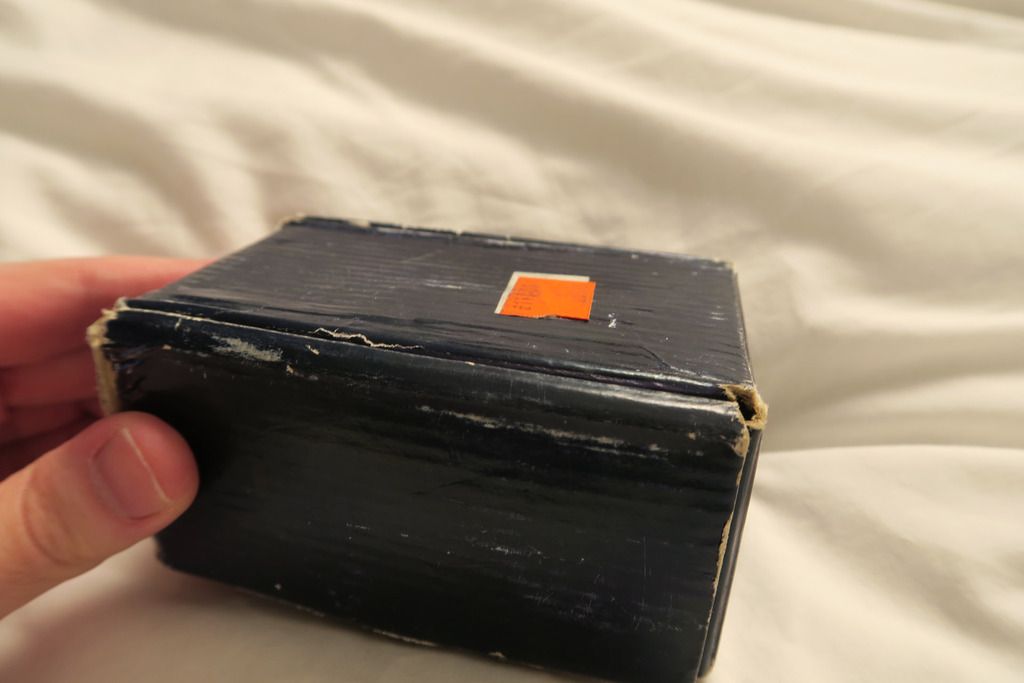
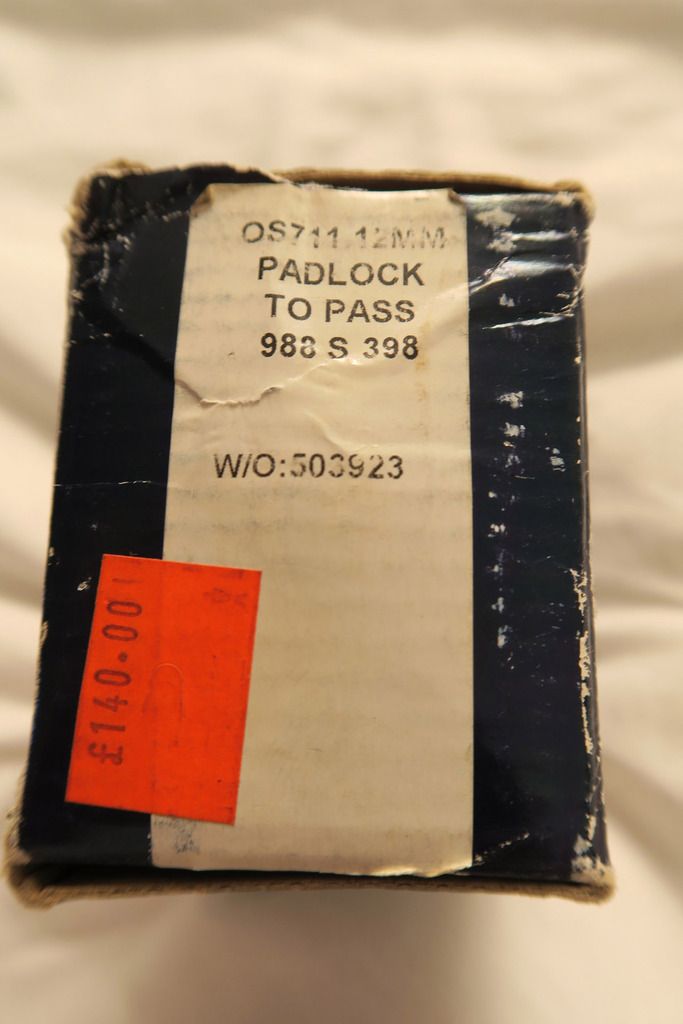
It comes in this nice original-looking box, which helpfully tells us that the RRP is £140
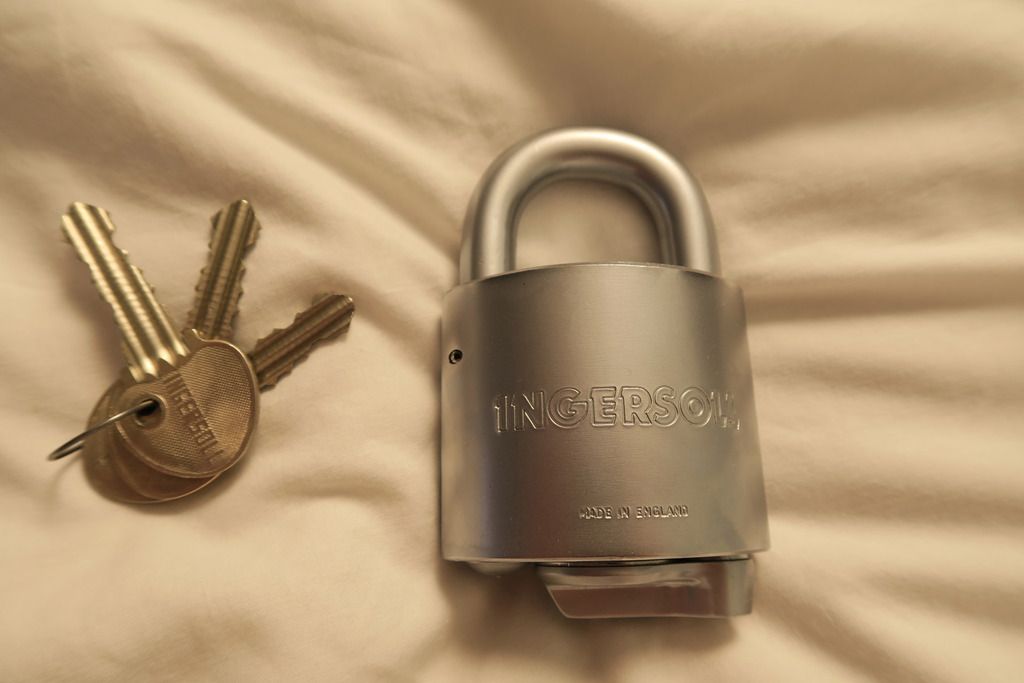
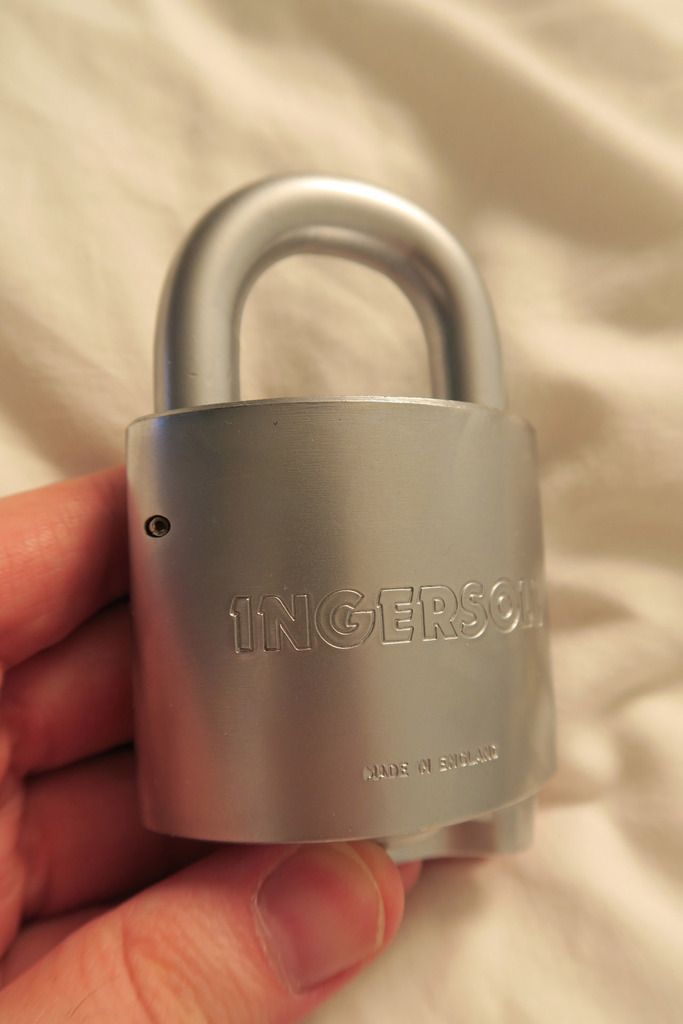
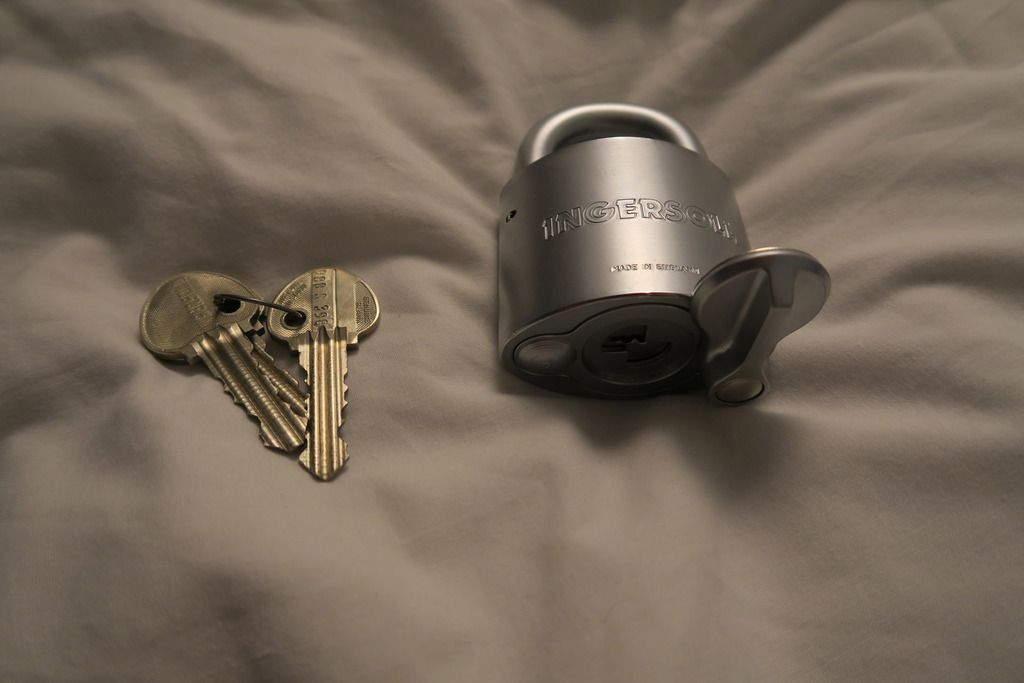
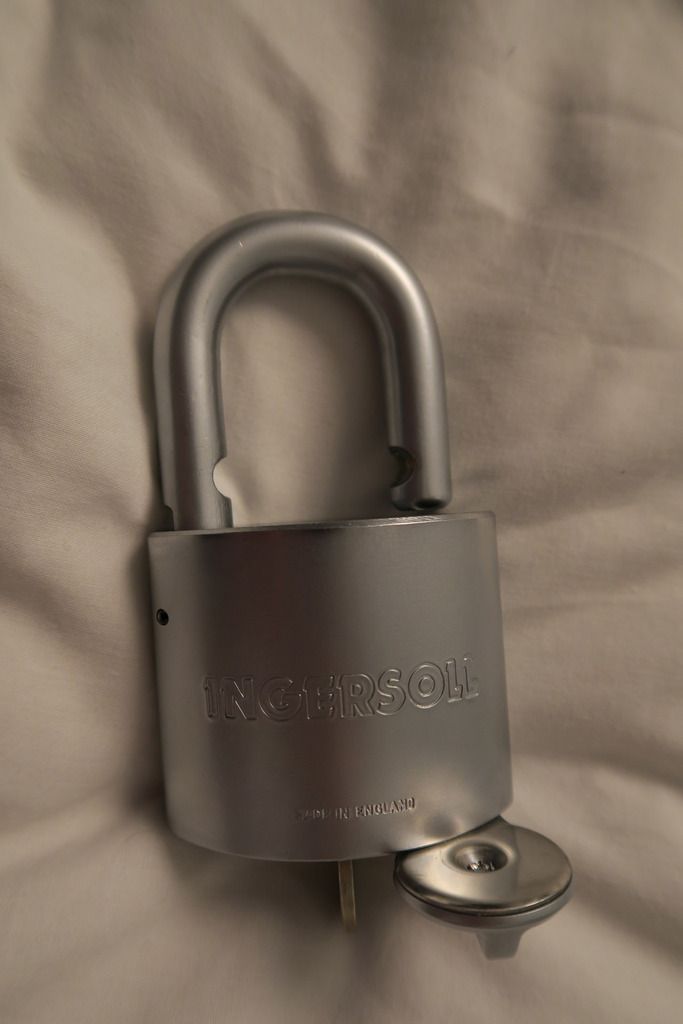
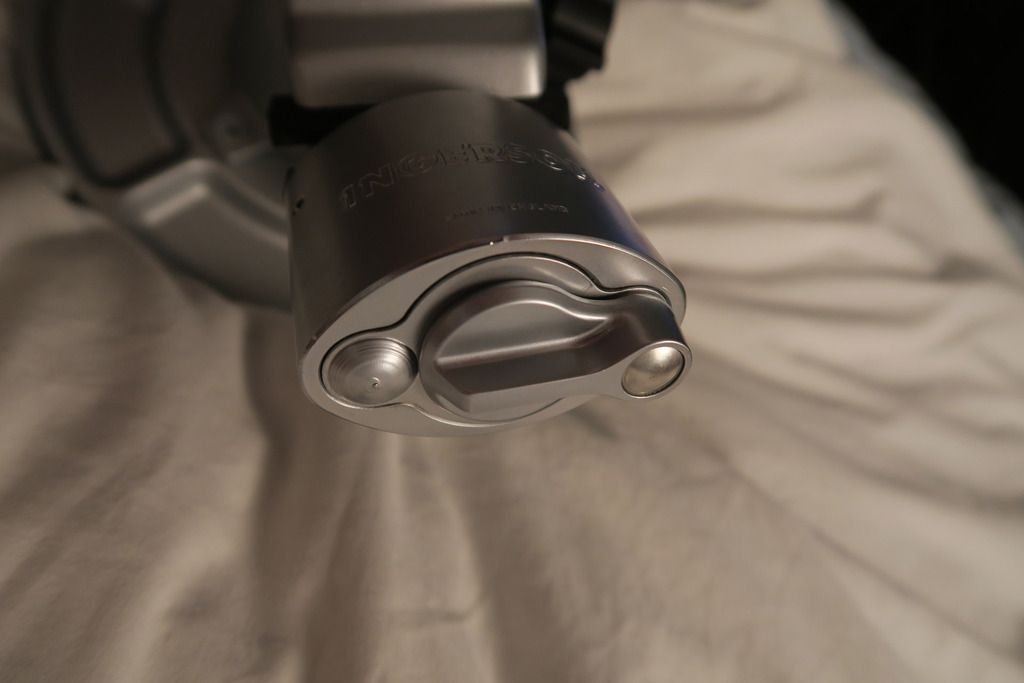
... It's an Ingersoll! The Open shackle version:
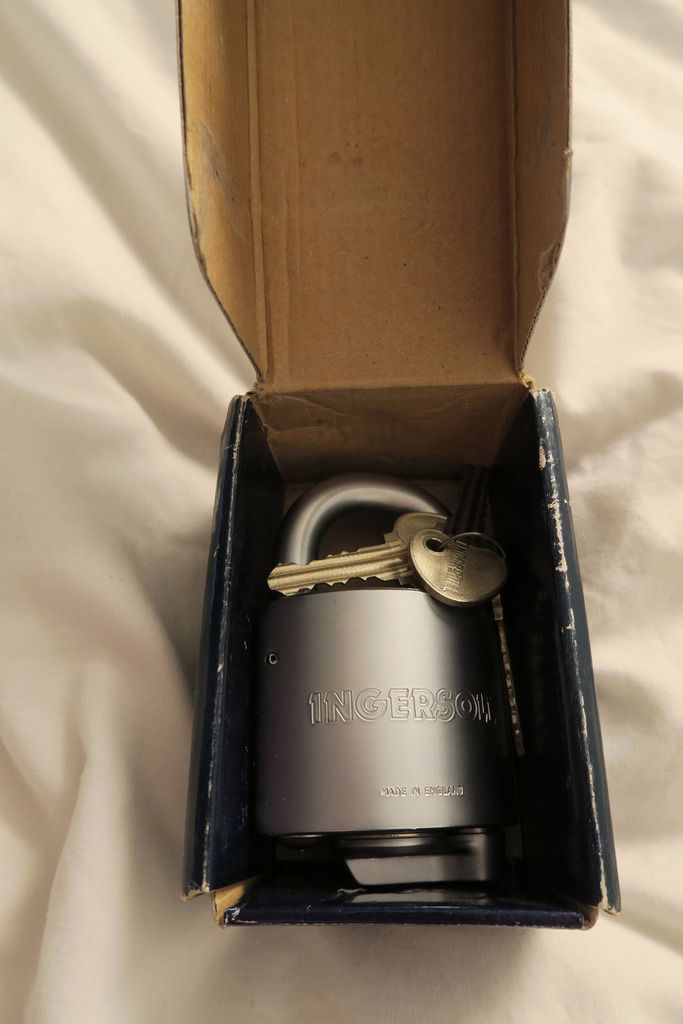
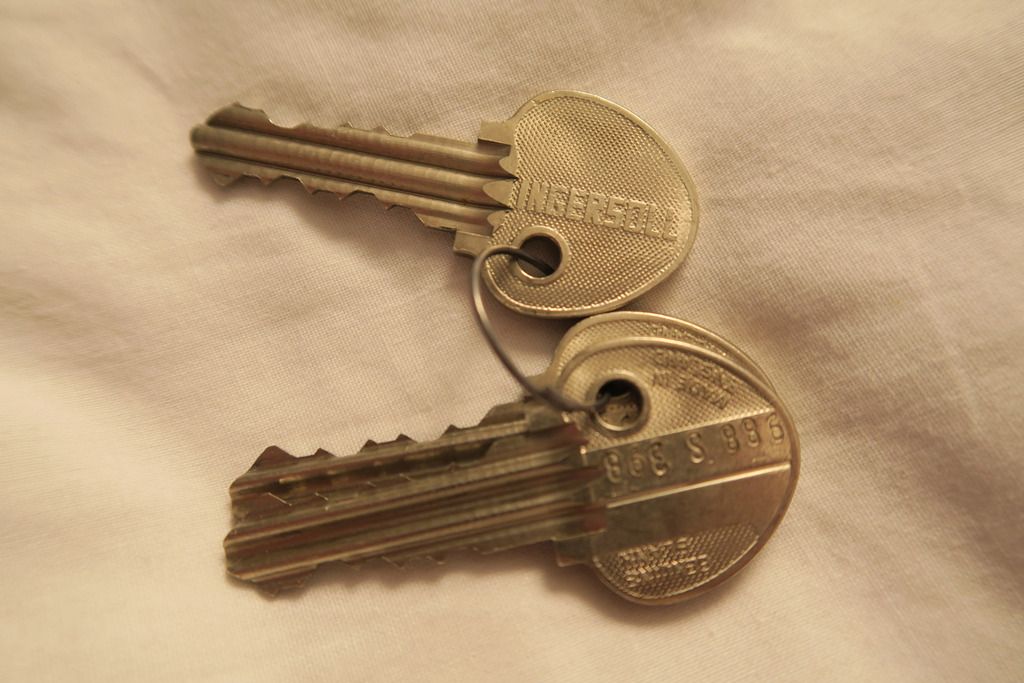
It's in lovely condition, with three keys! (I forgot to mention that I got both this and the 362 on eBay second-hand, so while they're in fabulous condition they're not new-new, and for example the 362 didn't come with the Protec key card sadly)
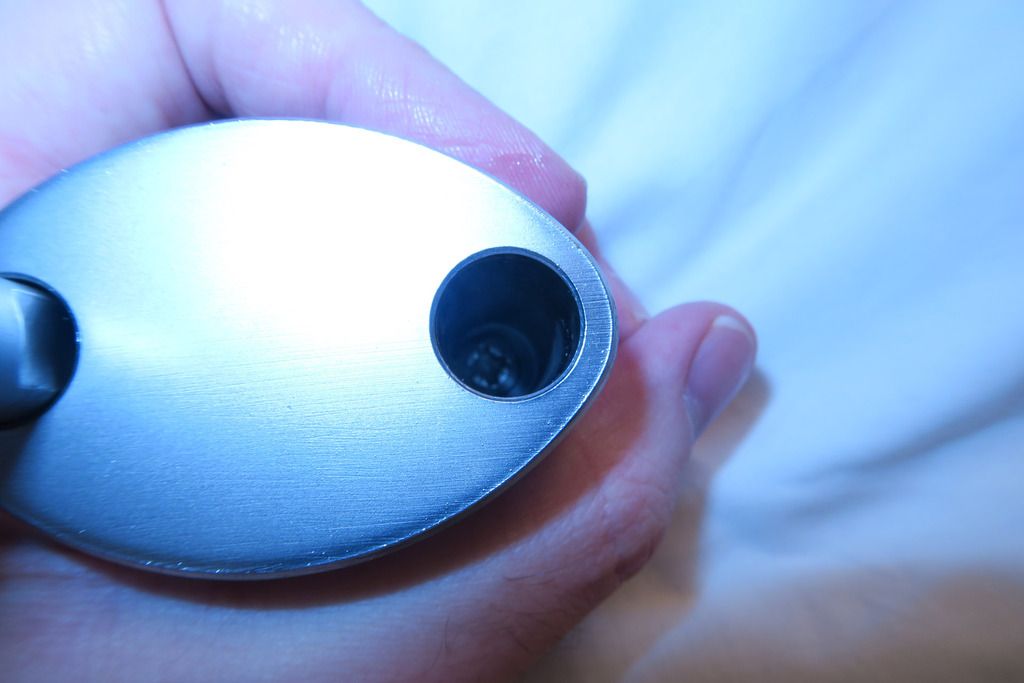
The side, showing a little hole with what looks like a grub screw in it. It isn't, and this becomes my bugbear later on....
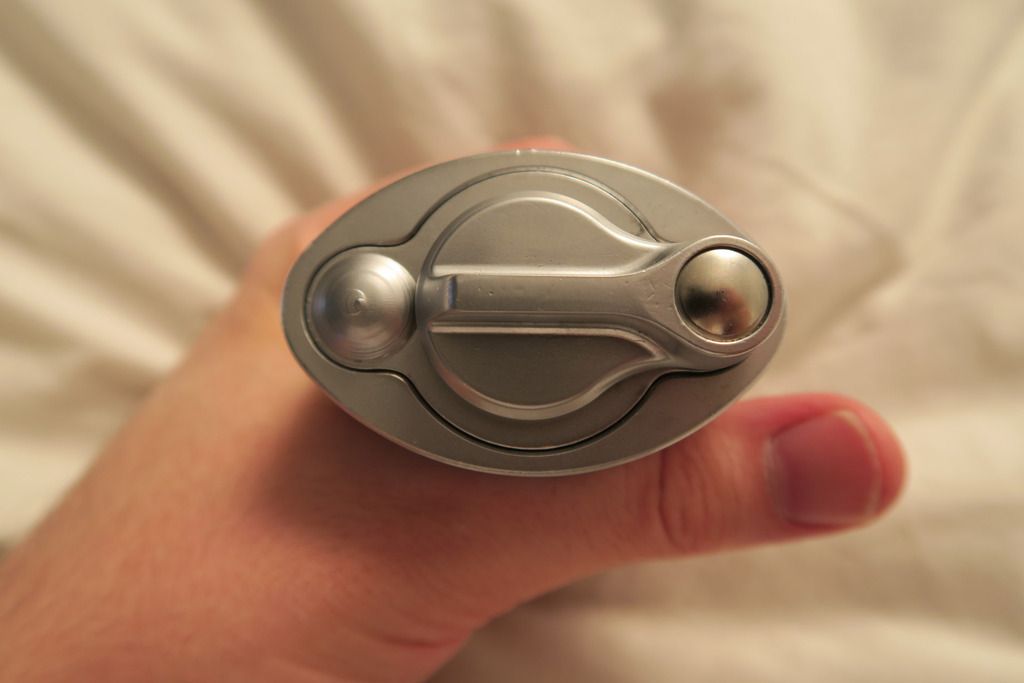
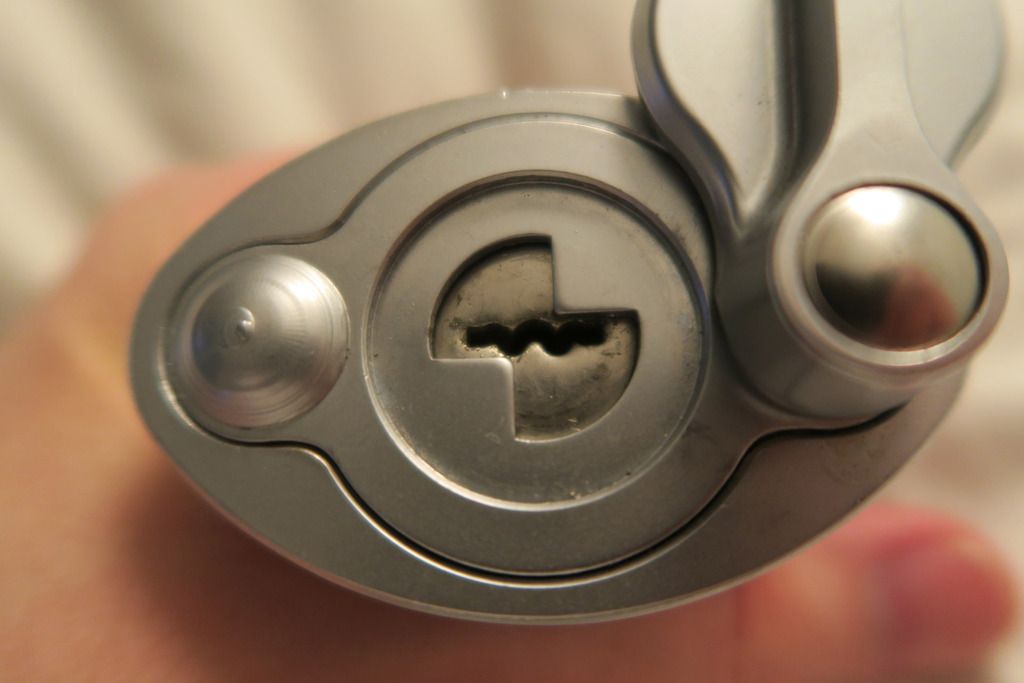
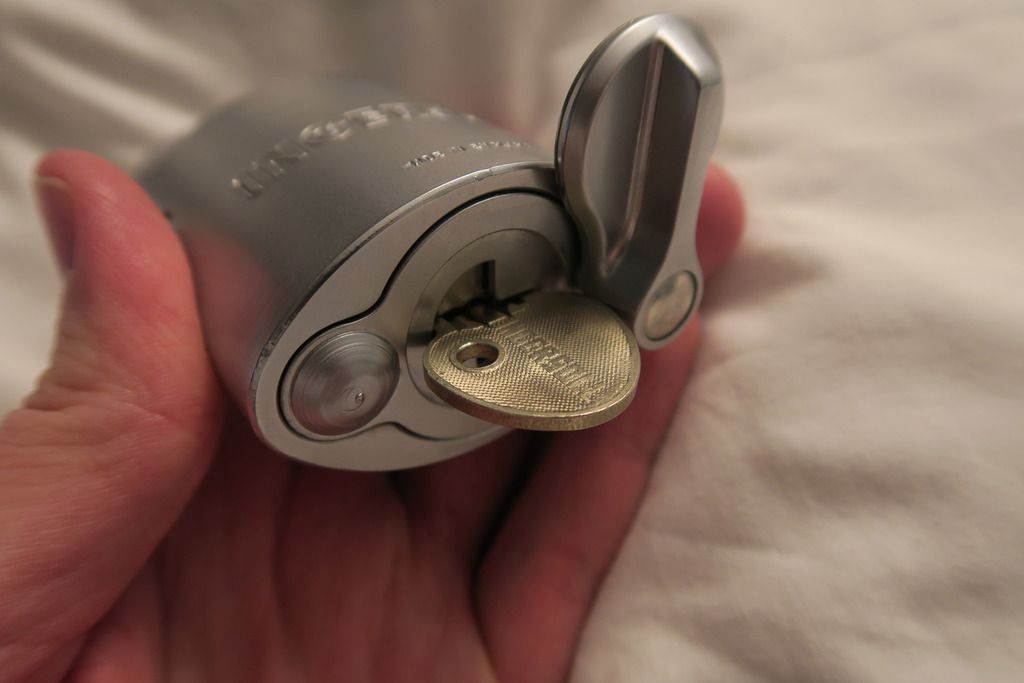
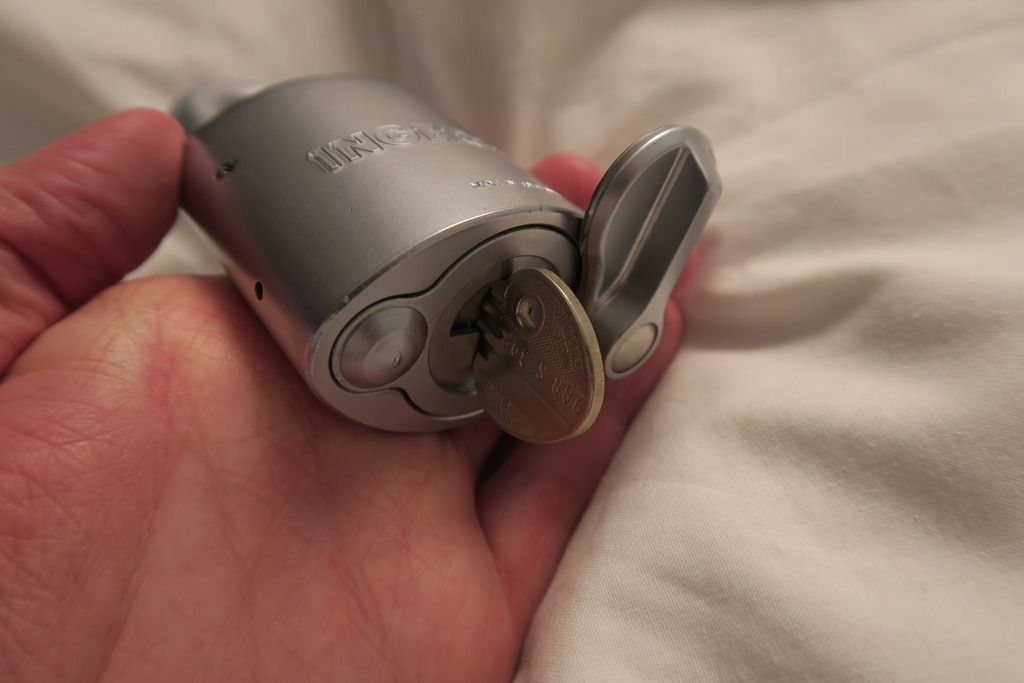
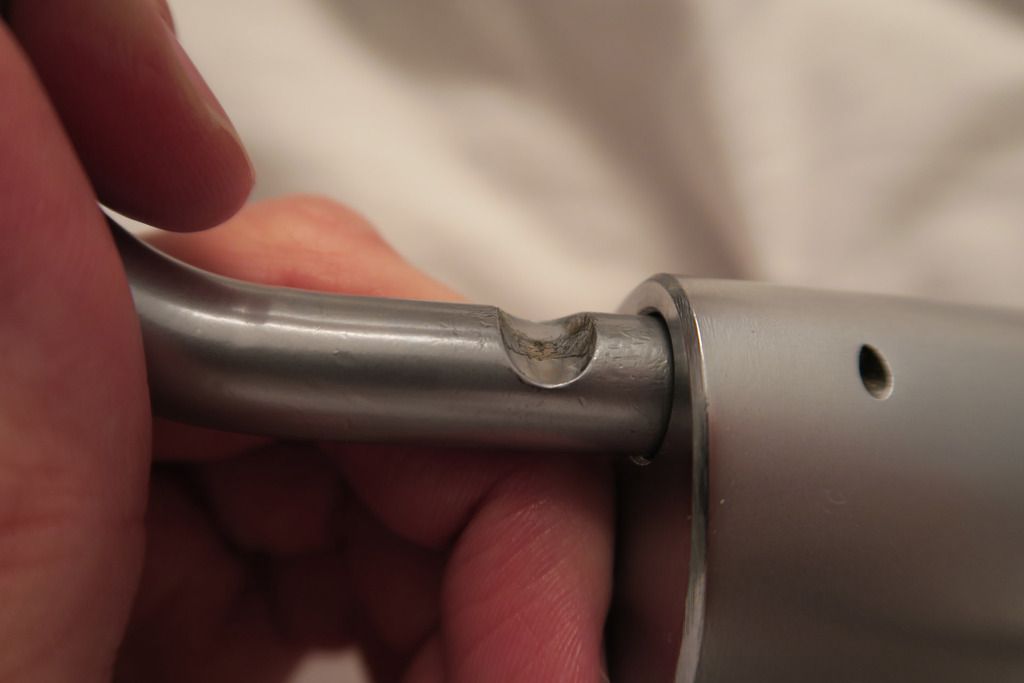
I'm unreasonably fascinated with this keyhole door thingy; I assume it's for weather protection. It's a little plate mounted with the bolt on the right, and swivels around in a 360 degree arc to get out of the way of the keyhole. When it lines up with the lock, it makes a satisfying click that makes me thing the plate that contacts the lock is possibly magnetic:
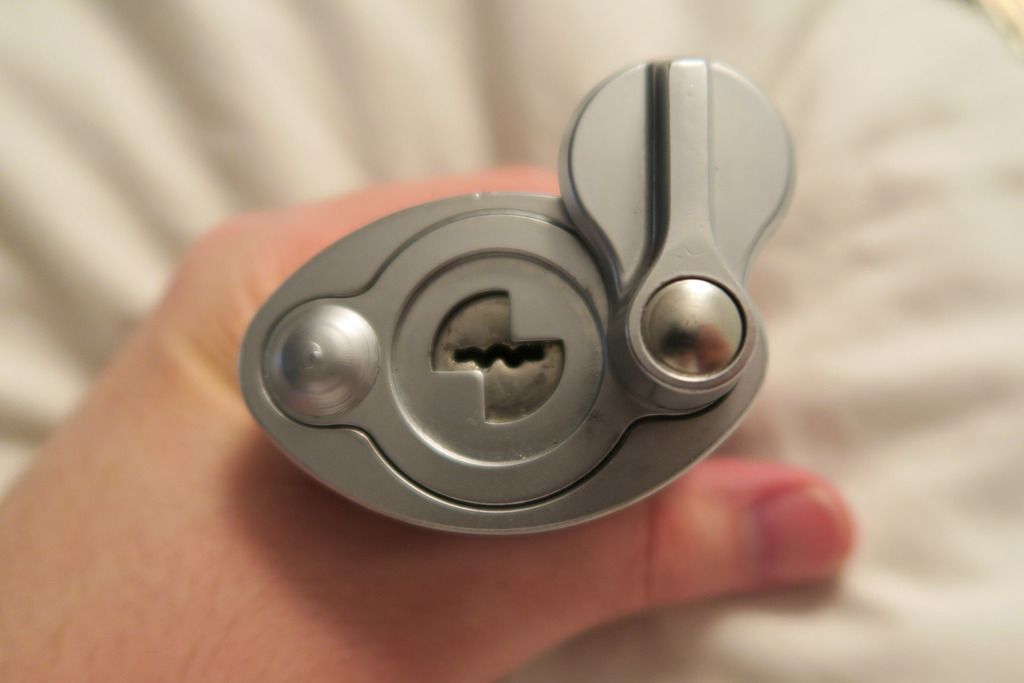
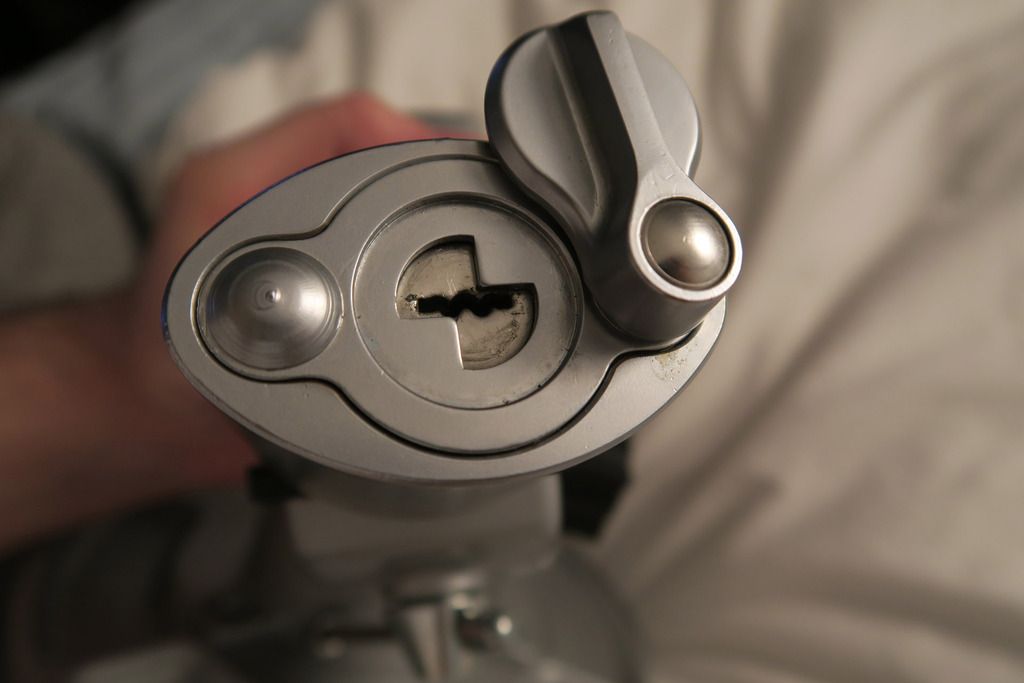
Swivelled out of the way, showing the keyway. Ingersolls use, believe it or not, a lever locking system. It's 10 levers and has bitting on both sides of the key, 5 levers on each side, and the key can be inserted ONLY one way so that *is* 10 unique levers
Liking that anti drill / cylinder retaining plate:
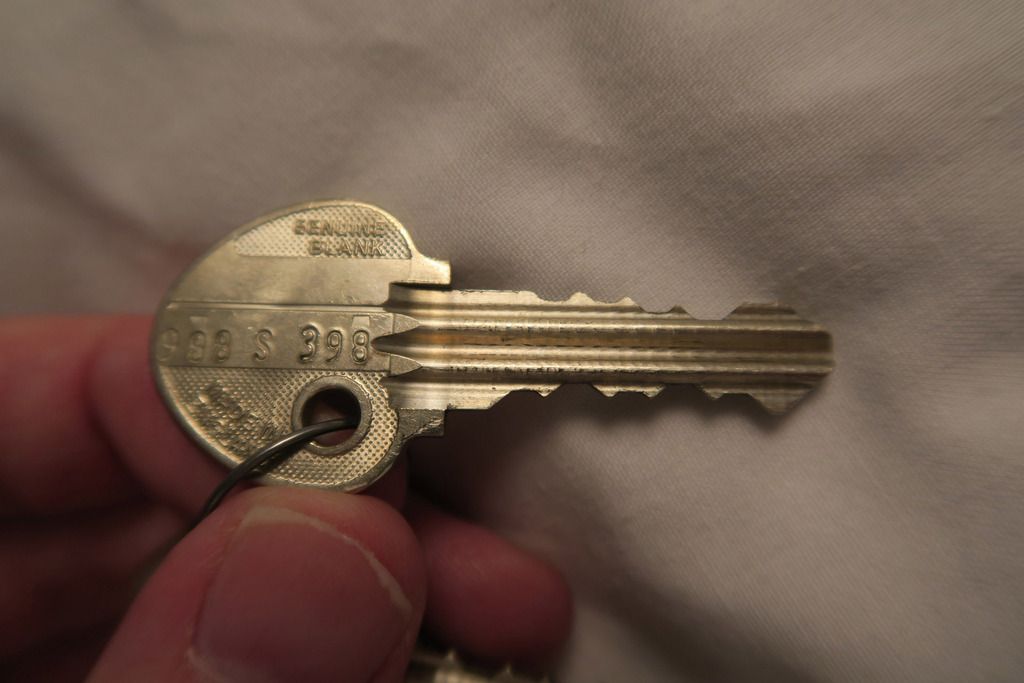
The keys, which are a work of art IMO. That profile is just something else!
Key in lock, locked position:
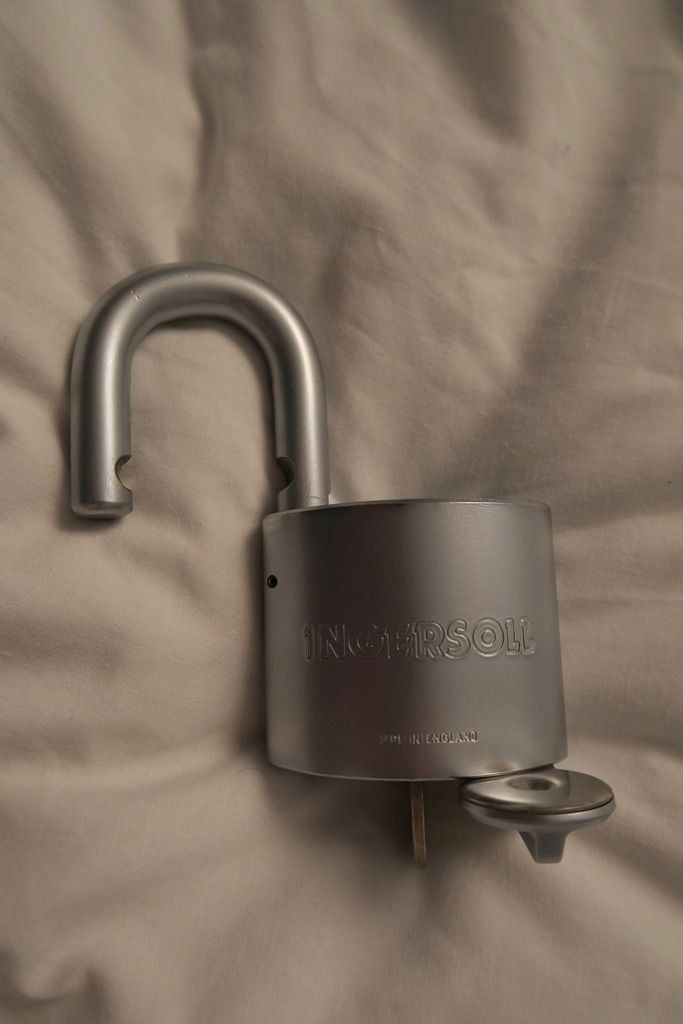
Unlocked position. Note that both this and the 362 are dead core locks; there is no spring tension on the keyway and the cylinder sits open once unlocked. They're also both key retaining:
Shackle open:
Ball bearing locking, obviously:
With this light applied, you can see the screw at the bottom of the open-side shackle hole:
I unscrewed it, aaaand... nada. Couldn't get the bottom plate to come off. I couldn't find any other grub screws or set screws etc in any of the other various drainage holes so I took to Google - apparently there is another screw in the OTHER shackle hole, in other words, the shackle must be removed. But this isn't a removable shackle lock... Remember in one of the early photos when I said "This looks like a grub screw, but it isn't"? I took a close look at it, and it's not a screw - it looks like a tightly-wound piece of metal shoved into the small hole. I found out that it's actually what's called a "roll pin", and you need tools to remove it (such as a punch) and I assume once you do, it'll be nigh-impossible to put it back in. Thus, not wanting to break my lock, I'm afraid that a breakdown won't be possible. Unless someone can give me tips for removing, and replacing, the roll pin!
Moving on, here's a couple more pics of that weather door and keyway:
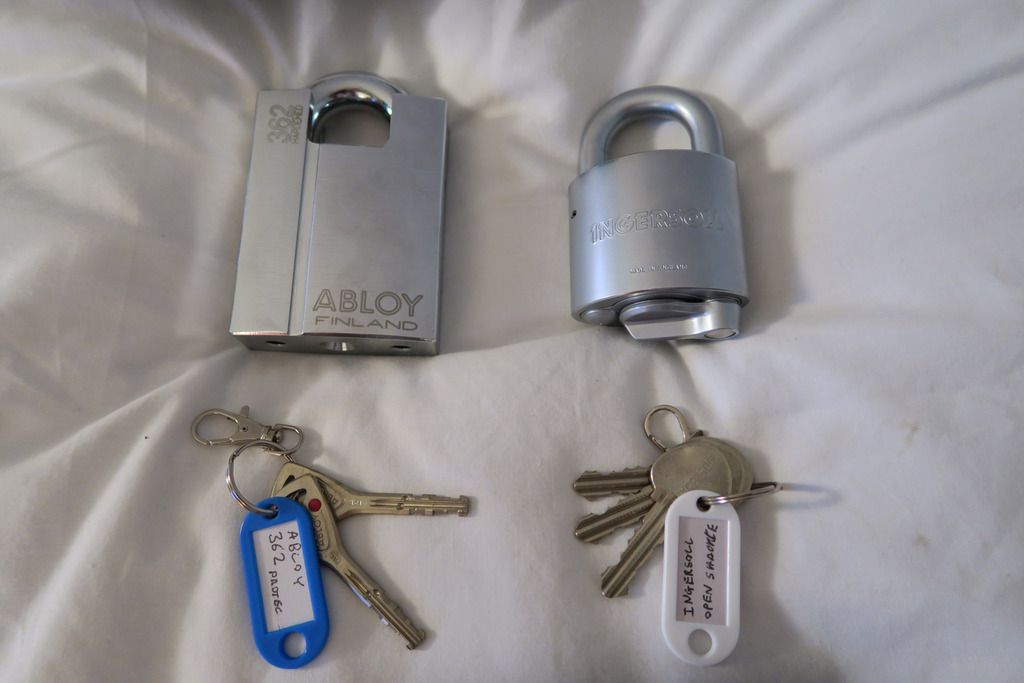
Couple of final pics of them both together
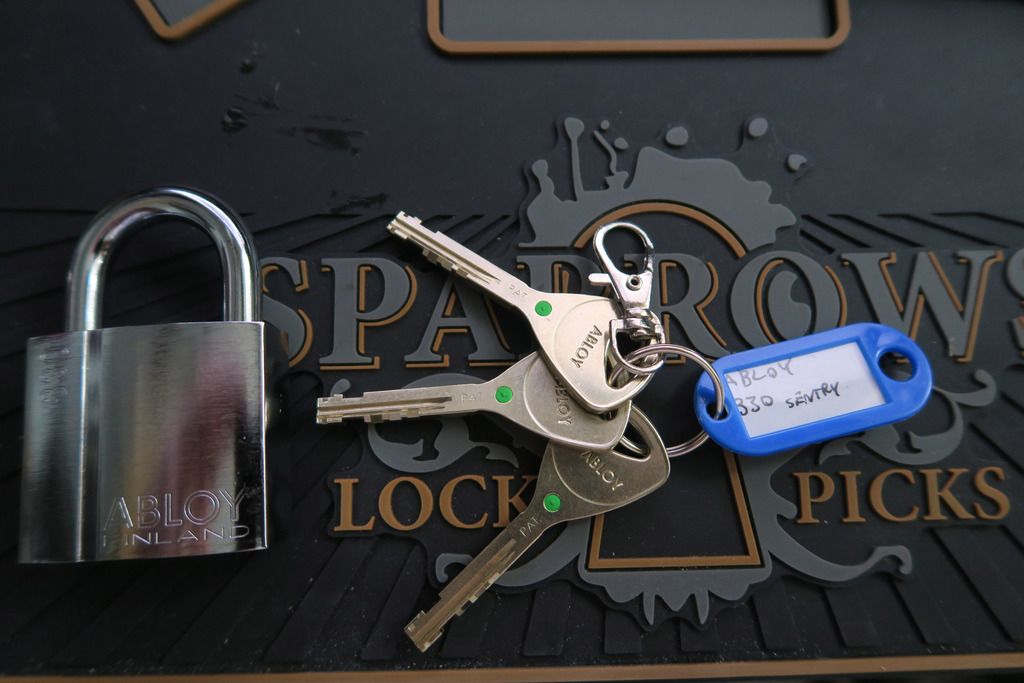
Custom setup for key rings - a strong main ring, with a lobster clasp and tag named with the lock. I'm going to colour-code the tags, starting with:
White - Ingersoll
Blue - Abloy
Not decided on the rest yet, but I also have Black, Red, and Green
---
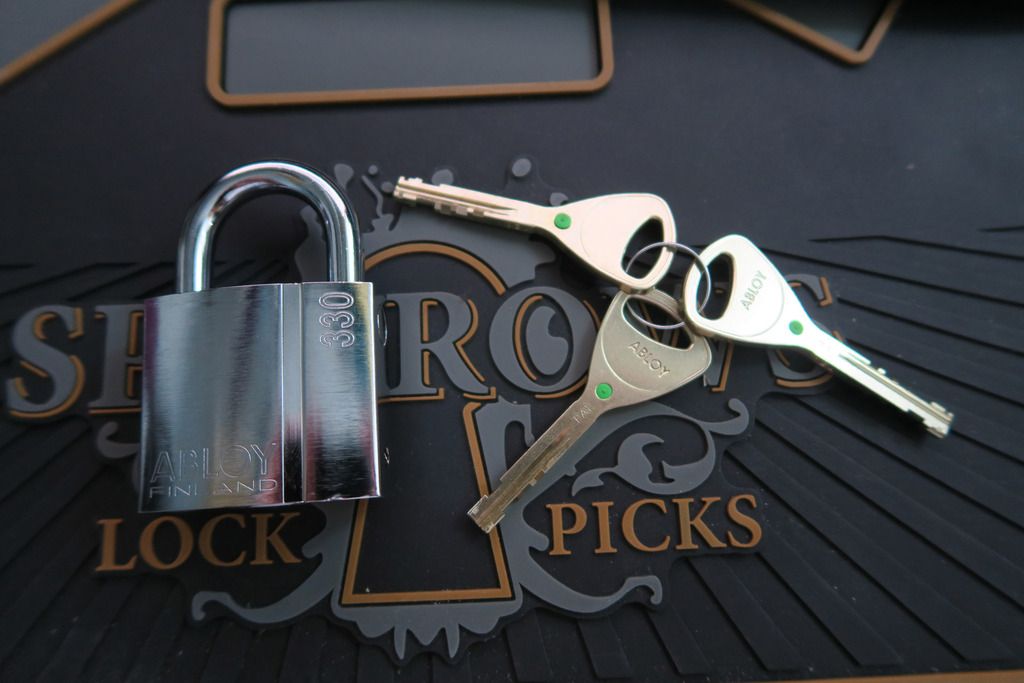
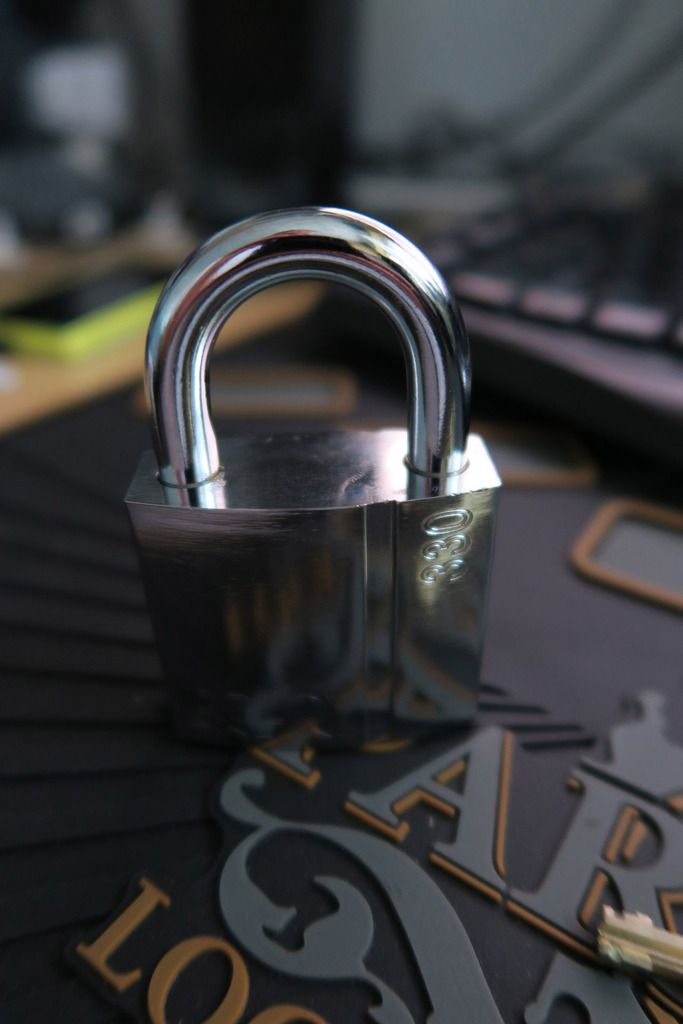
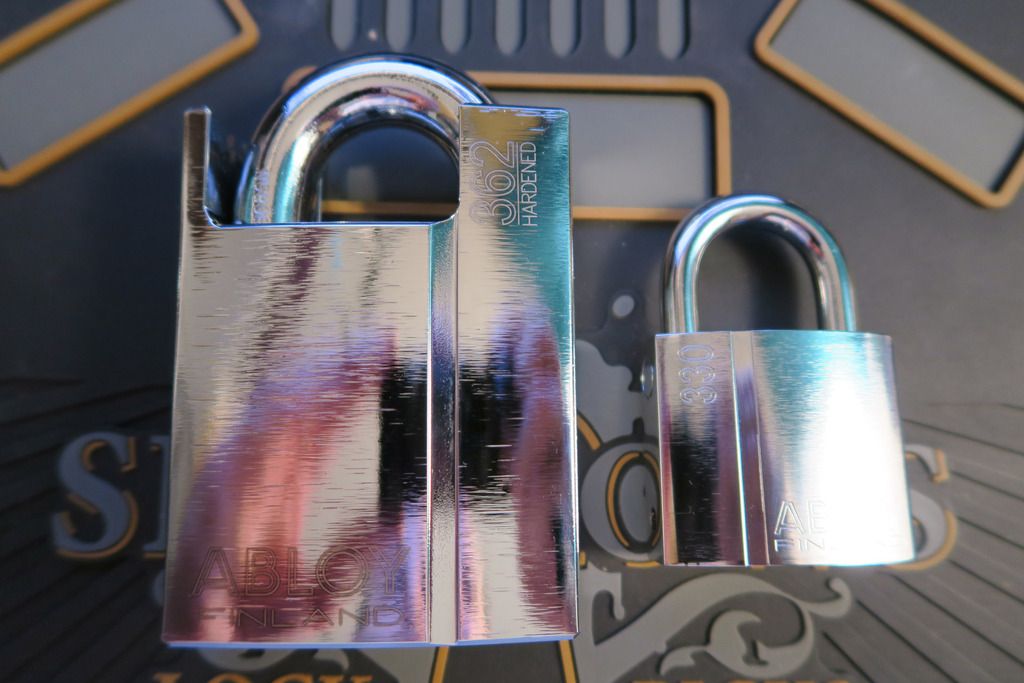
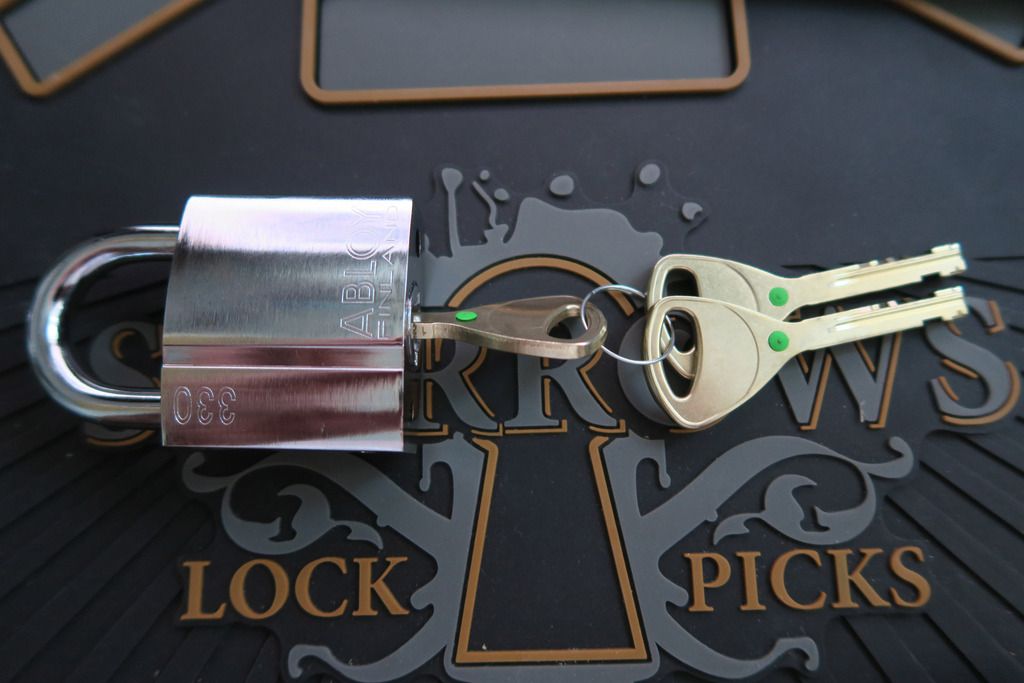
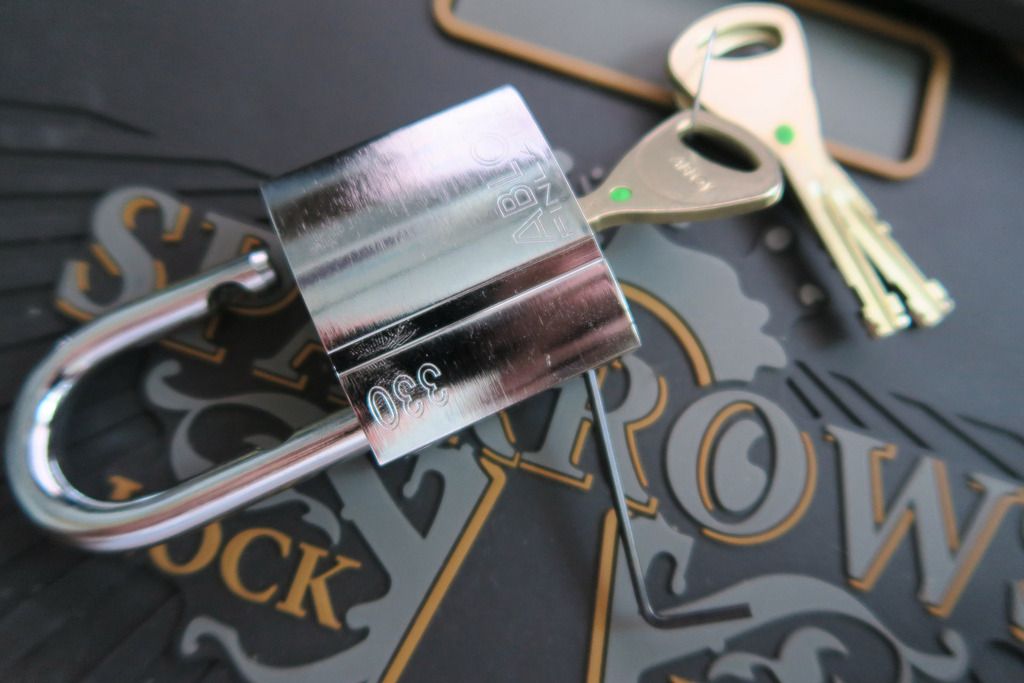
Today a cute little Abloy 330 turned up in the post. Gotta love eBay.
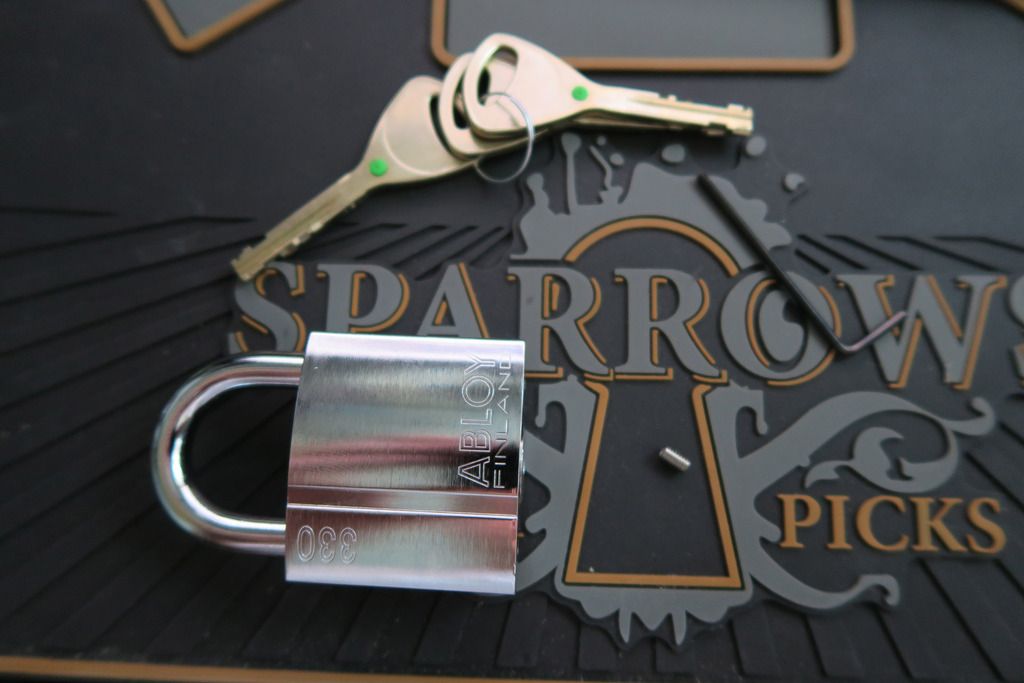
Putting it next to the 330, it's really tiny by comparison - the fact that it still uses an Abloy core (Sentry rather than Protec, but I can put a Protec in if I wanted to...) is just hilarious to me.
I did manage to strip the core out as well, and I have a couple of tips to share for people who wish to do likewise as there are a couple of things that are non-obvious at first.
Next to the 362. Adorable!
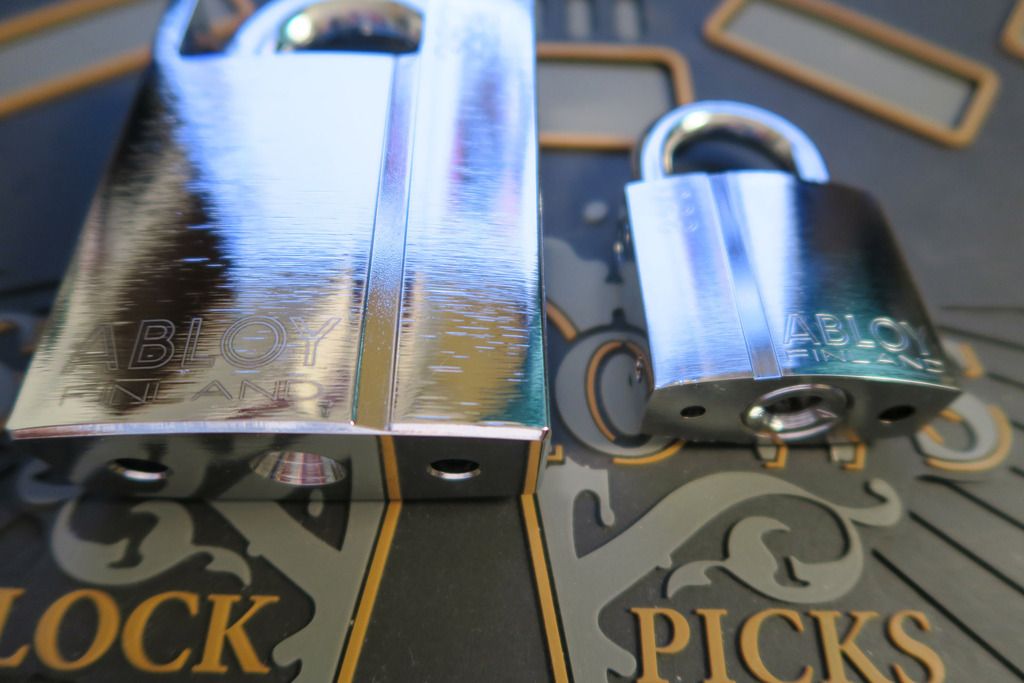
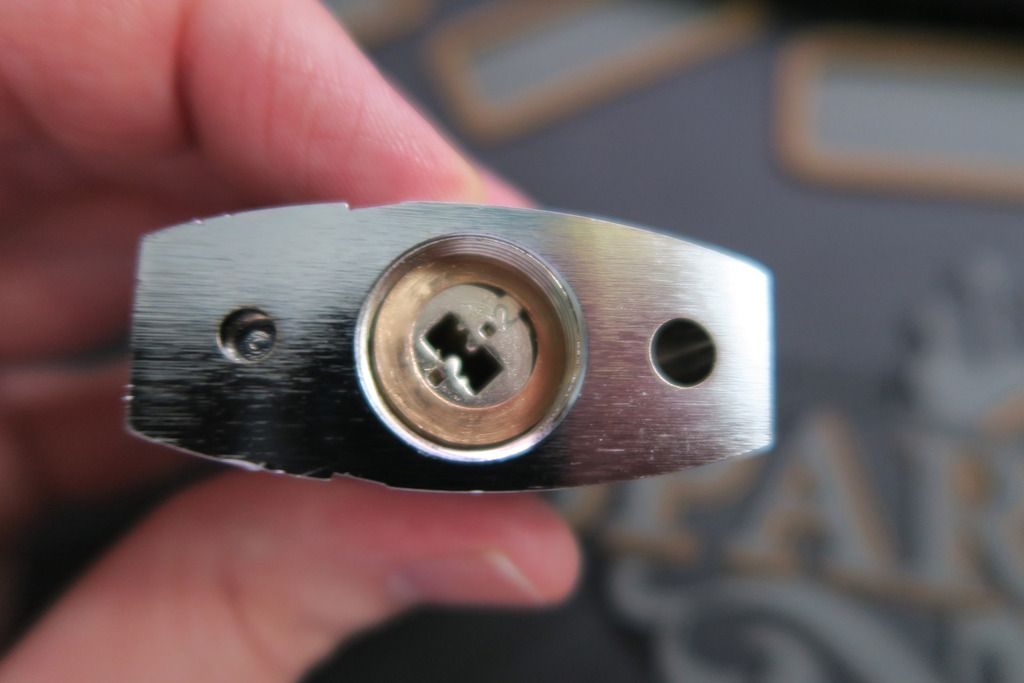
You can tell that it's a Sentry core because of the squared-off, egg-timer shaped keyway rather than the rounded, "number 8 that got opened up in the middle" curvy Protec keyway:
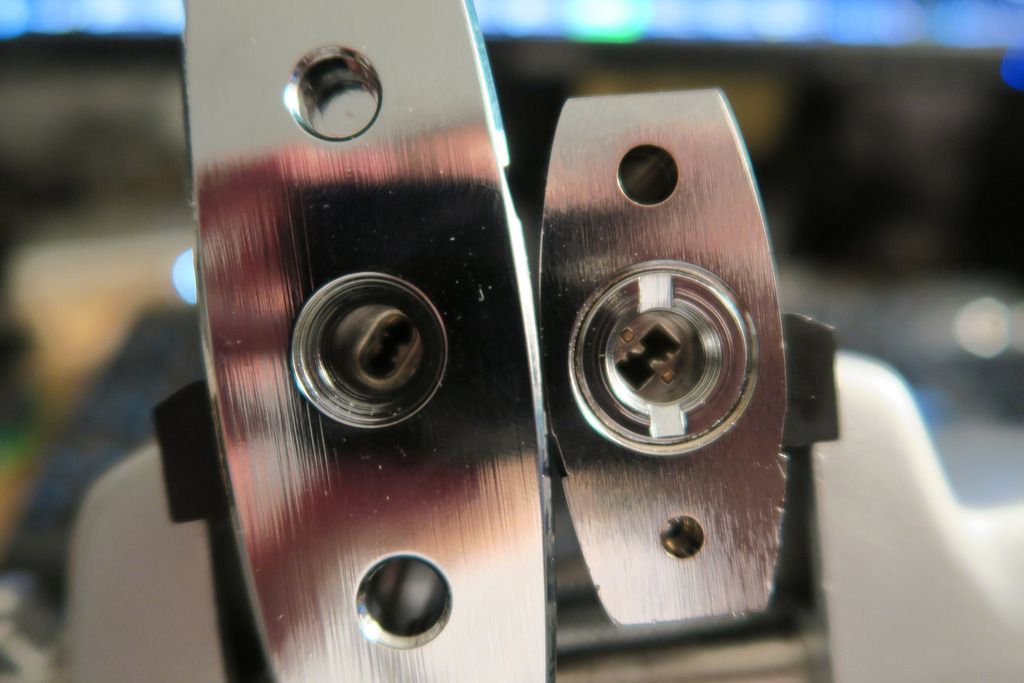
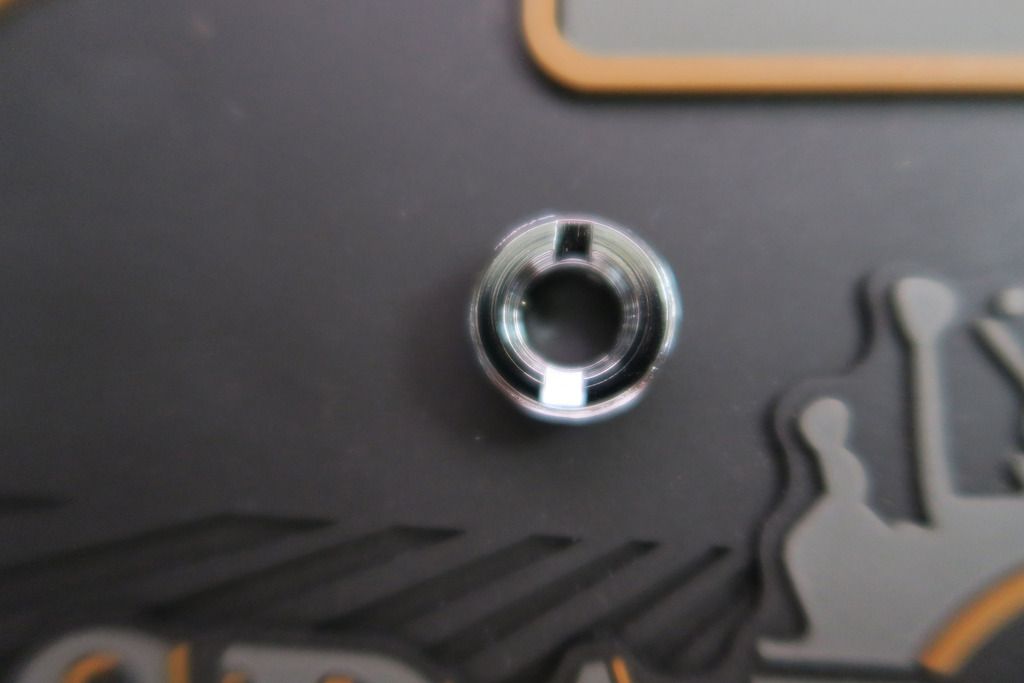
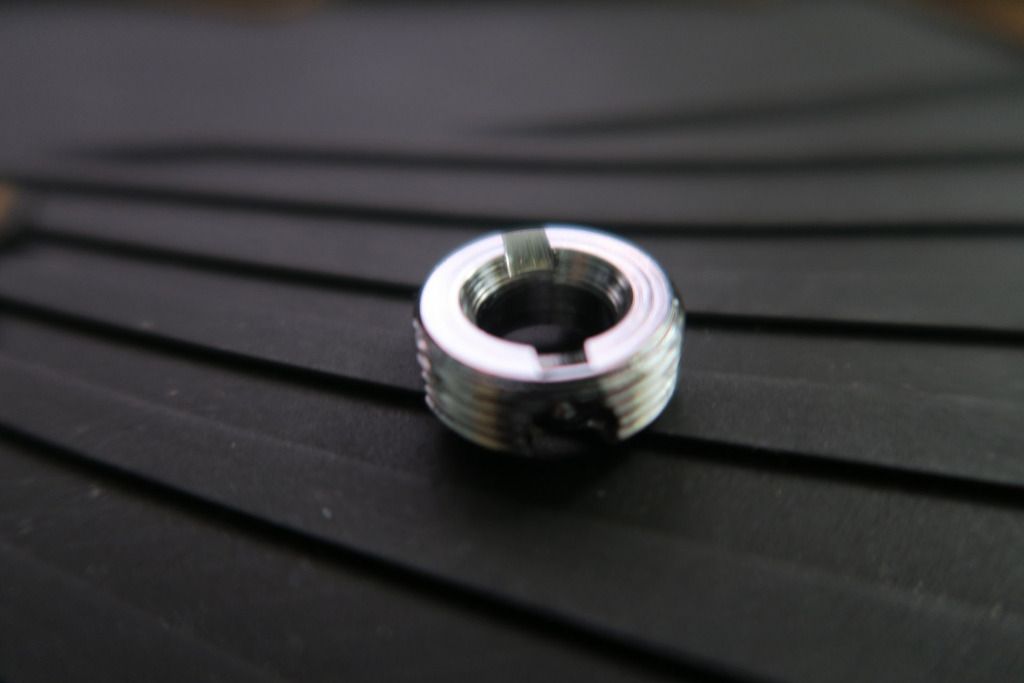
Note how the armoured core protecting plug has two little slots in it? Take note of that for later:

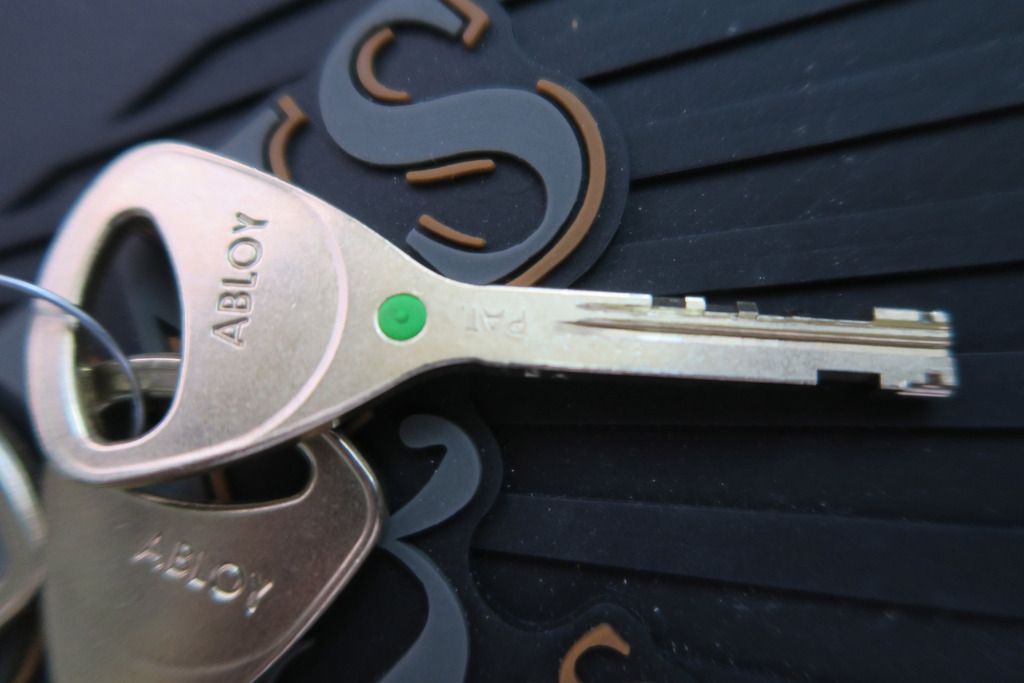
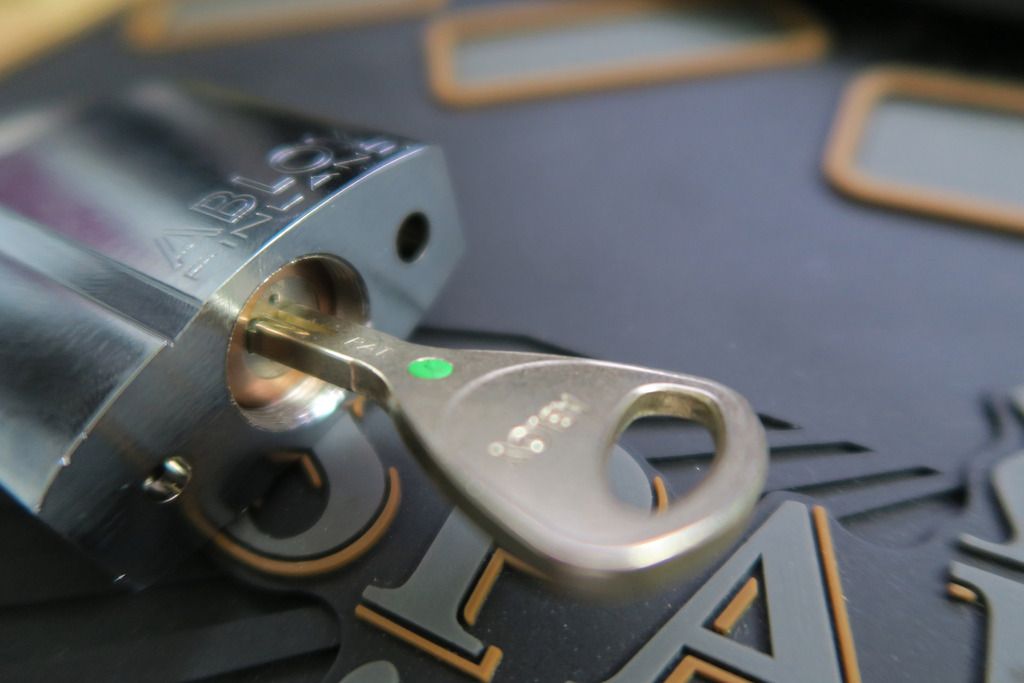
The key! It's chunkier than the Protec, and lacks the active element or dimple cuts. The bitting itself seems simpler too, as there is bitting on only one side:
Key in the lock:
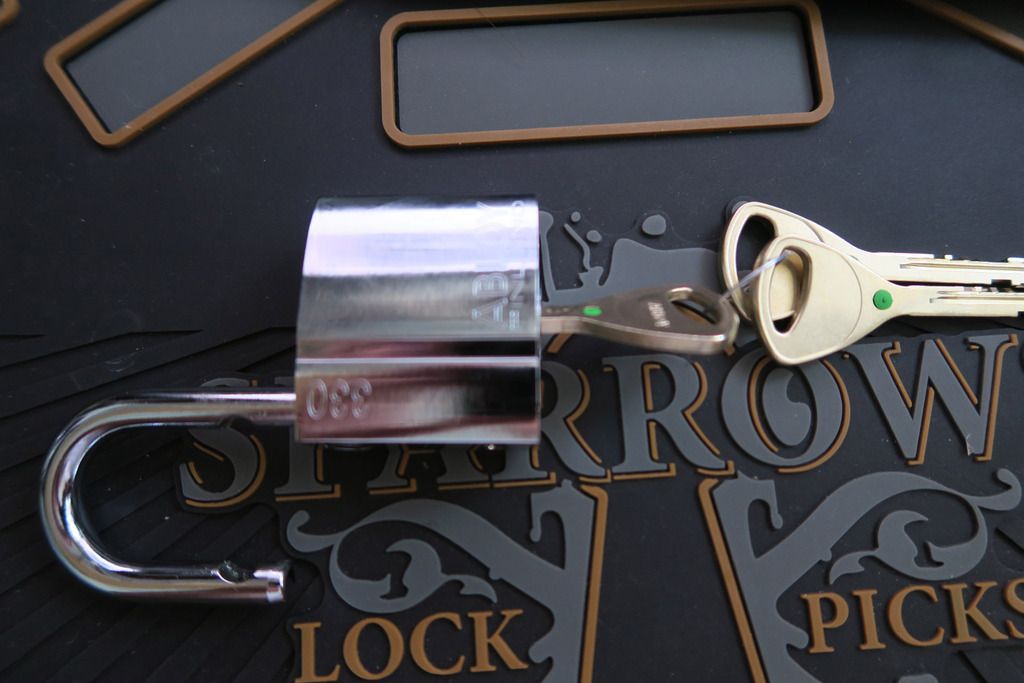
Unlocked, shackle open:

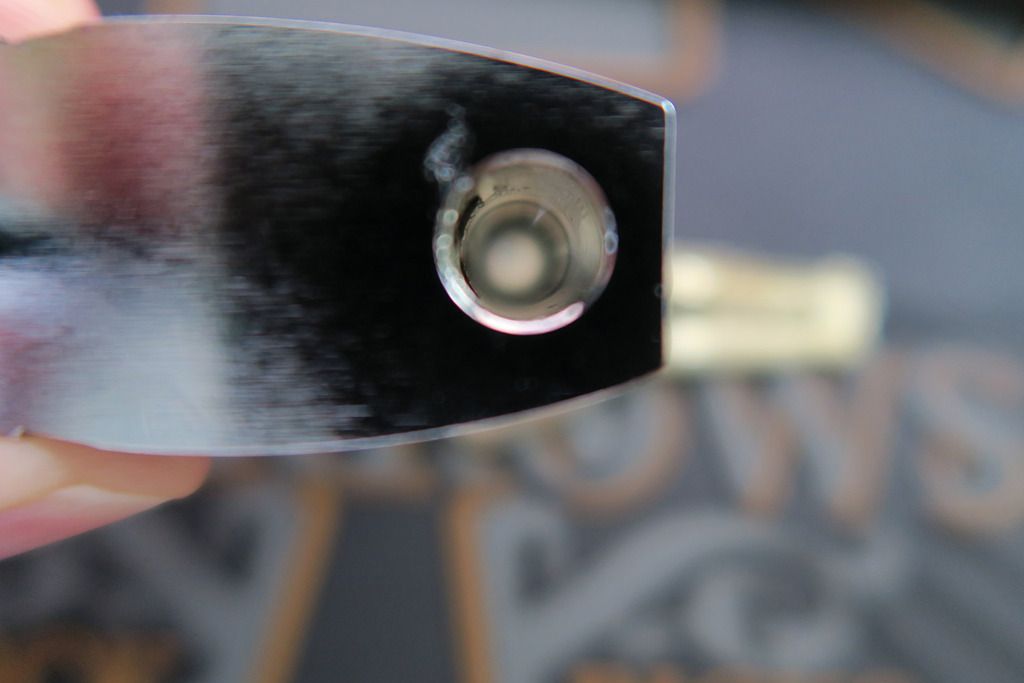
Slightly blurry, but this is the view down the shackle hole. Nothing down there:
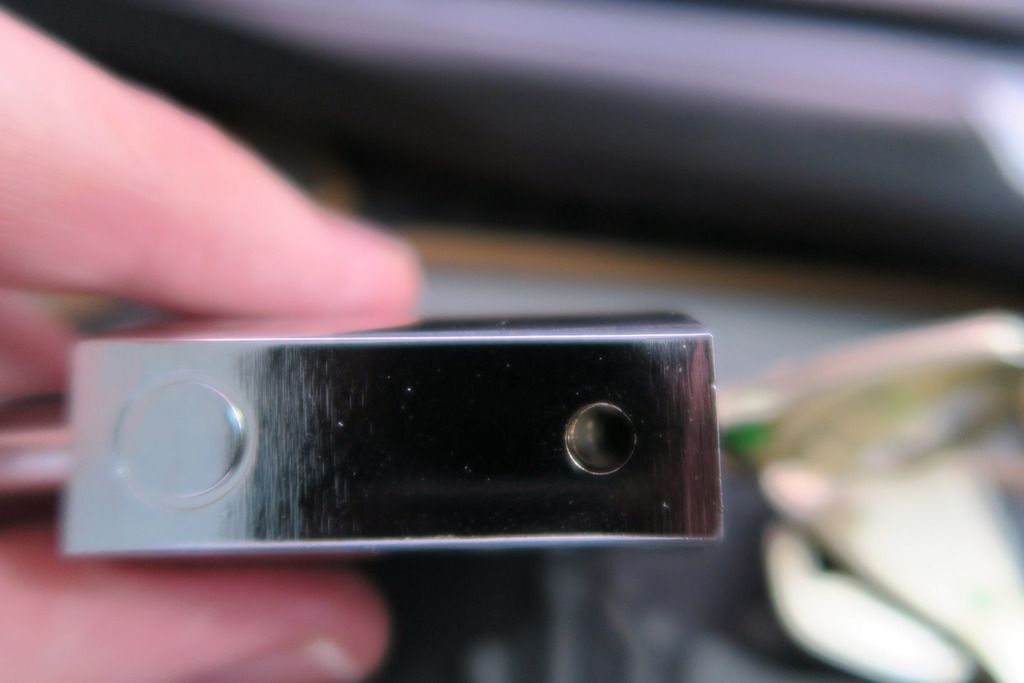
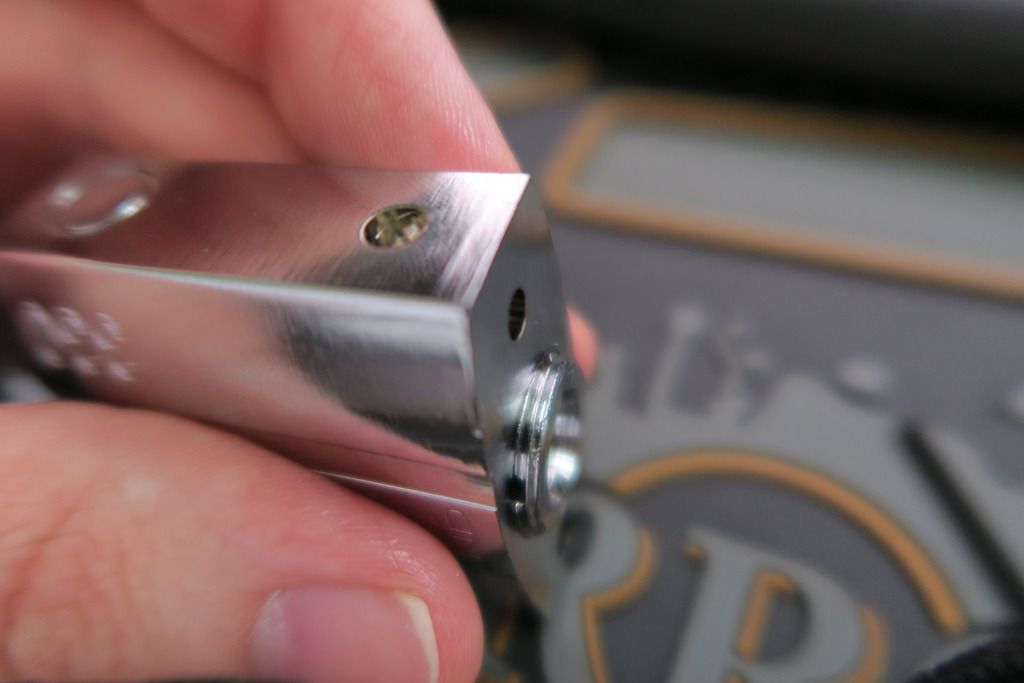
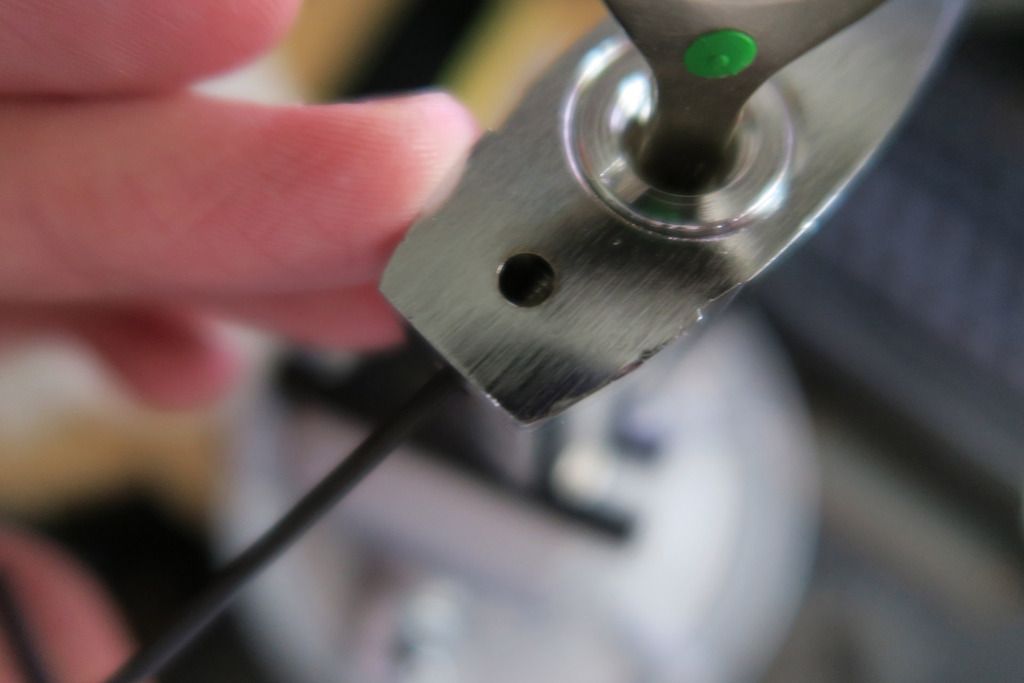
On the shackle-open side is this hole. When the shackle is closed, it blocks this hole but with the shackle removed you can see the grub screw that holds the core protector in. You'll need a hex key for this (sorry for the terrible photo):
Here you can see the hex key removing the screw:
Tiny screw!

At this point I started pulling on the key and shaking the lock up and down trying to free the core. Well don't do that! After some research I found that you actually need to unscrew this cap, similar to the 362. Start it off by using the bow of the key, which fits across to both slots in the plug, and then use your fingers to take it the rest of the way:
With the core protector removed, you can now see another of those brass rings (same as the 362), and the core beyond that. I started to remove this at first, saw loose disks coming out and panicked a bit - but don't! Turns out actually there is only 1 loose disk, which is a sort of ward-guide for the key, and the disk pack for the rest of the lock is contained in it's own shell:
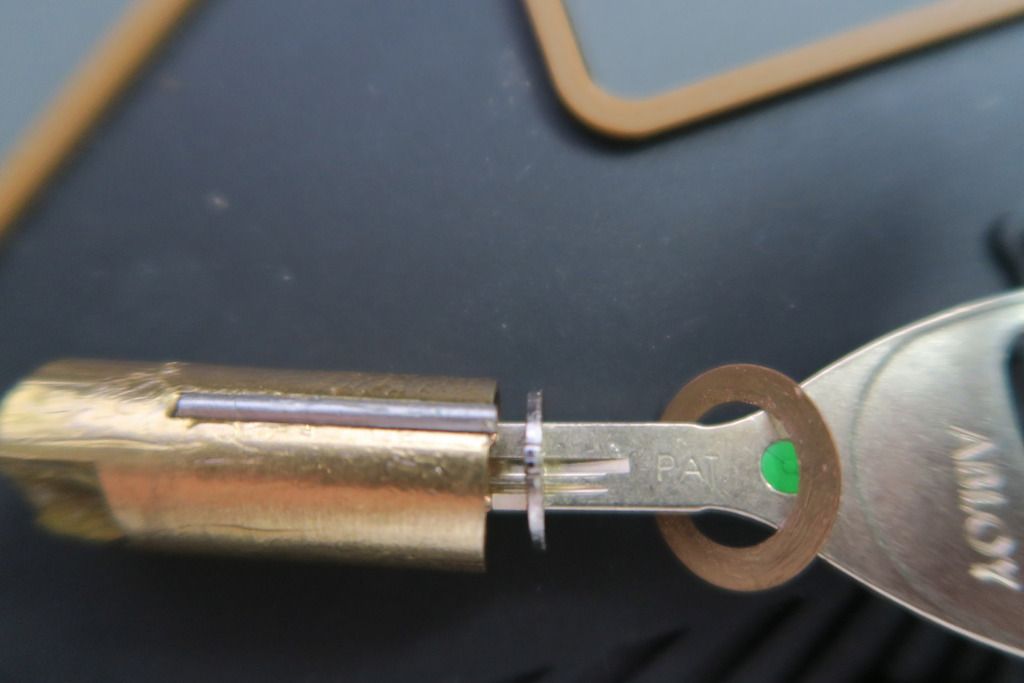
To remove the disk pack, I recommend pushing the key in as normal:
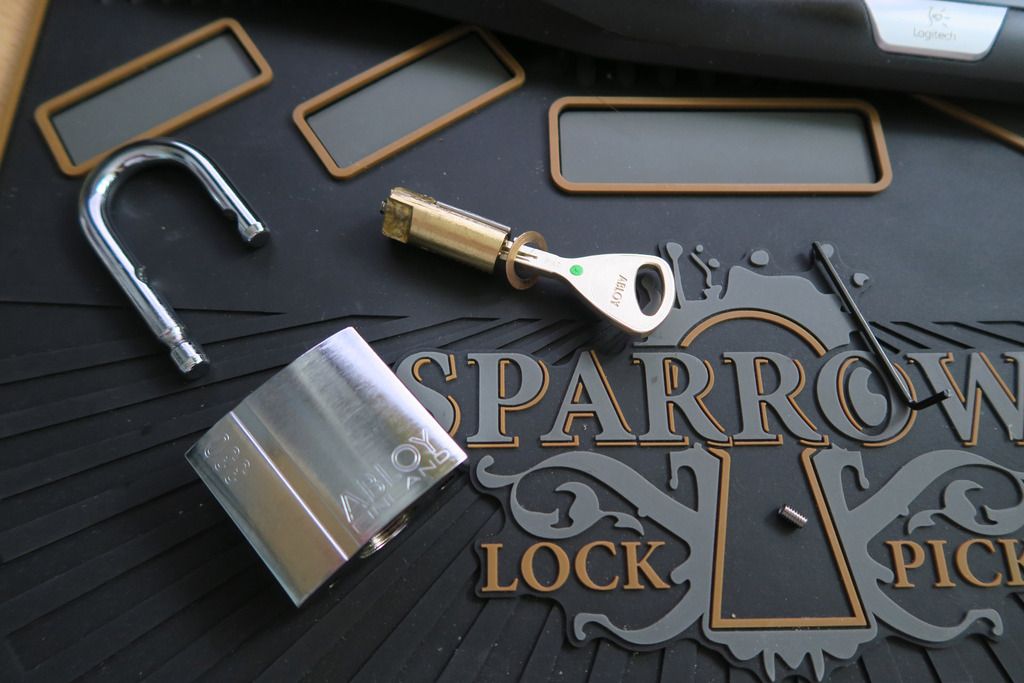
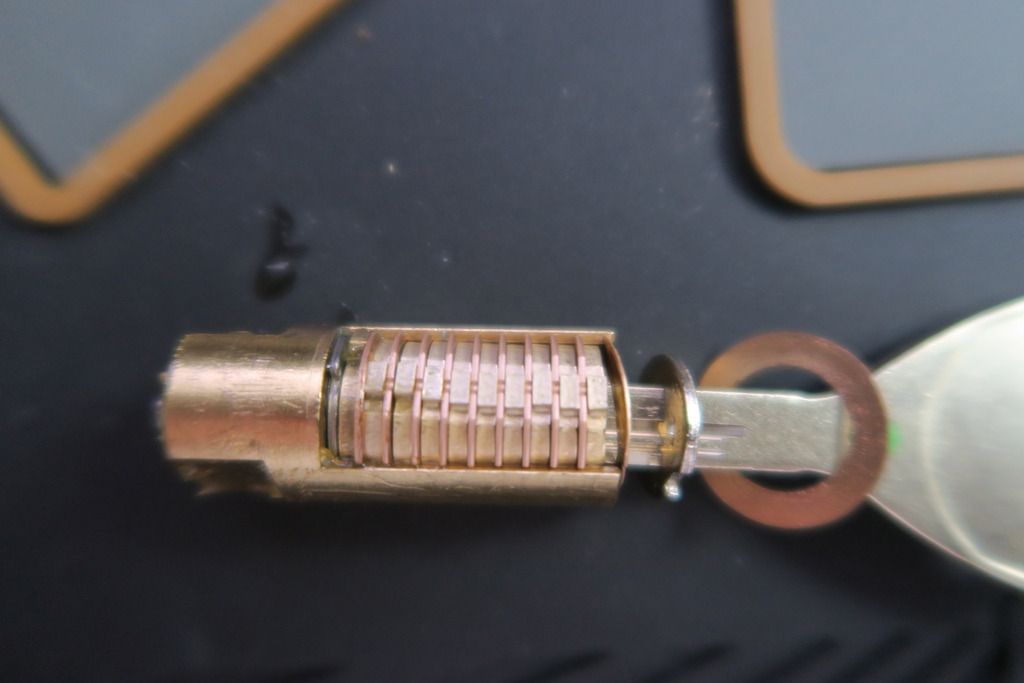
Then twist it around until it frees, and pull it out. Here's all the "bits" - shackle, lock body, key, grub screw and the cylinder attached to the key:
This sidebar fits into a slot in the lock body. Make sure you line them up properly while re-assembling!
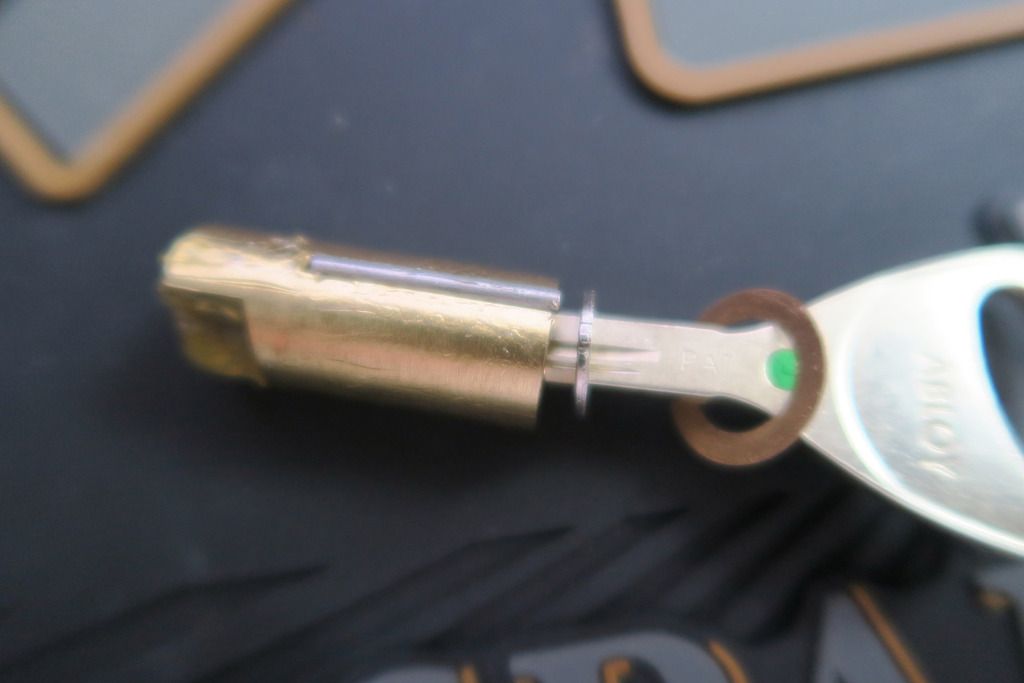
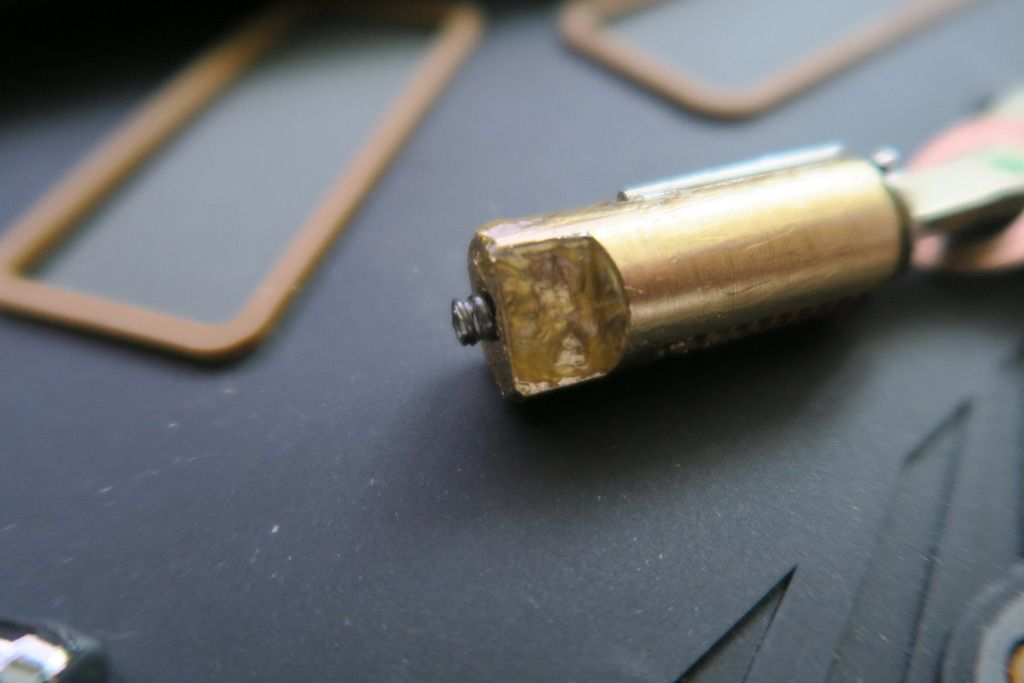
Little screw thingy that fits into the end of the lock. From what I can tell, the sides of the cylinder are also the BB recess points (or they may actuate a cam further in; it's hard to tell and I didn't want to try to pull anything out cos those BBs are hard to re-fit!):
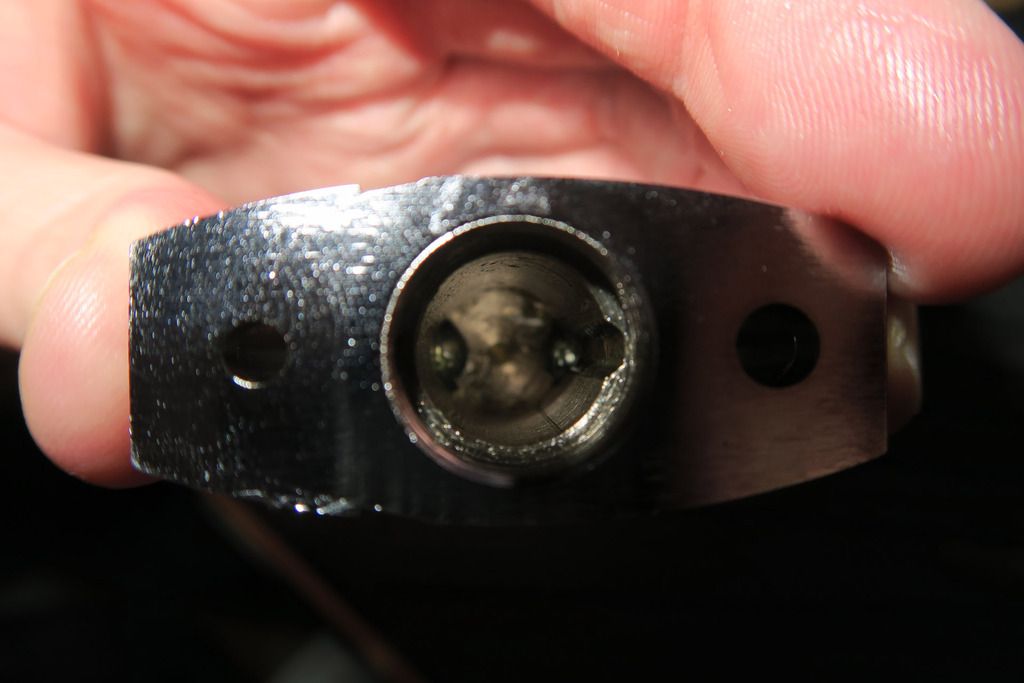
Looking down the empty cylinder slot in the lock body, we can see the BBs at the end:
Shackle, loose:

There's that ward guide and copper ring:
There's the disks! I didn't remove them entirely in case I got the order mixed up. Plus these locks are very well lubed and I keep losing lube to my fingers, tools and the mat, with no new lube to replace it with:
To re-fit, simply slide the whole pack, with the key, back into the body and jiggle around until the key comes free. Don't forget to line up that sidebar with the slot on the side!:

TAKE CAREFUL NOTE HERE! When re-fitting the plug, you may find that the end ring and copper ring come out with your key. When you re-fit them, make sure the edge of the silver ward ring has the number "02" (or whatever) facing OUTWARDS, towards the keyhole. Don't make my mistake and fit it backwards, put the whole thing back together and find that the key won't pass through the warding cos it's reversed

Screw the outer plug back in and test the lock before you put the grub screw back in!

Screwing the grub screw back in. Little note here - when I first removed this screw, it was in EXTREMELY tightly, and the key still rotated smoothly in the cylinder. After I'd removed and replaced it for the first time, I screwed it back in tightly but found that the key was extremely stiff and would hardly turn the cylinder. I found that loosening the screw slightly eased up the tension on the core and allowed it to work normally. Not sure how it was working originally though (i.e. why it was so tight but the key was still smooth). In any case, if you reinstall the cylinder and find the key very stiff, try loosening the grub screw slightly.
LOCK BLOOD! Seriously though, I really need to track down whatever-the-hell lube it is they use on these BBs, actuators, etc etc inside the lock so I can re-lube them before reassembly. If anyone knows what this stuff is please comment or shoot me a PM!!
Tagged up and ready to go.. To the collection
Just my lil collection
Ok so first, here's the safe that I currently keep them all in:

It's getting a little cramped!!
Safe door open:

A big pile of Euro cylinders These are cheapie ones which I got for about £5 to £10 each from a local hardware place, spanning smaller sizes (30/30) up to larger sizes. I bought them primarily to match against some I currently have installed as I've been trying to figure out how they are measured (conflicting info on the Internet) but will be re-purposing them as practice locks for picking. I found another one later too, that I forgot to include in this pic:

Close-up of said cylinders. Some Yale and some mostly unbranded:

Three fancy ones that I bought for another project (helping family choose new door locks) - an Abloy Protec2, a CISA Astral S and an Avocet ABS. None of these will be needed now but will make some nice collectibles and "emergency locks"!:

Close-up of the Cisa Astral S box:

Out of it's packaging:

Laid out next to the keys and the security card:

Keyway - look at that warding!:

The key itself. Blanked the number on the key out as I'm not sure if that's a security issue. Crazy number of grooves (or maybe that's standard for these dimple keys? Not sure):

Key in the lock:

Onto the Avocet ABS. Box:

Side of the box. It's BS 3-star approved (the highest rating) as well as "Sold Secure" and "Secure by design" (not sure how legit/important those two are, but British Standard is the.. well... standard for most UK stuff so I trust that rating):

Some features from the other side of the box:

The cylinder, keys and security card. Notice the cute little rubber sleeves they put on every key! You can see the sacrificial front part of the cylinder too, which helps to protect against snapping:

The key bitting. Some kind of crazy pin-in-pin stuff and a magnetic pin too:

Key bitting close up. I have another of these locks in use elsewhere and can confirm that the location of the magnetic pin does move from lock to lock (was in the end in the other lock so thought maybe it was always in the same place, which seemed like a security flaw):

The cylinder itself. Nice of them to mark the external section:

The lock with the key in it:

My pride and joy - the Abloy Protec2. Cost a pretty penny and they're hard to track down but boy is it a beautiful lock:

The bitting, and the active element that in my understanding makes up most of the change from the original Protec:

The external face. It's the hardened variety (got a bit scared after watching that one YouTube video where they use a dedicated Protec drill bit to drill the "regular" cylinder out in a couple of seconds!):

Side on. Notice how the two halves look different? The "wobbly" textured half (right hand side in this pic) is the hardened half. Looks like they only harden 1/2 of the double cylinder 'cos the other side doesn't say Hard on it. Seems a bit cheapskate for a £160 cylinder!!:

Key in lock:

Here's that one random cheapie Euro cylinder that I forgot to photograph earlier. Inserted here cos I was about to take all my locks out of the safe and then found this one!:

On to padlocks! A big bunch of Master 3s that I bought for picking (not having much luck, they all feel "gritty" and tight, not sure if that's my bad skill or just cos they are crappy locks). Also a bigger Master (No.5?), a brass one (I think 170 or something like that? Apparently it has security pins in it) and another, more secure one (Not sure of the model, I've been searching on Masterlock's site but haven't come across that exact one). Oh, turns out I do have some more Masters too but didn't see them until later, D'oh!:

Most of my other locks, a random assortment!:

Those random locks, zoomed in. In this quarter, we have (from left to right):
Random laminated padlock, "Roebuck" solid brass lock with cruciform key (cross shaped - pretty cool looking), cheap disk lock, Tri-Circle cheap Chinese lock (you get a lot of those here in the UK!), An interesting cupboard type lock that I can't remember where I got it, seems to use some kind of wafer keys, and a "Sterling" disk lock that is 4-wheel combination operated:

On to the top right corner of the pile

Close up of that lovely Anchor Las:

Bottom right: Random "Guard" laminated padlock, Master Lever operated lock (that's one of the Masters I missed the first time), and another brass Master lock (that's the other one!):

These aren't really locks in the traditional sense... They're puzzle locks

Everything in one big pile. Yeesh!:

-------
Decided to take apart my lock safe lock
I've removed the cover from a couple of safes that I own before, however I (currently) don't know a great deal about safe locks which means two things:
1. My commentary probably won't be especially useful (as I can only guess as which part does what
2. I didn't want to fully disassemble the lock in case I couldn't figure out how to put it back together again - it is a "lock in use", even a fairly unimportant use.
That said, let's take a look!
By the way, this safe model is a Chubbsafes Air 10K. You can currently buy them from just over £70 in the UK - check out safe dot co dot uk (that's where I got mine).
Here's the front, unlocked, with the keys in the door. It seems to use a lever lock system (we'll see more of that in a minute), which has bitting on both sides:

Here's the inside of the door. You can see that the door material itself is quite thin (4mm according to the website) and the lock mechanism is held inside this box which is made of even thinner material, similar to cheap petty cash boxes. It's fixed to the wall of the safe by means of 4 screw poles welded to the door. Unfortunately in my safe, the holes drilled in the inner lock-containing-box and the 4 screw poles are mismatched, which meant that the box was fitted on with some force, and took a lot of trouble to fit back on when reassembly was complete. You can also see the two locking bolts in this view, which look reasonable. However their weakness IMO is the way that they are fastened to the lock, which we'll see later:

After removing the outer containing box, this is what you see. I found this quite unusual, as other safes that I have partially disassembled have put the locking levers right here, but on this Chubb safe they are hidden within their own lock unit rather than being completely loose. You can see that the two locking bolts are attached to a single piece of metal, which is attached with those two black screws on the middle-right of the picture to the locking mechanism. IMO that's the weak point of this lock as drilling through where the two screws are would likely cause the locking bolts to come loose and be easy to pull away with a wire...
The lock unit itself is screwed into the safe with the four bolts near the mid top and bottom of the picture. The bolts actually screw into a plate which is welded to the door, not into the door itself. I assume this provides a degree of simple drilling protection as well as giving the lock unit something to screw into.

Here you can see a side profile of the lock, including all the levers:

Here's that shot from earlier, but with the bolts fully extended. You can better see how the bolts connect to the lock unit, here.

Side view of the lock from the bolt edge:

Here I've removed the lock unit from the safe. You can see again how the bolts attach to the lock unit. The two rectangular pieces of metal at the top and bottom with empty screw holes in form the back of the lock unit as seen in previous pictures, whereas the main plate in the middle is usually hidden against the door. See those four silver Phillips screws? That's what holds the front of the unit to the back.

Another side view of those levers:

Bolts and connecting plate attaching to the locking unit with those two screws...

Here's the lock unit from the inside view again, with the cover removed. You can see how the main bolt driver thingy attaches to the rest of the unit. The silver plates in the middle are the levers where the keys go into. The key fits into the large exposed "wing" shape at the bottom of the lever plates, and the top section consists of all the warding which ensures that the correct key has been entered. As far as I can tell it's this part, not actually the area where the key enters, that represents the levers of this lock.

Closer view of the locking mechanism including the lever plates. Inside those plates are the key area (middle-bottom), the warding (middle-top) and the bolts (each corner) that hold the plates in place. They have long slots cut into them to allow the plates to move up and down as the key is turned. The big bolt at the top-left corner of the warding area is what passes through the gaps in the warding and allows the lock to open (or not). There's also a little spring connected to a plastic thingy (at the top) and little metal stub (at the bottom) in the middle-right section of the lever plates. This nearly tripped me up later as I didn't realise it was loose and the spring went pinging off! Luckily I was taking photos so was able to go back and figure out how to put it back together...

Lever plates removed, you can also see that loose spring and the metal stub it attaches to near the very bottom of the lock. Oops! With the levers removed, you can see a bit more of the mechanism. Unfortunately I didn't figure out much more than this (such as how the main bolt lever is actuated by the key levers or what's in the bottom part of the lock, such as those semi-exposed silver parts, as I was getting a bit worried about breaking something and decided to put it back together for now!

Close up of the levers and warding gate thingies:

Close up of the back half of the lock. Looks like there are even more levers hidden away back there! You can also see the black plastic plate that the spring attaches to better here. No idea what this is for, though.

Reassembling... Figured the little spring out luckily!

The back of the safe door - you can see the screw poles where the outer lock-holding tray screws in (four corners) and the small plate welded to the door with the screw holes in - that's where the lock screws in. Another easy place to attack if you wanted to drill and knew the measurements, I guess:

That's it for now! Sorry for the partial disassembly - if I get brave I might take the whole thing apart sometime. Hopefully this has been useful or at least interesting to some people
---
Oh! I got these new locks a couple of days back!
First up, is the stunning Abloy 362. Have to admit, when this arrived I just sat there grinning and unlocking/locking and pulling open and closing the shackle over and over. Anyone nearby would think I'd gone mad!


Focusing on the "362 Hardened" Stamp:

Focusing on "Boron" stamped into the shackle. Look at the size of that thing!


The bottom of the lock, and the keyway. It's a Protec, not a Protec2 unfortunately. Maybe some time I'll fit it with a Protec2 Ruby from SecuritySnobs

Look at the thickness on that closed shackle warding! Yowzers. The round plug in the middle with the slot shape in it is where you load the cylinder (more on that later):


Sorry for the bright orange:

Shackle open:

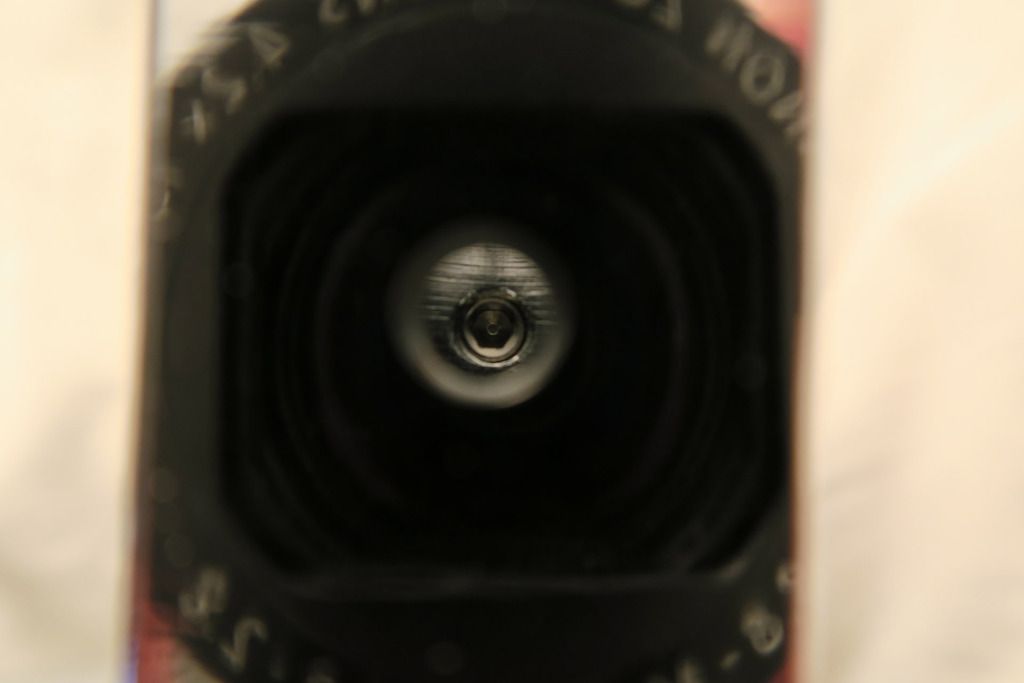
Looking down at the inside of the shackle hole:

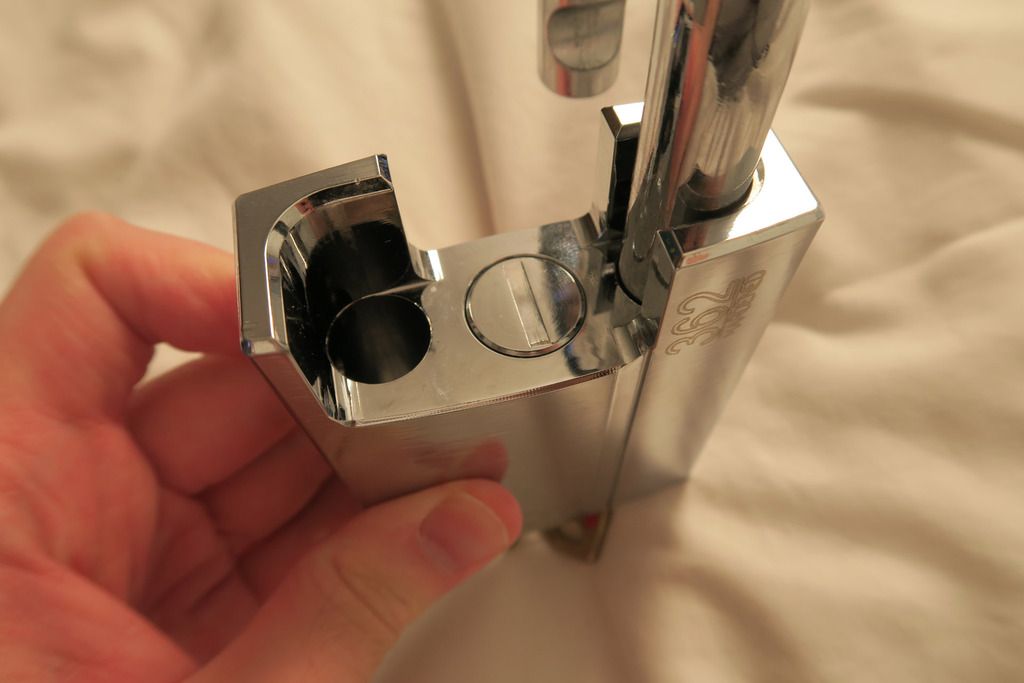
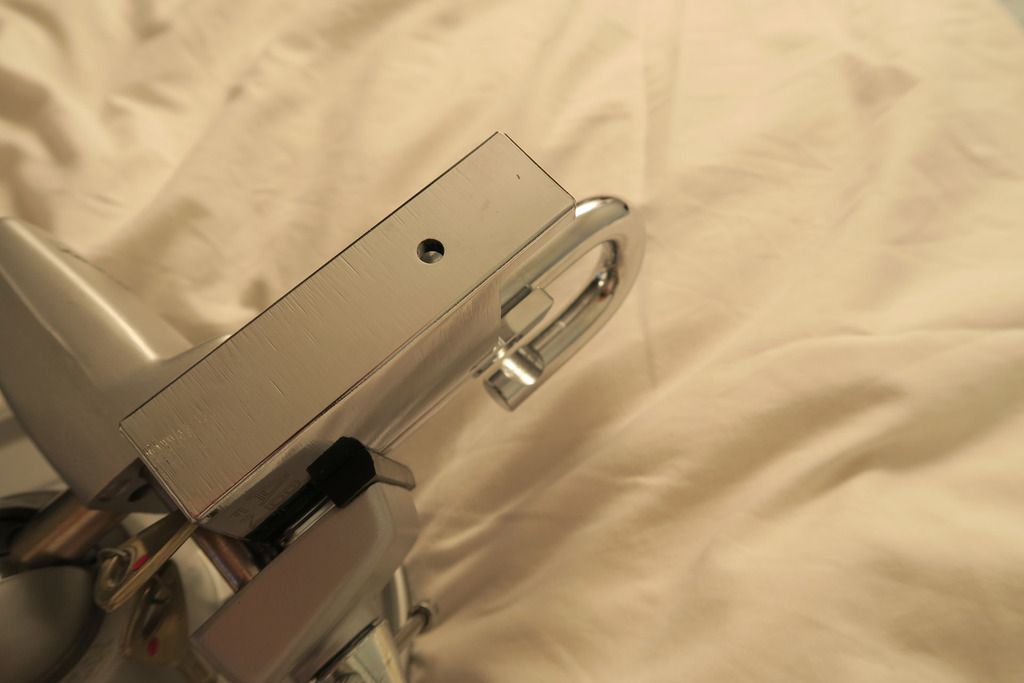
Clamped up in the vice. You see that little hole in the side? When the shackle is inserted, all you can see is the side of the shackle....

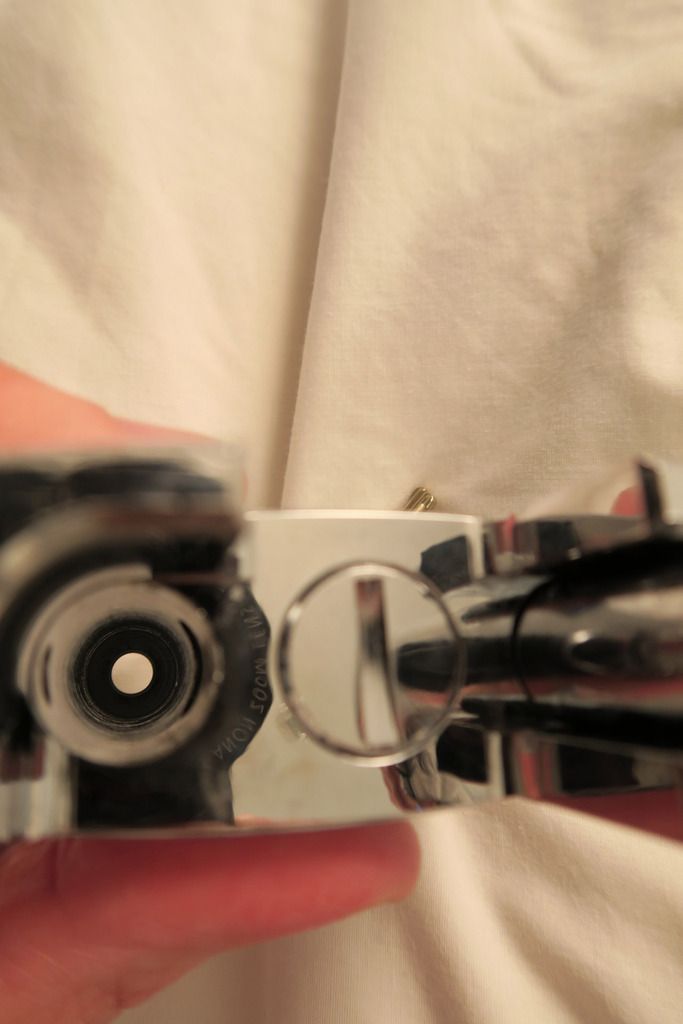
... But when it's removed, if you look through, you can see a hex grub screw on the other side of the shackle hole. This is how you unlock the middle plug:

A few more pretty shots


Unscrewing that little grub screw holding the centre plug. It's a LONG screw - it goes right through the plug and into the body at the other side!


You can then unscrew the plug with a key bow or coin:

Man, LOOK at that thing!

With the plug removed you can see down inside, there's a little copper disk (Not sure of it's purpose, maybe as some kind of washer to stop the next part rubbing on the bottom of the top plug). and the top of the ball locking plug:

Ball locking actuator thingy (I'm sure it has a proper name!) removed. Very greasy! Wish I had some more lube to re-lube it along with the ball bearings.. Not sure what I need for that though:

Ball bearings removed:

Dat shackle 8)

Bits n bobs - the top cap, retaining screw and ball bearing actuator:

Body of lock, sans shackle:

Looking down inside the lock. What you're looking at is the top of the Protec cylinder, the rectangular notch on the top interacts with the bottom of the ball bearing retaining doodad, turning it and causing the ball bearings to be able to fall into the notch on the doodad, out of the shackle notches, thus opening the lock:

However, this was as far as I was able to go. Why? On the last photo, if you look carefully around the brass cylinder unit in the middle, you can see a C-clip circlip kinda thing - that's holding the cylinder in place, and after a brief Google of "Abloy 362 disassembly" I found out that it's very hard to remove, requiring special tools, and that the whole unit (complete with sidebar etc) is a nighmare to re-install, soo... That's it for this disassembly
Aaaaand the second lock
*drumroll*
...

It comes in this nice original-looking box, which helpfully tells us that the RRP is £140


... It's an Ingersoll! The Open shackle version:

It's in lovely condition, with three keys! (I forgot to mention that I got both this and the 362 on eBay second-hand, so while they're in fabulous condition they're not new-new, and for example the 362 didn't come with the Protec key card sadly)

The side, showing a little hole with what looks like a grub screw in it. It isn't, and this becomes my bugbear later on....

I'm unreasonably fascinated with this keyhole door thingy; I assume it's for weather protection. It's a little plate mounted with the bolt on the right, and swivels around in a 360 degree arc to get out of the way of the keyhole. When it lines up with the lock, it makes a satisfying click that makes me thing the plate that contacts the lock is possibly magnetic:

Swivelled out of the way, showing the keyway. Ingersolls use, believe it or not, a lever locking system. It's 10 levers and has bitting on both sides of the key, 5 levers on each side, and the key can be inserted ONLY one way so that *is* 10 unique levers

Liking that anti drill / cylinder retaining plate:

The keys, which are a work of art IMO. That profile is just something else!


Key in lock, locked position:

Unlocked position. Note that both this and the 362 are dead core locks; there is no spring tension on the keyway and the cylinder sits open once unlocked. They're also both key retaining:

Shackle open:


Ball bearing locking, obviously:

With this light applied, you can see the screw at the bottom of the open-side shackle hole:

I unscrewed it, aaaand... nada. Couldn't get the bottom plate to come off. I couldn't find any other grub screws or set screws etc in any of the other various drainage holes so I took to Google - apparently there is another screw in the OTHER shackle hole, in other words, the shackle must be removed. But this isn't a removable shackle lock... Remember in one of the early photos when I said "This looks like a grub screw, but it isn't"? I took a close look at it, and it's not a screw - it looks like a tightly-wound piece of metal shoved into the small hole. I found out that it's actually what's called a "roll pin", and you need tools to remove it (such as a punch) and I assume once you do, it'll be nigh-impossible to put it back in. Thus, not wanting to break my lock, I'm afraid that a breakdown won't be possible. Unless someone can give me tips for removing, and replacing, the roll pin!
Moving on, here's a couple more pics of that weather door and keyway:


Couple of final pics of them both together

Custom setup for key rings - a strong main ring, with a lobster clasp and tag named with the lock. I'm going to colour-code the tags, starting with:
White - Ingersoll
Blue - Abloy
Not decided on the rest yet, but I also have Black, Red, and Green

---
Today a cute little Abloy 330 turned up in the post
Putting it next to the 330, it's really tiny by comparison - the fact that it still uses an Abloy core (Sentry rather than Protec, but I can put a Protec in if I wanted to...) is just hilarious to me
I did manage to strip the core out as well, and I have a couple of tips to share for people who wish to do likewise as there are a couple of things that are non-obvious at first.


Next to the 362. Adorable!


You can tell that it's a Sentry core because of the squared-off, egg-timer shaped keyway rather than the rounded, "number 8 that got opened up in the middle" curvy Protec keyway:

Note how the armoured core protecting plug has two little slots in it? Take note of that for later:

The key! It's chunkier than the Protec, and lacks the active element or dimple cuts. The bitting itself seems simpler too, as there is bitting on only one side:

Key in the lock:

Unlocked, shackle open:


Slightly blurry, but this is the view down the shackle hole. Nothing down there:

On the shackle-open side is this hole. When the shackle is closed, it blocks this hole but with the shackle removed you can see the grub screw that holds the core protector in. You'll need a hex key for this (sorry for the terrible photo):

Here you can see the hex key removing the screw:

Tiny screw!


At this point I started pulling on the key and shaking the lock up and down trying to free the core. Well don't do that! After some research I found that you actually need to unscrew this cap, similar to the 362. Start it off by using the bow of the key, which fits across to both slots in the plug, and then use your fingers to take it the rest of the way:


With the core protector removed, you can now see another of those brass rings (same as the 362), and the core beyond that. I started to remove this at first, saw loose disks coming out and panicked a bit - but don't! Turns out actually there is only 1 loose disk, which is a sort of ward-guide for the key, and the disk pack for the rest of the lock is contained in it's own shell:

To remove the disk pack, I recommend pushing the key in as normal:

Then twist it around until it frees, and pull it out. Here's all the "bits" - shackle, lock body, key, grub screw and the cylinder attached to the key:

This sidebar fits into a slot in the lock body. Make sure you line them up properly while re-assembling!

Little screw thingy that fits into the end of the lock. From what I can tell, the sides of the cylinder are also the BB recess points (or they may actuate a cam further in; it's hard to tell and I didn't want to try to pull anything out cos those BBs are hard to re-fit!):

Looking down the empty cylinder slot in the lock body, we can see the BBs at the end:

Shackle, loose:

There's that ward guide and copper ring:

There's the disks! I didn't remove them entirely in case I got the order mixed up. Plus these locks are very well lubed and I keep losing lube to my fingers, tools and the mat, with no new lube to replace it with:

To re-fit, simply slide the whole pack, with the key, back into the body and jiggle around until the key comes free. Don't forget to line up that sidebar with the slot on the side!:

TAKE CAREFUL NOTE HERE! When re-fitting the plug, you may find that the end ring and copper ring come out with your key. When you re-fit them, make sure the edge of the silver ward ring has the number "02" (or whatever) facing OUTWARDS, towards the keyhole. Don't make my mistake and fit it backwards, put the whole thing back together and find that the key won't pass through the warding cos it's reversed

Screw the outer plug back in and test the lock before you put the grub screw back in!

Screwing the grub screw back in. Little note here - when I first removed this screw, it was in EXTREMELY tightly, and the key still rotated smoothly in the cylinder. After I'd removed and replaced it for the first time, I screwed it back in tightly but found that the key was extremely stiff and would hardly turn the cylinder. I found that loosening the screw slightly eased up the tension on the core and allowed it to work normally. Not sure how it was working originally though (i.e. why it was so tight but the key was still smooth). In any case, if you reinstall the cylinder and find the key very stiff, try loosening the grub screw slightly.

LOCK BLOOD! Seriously though, I really need to track down whatever-the-hell lube it is they use on these BBs, actuators, etc etc inside the lock so I can re-lube them before reassembly. If anyone knows what this stuff is please comment or shoot me a PM!!

Tagged up and ready to go.. To the collection


