KABA Micro Teardown - warning - picture heavy.
KABA Micro
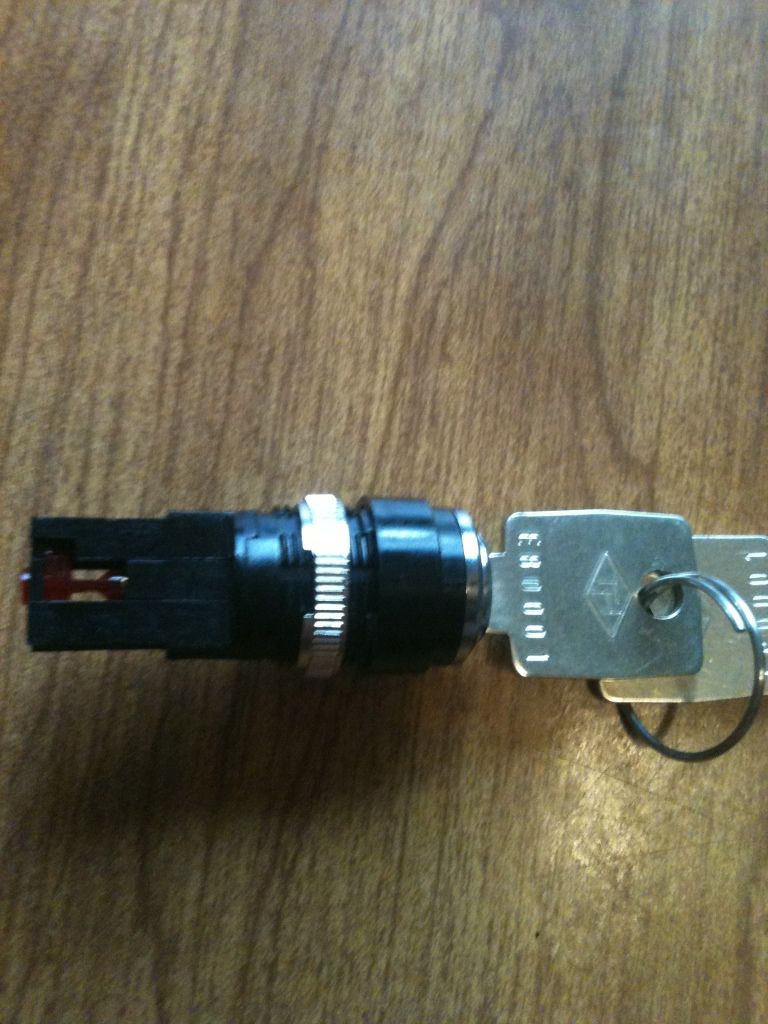
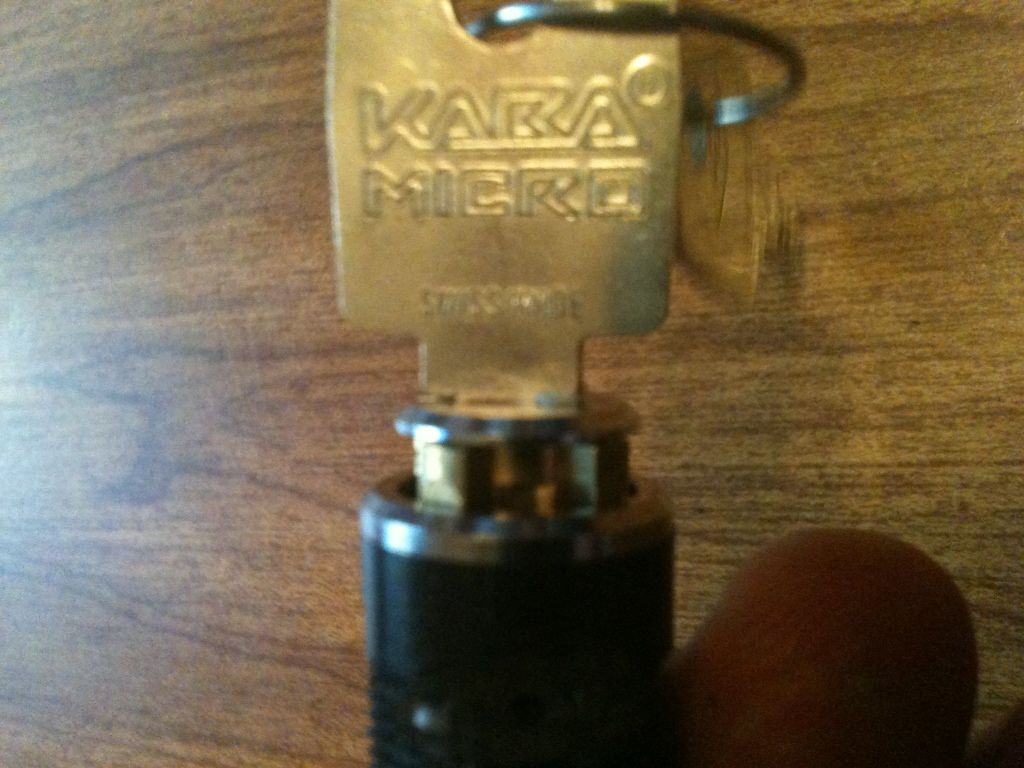
Received a couple of KABA Micro switch locks on a trade. Always wanted to get a couple - partly to try modifying one to work in an American 5200 padlock like LSA did. Partly because it looks like a cool lock.

This is a switch lock. The key can be turned to three positions, and the key can be removed at those three positions.
It picked much easier than expected. It made me wonder, so even though you all know how much I hate taking locks apart and taking pictures, for you guys and gals, I'll take one for the team and just do it.
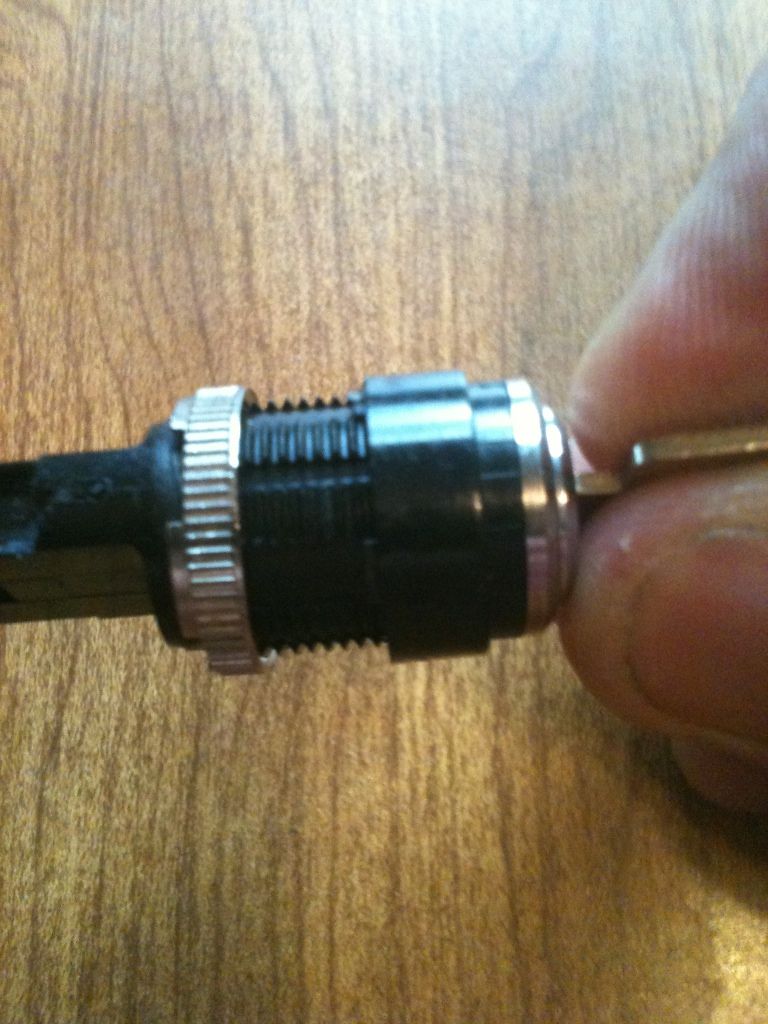
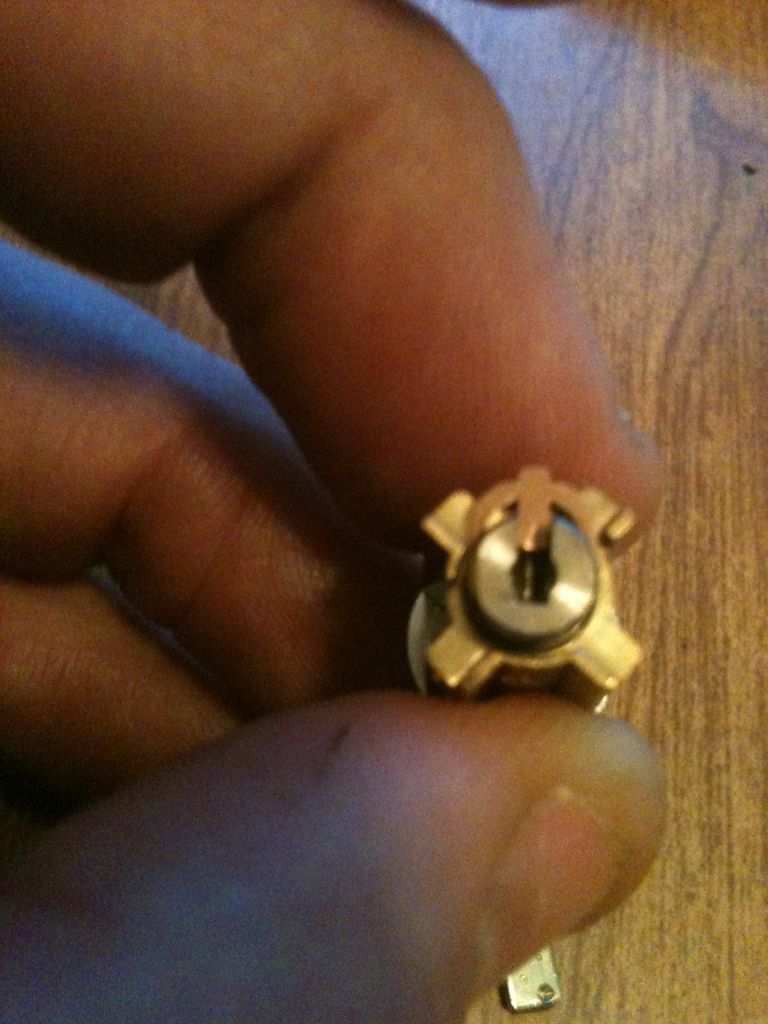
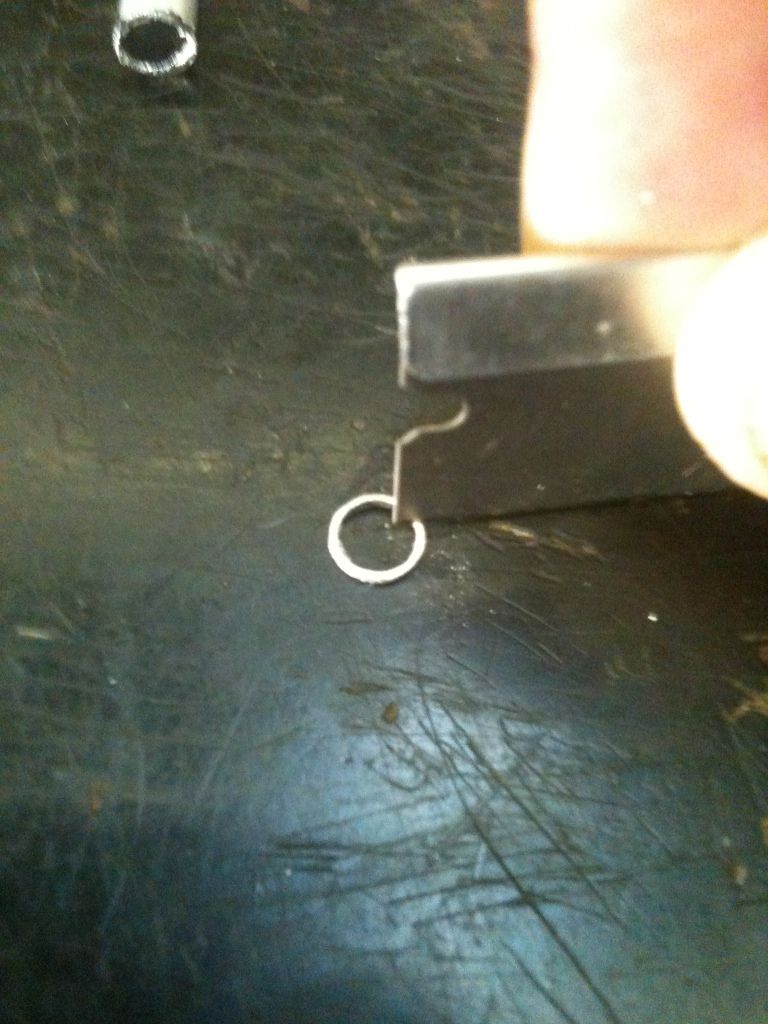
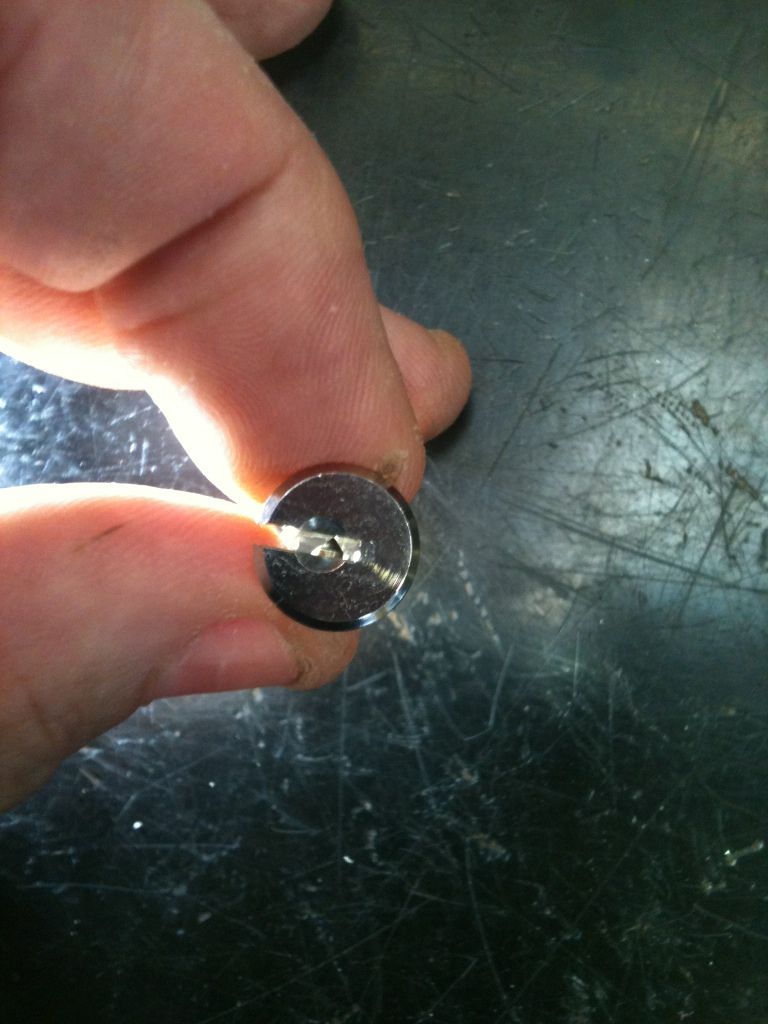
First, remove this ring...
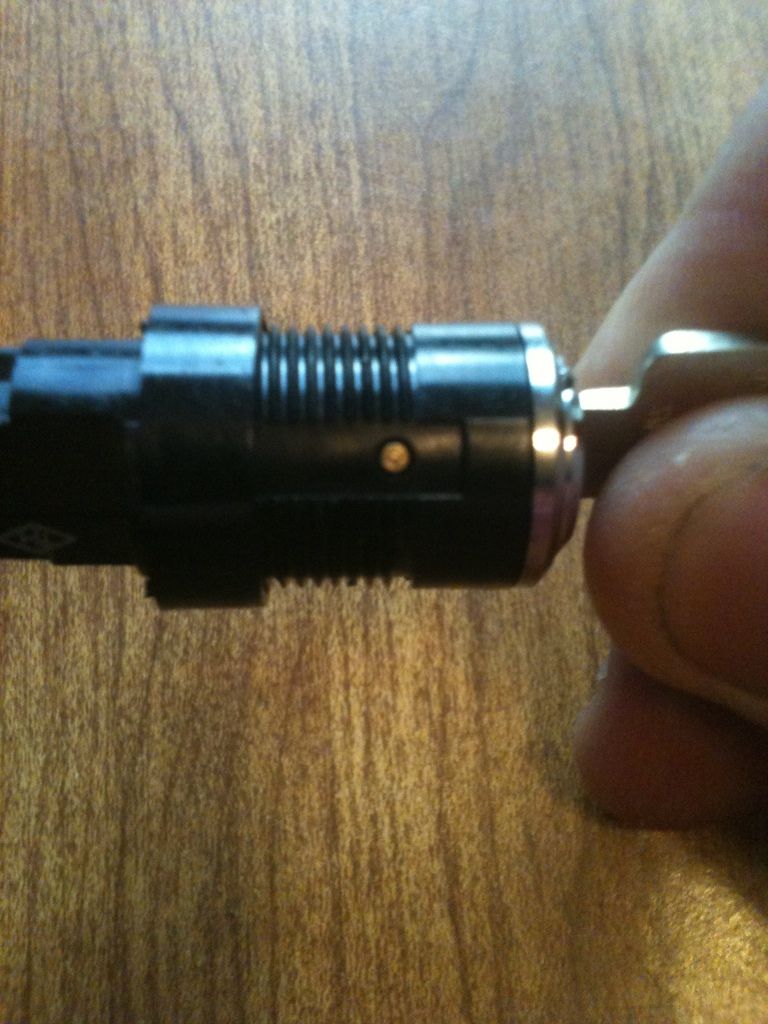
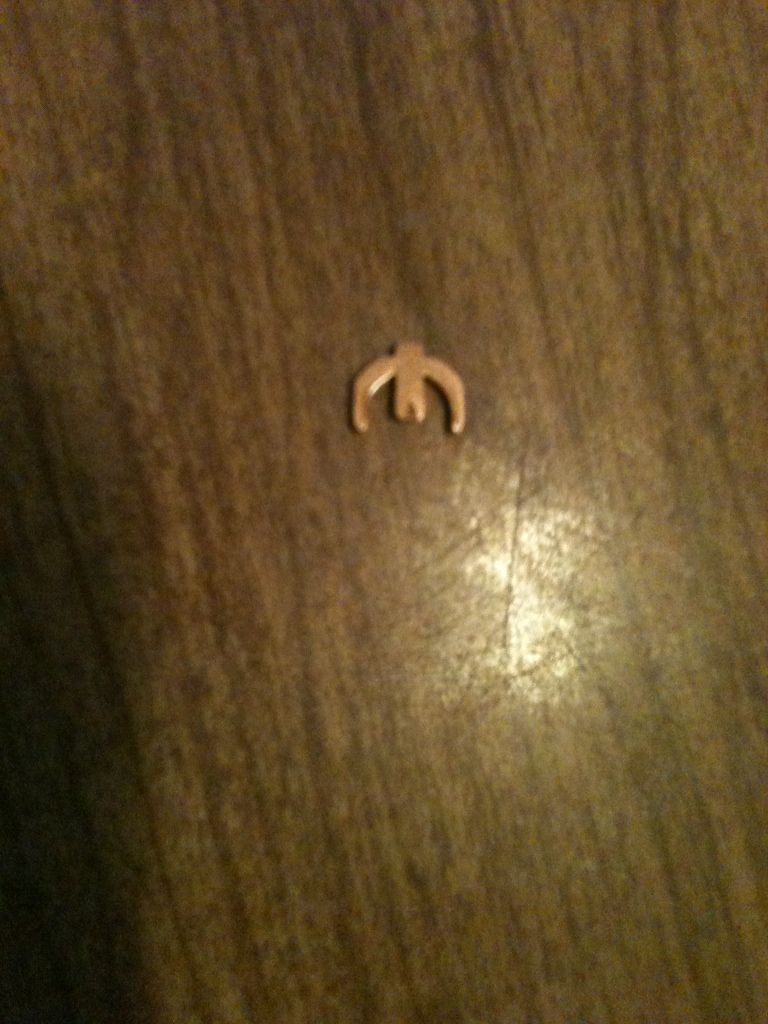
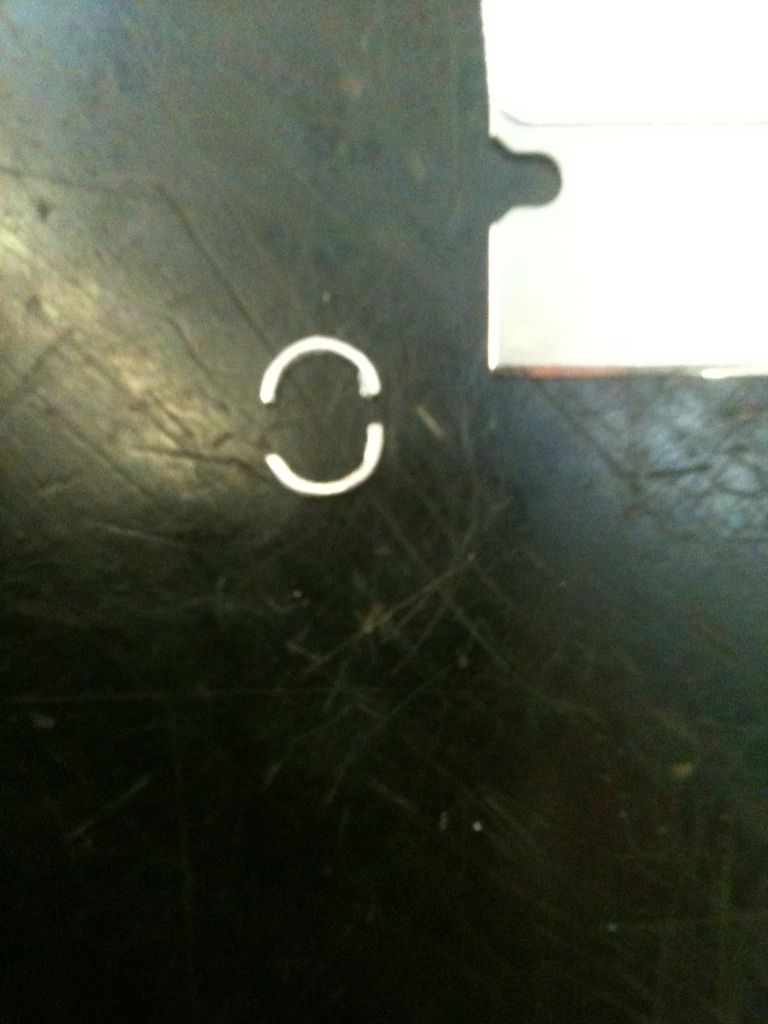
Then this next plastic ring can be slid back and off, exposing the brass pin that retains the cylinder in the switch.
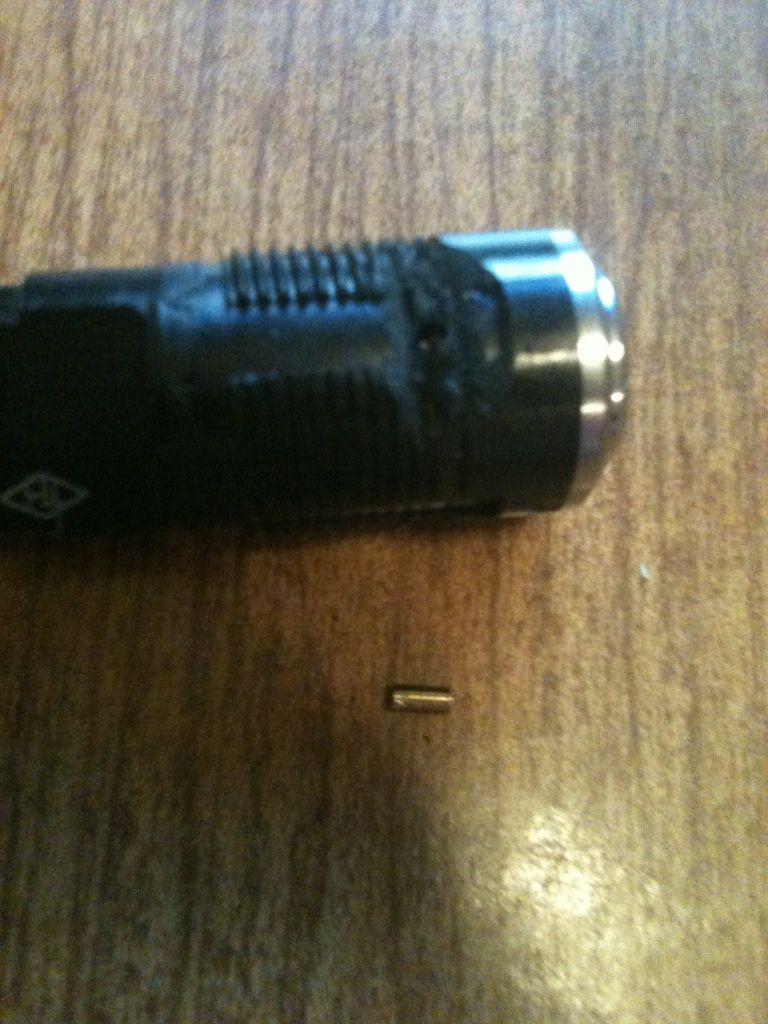
Since the pin is very slightly friction fit, you can not rap the lock on a table to get the pin out. Trust me - I tried. Used a knife to whittle down the plastic around the brass pin until the pin could be removed.
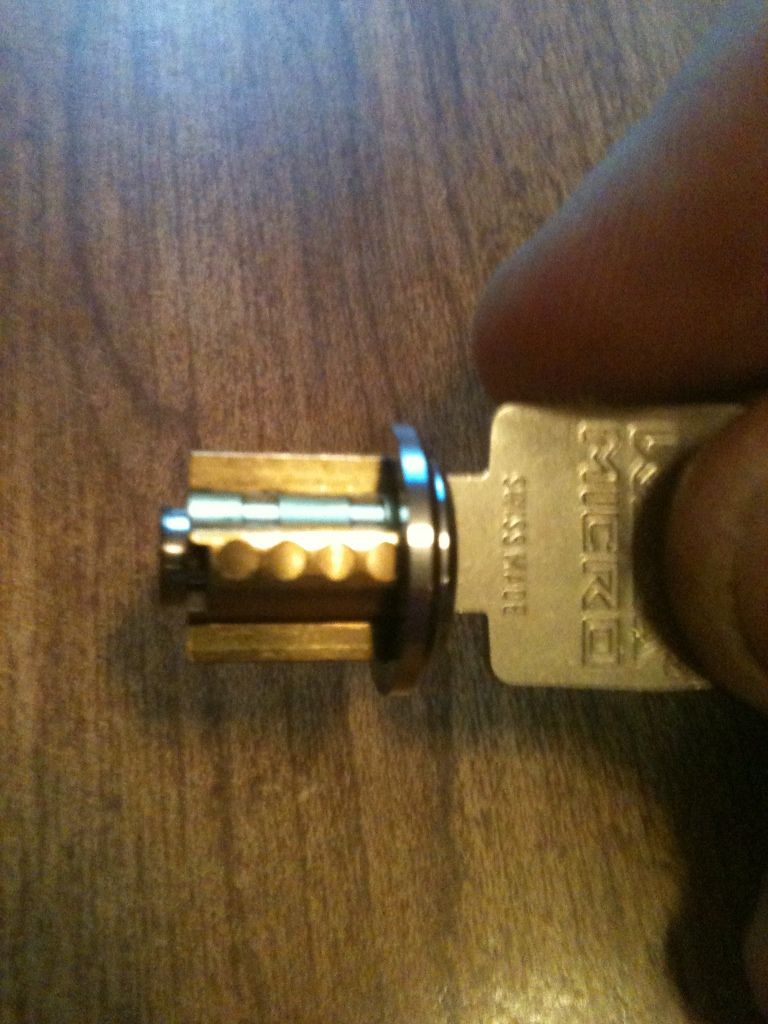
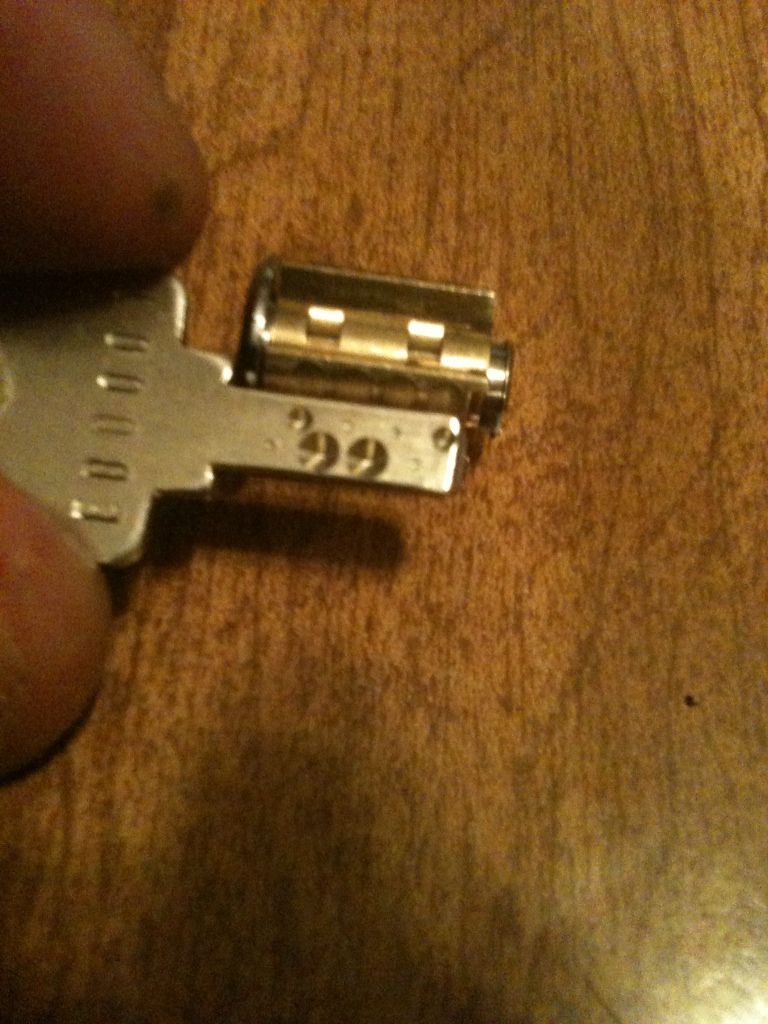
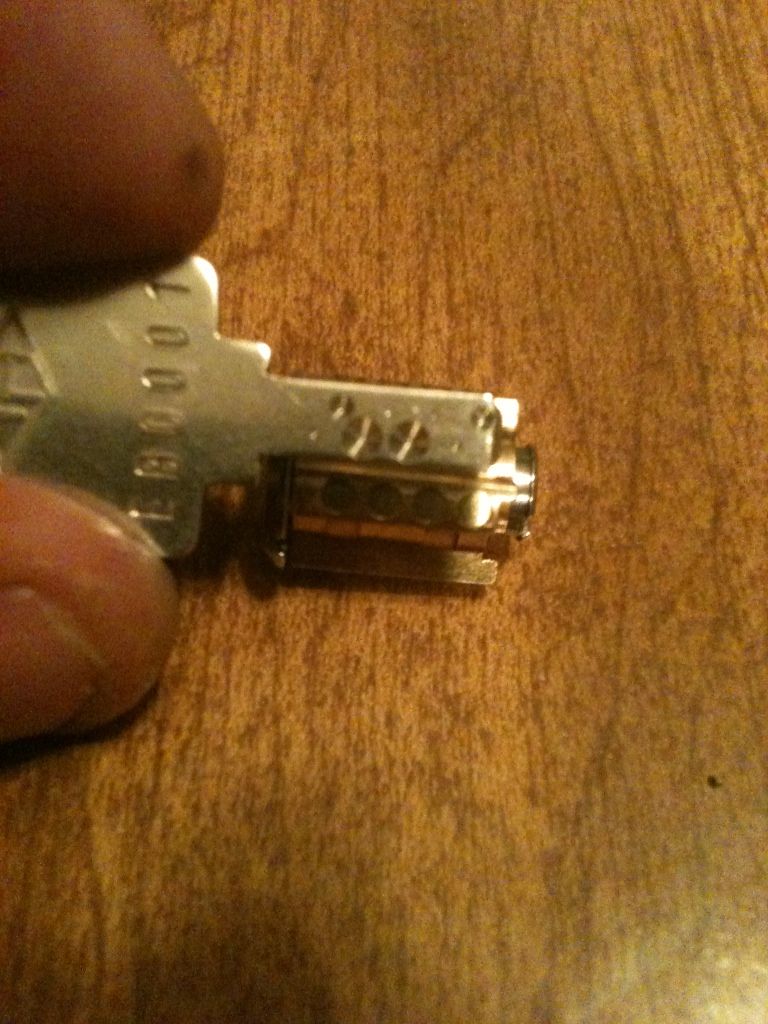
Put in the key and turn it slightly so you can withdraw the lock cylinder from the switch.
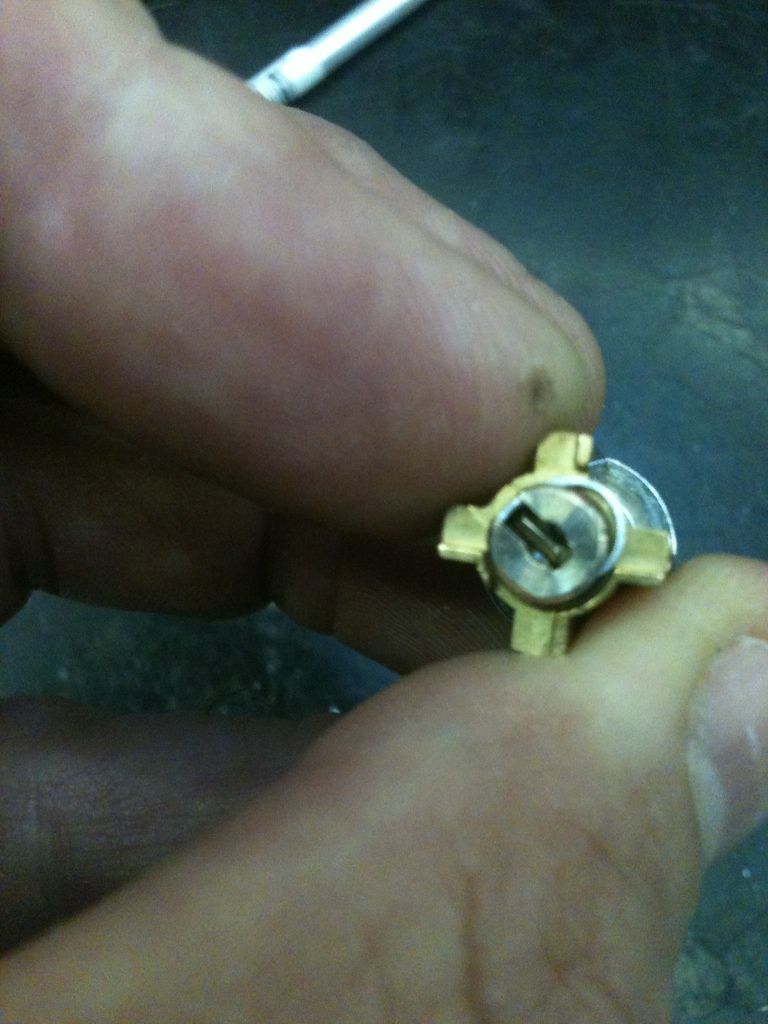
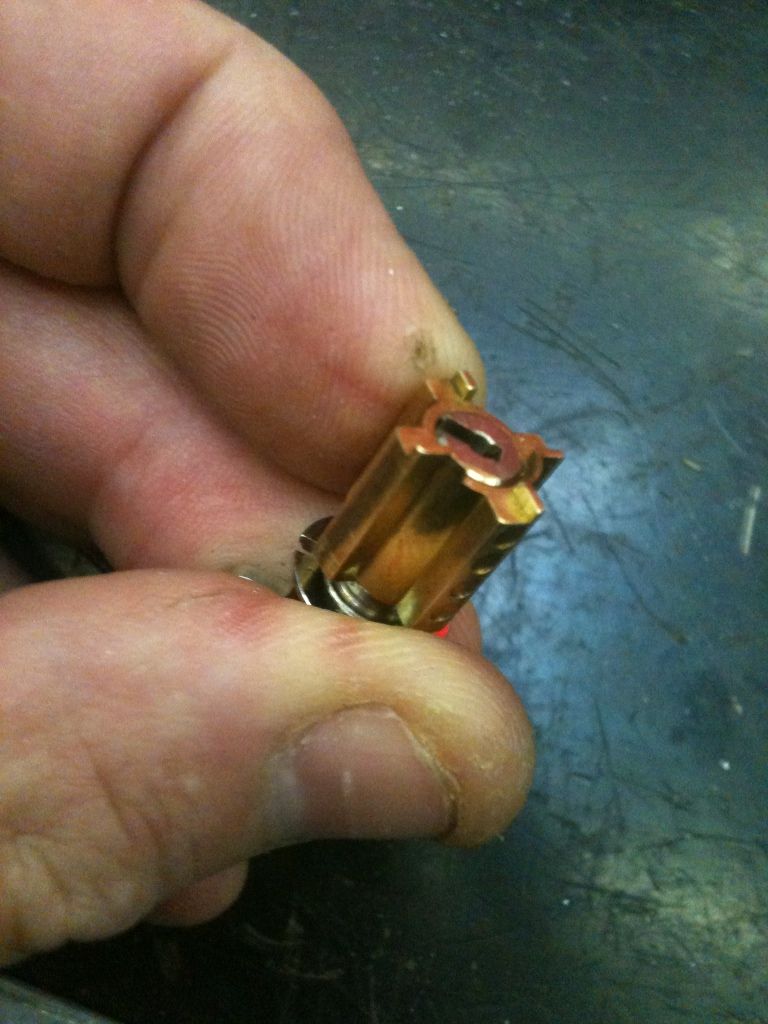
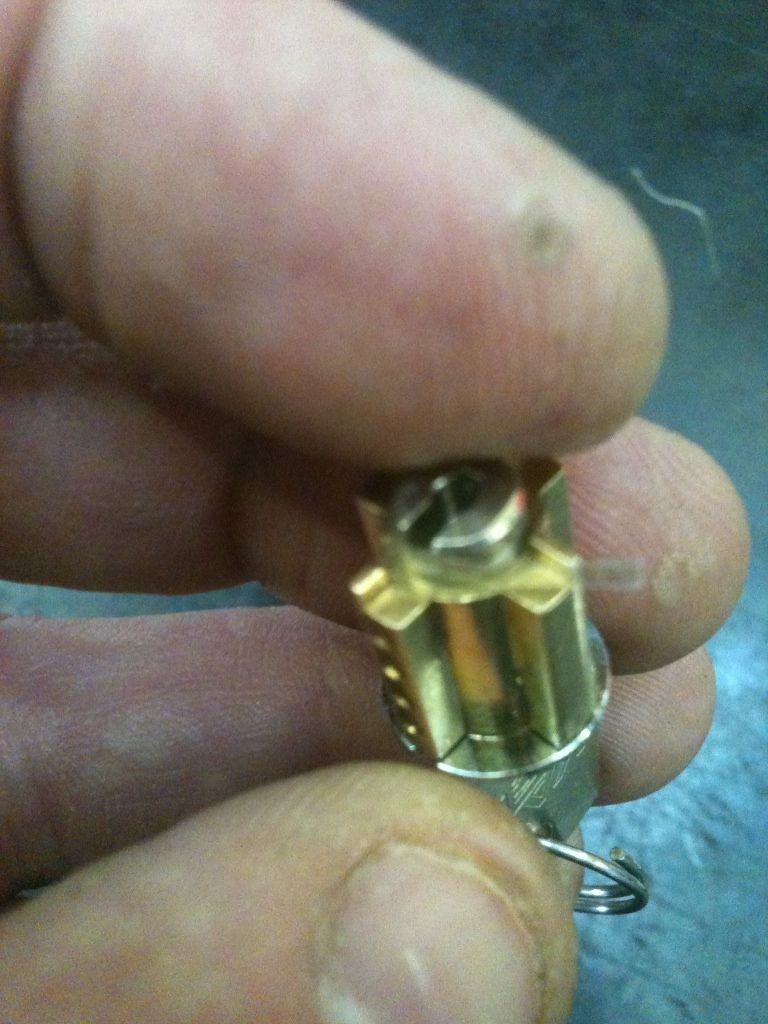
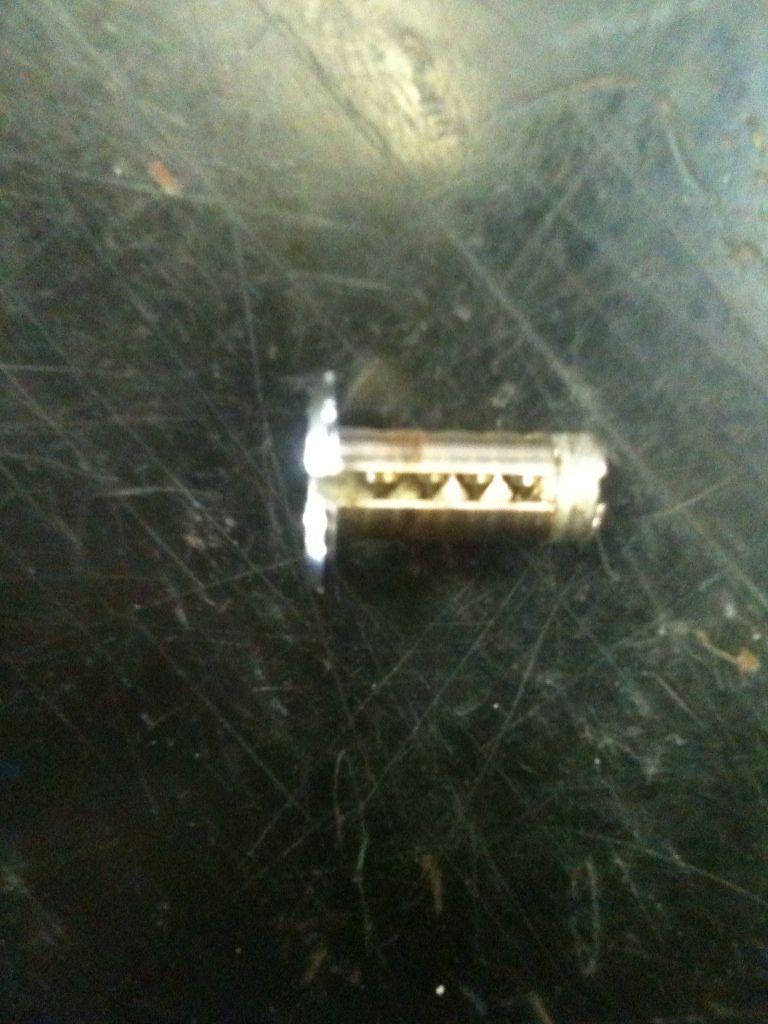
Now we can see the lock cylinder in all its glory.
There are four sides. Three bibles to hold the three sets of driver pins and springs, and a fourth side that is just there. You can remove the ring that spins freely.
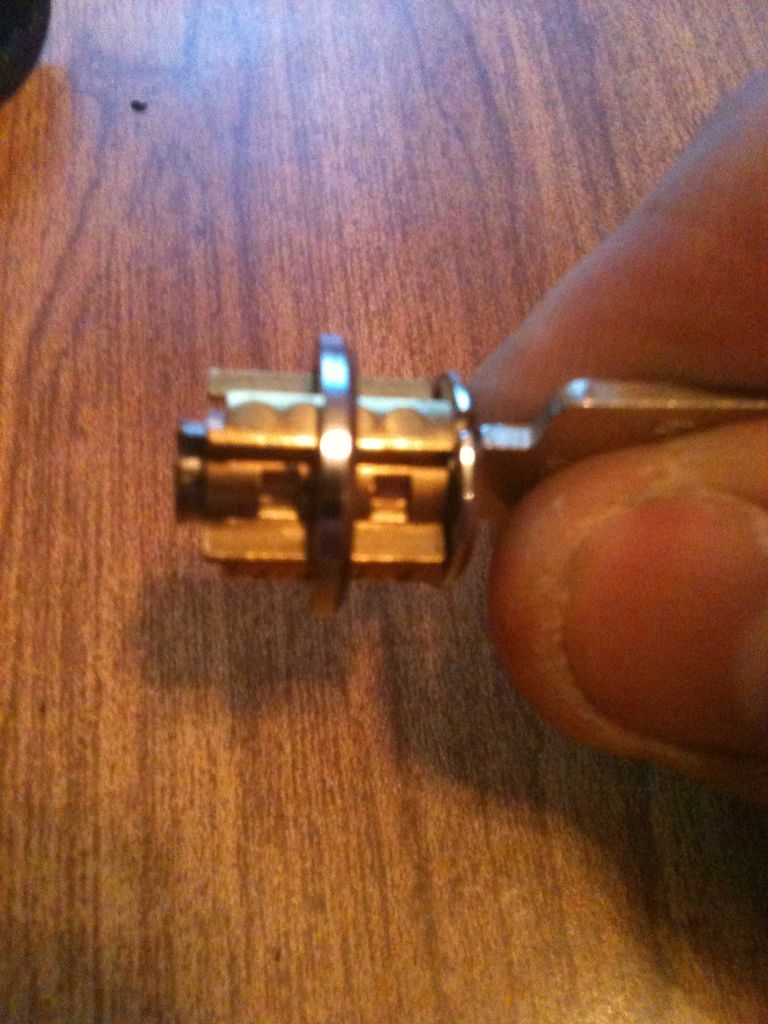
Do any of you see what is wrong when you compare the key to the bibles? No? We will come back to it.
Turn the lock around and see the clip that retains the plug.
Turn the key so you can slide the retainer clip out between the raised areas. It will only do this in one position.
OK, one more chance to guess what is wrong comparing the key to the bibles...
See it yet??? Well, disassembly discontinues while you think about it.
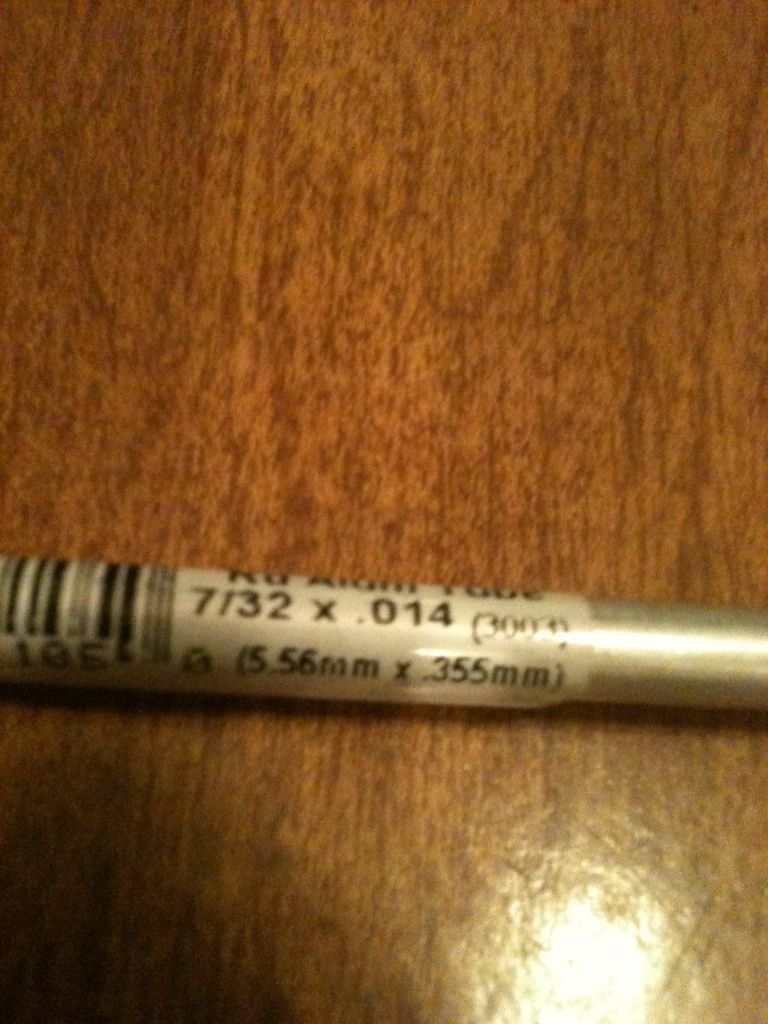
Get a plug follower. I used aluminum tubing.
Now, using the plug follower, remove the plug.
Oh, crud!!! The %}+]%}*#[^{*}}# plug only slides in enough to let the <]^*~^]€%{ driver pins (one from each of the three bibles) drop into the groove the retainer clip fit into! Now the #*]^^]*}*#[% plug is stuck... It can't be pulled out of the lock, and it can't be pushed back in!
Used an ultra-thin shim (from a DVD security tag) to get the drivers shimmed back enough to push the plug back in. Only took 10 #^{%{%^{% minutes.
How to get the plug out? Hmmm.
OK, simple solution!!! Use three shims, one for each bible!!! Why didn't I think of that at the beginning?
Why not? Because that idea was a FAIL. That is why. this is a Swiss-manufactured lock. The tolerances are too tight for two shims, let alone three.
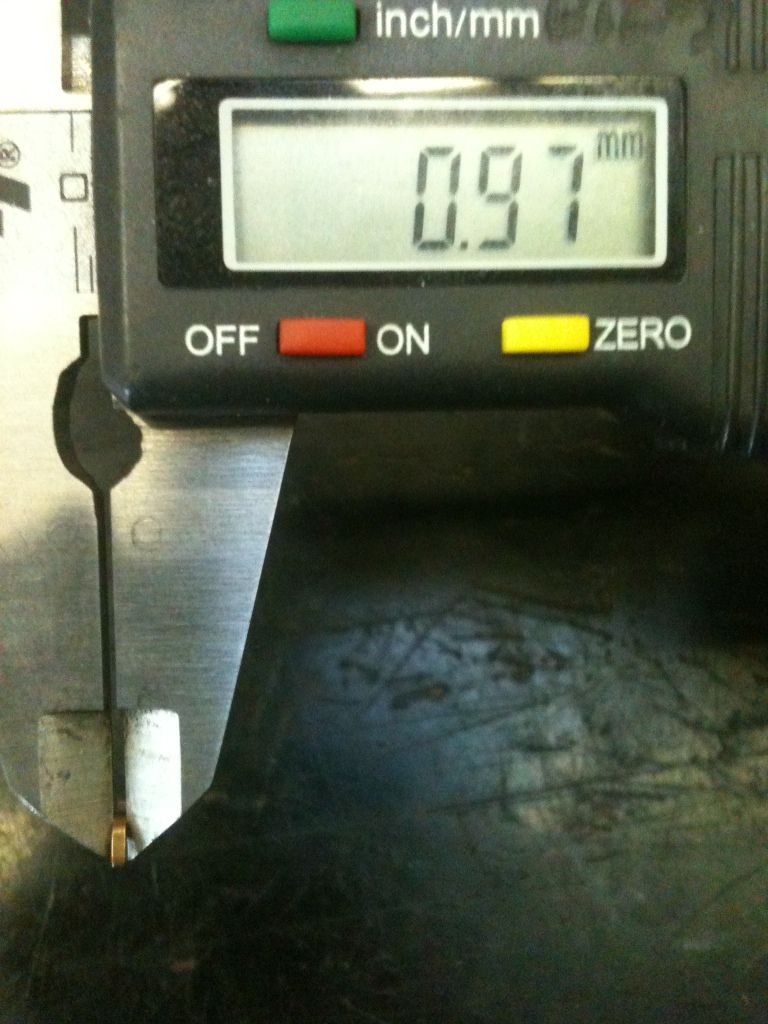
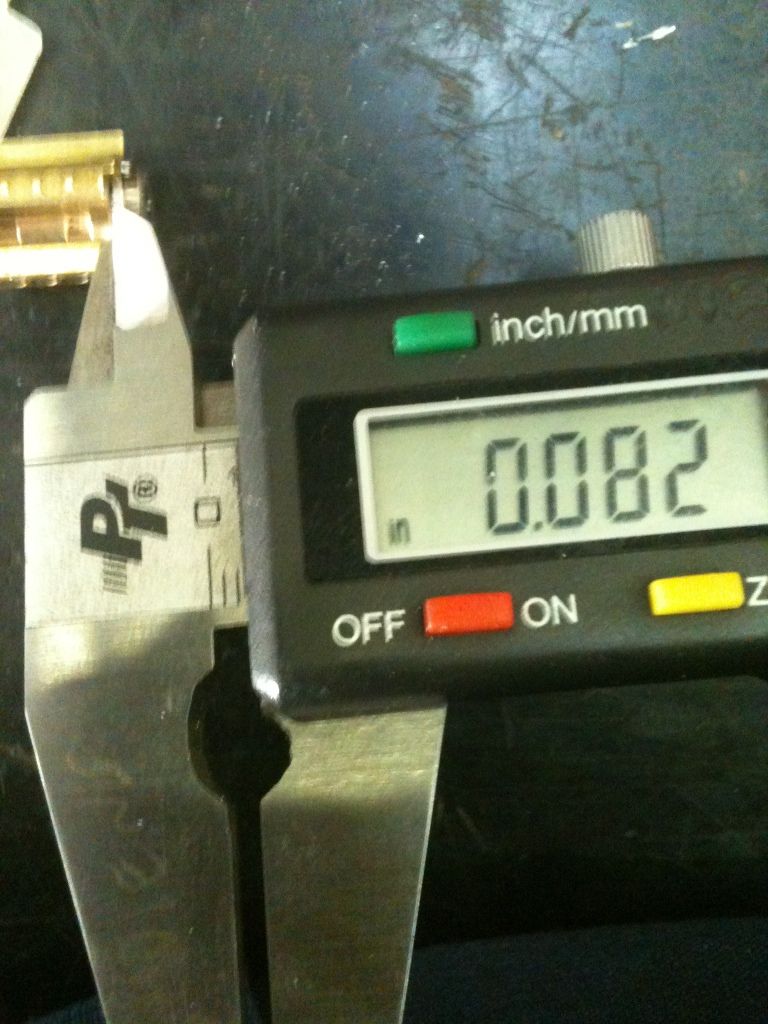
OK, next solution. Fill the gap the retainer clip fits into. Measure the thickness of the clip...
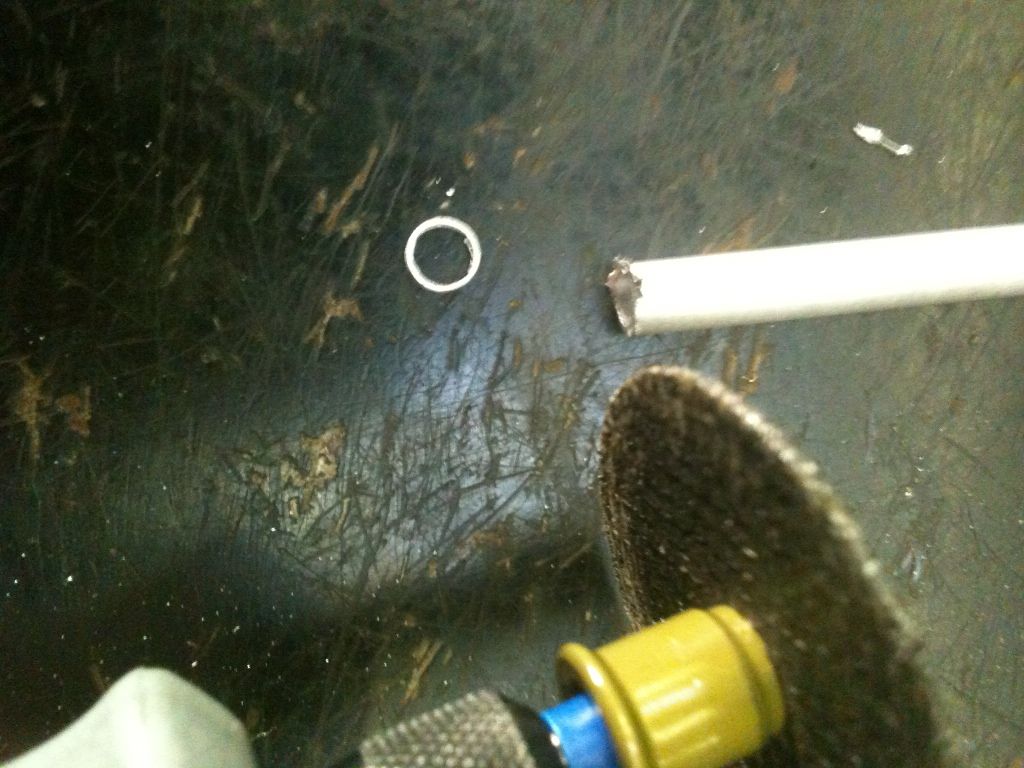
Now remember the aluminum tubing we are using for a follower? Cut a slice with a dremel tool. Don't use a saw, or the delicate tube will crush.
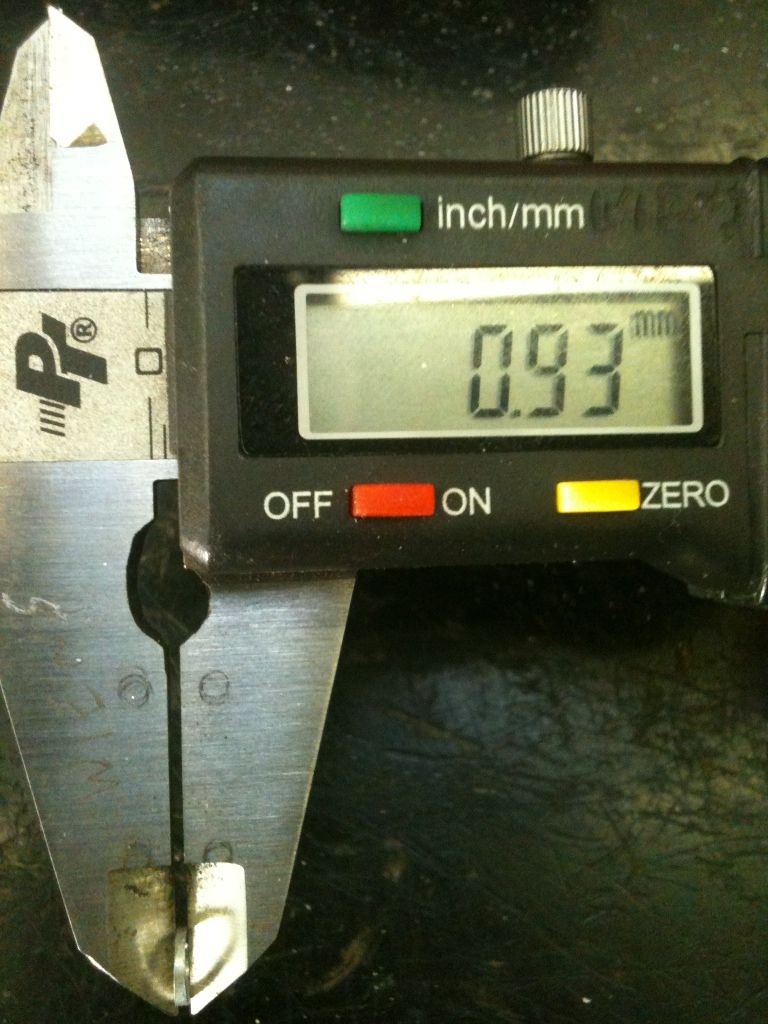
Sand it down to the correct thickness...
It will need to be perfectly round to fill the gap, yet not jam. How to you keep it round, yet still get it into the groove? Good thing it is aluminum after all!
Cut it in half. Do not try to bend it to fit. The tolerances are just too close.
Put one half into the groove, use a pick to slide it around to the other side, and put in the other half. Hint: the spacers you just made will go in easiest at the same gap as you removed the retainer clip.
ANNNNNDD... IN YOUR FACE, KABA !!! Who's your daddy now!?!
Apparently it ain't me. there is still a super thin lip at the end of the plug that these ^{*#*#*{%[^{*}*}^{{ driver pins can still catch on.
Well, at least the plug can still be pushed back in.
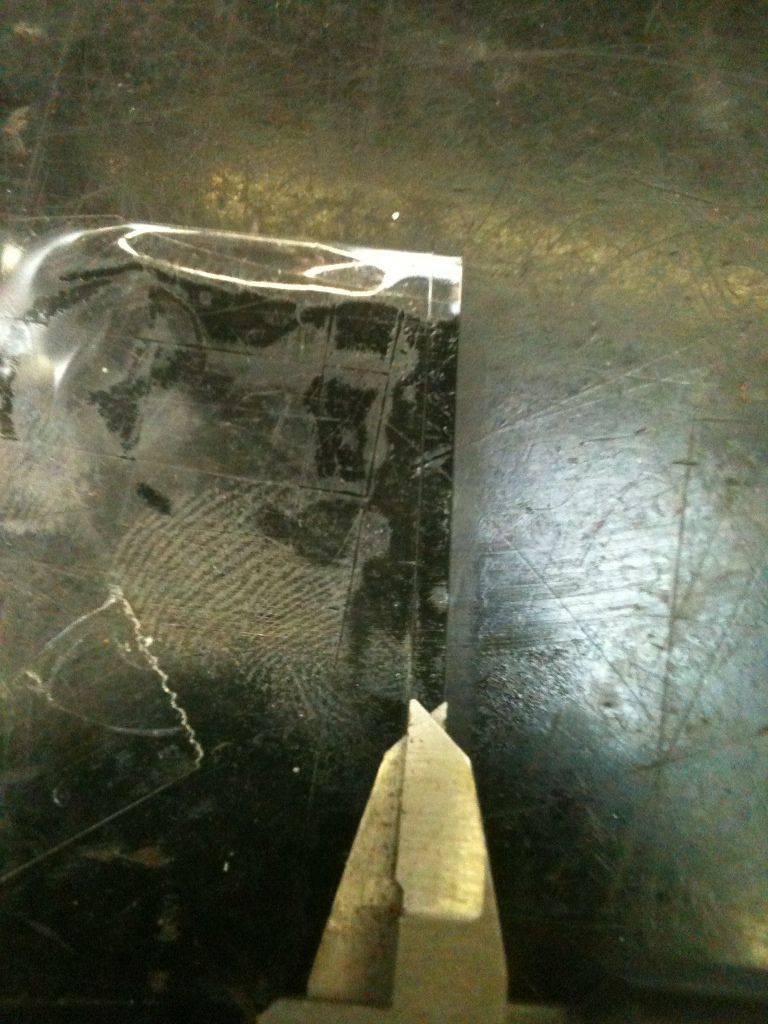
How to fill that tiny ^}#*}*^ gap? First, measure it...
And cut a strip of cellophane packing tape. Anybody who has received a package from me is familiar with this tape. Used a ruler as a straight edge and a razor to cut accurately.
If you look closely, you can see the tape being wound into the gap.
Let's try this again... A bit more humbly, just in case...
Woo Hoo!!!
OK, folks. Back to the question before. What is wrong with comparing the key to the lock...
Only one row of pins?
Well, how many key pins are in that row?
Wait a minute... Let's compare all the key pins with the key...
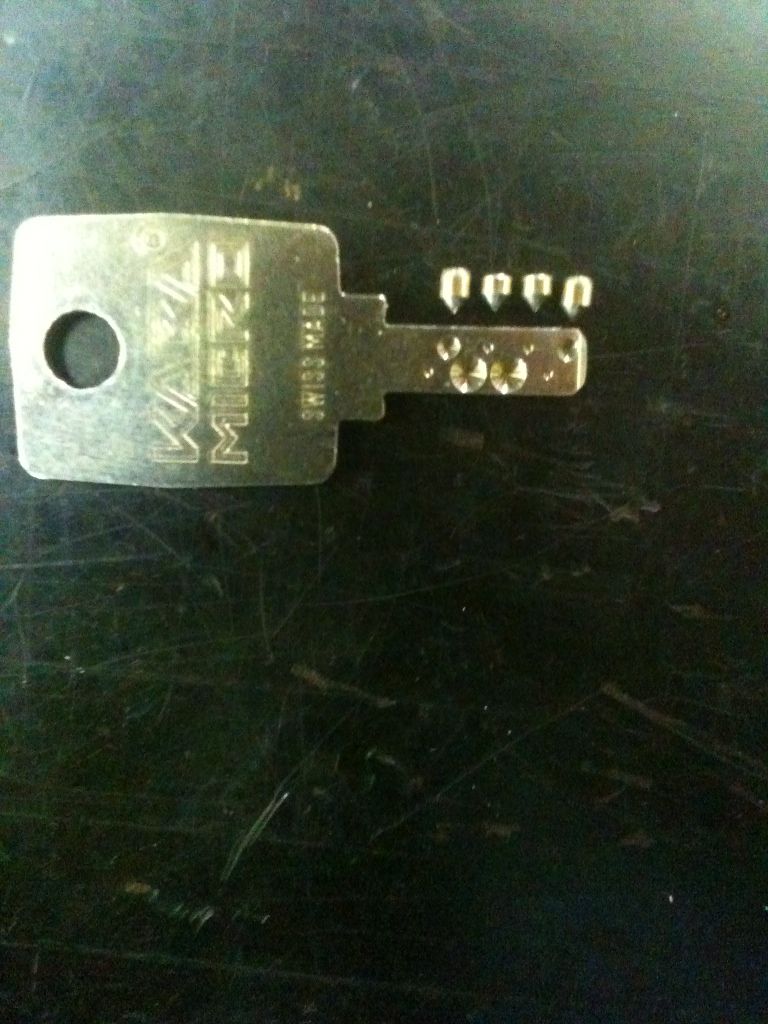
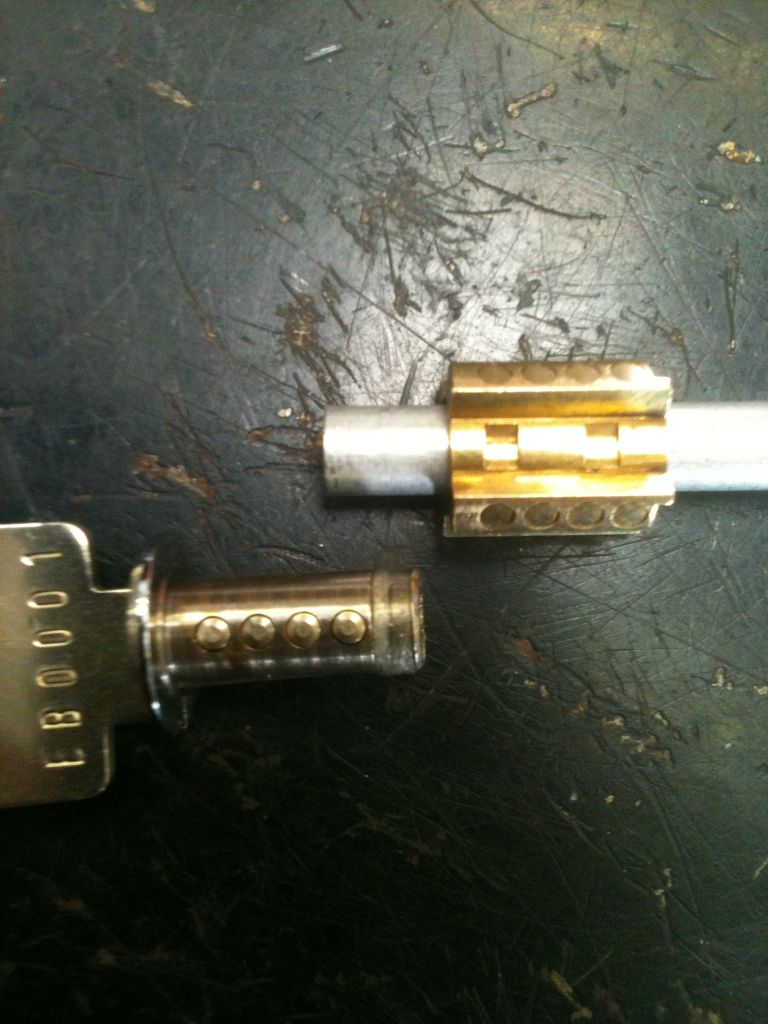
Are you kidding? Eight fancy bitting cuts, professionally staggered from each other, and there are only f.o.u.r. key pins?!?
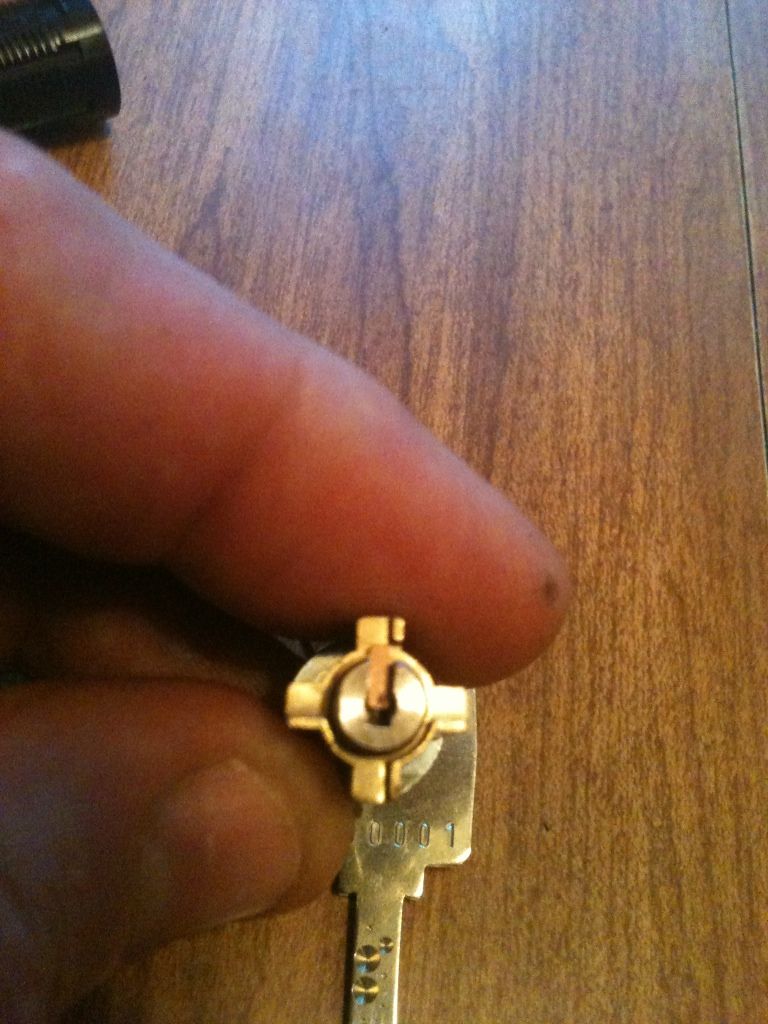
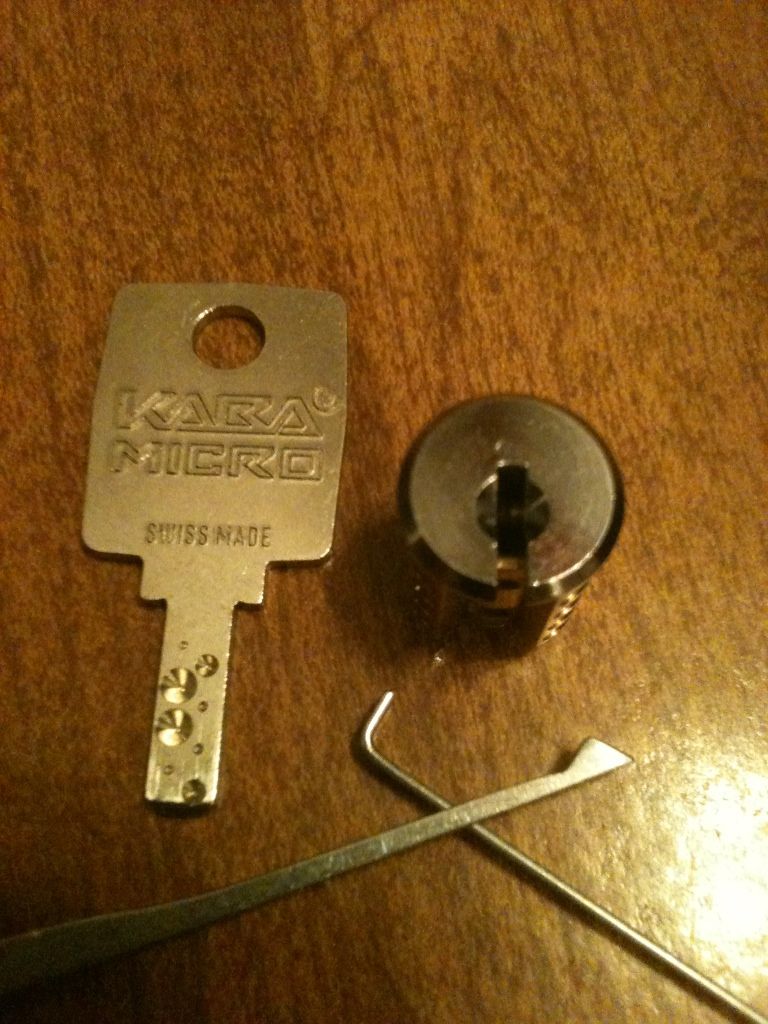
Yep, this is a four key pin lock. Here is how the key lines up...

One caveat... There are 12 driver pins. Four each in three bibles. Remember what happens with some pin tumbler locks when you 180 the lock? Well, that happens every 90 degrees in this lock. Just pop them back out of the keyway like usual. The edges of the key blade typically keep the driver pins in place when the key is used.
Sorry, but did not want to fight with twelve tiny springs and twelve even tinier driver pins inside a very tiny cylinder to reassemble, so no pictures of the driver pins.
So now you know why this lock is pretty simple to pick. (For a KABA).
And finally, thanks to Lockcr4ck3r for the trade!
Note: The lock reassembled easily back into the switch. The black plastic ring even covered all sign of trimmed plastic around the cylinder retaining pin.
Gordon
Received a couple of KABA Micro switch locks on a trade. Always wanted to get a couple - partly to try modifying one to work in an American 5200 padlock like LSA did. Partly because it looks like a cool lock.
This is a switch lock. The key can be turned to three positions, and the key can be removed at those three positions.
It picked much easier than expected. It made me wonder, so even though you all know how much I hate taking locks apart and taking pictures, for you guys and gals, I'll take one for the team and just do it.
First, remove this ring...
Then this next plastic ring can be slid back and off, exposing the brass pin that retains the cylinder in the switch.
Since the pin is very slightly friction fit, you can not rap the lock on a table to get the pin out. Trust me - I tried. Used a knife to whittle down the plastic around the brass pin until the pin could be removed.
Put in the key and turn it slightly so you can withdraw the lock cylinder from the switch.
Now we can see the lock cylinder in all its glory.
There are four sides. Three bibles to hold the three sets of driver pins and springs, and a fourth side that is just there. You can remove the ring that spins freely.
Do any of you see what is wrong when you compare the key to the bibles? No? We will come back to it.
Turn the lock around and see the clip that retains the plug.
Turn the key so you can slide the retainer clip out between the raised areas. It will only do this in one position.
OK, one more chance to guess what is wrong comparing the key to the bibles...
See it yet??? Well, disassembly discontinues while you think about it.
Get a plug follower. I used aluminum tubing.
Now, using the plug follower, remove the plug.
Oh, crud!!! The %}+]%}*#[^{*}}# plug only slides in enough to let the <]^*~^]€%{ driver pins (one from each of the three bibles) drop into the groove the retainer clip fit into! Now the #*]^^]*}*#[% plug is stuck... It can't be pulled out of the lock, and it can't be pushed back in!
Used an ultra-thin shim (from a DVD security tag) to get the drivers shimmed back enough to push the plug back in. Only took 10 #^{%{%^{% minutes.
How to get the plug out? Hmmm.
OK, simple solution!!! Use three shims, one for each bible!!!
Why not? Because that idea was a FAIL. That is why.
OK, next solution. Fill the gap the retainer clip fits into. Measure the thickness of the clip...
Now remember the aluminum tubing we are using for a follower? Cut a slice with a dremel tool. Don't use a saw, or the delicate tube will crush.
Sand it down to the correct thickness...
It will need to be perfectly round to fill the gap, yet not jam. How to you keep it round, yet still get it into the groove? Good thing it is aluminum after all!
Cut it in half. Do not try to bend it to fit. The tolerances are just too close.
Put one half into the groove, use a pick to slide it around to the other side, and put in the other half. Hint: the spacers you just made will go in easiest at the same gap as you removed the retainer clip.
ANNNNNDD... IN YOUR FACE, KABA !!! Who's your daddy now!?!
Apparently it ain't me.
Well, at least the plug can still be pushed back in.
How to fill that tiny ^}#*}*^ gap? First, measure it...
And cut a strip of cellophane packing tape. Anybody who has received a package from me is familiar with this tape.
If you look closely, you can see the tape being wound into the gap.
Let's try this again... A bit more humbly, just in case...
Woo Hoo!!!
OK, folks. Back to the question before. What is wrong with comparing the key to the lock...
Only one row of pins?
Well, how many key pins are in that row?
Wait a minute... Let's compare all the key pins with the key...
Are you kidding? Eight fancy bitting cuts, professionally staggered from each other, and there are only f.o.u.r. key pins?!?
Yep, this is a four key pin lock. Here is how the key lines up...
One caveat... There are 12 driver pins. Four each in three bibles. Remember what happens with some pin tumbler locks when you 180 the lock? Well, that happens every 90 degrees in this lock. Just pop them back out of the keyway like usual. The edges of the key blade typically keep the driver pins in place when the key is used.
Sorry, but did not want to fight with twelve tiny springs and twelve even tinier driver pins inside a very tiny cylinder to reassemble, so no pictures of the driver pins.
So now you know why this lock is pretty simple to pick. (For a KABA).
And finally, thanks to Lockcr4ck3r for the trade!
Note: The lock reassembled easily back into the switch. The black plastic ring even covered all sign of trimmed plastic around the cylinder retaining pin.
Gordon