Disassembly of the New Style Best Padlocks
Want to start by thanking MatrixBlackRock, who sent me the lock in the pictures below so I could do a pictorial on how to take the thing apart..  (He's over at the lighter side, but still like to thank him for the lock). These are significantly easier to disassemble than the older style Best padlocks.
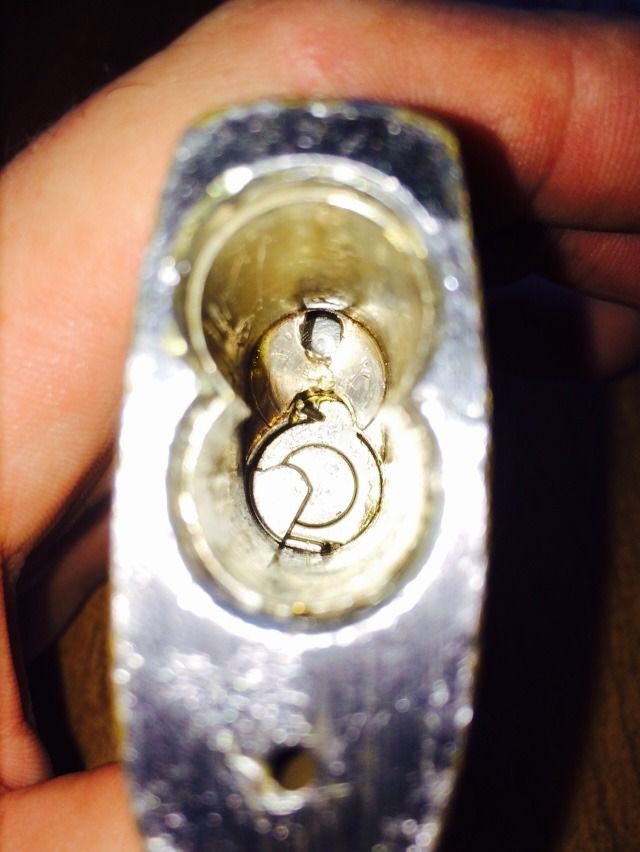
Will be taking this a little out of order, so you can understand how to get the locking cam assembly out of the core without buying the (very) pricey disassembly tool from BEST Access Systems.
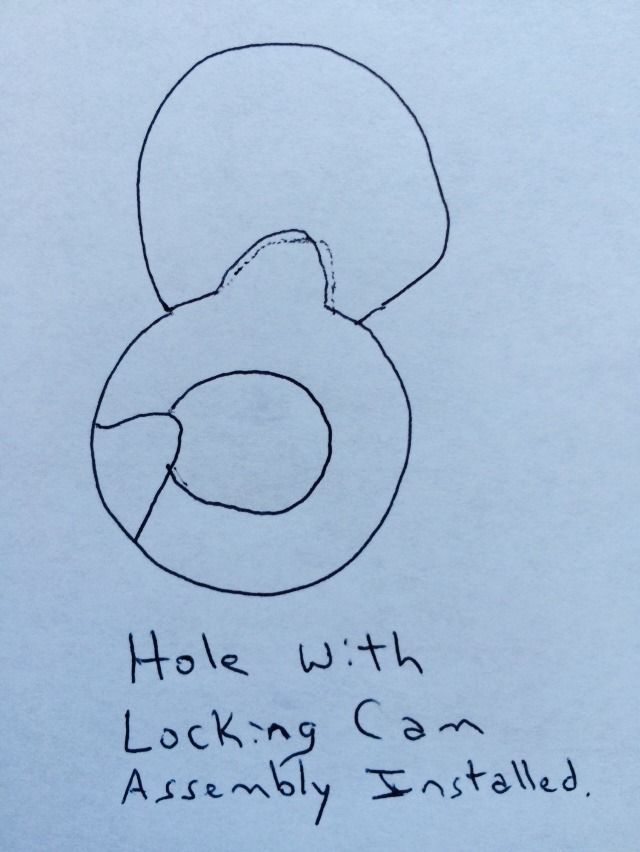
To start, when you look into the padlock with the core removed, you will see the shape like so:

When the locking cam in installed, it rotates slightly clockwise into a slot, represented by the dotted line.
OK enough drawings. The locking cam is spring loaded, a fact which the tool is designed to use.
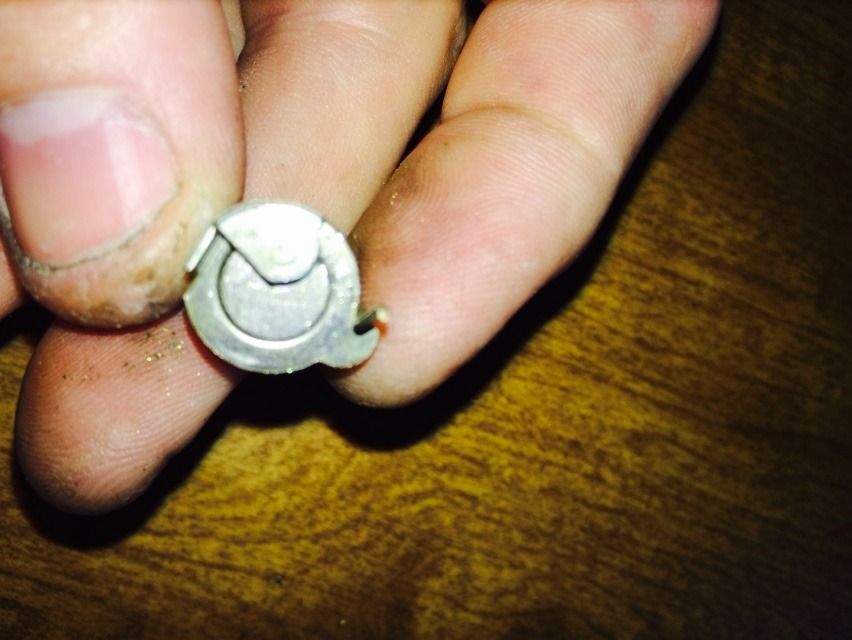
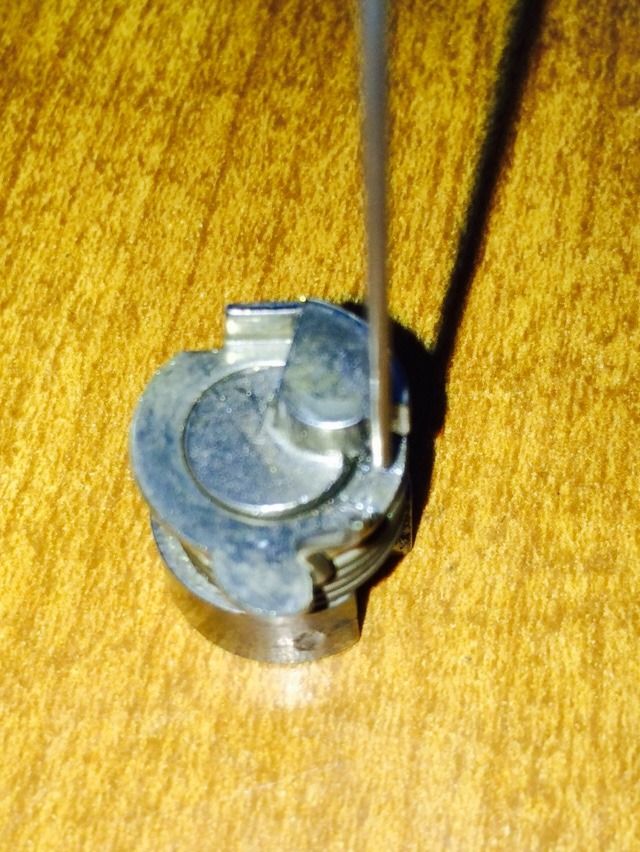
top view and side view of the cam.
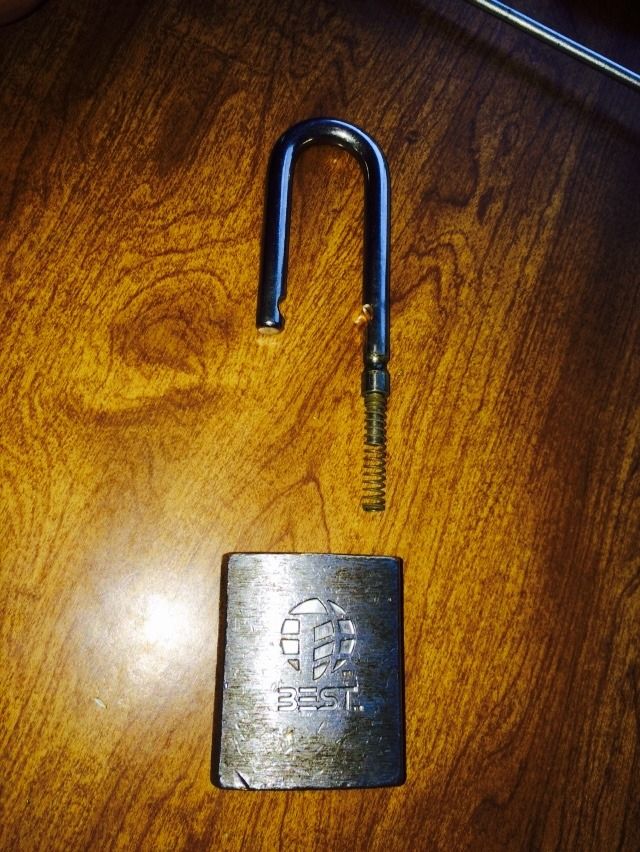
The tools we will be using: A screw driver and a piece of music wire with a 90 degree bend at the tip.
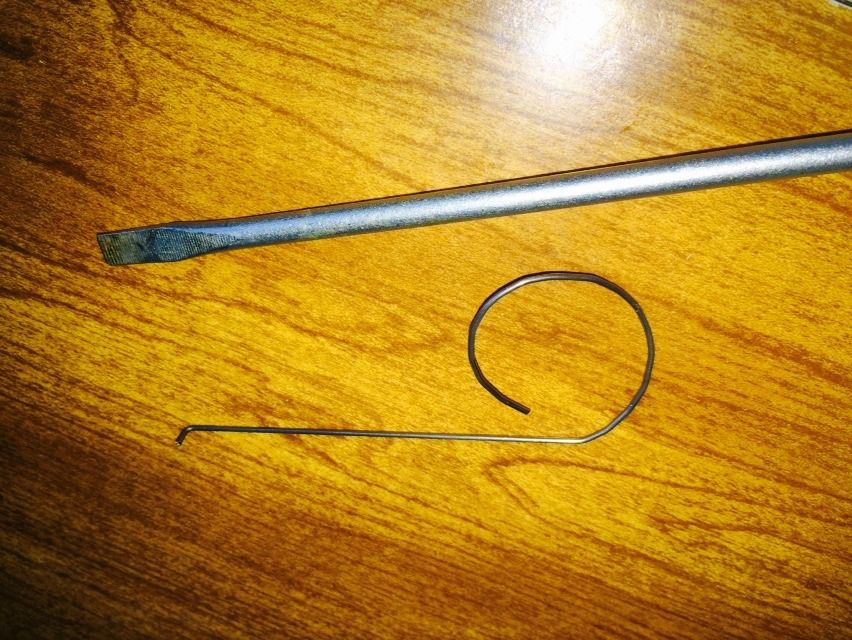
We will be using a screwdriver to compress the spring.
Once the spring is compressed downward, you can slip the 90 degree angle into the gap created.
From the top, it looks like this:
OK, now that you know what we will be doing, here we go into the padlock.
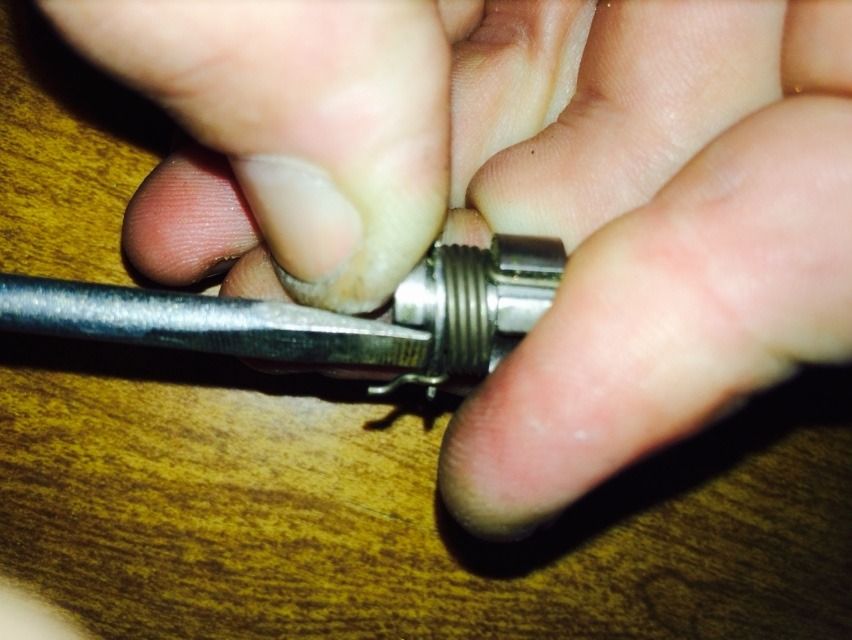
Hook the end of the hook into the gap, then use a screwdriver to turn the locking cam counter-clockwise so the tab on the cam lines up with the gap in the lock body. Then pull on the hook.

Voila! It will take a couple tries to get the hook into the gap while compressing the spring with a screwdriver, but it will work.
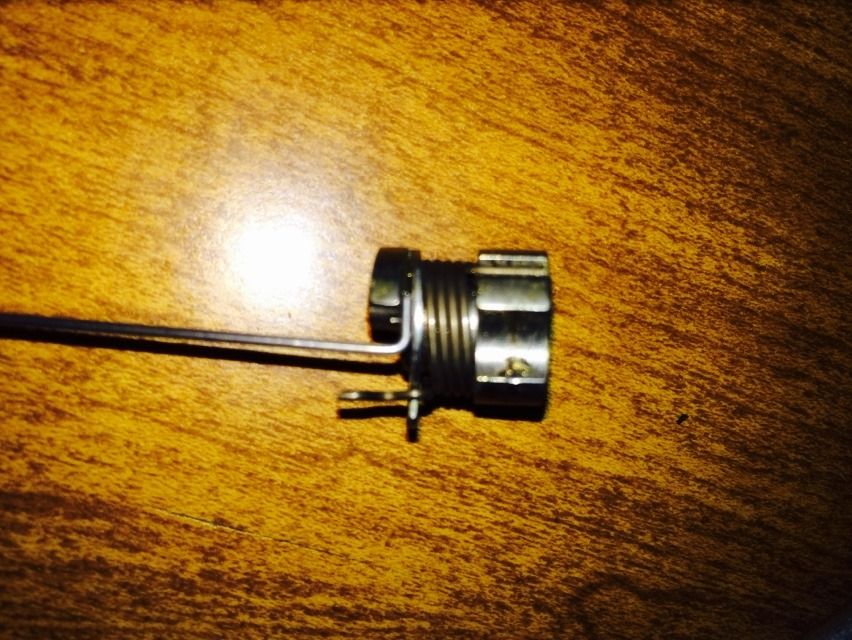
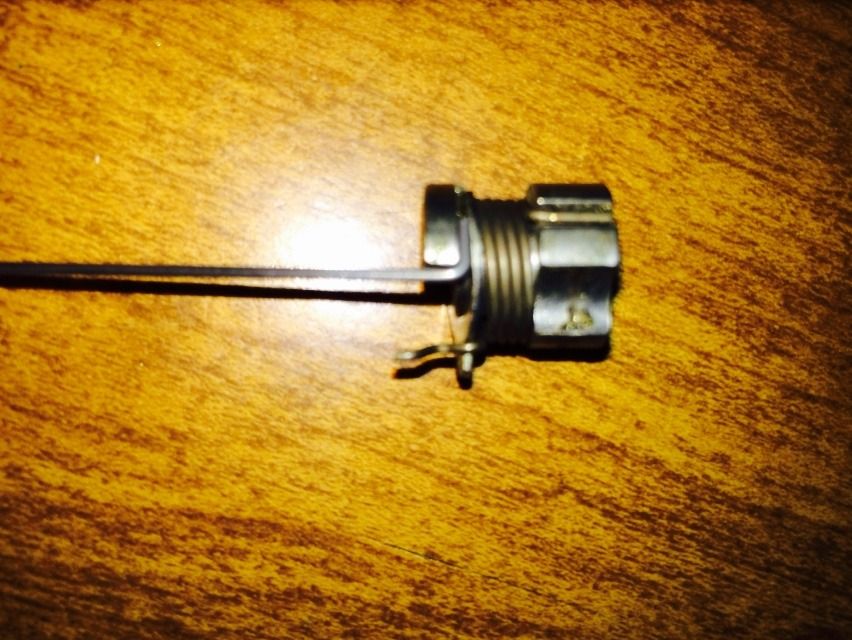
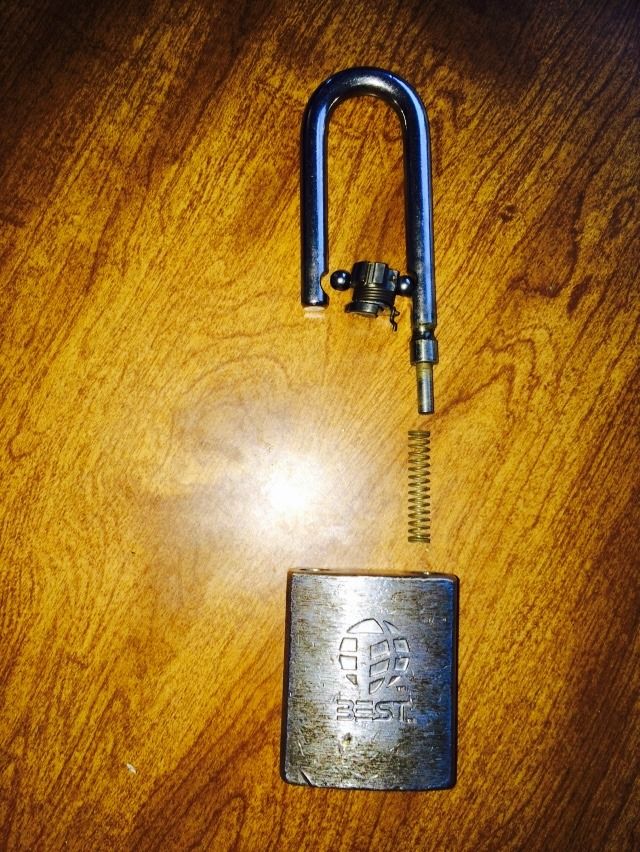
The rest of disassembly is very easy. Pull up on the shackle to remove it and the shackle spring.
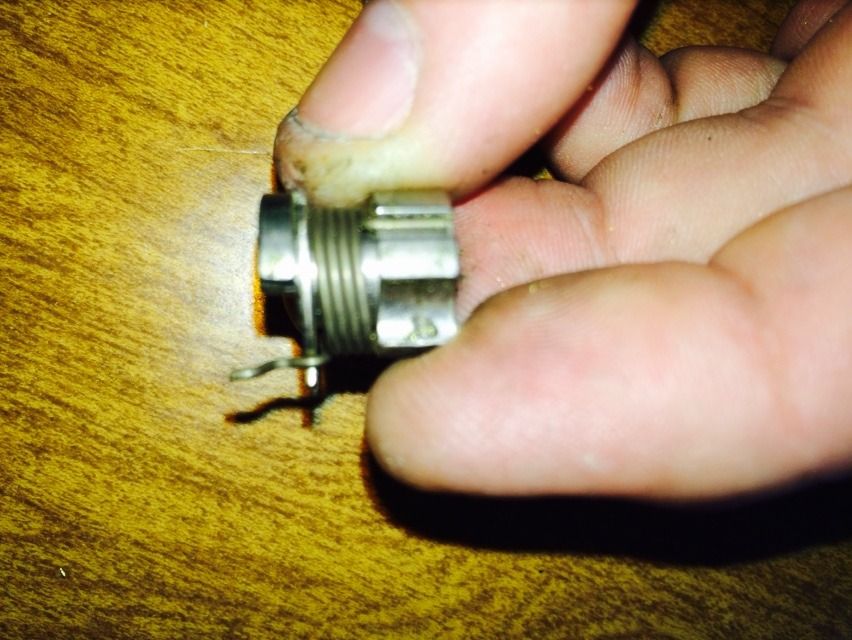
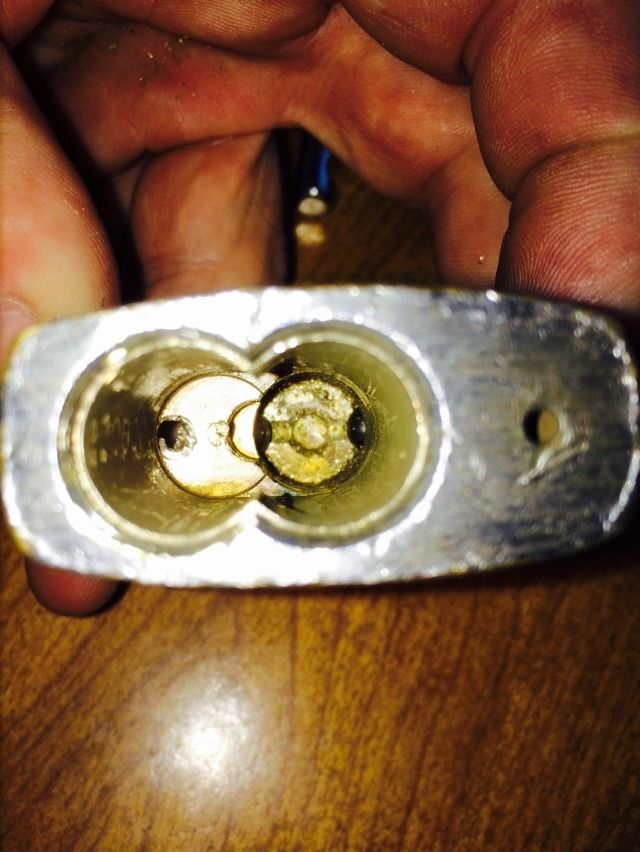
Looking into the lock body where the cam was, you can see the tumblers sticking partly into the hole.
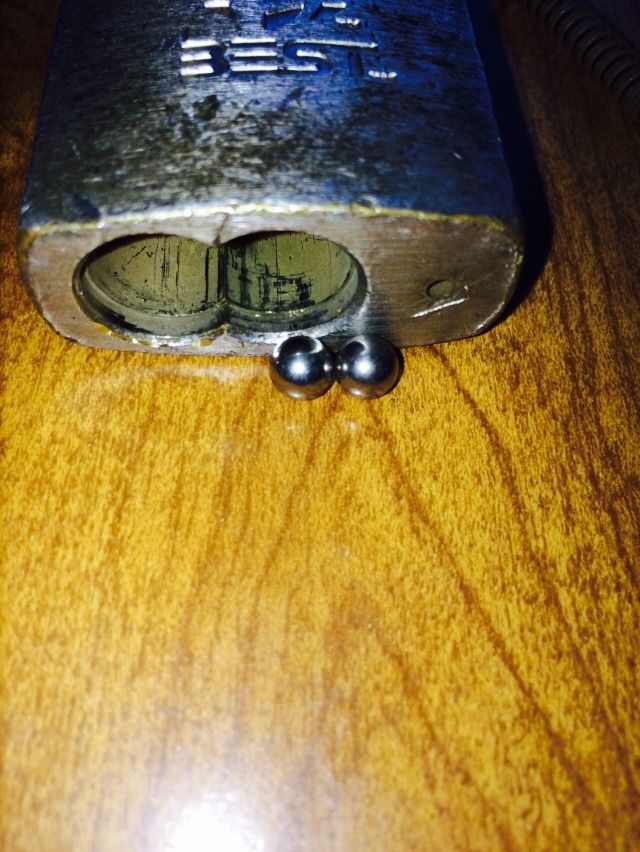
Now dump out the tumblers (Best calls the bearings 'tumblers') from the bottom of the lock.
Now for the rest of disassembly... Oh, wait! There is NO MORE DISASSEMBLY! All the parts are out of the lock body!
Used a bit soapy water and a pipe cleaner to clean out the old grease (one of the bearings was stuck) and a sponge with that soapy water to take the loose dirt off the lock body. Rinsed out the soapy water and dried it with compressed air. Lubed the tumblers and locking cam assembly and reassembled.

Don't it look pretty? Have a core with a 'K' keyway all ready to install. But gotta get a throw member (fits into the back of the core, what I called an 'actuator' in previous write-ups. Spent some time in the BEST service manual, and learned some new terms. Yes, I learn new stuff everyday about locks. Soooo much to learn. Anyway, once I get the throw member, will have this lock proudly in my collection.
Hope you learned something, too!
Gordon
Will be taking this a little out of order, so you can understand how to get the locking cam assembly out of the core without buying the (very) pricey disassembly tool from BEST Access Systems.
To start, when you look into the padlock with the core removed, you will see the shape like so:
When the locking cam in installed, it rotates slightly clockwise into a slot, represented by the dotted line.
OK enough drawings. The locking cam is spring loaded, a fact which the tool is designed to use.
top view and side view of the cam.
The tools we will be using: A screw driver and a piece of music wire with a 90 degree bend at the tip.
We will be using a screwdriver to compress the spring.
Once the spring is compressed downward, you can slip the 90 degree angle into the gap created.
From the top, it looks like this:
OK, now that you know what we will be doing, here we go into the padlock.
Hook the end of the hook into the gap, then use a screwdriver to turn the locking cam counter-clockwise so the tab on the cam lines up with the gap in the lock body. Then pull on the hook.
Voila! It will take a couple tries to get the hook into the gap while compressing the spring with a screwdriver, but it will work.
The rest of disassembly is very easy. Pull up on the shackle to remove it and the shackle spring.
Looking into the lock body where the cam was, you can see the tumblers sticking partly into the hole.
Now dump out the tumblers (Best calls the bearings 'tumblers') from the bottom of the lock.
Now for the rest of disassembly... Oh, wait! There is NO MORE DISASSEMBLY! All the parts are out of the lock body!
Used a bit soapy water and a pipe cleaner to clean out the old grease (one of the bearings was stuck) and a sponge with that soapy water to take the loose dirt off the lock body. Rinsed out the soapy water and dried it with compressed air. Lubed the tumblers and locking cam assembly and reassembled.
Don't it look pretty? Have a core with a 'K' keyway all ready to install. But gotta get a throw member (fits into the back of the core, what I called an 'actuator' in previous write-ups. Spent some time in the BEST service manual, and learned some new terms. Yes, I learn new stuff everyday about locks. Soooo much to learn. Anyway, once I get the throw member, will have this lock proudly in my collection.
Hope you learned something, too!
Gordon