![]() Tue Aug 23, 2016 4:05 am
Tue Aug 23, 2016 4:05 am
Kaba eXpert Gutting
G'day Guys,
Second post on this forum, also placed a post in the introduction thread.
Noticed someone was looking for the guy shots of the KABA 20, since they've gone missing from the imagehost. Well, its not a 20, but you get the idea. Some details on the eXpert can be found here. I'm assuming its AU only, and probably has another name elsewhere in the world, possibly the Quattro? If anyone can fill me in here, it would be greatly appreciated. Sorry for the lack of focus, this was the very first day I had my new camera, and it never occurred to me to check the images before I re-assembled the lock.
Bits everywhere! In this photo, you can see the plug with pins held in with grease, the body (in brass), its cover, my homemade follower, the driver pins, and the springs I purchased to replace all the ones I bent taking it apart!

Heres one side of the plug with the pins and key inserted. As mentioned above, to get all the pins to stay in when I slid the plug back into the body I used rubber grease. This is the pink gloop you can see.

The other side of the sub assembled plug.

A shot from above.

The first of the pin shots. There were 4 rows of pins, at roughly 1oclock, 5oclock, 7oclock and 11oclock. These pins were the pointed ones and IIRC (its been about 6 months since I pulled it to bits) interfaced with the millings on the side of the key.

The second of the pin shots. These are the pins that interfaced with the millings on the L and R of the top / bottom of the key (its reversible, so there are 8 sets of millings on the key for the four rows of pins).

A shot of the cylinder and its cover. The two larger holes situated on the top are for the bars that fix the cylinder to the retainer that suits the lock. In my case, I have it fitted to an AU Padlock IC, so those bars fitted into the brass retainer, which you can see in later shots.

Another (out of focus :/) shot of the cylinder.

Driver pins and springs. I had trouble re-assembling the lock at first, as I could get it all back together, but the key would get stuck in the lock. I had noticed that the driver pins were different sizes, but since this was way back when I had just started picking, I assumed they were like that to make it more difficult to pick. Not so. Pin stacks in this lock need to be balanced, as there is not enough room for the large pins coupled with the large drivers, and they foul against the outer cover, trapping the key. Thanks to LockSmithArmy on Youtube, whom I sent PMs to to find this out. You can see his video of him picking a KABA Penta (The same as this eXpert, but with 5 rows of pins instead of 4) here.

Reassembly. This is the cylinder with the plug and key inserted. I slowly pressed the cover back on while adding drivers and springs. All pins are slightly offset to one another to allow this, if ever so slightly. When I asked my local KABA lockie how he does it, he proudly showed me his $1000 KABA jig, and explained that I would never get it back together without one

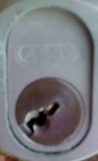
Assembled into an ABUS Rock 83/55.

And lastly, a close shot of the assembled lock. You can see the brass retainer I was rabbiting about on above. You can also see the hole I have filled with epoxy. This is where I drilled it when I accidentely locked it in a state where the key would not turn the padlocks cam. I drilled here, where there is no anti drill inserts, or pins in the way, and eventually hit the retaining screw, which undid, and released the lock. Yes really.. All that security in the lock, foiled by a 2mm drillbit. I have also used this method on quite a number of other AU IC padlocks with success, but have noted that the latest revisions of them (last 6 months or so) seem to include anti drill inserts here. On regular pin tumbler locks drilling here will destroy the springs, but they are easily replaced.

Anyway, hope thats of interest to some of you guys. Best of luck picking it! These images are hosted on my own host, so they should be around for millenia to come, or until I stop paying the bill.
-adi_picker
Second post on this forum, also placed a post in the introduction thread.
Noticed someone was looking for the guy shots of the KABA 20, since they've gone missing from the imagehost. Well, its not a 20, but you get the idea. Some details on the eXpert can be found here. I'm assuming its AU only, and probably has another name elsewhere in the world, possibly the Quattro? If anyone can fill me in here, it would be greatly appreciated. Sorry for the lack of focus, this was the very first day I had my new camera, and it never occurred to me to check the images before I re-assembled the lock.
Bits everywhere! In this photo, you can see the plug with pins held in with grease, the body (in brass), its cover, my homemade follower, the driver pins, and the springs I purchased to replace all the ones I bent taking it apart!
Heres one side of the plug with the pins and key inserted. As mentioned above, to get all the pins to stay in when I slid the plug back into the body I used rubber grease. This is the pink gloop you can see.
The other side of the sub assembled plug.
A shot from above.
The first of the pin shots. There were 4 rows of pins, at roughly 1oclock, 5oclock, 7oclock and 11oclock. These pins were the pointed ones and IIRC (its been about 6 months since I pulled it to bits) interfaced with the millings on the side of the key.
The second of the pin shots. These are the pins that interfaced with the millings on the L and R of the top / bottom of the key (its reversible, so there are 8 sets of millings on the key for the four rows of pins).
A shot of the cylinder and its cover. The two larger holes situated on the top are for the bars that fix the cylinder to the retainer that suits the lock. In my case, I have it fitted to an AU Padlock IC, so those bars fitted into the brass retainer, which you can see in later shots.
Another (out of focus :/) shot of the cylinder.
Driver pins and springs. I had trouble re-assembling the lock at first, as I could get it all back together, but the key would get stuck in the lock. I had noticed that the driver pins were different sizes, but since this was way back when I had just started picking, I assumed they were like that to make it more difficult to pick. Not so. Pin stacks in this lock need to be balanced, as there is not enough room for the large pins coupled with the large drivers, and they foul against the outer cover, trapping the key. Thanks to LockSmithArmy on Youtube, whom I sent PMs to to find this out. You can see his video of him picking a KABA Penta (The same as this eXpert, but with 5 rows of pins instead of 4) here.
Reassembly. This is the cylinder with the plug and key inserted. I slowly pressed the cover back on while adding drivers and springs. All pins are slightly offset to one another to allow this, if ever so slightly. When I asked my local KABA lockie how he does it, he proudly showed me his $1000 KABA jig, and explained that I would never get it back together without one
Assembled into an ABUS Rock 83/55.
And lastly, a close shot of the assembled lock. You can see the brass retainer I was rabbiting about on above. You can also see the hole I have filled with epoxy. This is where I drilled it when I accidentely locked it in a state where the key would not turn the padlocks cam. I drilled here, where there is no anti drill inserts, or pins in the way, and eventually hit the retaining screw, which undid, and released the lock. Yes really.. All that security in the lock, foiled by a 2mm drillbit. I have also used this method on quite a number of other AU IC padlocks with success, but have noted that the latest revisions of them (last 6 months or so) seem to include anti drill inserts here. On regular pin tumbler locks drilling here will destroy the springs, but they are easily replaced.
Anyway, hope thats of interest to some of you guys. Best of luck picking it! These images are hosted on my own host, so they should be around for millenia to come, or until I stop paying the bill.
-adi_picker