![]() Sun Feb 24, 2013 3:31 pm
Sun Feb 24, 2013 3:31 pm
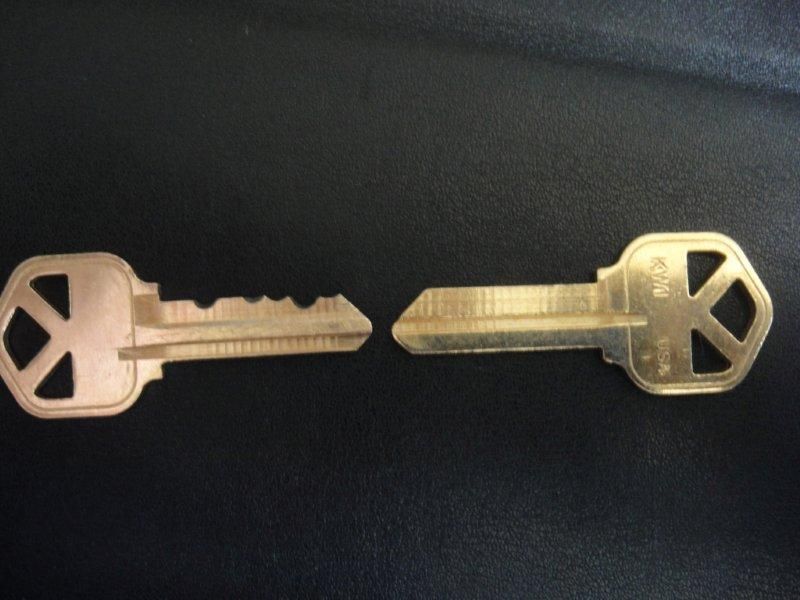
How to modify a KW1 blank to fit a Lockwood V7
How to modify a KW1 to work in a Lockwood V7
I don't think of this as a tutorial as much as how I modified the key to fit. Did not list specs as to how much to file the warding, because that will vary depending upon the actual keyway. This modified key works perfectly in two of the three V7s I got from Rodmdx, the the third lock has a slightly different keyway. The third lock will only require a slight bit more filing of the wards to work, but that will be on a different blank, since this blank is already working.
Don’t have any Lockwood V7 blanks, so taking a tip from LocksmithArmy, I tried modifying a KW1 blank. I started by picking, then field stripping the lock, so that I could more easily see the modifications needed using just the key and the plug. Used a cheap-donkeyed set of diamond needle files from Harbor Freight to make the modifications, which allow better control than a dremel tool.
Below are the measurements I took with my cheap micrometer comparing only the differences between the KW1 and the modified KW1 blanks. I have included both forms of measurement for people in more places. If the specification is not listed, I did not change it.
Normal KW1 Modified KW1
Blade length from shoulder to tip:
1.095” (27.81mm) 1.108” (28.15mm)
Blade Height:
.335” (8.51mm) .306” (7.77mm) trimmed on top AND bottom!!!
Bottom ward:
.024” (.60mm) .015” (.40mm)
Shoulder to first bitting on V7: .236” (5.98mm)
Distance between bittings: .125” (3.17mm)
NOTES:
The length of the blade from shoulder should be longer, but as the seventh pin was a deep cut, I let it ride on the ramp at the tip of the key. Yes, that is a no-no for locks in actual use, but it works beautifully for my toy that will never see the wear of a lock in use.
I increased the length of the blade by filing back the shoulders of the key.
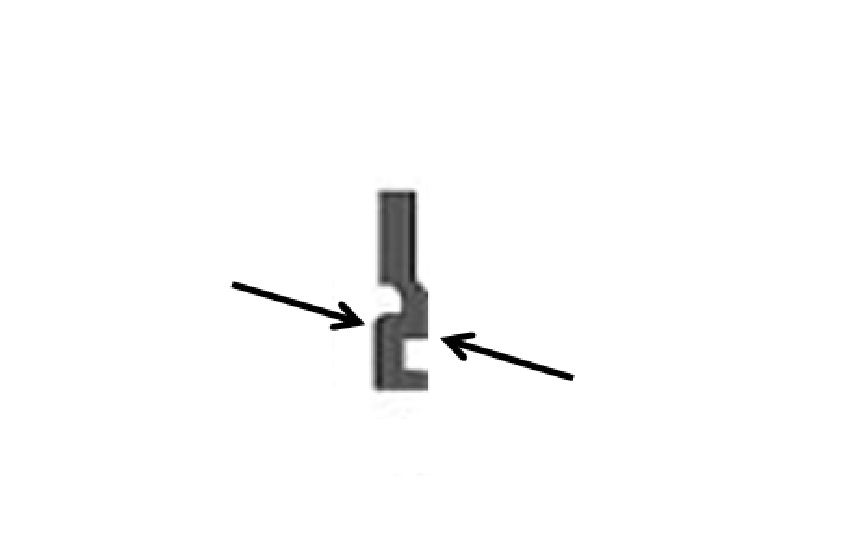
Filed bevels on the parts highlighted below:
Good luck to all,
Gordon
I don't think of this as a tutorial as much as how I modified the key to fit. Did not list specs as to how much to file the warding, because that will vary depending upon the actual keyway. This modified key works perfectly in two of the three V7s I got from Rodmdx, the the third lock has a slightly different keyway. The third lock will only require a slight bit more filing of the wards to work, but that will be on a different blank, since this blank is already working.
Don’t have any Lockwood V7 blanks, so taking a tip from LocksmithArmy, I tried modifying a KW1 blank. I started by picking, then field stripping the lock, so that I could more easily see the modifications needed using just the key and the plug. Used a cheap-donkeyed set of diamond needle files from Harbor Freight to make the modifications, which allow better control than a dremel tool.
Below are the measurements I took with my cheap micrometer comparing only the differences between the KW1 and the modified KW1 blanks. I have included both forms of measurement for people in more places. If the specification is not listed, I did not change it.
Normal KW1 Modified KW1
Blade length from shoulder to tip:
1.095” (27.81mm) 1.108” (28.15mm)
Blade Height:
.335” (8.51mm) .306” (7.77mm) trimmed on top AND bottom!!!
Bottom ward:
.024” (.60mm) .015” (.40mm)
Shoulder to first bitting on V7: .236” (5.98mm)
Distance between bittings: .125” (3.17mm)
NOTES:
The length of the blade from shoulder should be longer, but as the seventh pin was a deep cut, I let it ride on the ramp at the tip of the key. Yes, that is a no-no for locks in actual use, but it works beautifully for my toy that will never see the wear of a lock in use.
I increased the length of the blade by filing back the shoulders of the key.
Filed bevels on the parts highlighted below:
Good luck to all,
Gordon
Just when you think you've learned it all, that is when you find you haven't learned anything yet.