![]() Tue Aug 06, 2013 10:19 am
Tue Aug 06, 2013 10:19 am
A Tribute to the work of Rai
Most of us here are familiar with the work of Rai (or Raimundo). Those who are not, are probably fairly new to the site. Have had the privilege of getting a number of his tools, and am constantly amazed with each one. He is creative with the picks and tools he makes, and his dedication to quality is very rare.
Wanted to start a topic showing some of his handiwork, and hopefully more of you will add the tools you have acquired from him as well.
Some of these tools are 'tried and true'. Some are among his latest prototypes. Even have some extra parts he tossed in to show a bit of how he made the parts. Will be going into a little detail of what the picks are for if it is not obvious.
First, the family shot of his tools in my collection.
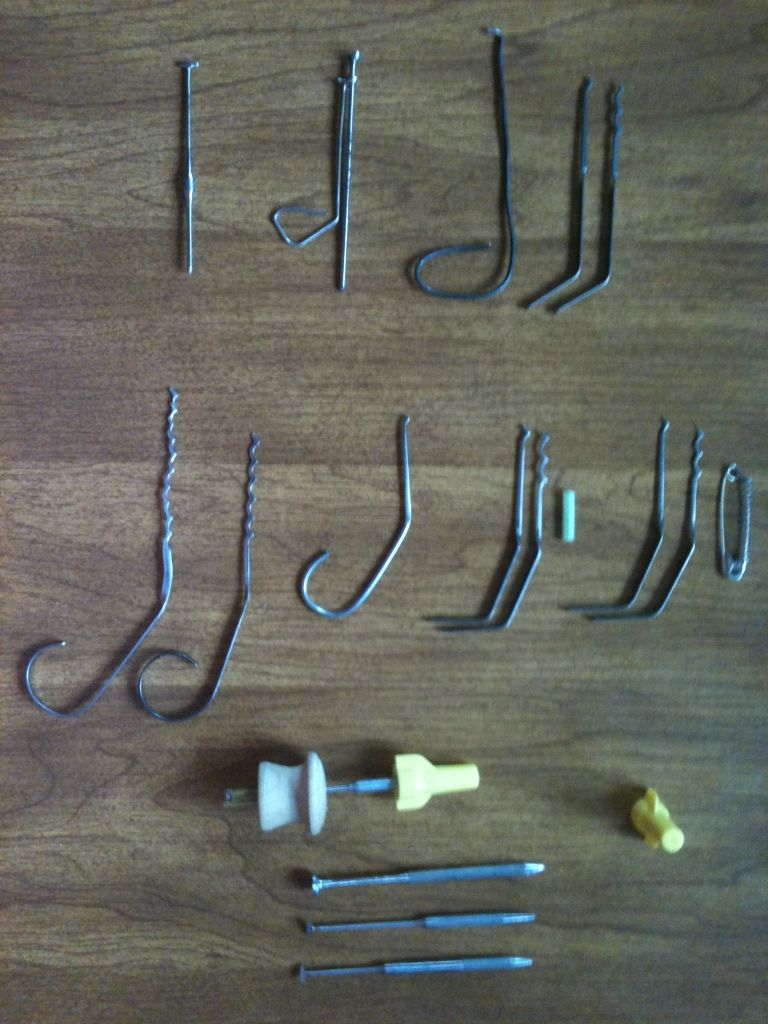
This is the first handmade-by-Rai set of Bogotas I have. It is always with me, and has travelled with me a fair bit.
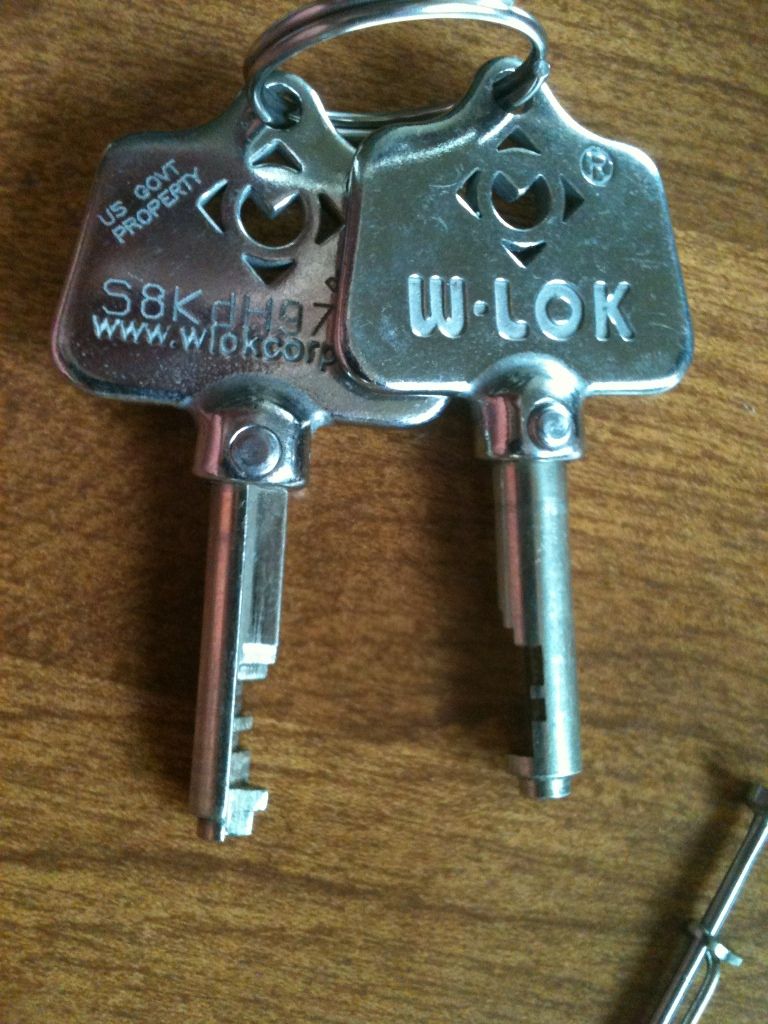
These are the only of Rai's tools that I have that he did not make (barring my own hand-made Bogotas). They are the Bogota Titan set, part of the Executive set from Serepick.com
When I wanted a backup set of Bogota picks, got this set.

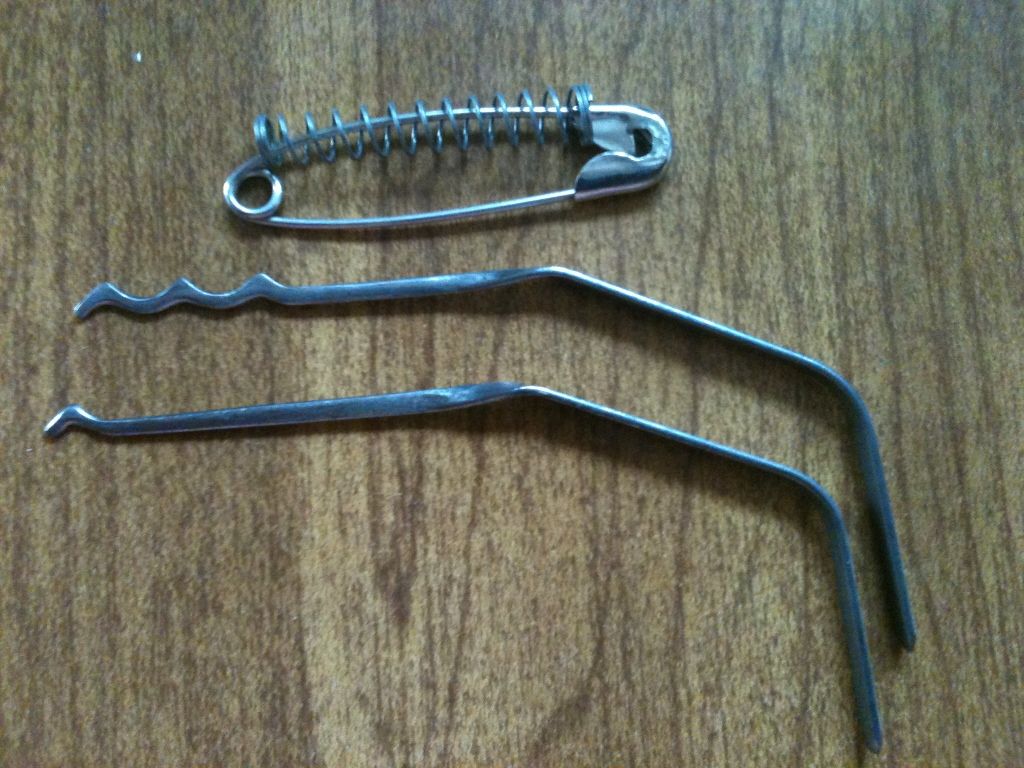
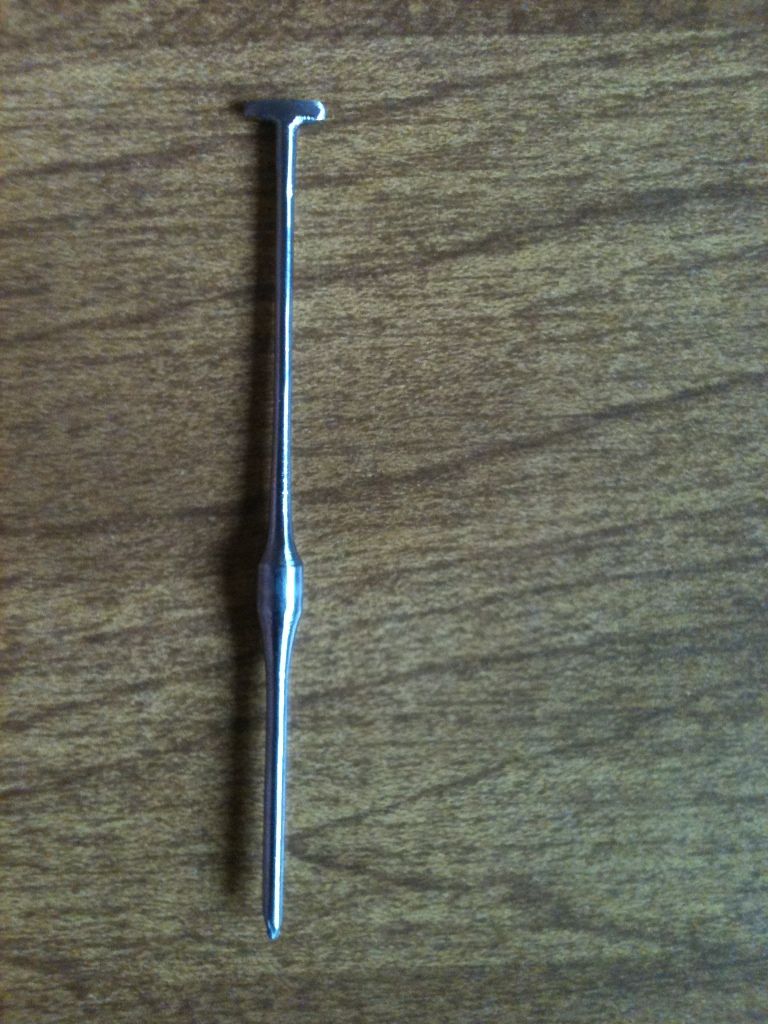
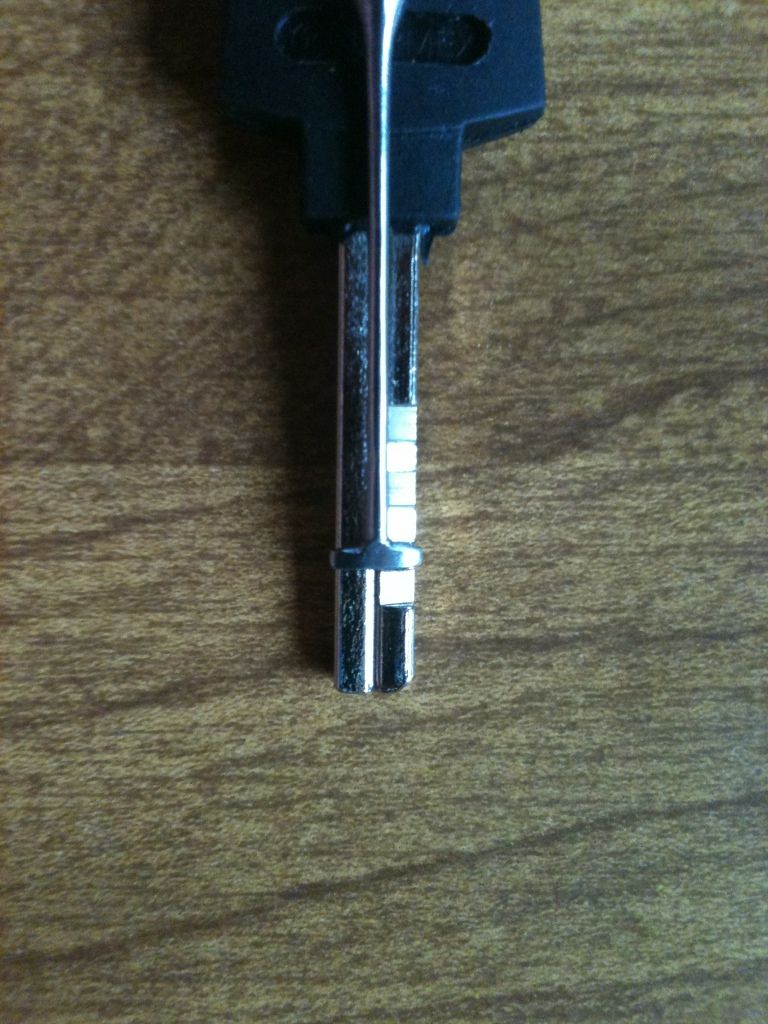
Now for something a little different. Well, OK, very different. This is a pick Rai made using a drywall screw. He put the screw into a drill and held it to a grinder to get rid of the threads, then a file and sandpaper to make the shaft smooth and even. He ground the head to the correct diameter, and cut out a quarter of the head. Shaped the other wire.
Any guesses what kind of lock it is used to pick?
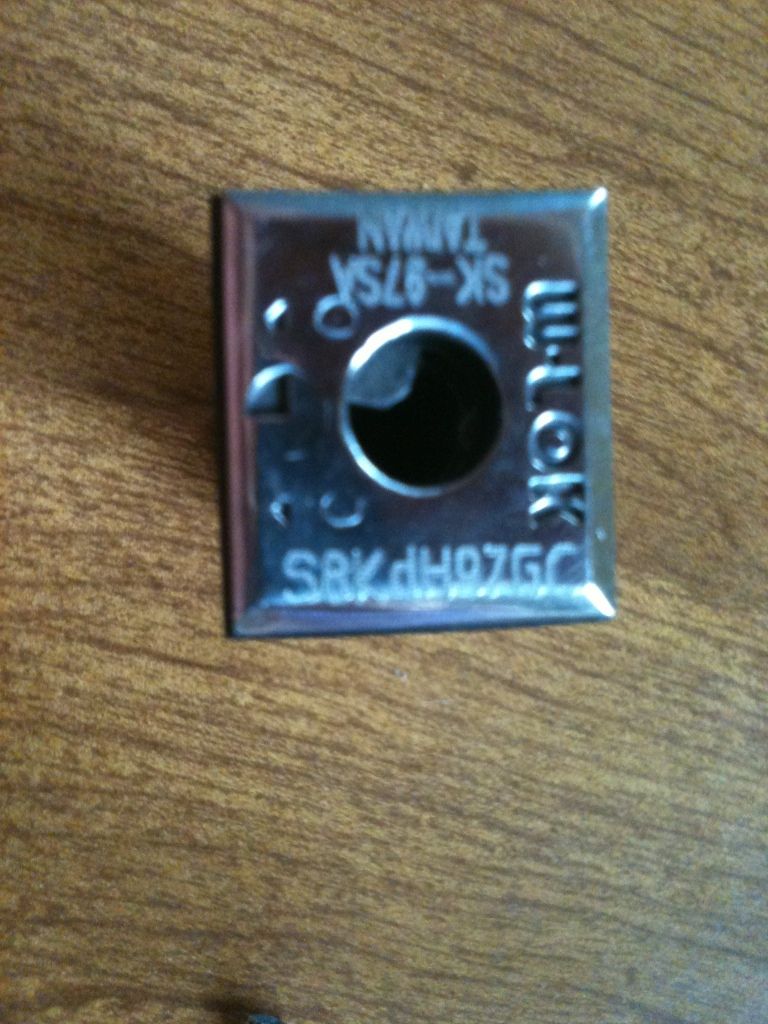
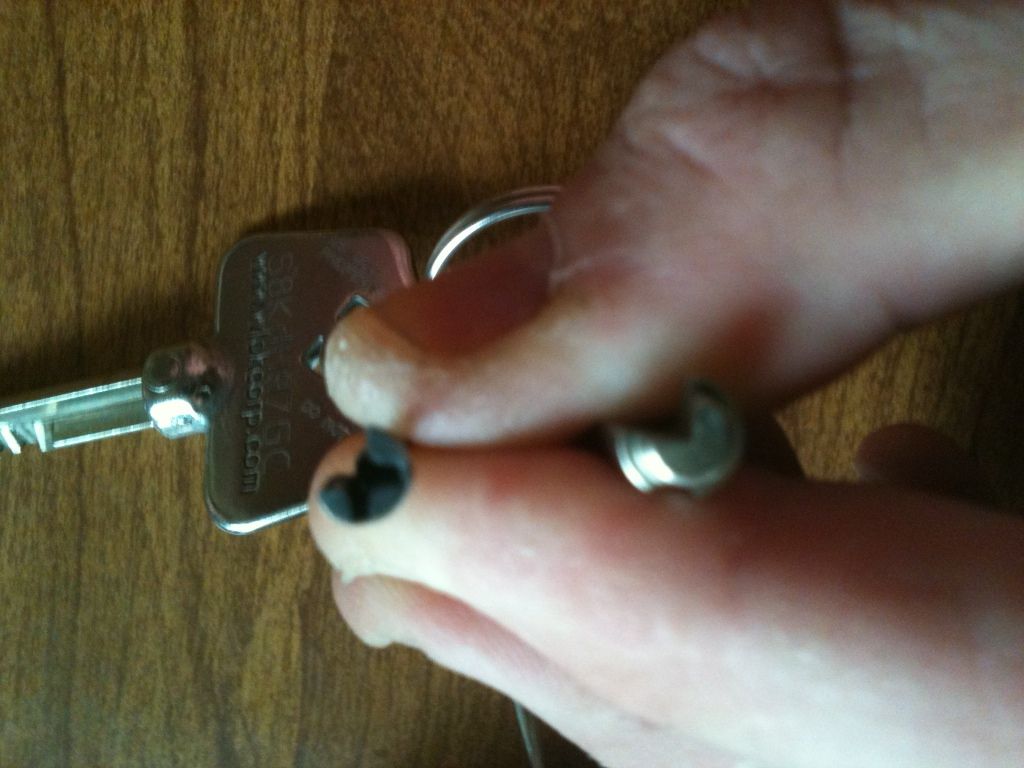
W-LOK. And why the shaped tip? Because the tip of the key has that shape and must be pressed into the back of the lock, forcing back a spring-loaded plunger, then that tip is used to drive the lock (once the discs are set).
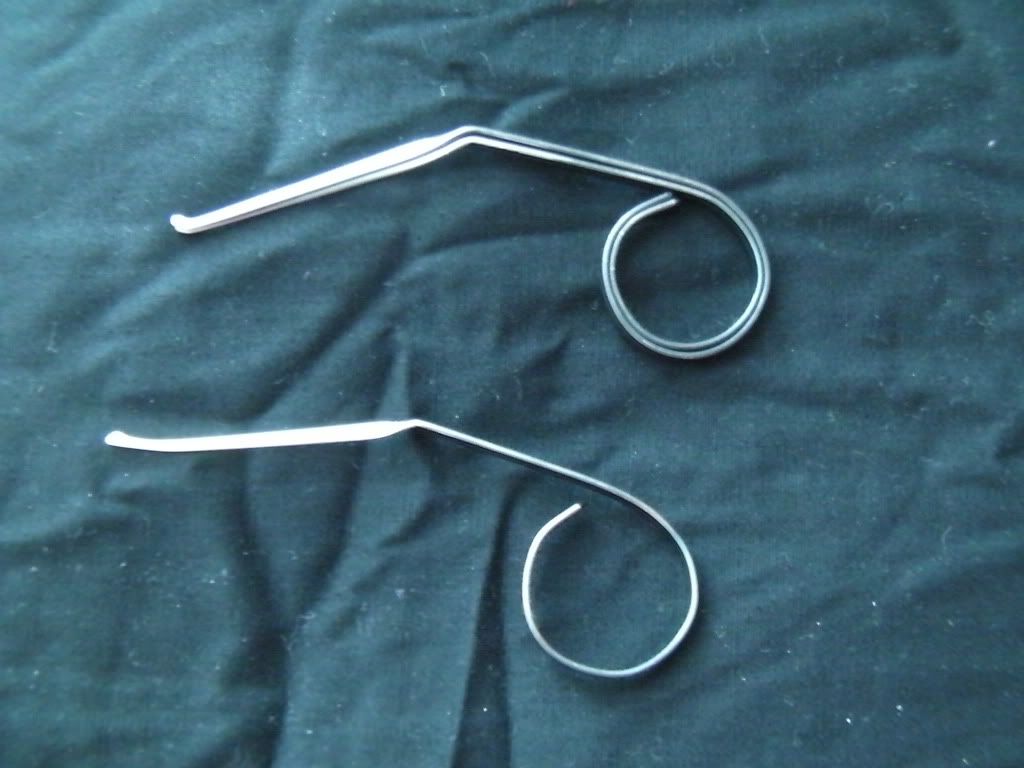
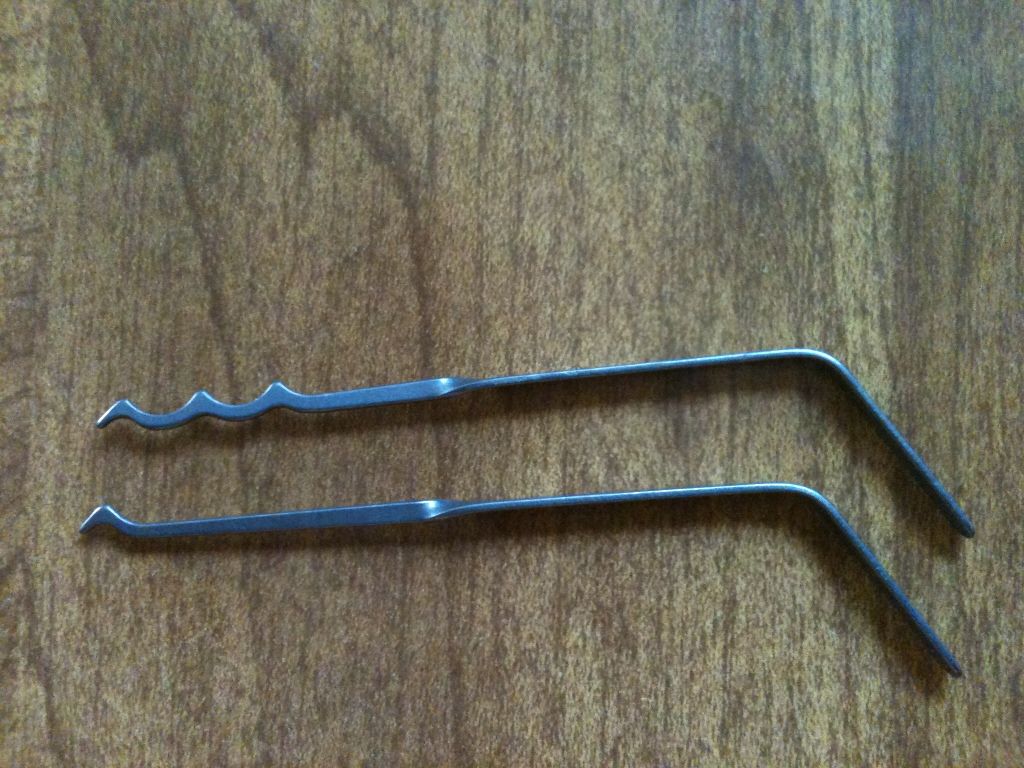
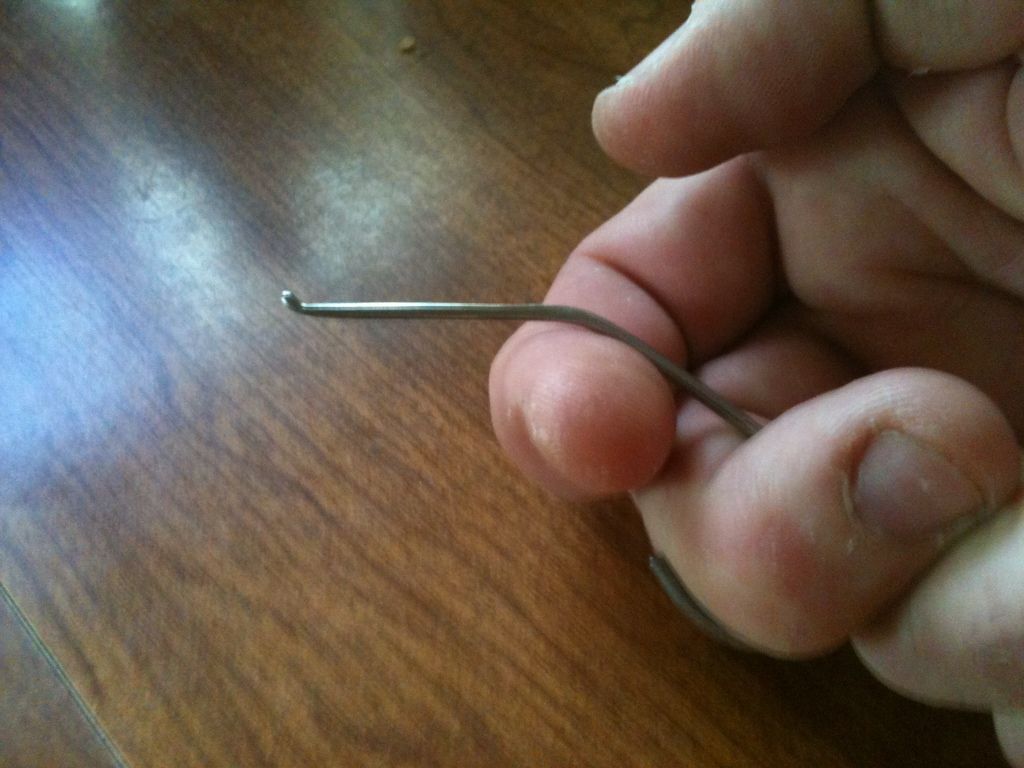
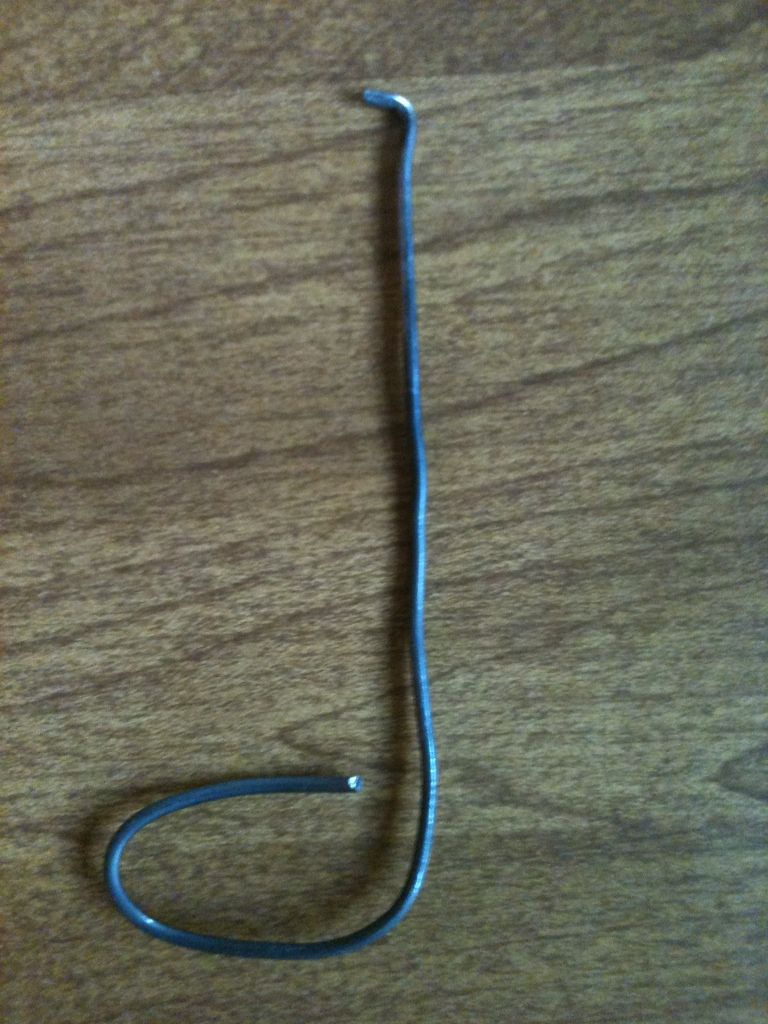
This hook that Rai sent works so well, it has joined my Bogota set, and is always with me.
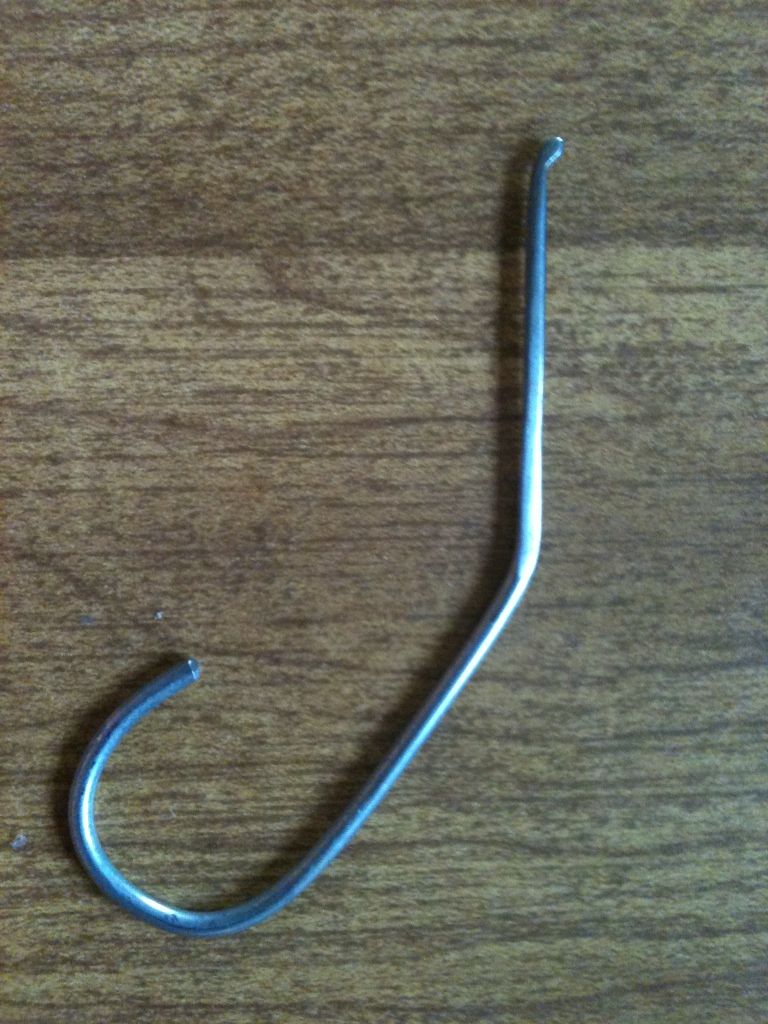
I use it like this, and it is incredibly strong!
Now you may notice a slight drop in quality in this next tool.
That is because it is not made by Rai, but by my son. Just had to toss the picture in. Over a year ago, he made this pick for his warded padlock from mechanic wire - entirely without my knowledge or help. I was impressed when he came into the room showing me that he could pick a lock, too. Then he repeatedly did so. My wife was not quite as impressed.
 Not bad for a kid who was still not 8 years old.
And now back to our regularly scheduled programming...
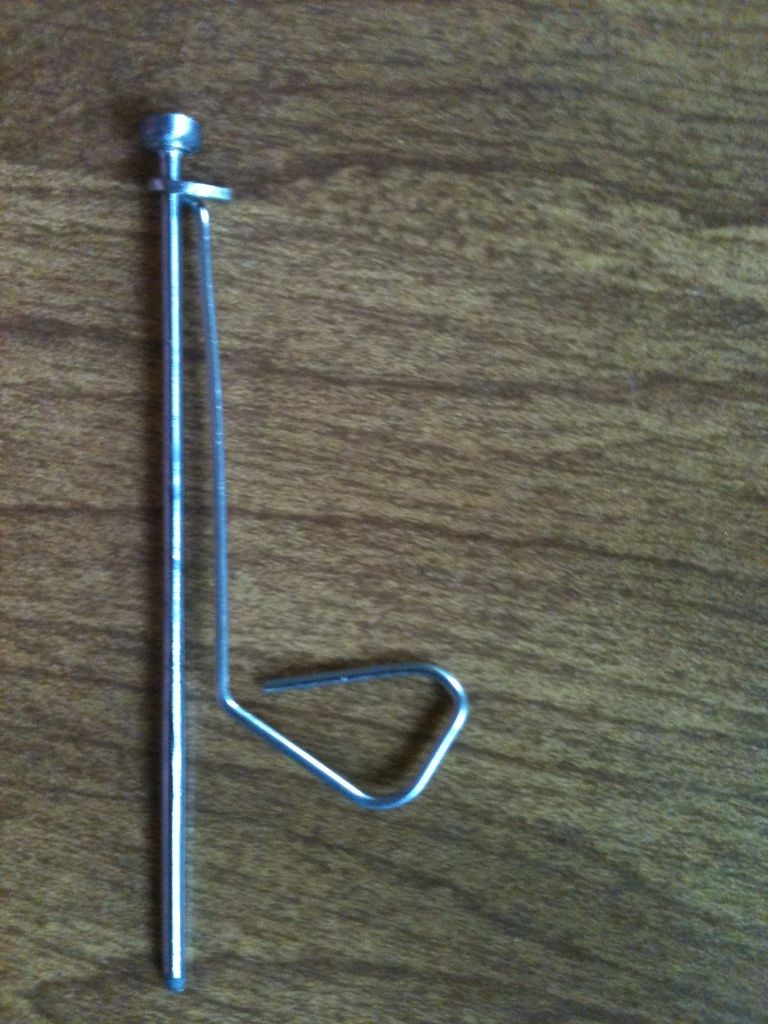
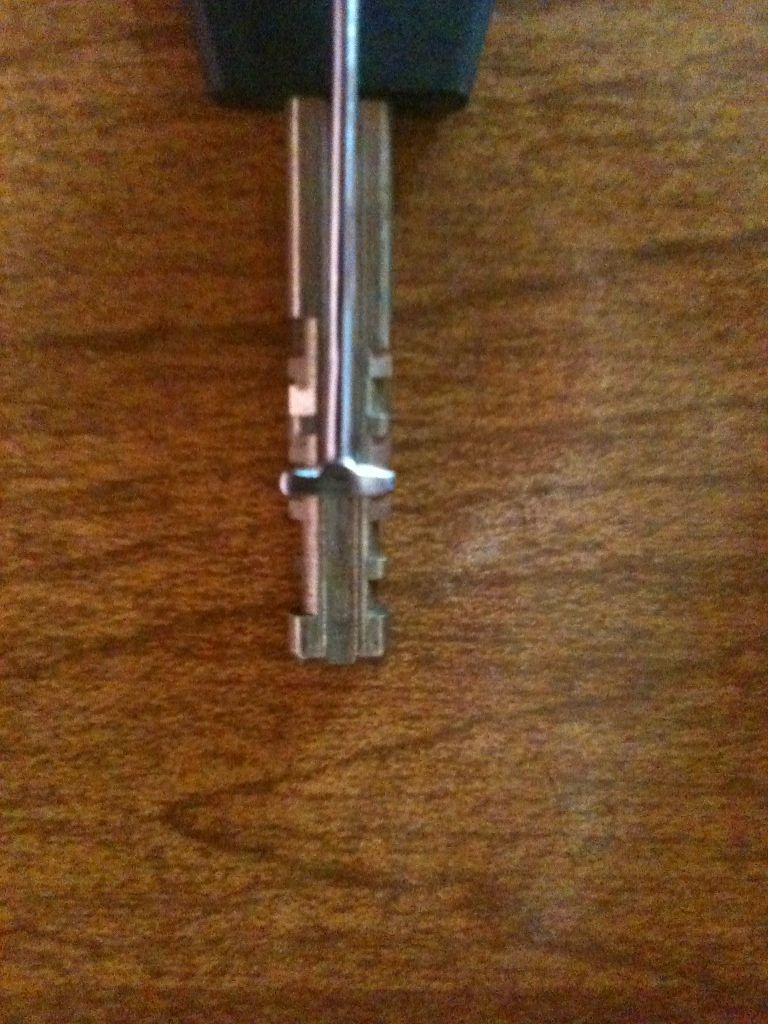
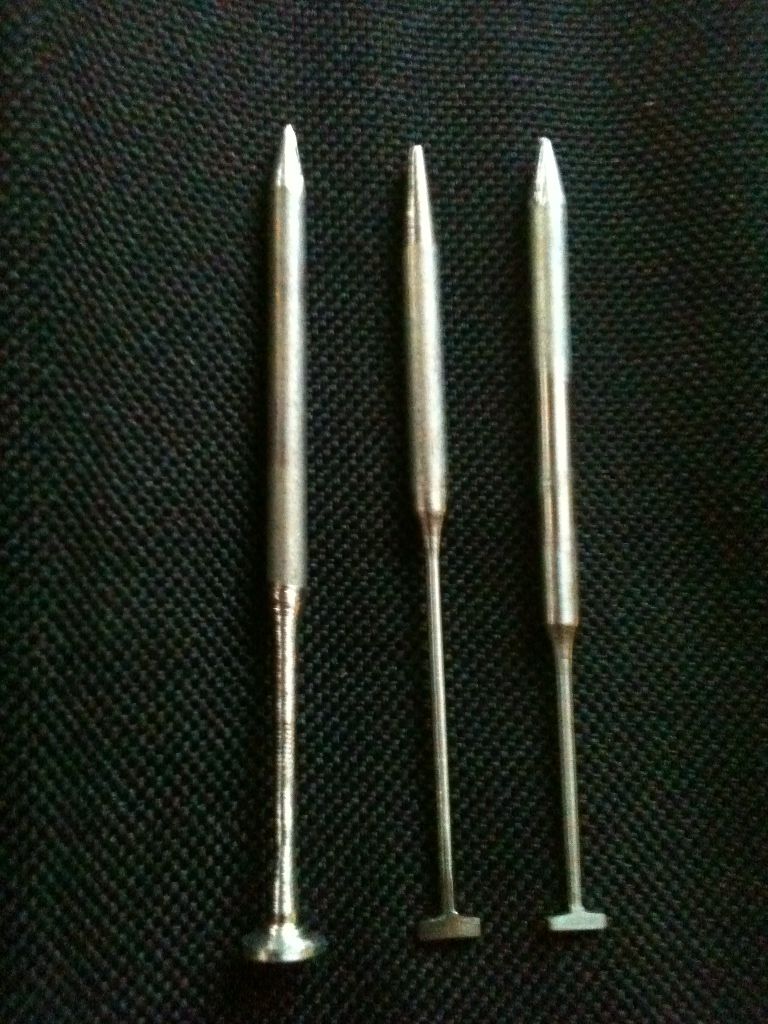
This next one was included with the W-LOK pick. Rai was working on making a light, but durable, disc detainer pick. To quote Rai, "This is made from a concrete nail spin in the chuck of a power hand drill against a grinder, then file and sanding stick. His idea was to make it light so it doesn't bend if dropped."
You can see it fits nicely on the bitting of the key of a Chinese disc detainer lock.
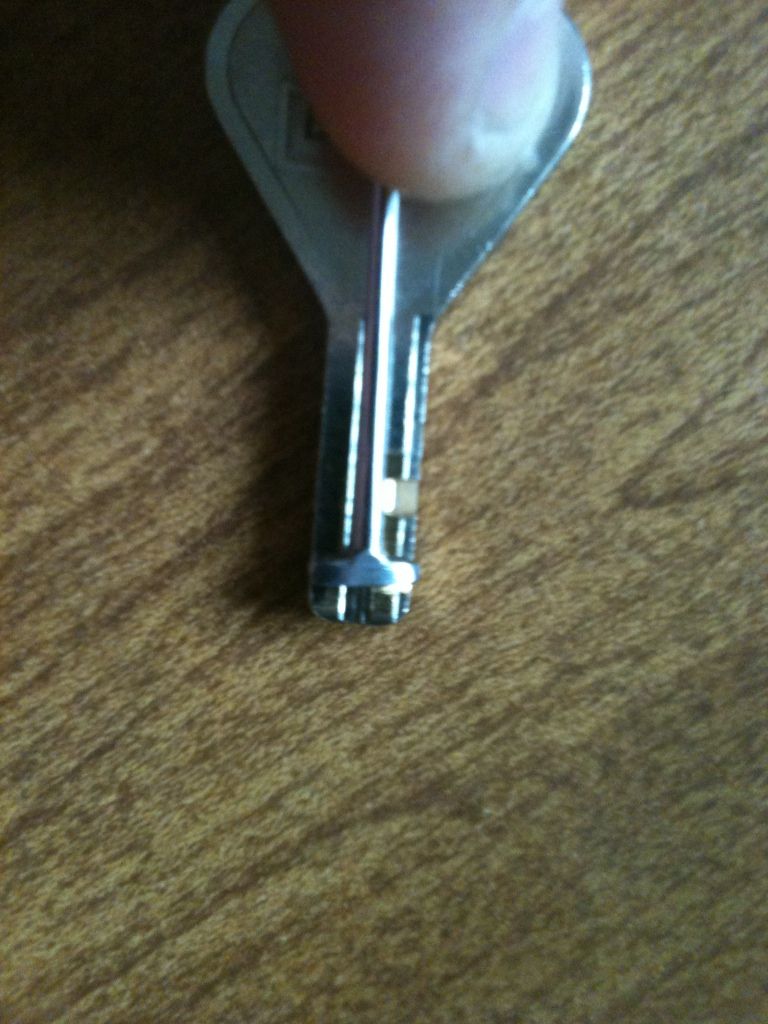
And onto the key of an ABLOY Disclock! (It may need a tiny bit of narrowing)
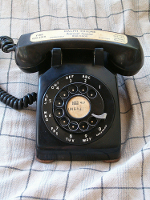
And even this super-duper high security lock from Wal-Mart! Well, the lock packaging said it was high security, so it must be true, right?
Now for a little fun. I am sure many of you saw the post somebody wrote about this lock and key...
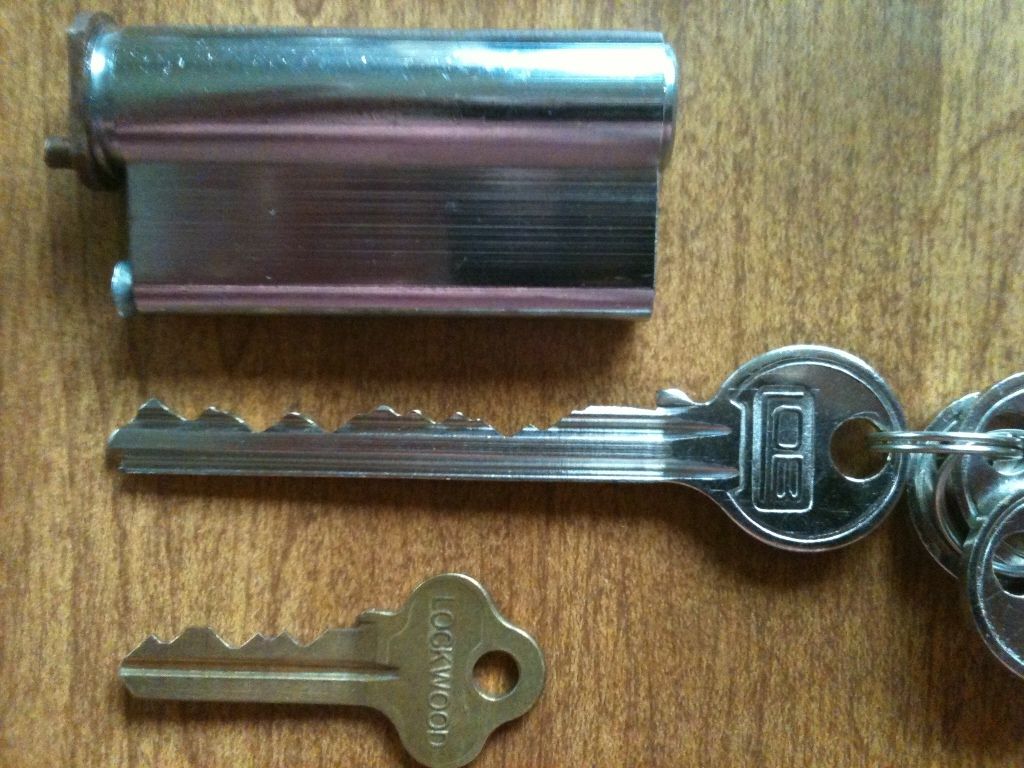
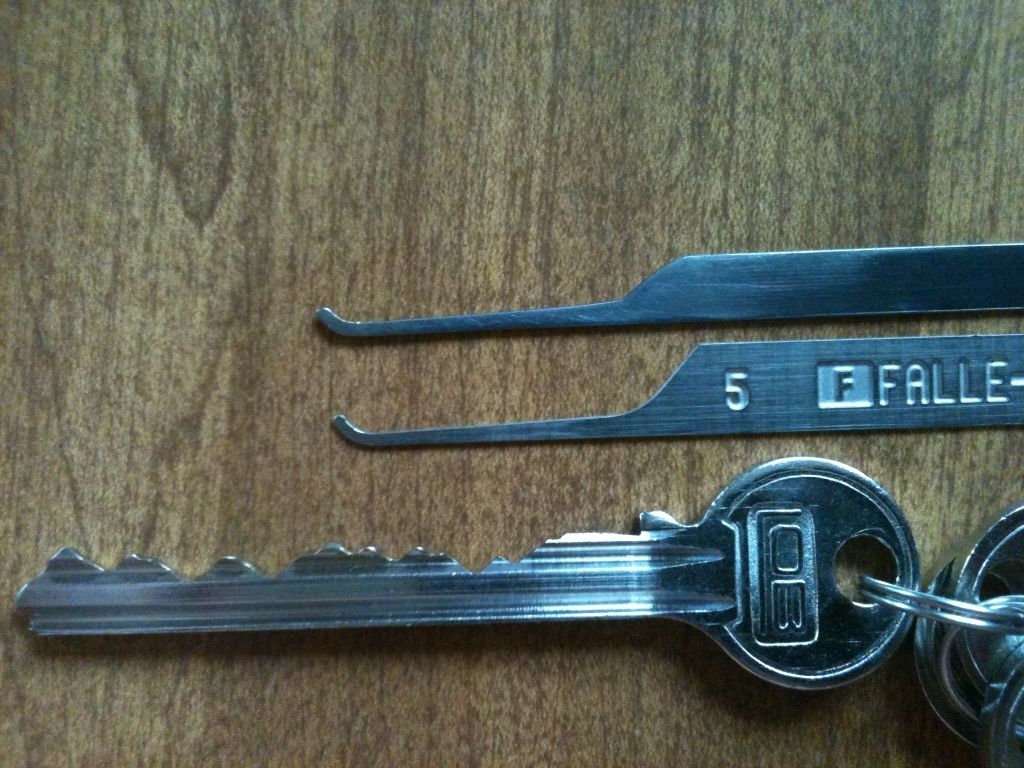
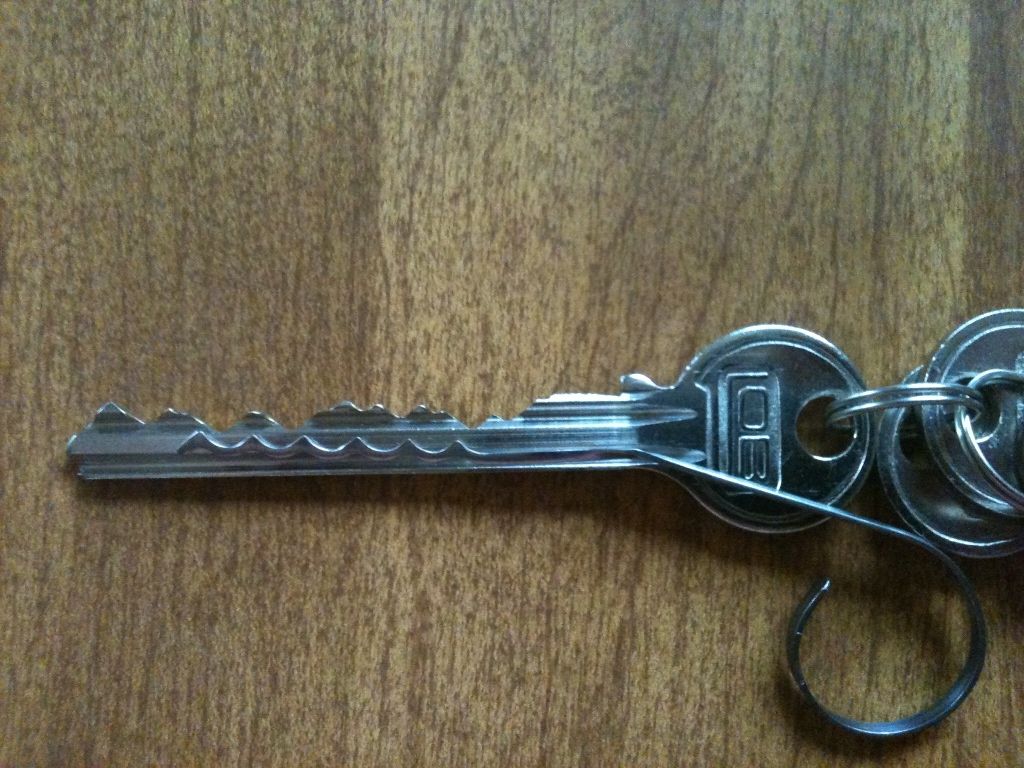
I placed a key from a Lockwood padlock below the LOB key for scale. How do you pick a lock with a key that long? Here is that key next to a commercially made pick, and my favorite hook - a homebrew made from a wide wiper insert. Let's face it - they just won't reach. The first pin is also waaaay further into the keyway than is normal.
So what do you do? Rai stepped in with an offer to make a Bogota a bit longer than usual. (It was well worth trading him a lock!)
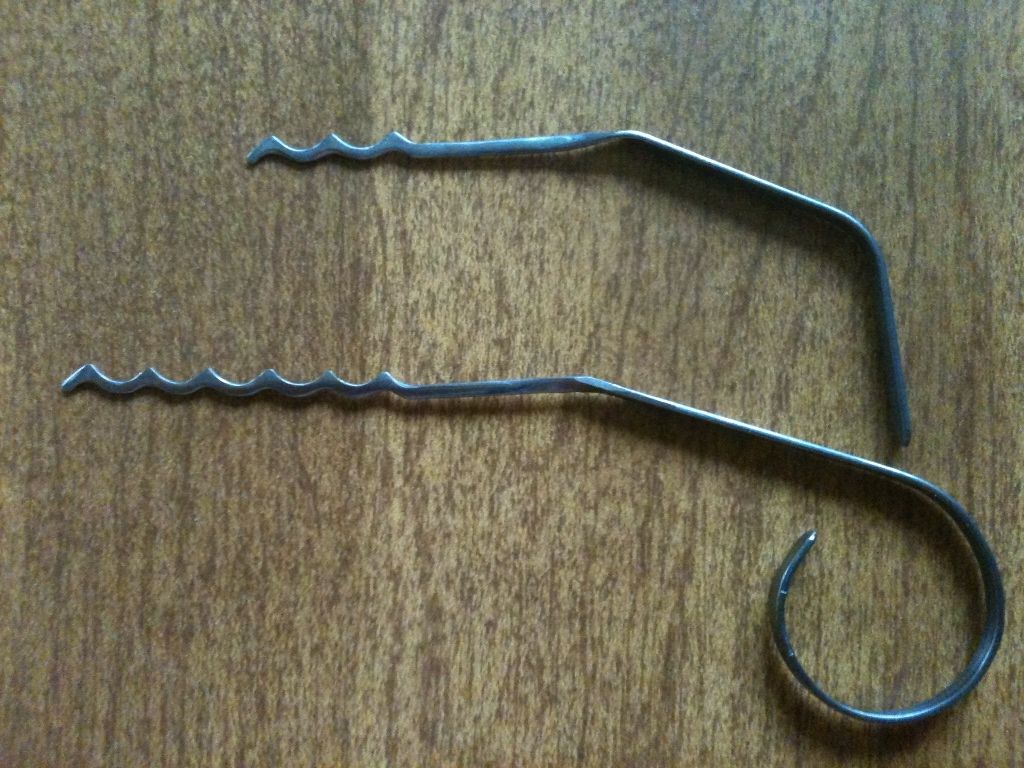
WOW, look at that Bogota! Custom made 6-hump, with a ring to hold onto my middle finger (he even asked what my finger size was!). That ring really helps with proper leverage and control when trying to pick that lock.
But there was still a problem.
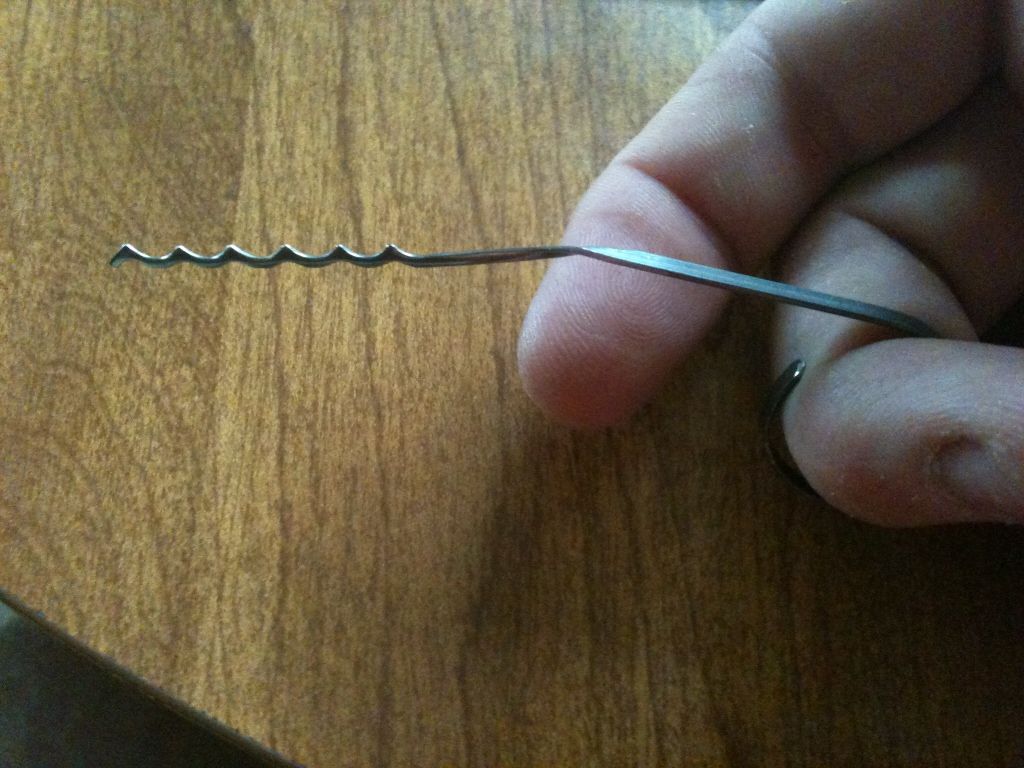
Uh-oh! That deeply set first pin meant that your standard off-the-shelf ( ) 6 hump Bogota still won't reach. Also, there is still a problem with the high-low-high-low-high-low (etcetera) bitting. You can't get enough angle to lift the high bittings deep inside the lock up high enough to set.  I could cheat
  and pick from both ends of the lock and get it open, but in real life, you usually do not have access to both sides of the lock.
So what to do? Rai had another idea. As usual, it was a pretty good idea, and it worked!
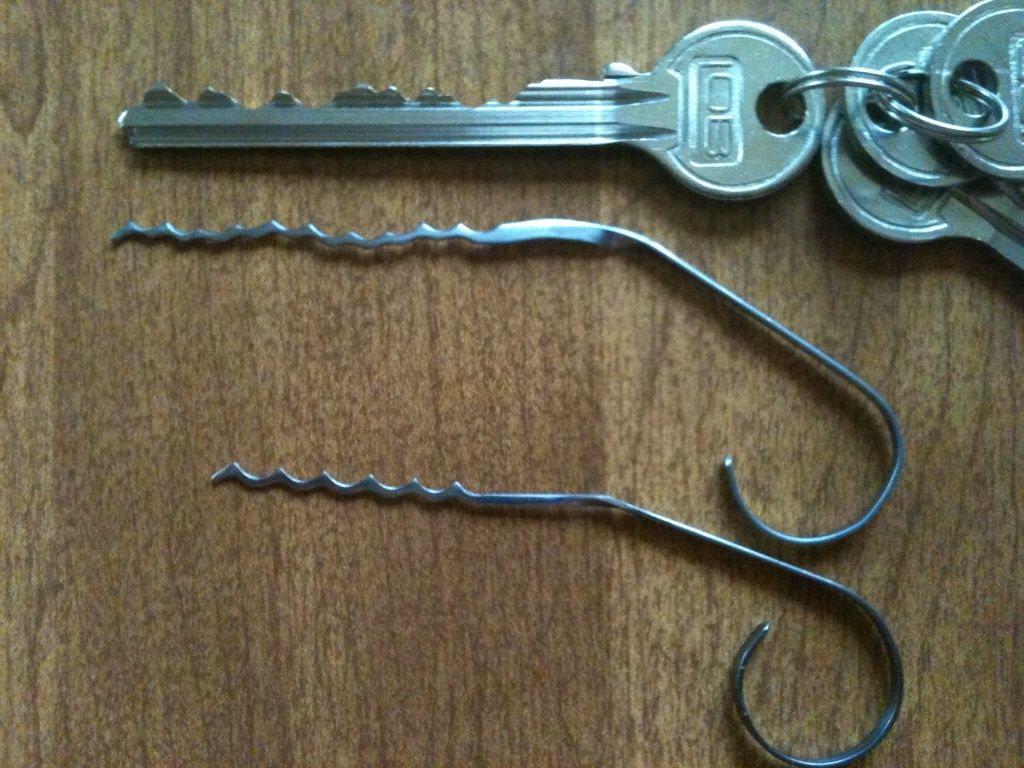
Not only does it work, if I ever come across a 13, or even a 14 linear pin lock, the pick would still reach! Rai referred to this as a 'Wave Rake Bogota', and I suspect it is also unique. The high/low variation of the peaks was enough to get all pins except one. Had use a wiper insert to make a hook long enough to reach the 11th pin.
And last, but certainly not least, a prototype disc detainer pick. Made from concrete nails, brass tubing, a wood furniture handle, a wire nut, and of course, Gorilla Glue. Let's face it… if it does not have duct tape, wire, or Gorilla Glue, a guy did not make it.
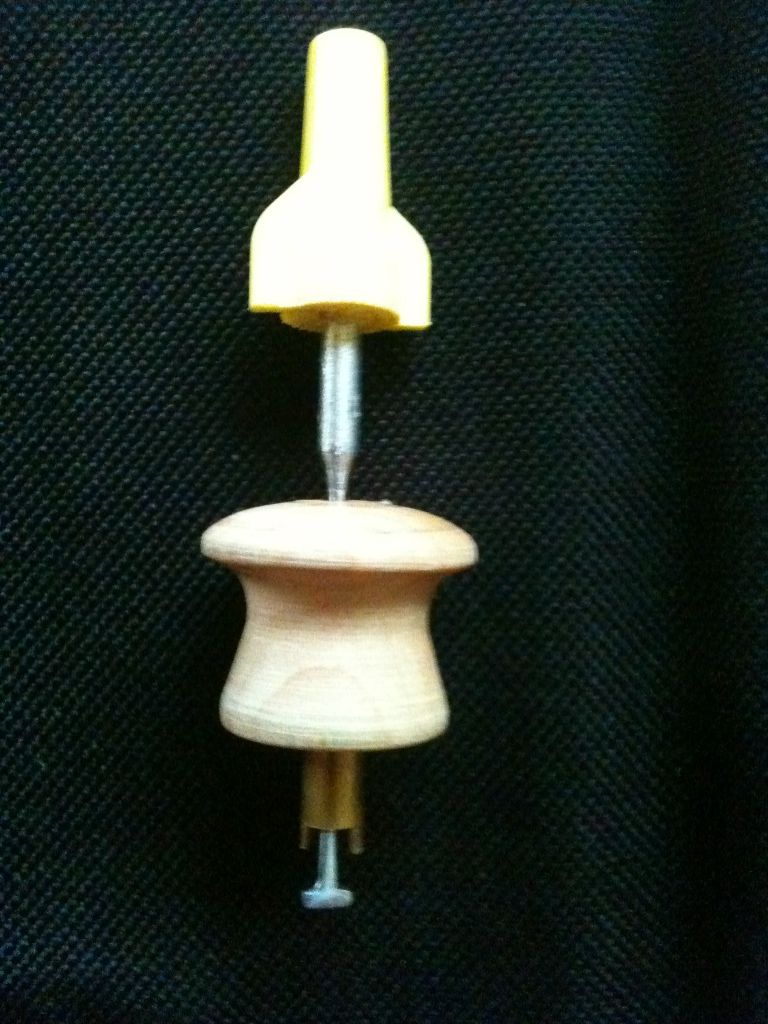
Here are the steps Rai took to make main part of the detainer pick. (This is his actual work, sent to me so I could see what he did). He started with a concrete nail, put it into a drill, and held it to a grinder to get the rough shape. Then he used a file and sanding block to finalize the size and finish of the spindle. Then he ground/filed/sanded the head of the nail to flatten it, then finalized the size and shape of the head. The part of this that turns the discs is NOT going to fall off.
My sincere thanks to Rai for the work he does that benefit all of us, and his willingness to share his knowledge with all of us.
So let's see some more of Rai's work guys! Please post pictures of your tools and picks made by Rai.
Gordon
Wanted to start a topic showing some of his handiwork, and hopefully more of you will add the tools you have acquired from him as well.
Some of these tools are 'tried and true'. Some are among his latest prototypes. Even have some extra parts he tossed in to show a bit of how he made the parts. Will be going into a little detail of what the picks are for if it is not obvious.
First, the family shot of his tools in my collection.
This is the first handmade-by-Rai set of Bogotas I have. It is always with me, and has travelled with me a fair bit.
These are the only of Rai's tools that I have that he did not make (barring my own hand-made Bogotas). They are the Bogota Titan set, part of the Executive set from Serepick.com
When I wanted a backup set of Bogota picks, got this set.
Now for something a little different. Well, OK, very different. This is a pick Rai made using a drywall screw. He put the screw into a drill and held it to a grinder to get rid of the threads, then a file and sandpaper to make the shaft smooth and even. He ground the head to the correct diameter, and cut out a quarter of the head. Shaped the other wire.
Any guesses what kind of lock it is used to pick?
W-LOK. And why the shaped tip? Because the tip of the key has that shape and must be pressed into the back of the lock, forcing back a spring-loaded plunger, then that tip is used to drive the lock (once the discs are set).
This hook that Rai sent works so well, it has joined my Bogota set, and is always with me.
I use it like this, and it is incredibly strong!
Now you may notice a slight drop in quality in this next tool.
That is because it is not made by Rai, but by my son. Just had to toss the picture in.
And now back to our regularly scheduled programming...
This next one was included with the W-LOK pick. Rai was working on making a light, but durable, disc detainer pick. To quote Rai, "This is made from a concrete nail spin in the chuck of a power hand drill against a grinder, then file and sanding stick. His idea was to make it light so it doesn't bend if dropped."
You can see it fits nicely on the bitting of the key of a Chinese disc detainer lock.
And onto the key of an ABLOY Disclock! (It may need a tiny bit of narrowing)
And even this super-duper high security lock from Wal-Mart! Well, the lock packaging said it was high security, so it must be true, right?
Now for a little fun. I am sure many of you saw the post somebody wrote about this lock and key...
I placed a key from a Lockwood padlock below the LOB key for scale. How do you pick a lock with a key that long? Here is that key next to a commercially made pick, and my favorite hook - a homebrew made from a wide wiper insert. Let's face it - they just won't reach. The first pin is also waaaay further into the keyway than is normal.
So what do you do? Rai stepped in with an offer to make a Bogota a bit longer than usual. (It was well worth trading him a lock!)
WOW, look at that Bogota! Custom made 6-hump, with a ring to hold onto my middle finger (he even asked what my finger size was!). That ring really helps with proper leverage and control when trying to pick that lock.
But there was still a problem.
Uh-oh! That deeply set first pin meant that your standard off-the-shelf (
So what to do? Rai had another idea. As usual, it was a pretty good idea, and it worked!
Not only does it work, if I ever come across a 13, or even a 14 linear pin lock, the pick would still reach! Rai referred to this as a 'Wave Rake Bogota', and I suspect it is also unique.
And last, but certainly not least, a prototype disc detainer pick. Made from concrete nails, brass tubing, a wood furniture handle, a wire nut, and of course, Gorilla Glue. Let's face it… if it does not have duct tape, wire, or Gorilla Glue, a guy did not make it.
Here are the steps Rai took to make main part of the detainer pick. (This is his actual work, sent to me so I could see what he did). He started with a concrete nail, put it into a drill, and held it to a grinder to get the rough shape. Then he used a file and sanding block to finalize the size and finish of the spindle. Then he ground/filed/sanded the head of the nail to flatten it, then finalized the size and shape of the head. The part of this that turns the discs is NOT going to fall off.
My sincere thanks to Rai for the work he does that benefit all of us, and his willingness to share his knowledge with all of us.
So let's see some more of Rai's work guys! Please post pictures of your tools and picks made by Rai.
Gordon
Just when you think you've learned it all, that is when you find you haven't learned anything yet.