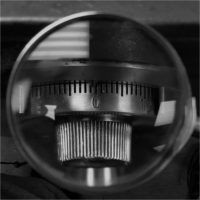
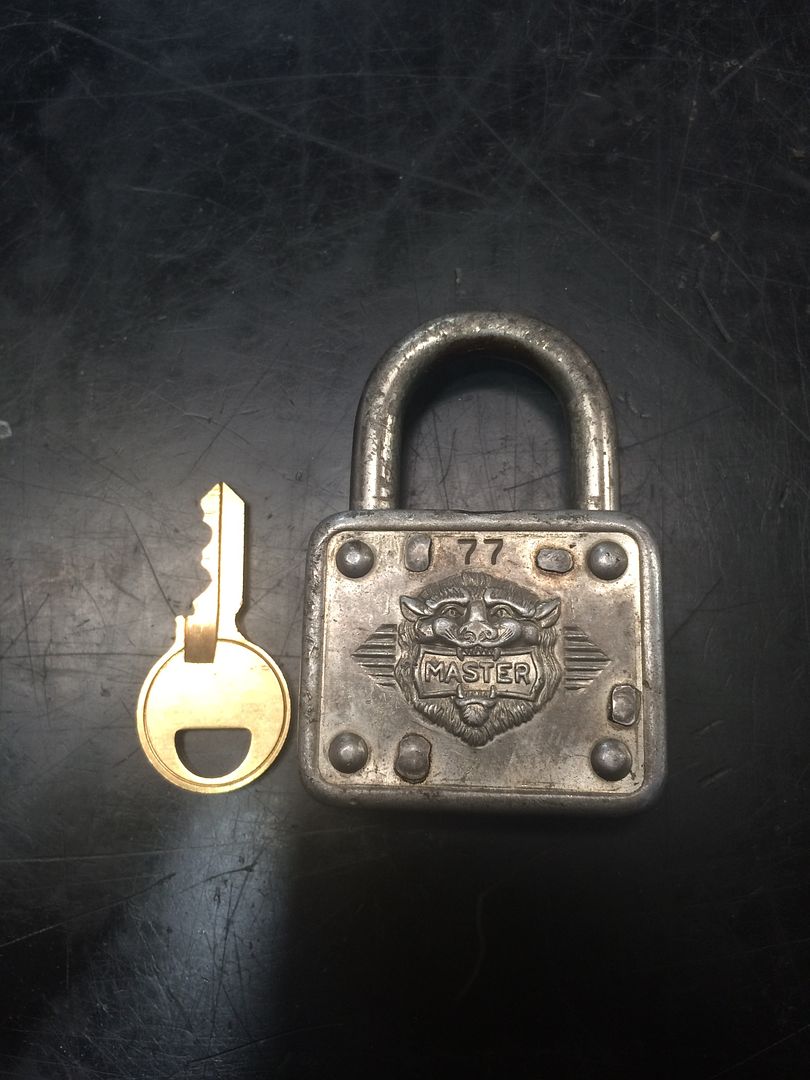
First lock I impressioned was a Master No. 3. Wafer locks are easier to see marks on, but are also more easily damaged from excessive force. That is less of a problem when the person is being taught by someone who has experience. But when the person's only trainer is the internet, it can be difficult.
The things to remember:
1. Do not apply too much tension. I use maybe twice or at most three times the force I normally use to open the lock with a key. Any more, and you will break keys and risk damaging/deforming pins.
2. The more pins there are, the more difficult it is to impression when starting out. So a simple wafer lock or Master padlock is a good idea. The Master locks do make decent marks.
3. Do NOT lubricate the lock before impressioning. Impressioning requires friction between the plug/lock body and pins at the shear line. Lube it, and friction is reduced.
4. If the lock is too dirty, you can use something to clean the junk out, but then blow compressed air into the keyway to get rid of excess lubrication.
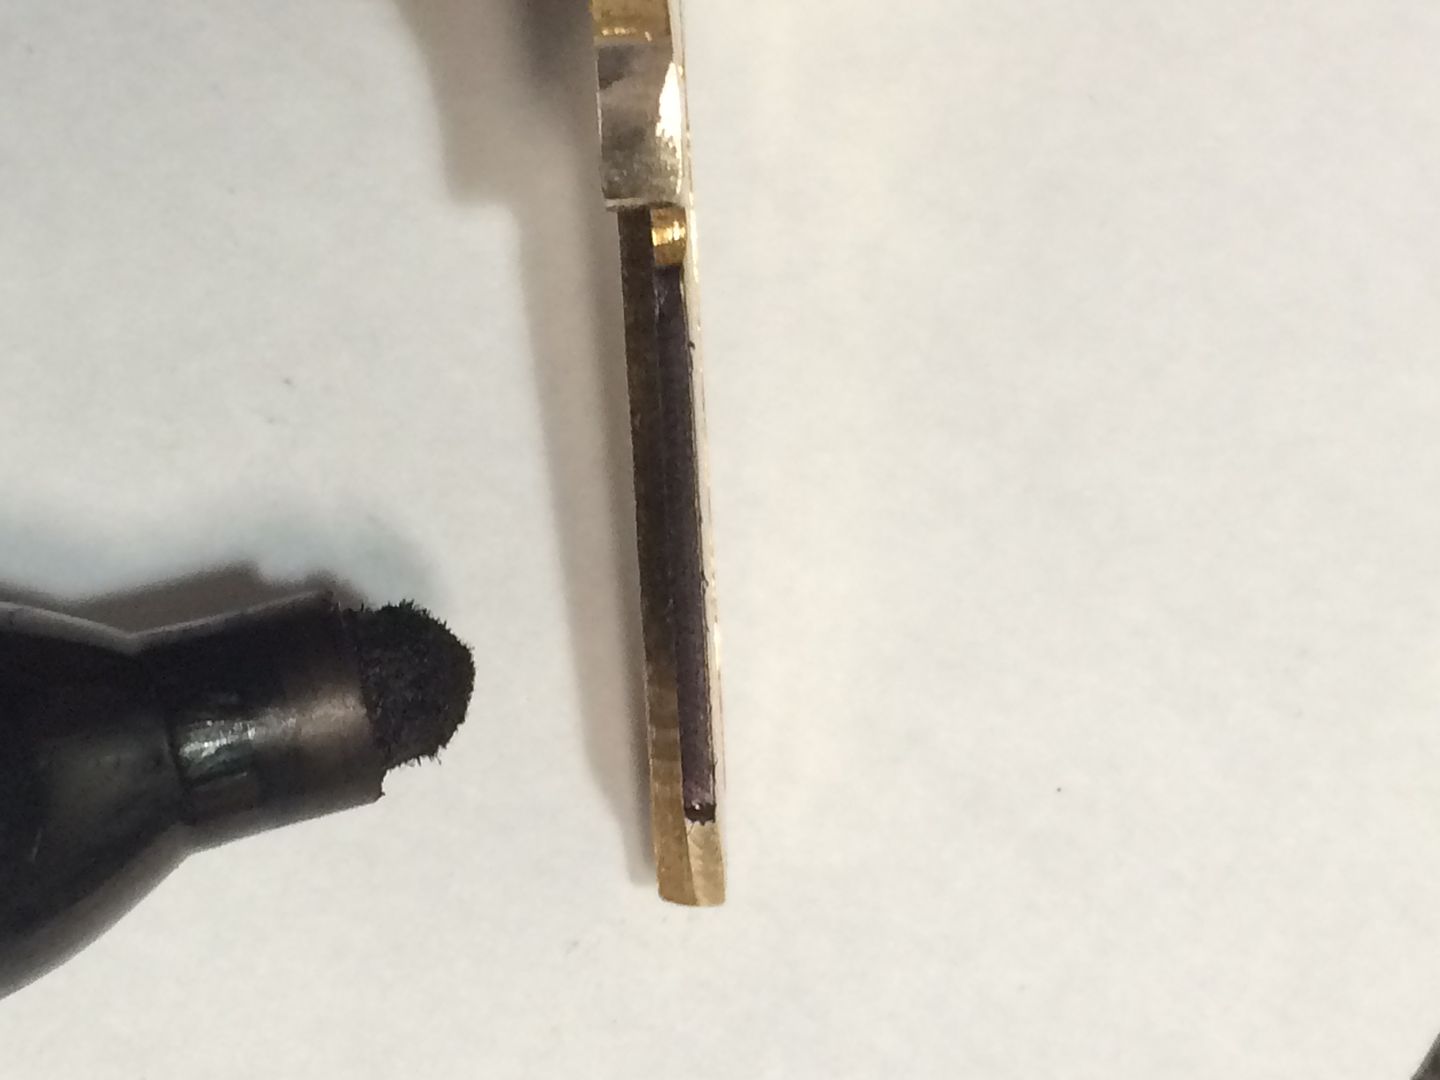
5. Make a mark with a Sharpie marker along the top edge of the key where the key pins ride. Put it in the lock and wiggle to make the pins just scratch the surface of the ink. Then draw lines straight down from the marks. The marks may wander slightly as you file down, but you will be able to see if what you think are impressioning marks are in the wrong place, and therefore probably not real impressions.
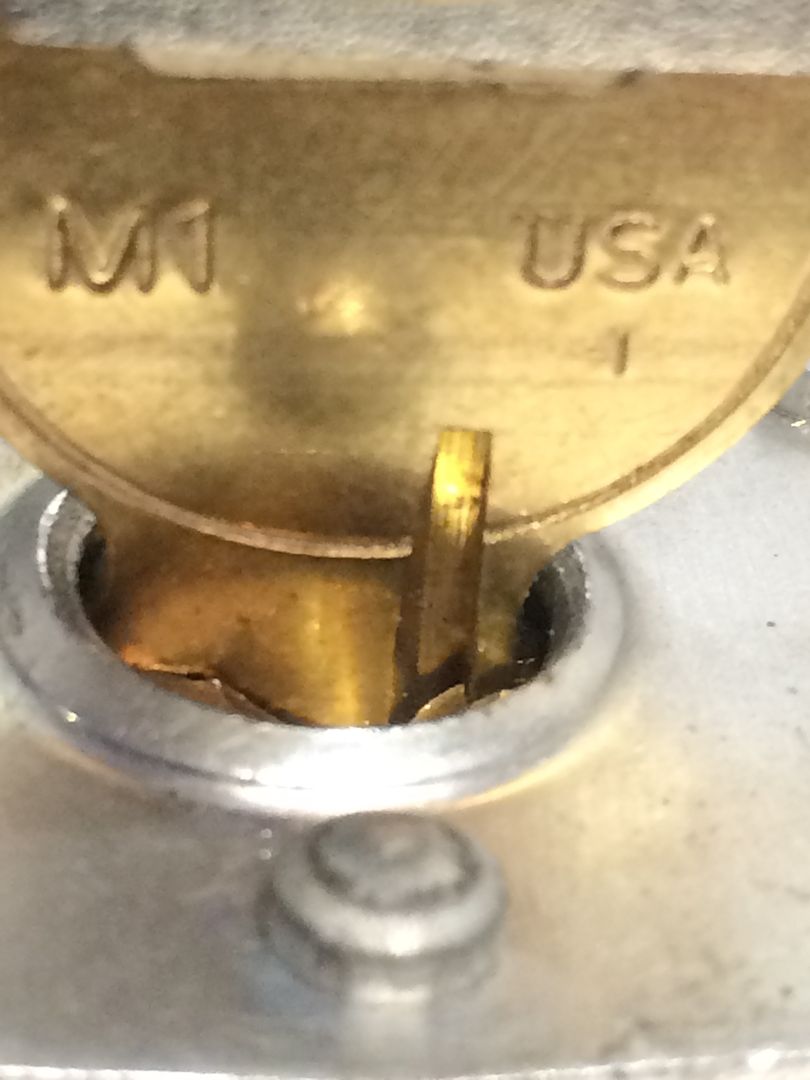
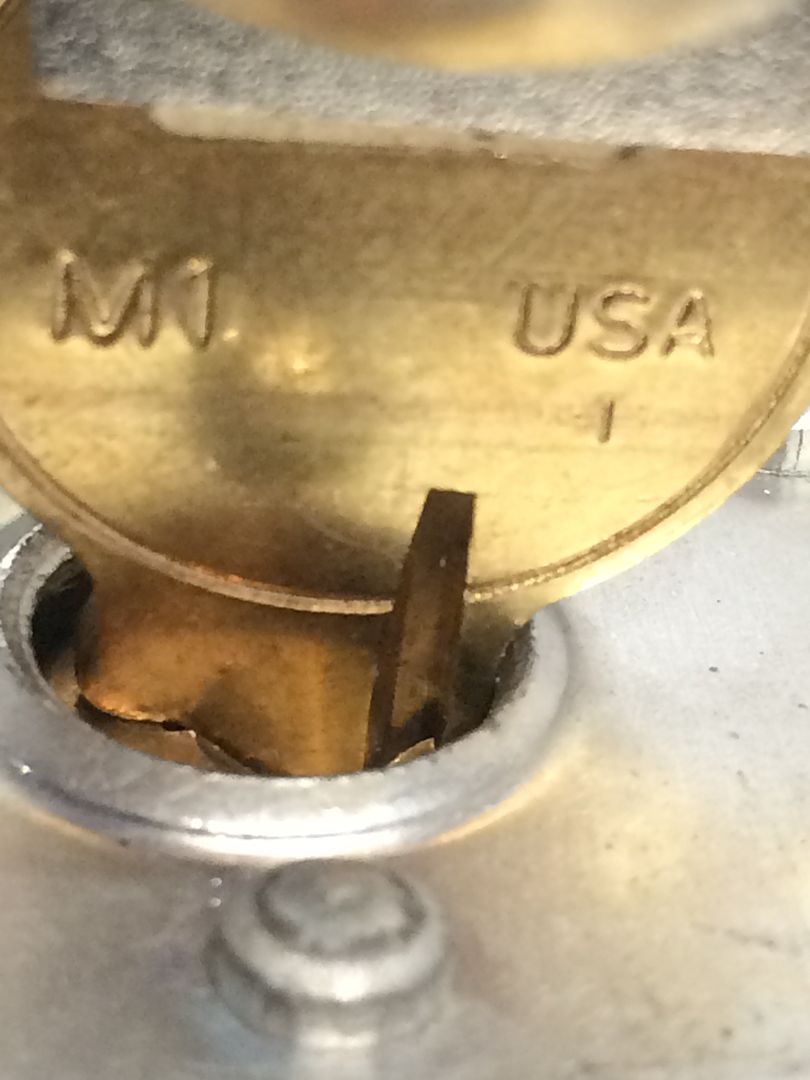
6. If you are impressioning a lock that has a cover plate around the plug (like a Master laminated lock), you may find it helps to file the shoulder so it is shorter and does not hit against the cover plate, and file the bottom of the key blank so it does not hit the cover plate either.
Here is an example of the filing down I am mentioning - made this key last week.
Let me grab a lock and take a couple pics of what I have been talking about. (Slow day at work).
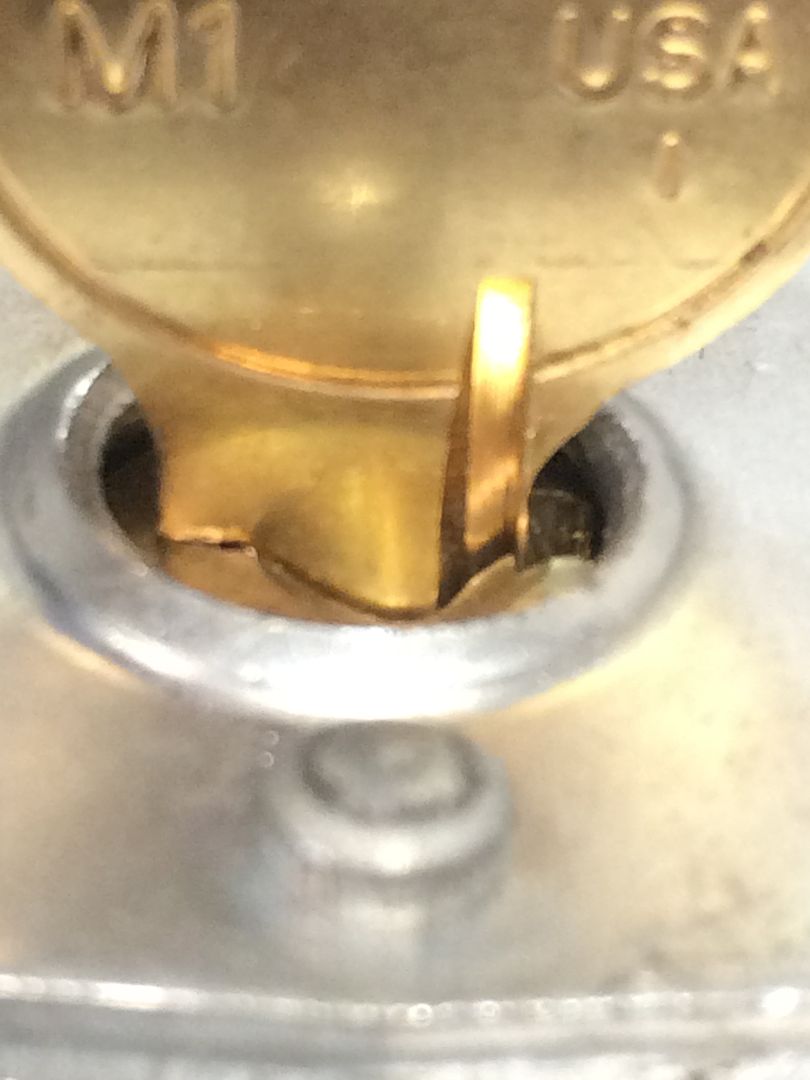
Hitting at the top of the keyway (top in this case is where the key pins are located).
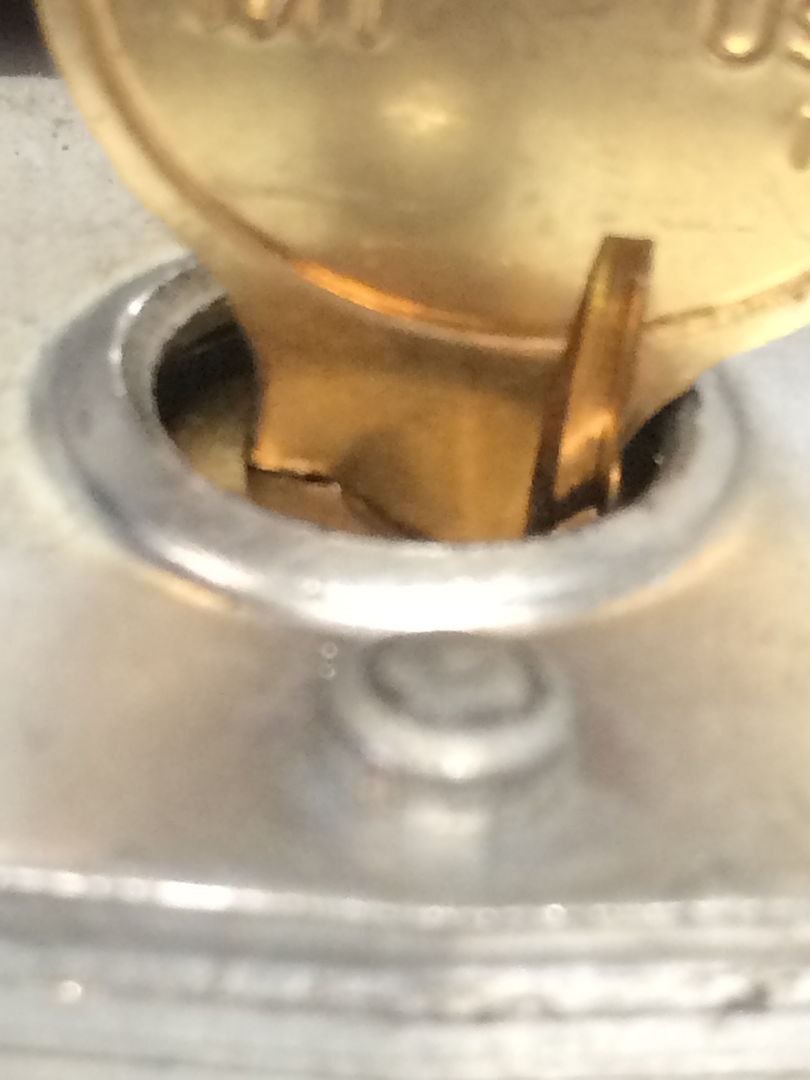
Hitting at the bottom of the keyway...
Impressioned key with shoulder and spine of the key filed away at the top, normal key blank below, with a marker showing the general area where I will be filing.
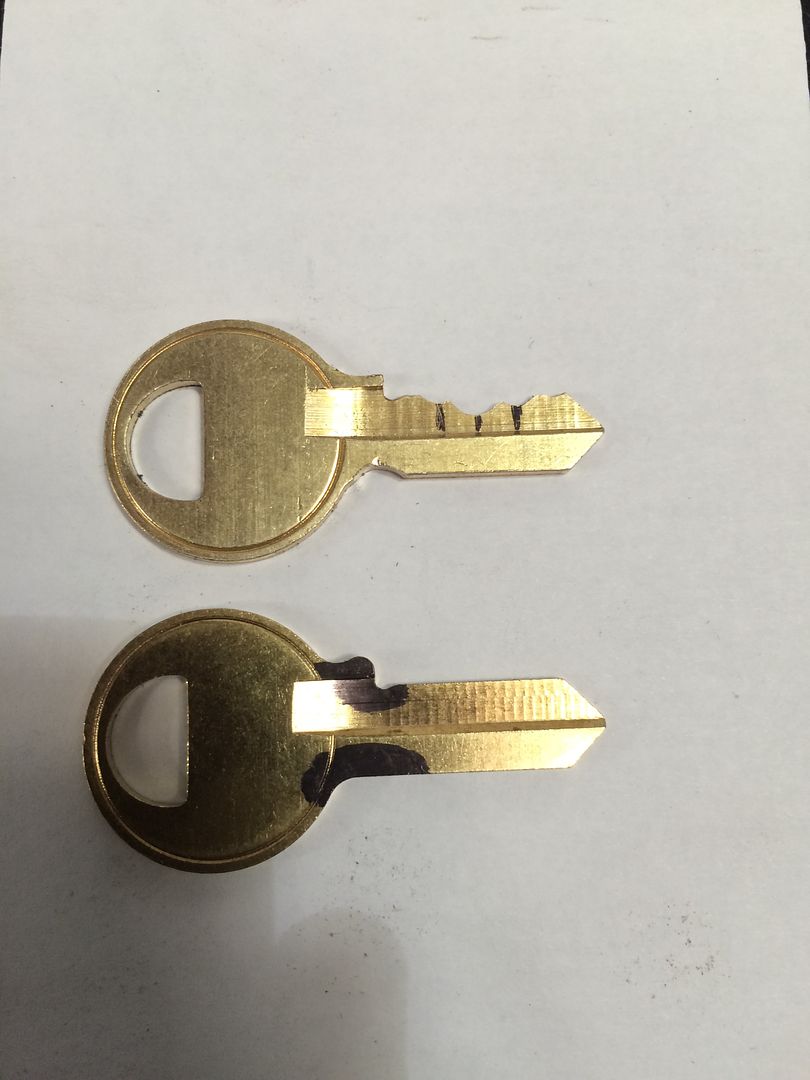
marked blank on the bottom, filed key on top. Now you can see where I filed the shoulder down and the spine of the key blade.
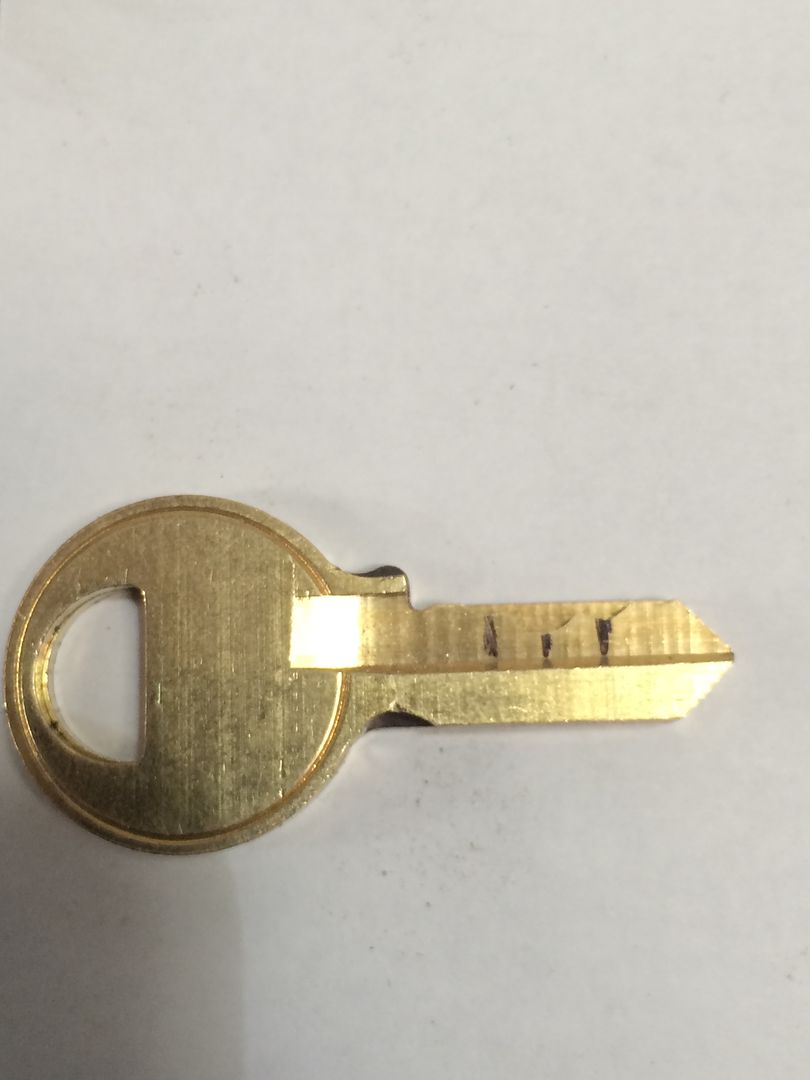
After filing, no hitting on the top...
... or at the bottom
That trick has helped me so often when impressioning locks with a cover plate that I just automatically do it if the lock has a cover plate.
Now how to keep your spacing between pins correct...
Ink the edge of the key blade.
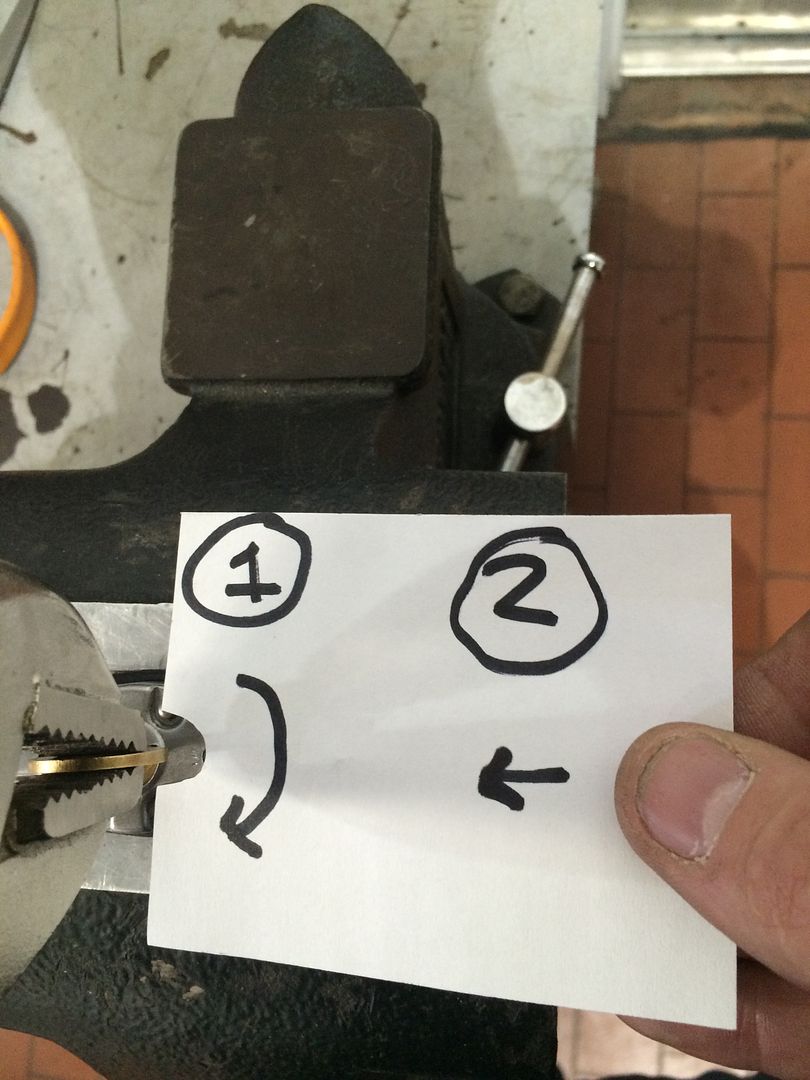
Put the key in the lock. Turn it in one direction until it stops (light force - you are not looking to make impressions yet), then move the key bow away from the key pins.
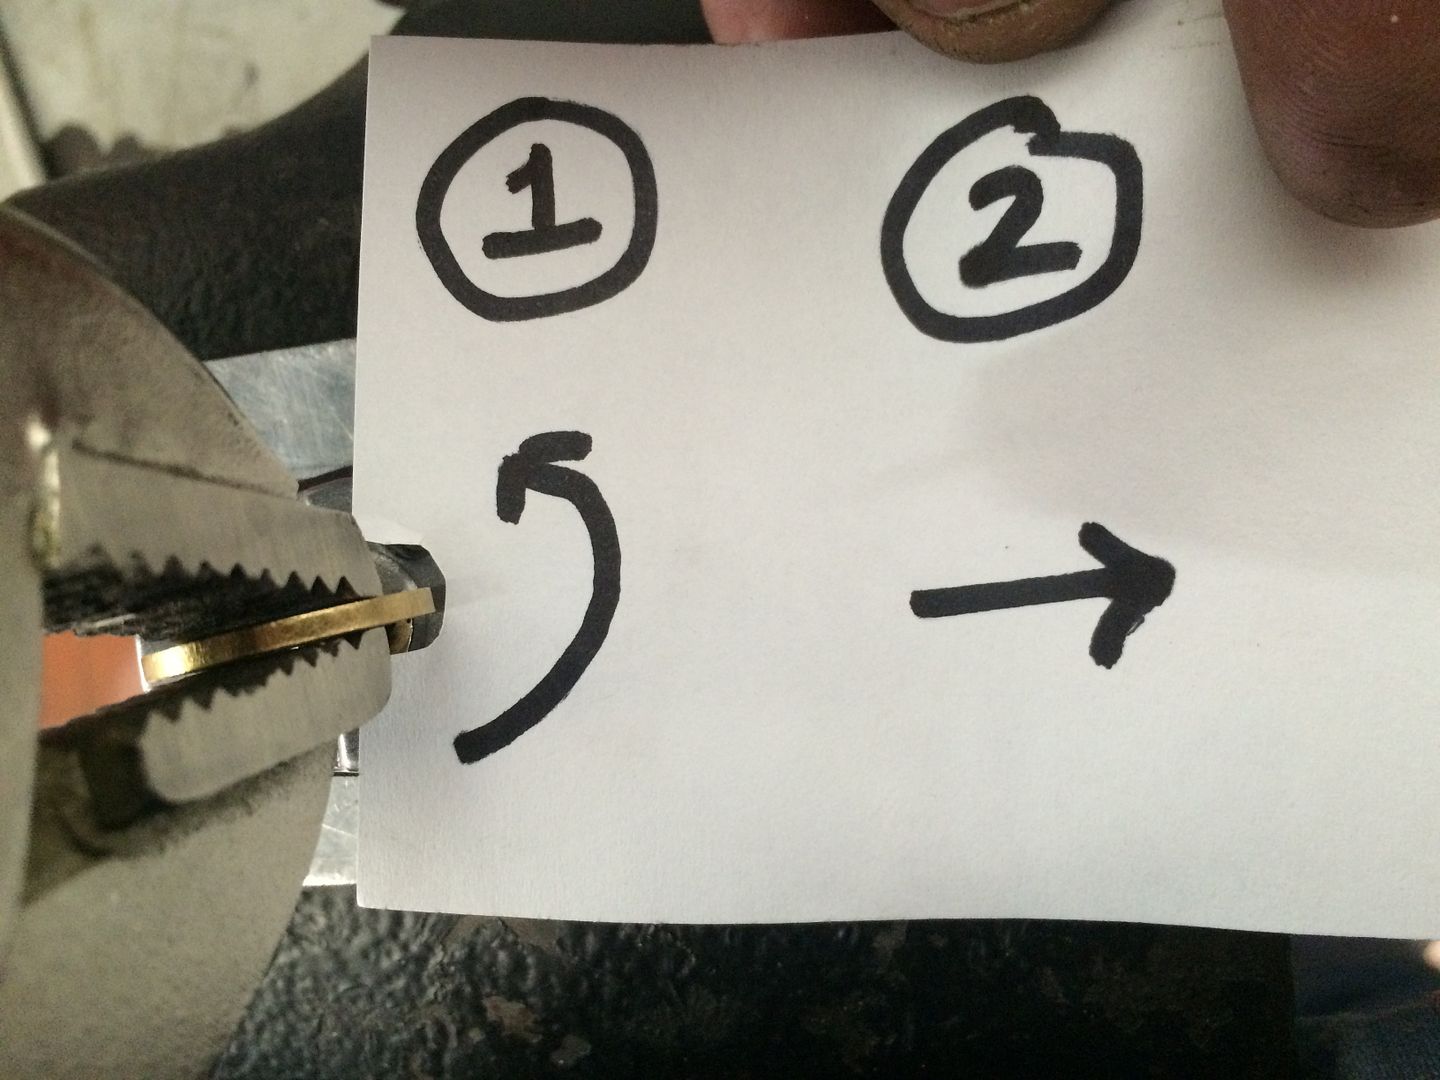
Release tension on the key blank. Turn it the other way until it stops (again, light force - you are not looking to make impressions yet), then move the key bow towards the key pins.
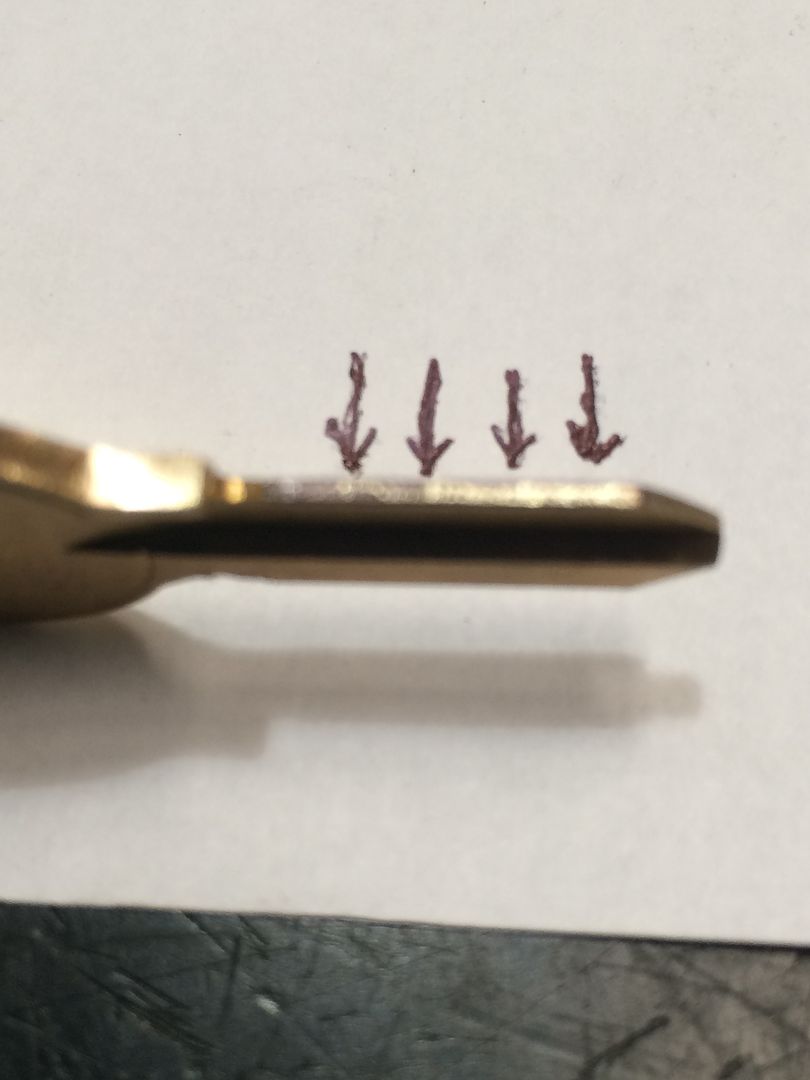
Now remove the blank and look at it. You should see marks for all (or nearly all) of the pin locations. Note: These are NOT impressions, just how to locate where the pins are.
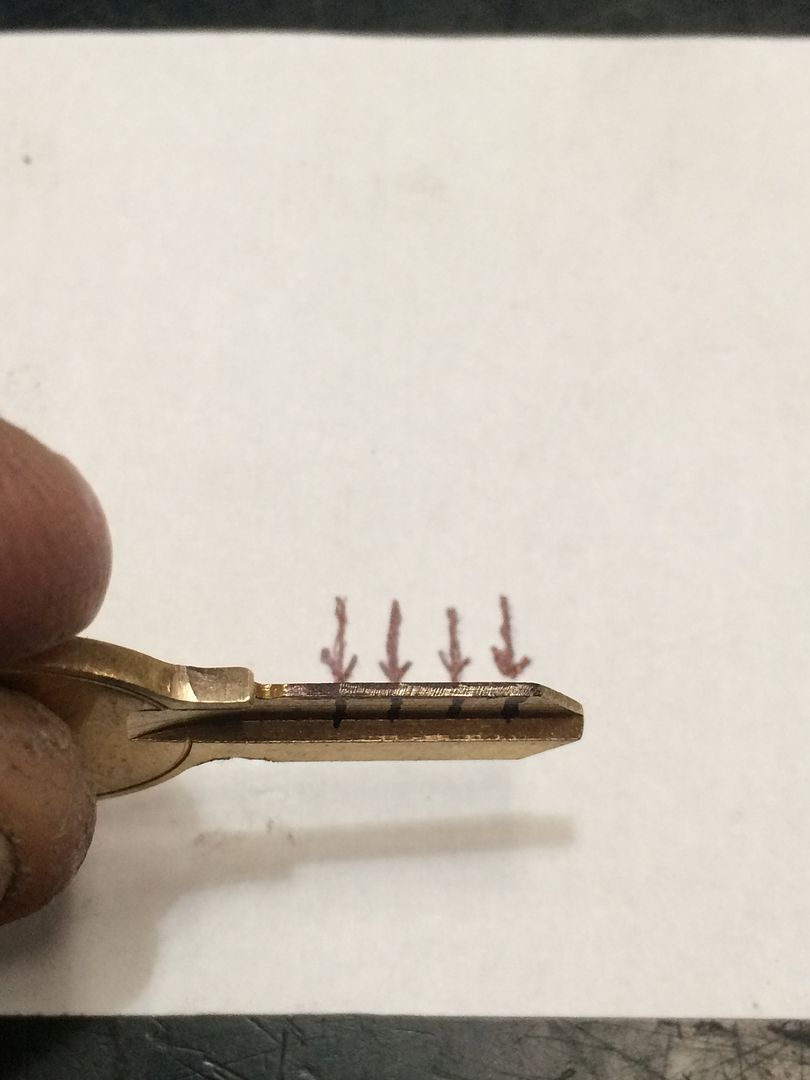
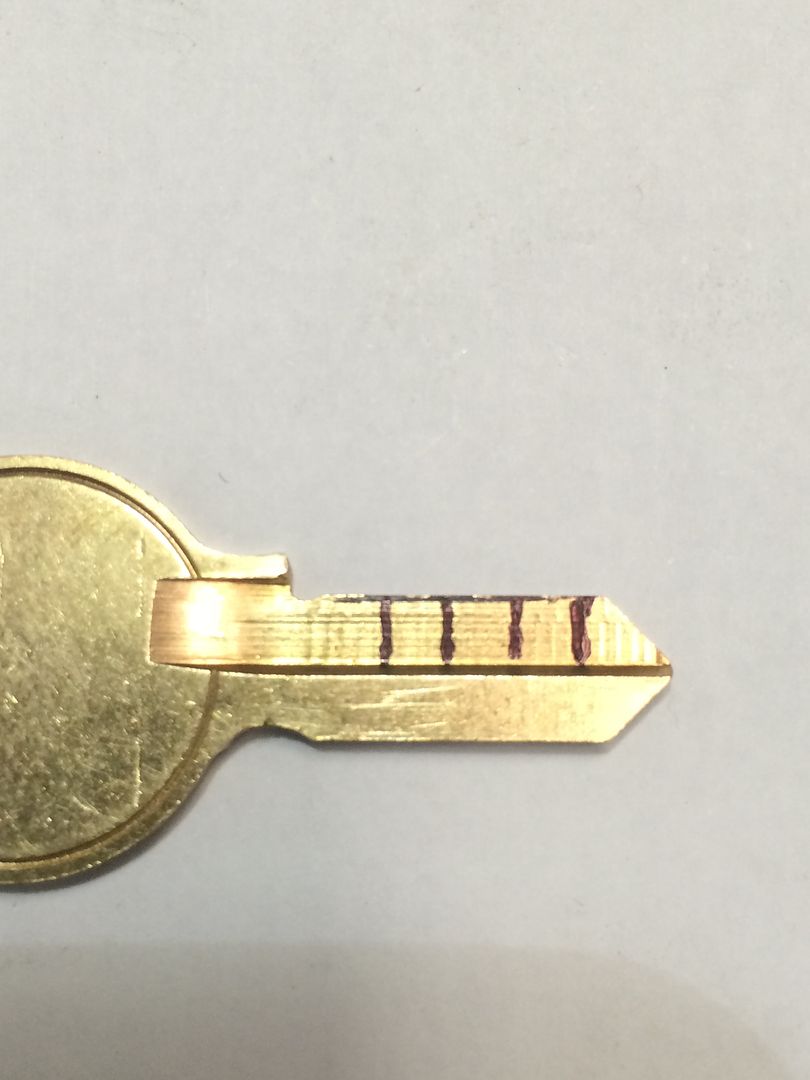
These marks are actually pretty easy to see, but hard as heck to photograph. So made arrows on the paper to point them out.
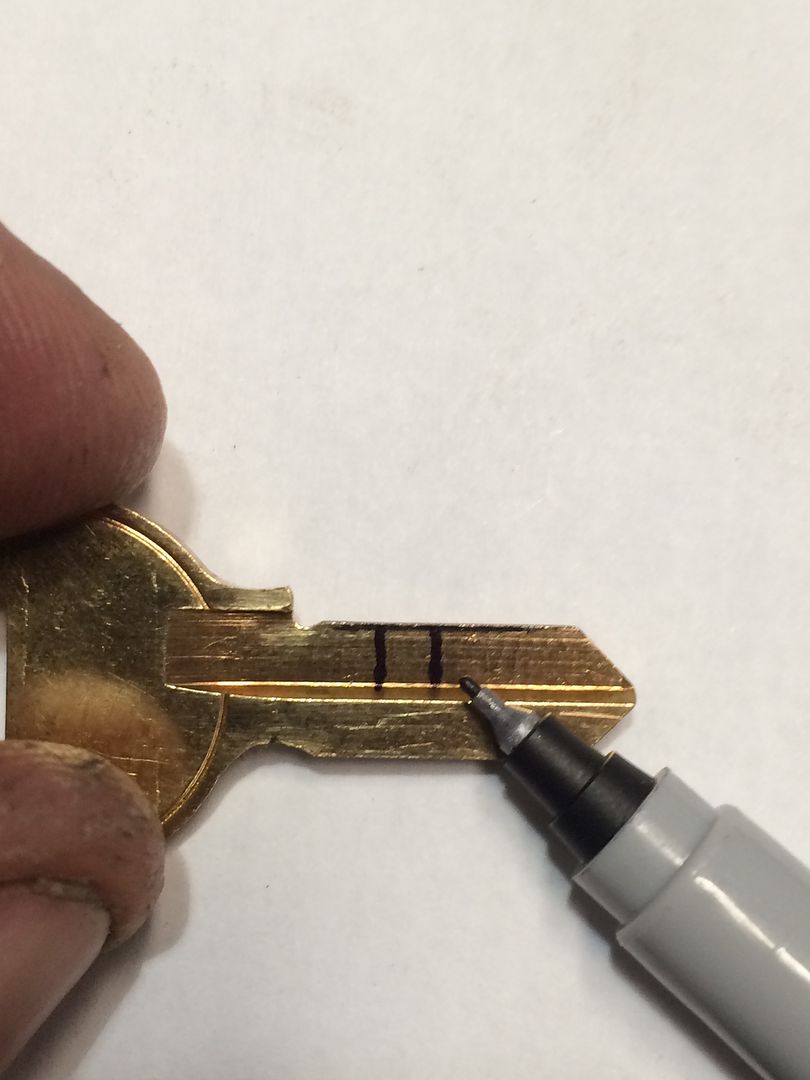
Now use a fine point marker to make lines straight down from the marks. This is so you do not 'drift' to the side when filing later.
I better quit now before I take over your thread.

I should do a pictoral thread on beginning impressioning, since the questions come up frequently.
Anyway, hope that helps a little.
Gordon
Just when you think you've learned it all, that is when you find you haven't learned anything yet.