Page 3 of 4

Re: fgarci03's Impressioning Quest

PostPosted: Wed Jun 19, 2013 12:23 am
by GWiens2001
I'd say that is a great idea, and well made, fgarci03. I am working on my next portable projects.

Gordon

Re: fgarci03's Impressioning Quest

PostPosted: Wed Jun 19, 2013 5:06 am
by Oldfast
LOVE IT! Beautiful work! So I'm assuming you worked this with the plug out & pins in?

p.s. Great work on that Corbin as well. I had read through it a while back, but never got around to commenting on it.

Re: fgarci03's Impressioning Quest

PostPosted: Wed Jun 19, 2013 5:09 am
by fgarci03
GWiens2001 wrote:I'd say that is a great idea, and well made, fgarci03. I am working on my next portable projects.

Gordon

Thanks, care to give us an insight of that? :mrgreen:

Oldfast wrote:LOVE IT! Beautiful work! So I'm assuming you worked this with the plug out & pins in?

p.s. Great work on that Corbin as well. I had read through it a while back, but never got around to commenting on it.

Yep Mike, I'm still lousy at impressioning per-se. Need to get to it though...
Thanks :mrgreen:

Re: fgarci03's Impressioning Quest

PostPosted: Wed Jun 19, 2013 5:42 am
by Oldfast
I'll do the same thing sometimes if the lock allows for it... less wear & tear overall.
Make no mistake though, even with the plug out, it can still be a tedious process :)

I'm lovin' this thread. Keep at it, and by all means... keep takin' pictures!

Re: fgarci03's Impressioning Quest

PostPosted: Wed Jun 19, 2013 6:10 am
by GWiens2001
fgarci03 wrote:
GWiens2001 wrote:I'd say that is a great idea, and well made, fgarci03. I am working on my next portable projects.

Gordon

Thanks, care to give us an insight of that? :mrgreen:


Just a teaser...

Image

Image

Image

Image

It is not the easiest thing, but it is fun trying to work out the key. And yes, there are a couple of case screws, but even with them removed, the cover is not coming off. Straight up impressioning, once the blank has the tip cuts and throat cuts made. Don't know enough about this lock, but figuring it out.

Gordon

Re: fgarci03's Impressioning Quest

PostPosted: Wed Jun 19, 2013 6:23 am
by fgarci03
:shock: :shock: :shock:

So you DO have a Sofer look alike!
That is awesome!

What is the box? Never saw anything like it!
Thanks for sharing :mrgreen: :drool:

Re: fgarci03's Impressioning Quest

PostPosted: Wed Jun 19, 2013 6:25 am
by GWiens2001
Actually, it does not belong to me. Impressioning a key for somebody else. And this ain't no pin tumbler - it is a lever lock. Looks to be 10 levers so far. :whip:

Gordon

Re: fgarci03's Impressioning Quest

PostPosted: Wed Jun 19, 2013 6:25 am
by Oldfast
Oh shit! Awesome.

Re: fgarci03's Impressioning Quest

PostPosted: Wed Jun 19, 2013 6:29 am
by fgarci03
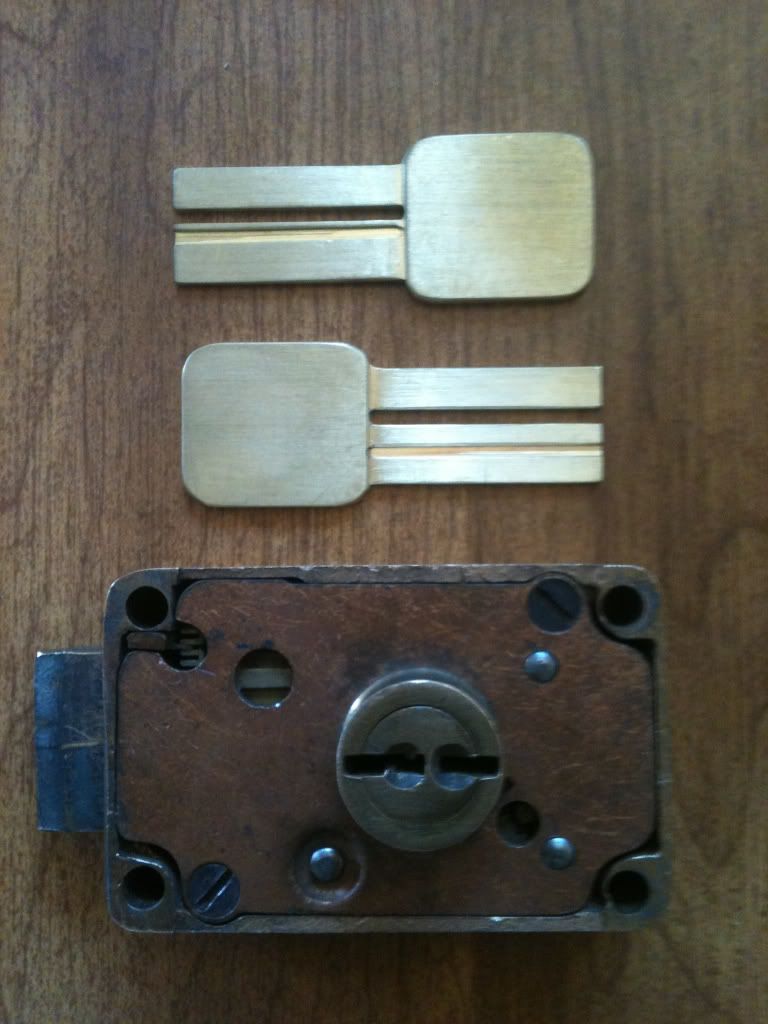
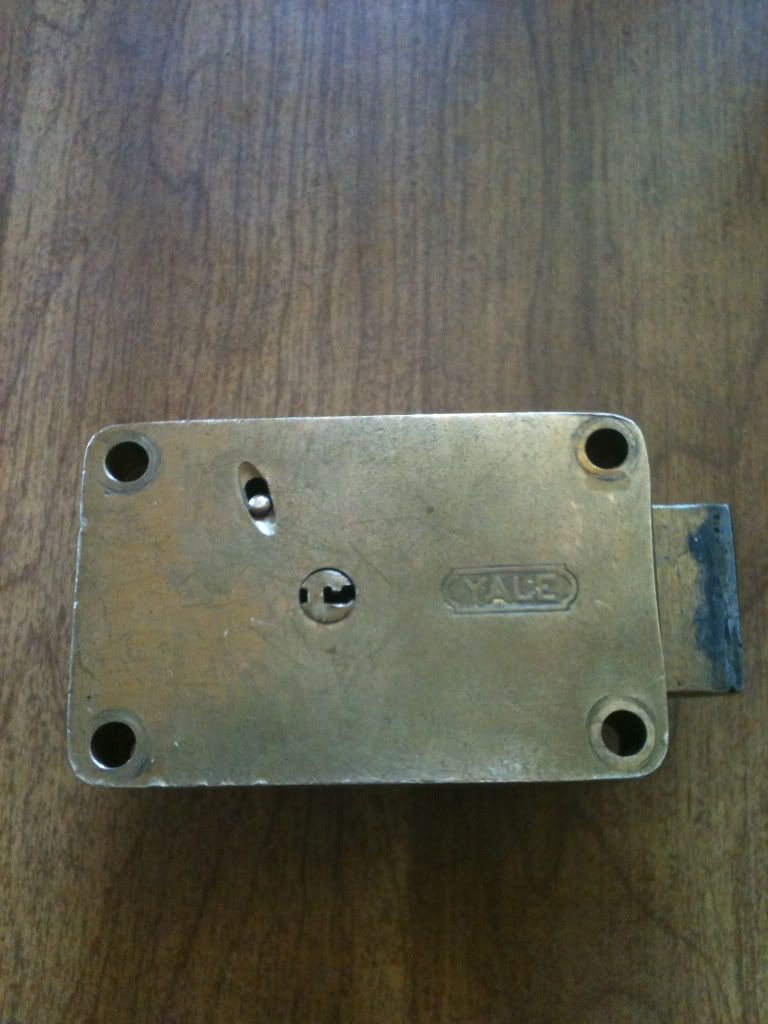
GWiens2001 wrote:Actually, it does not belong to me. Impressioning a key for somebody else. And this ain't no pin tumbler - it is a lever lock. Looks to be 10 levers so far. :whip:

Gordon


Holy....
That is so cool!!

Re: fgarci03's Impressioning Quest

PostPosted: Fri Jul 05, 2013 6:47 am
by fgarci03
IMPRESSION 11 - My first true pin tumbler impression

So well, I got from Gordon a NICE impressioning magnifier and a flashlight that fits there. The magnifier is from MBAUSA:
Image

And I also got 6 Master NÂș3 and blanks to paly with. Oh happy me!
Image

The blanks came with the spacing already cutted to help me out a bit (yeah, I'm a spoiled brat :mrgreen:)
Image

The process has nothing new. Just followed every guide around here, insert key, wiggle, see mark, file just a little bit.
I still feel it VERY inconsistent, and I will be wrecking some blanks on the other locks for sure. But I DID IT!
Image

The key is still an ugly one, but works like charm.
Image
(after the image was taken, I have sweeped it with the file just to remove that debris)

I finally felt that rotation with a heavy drag, and got the last mark deep into the key. After filing it, the key was smooth as an original. That's awesome.

Still have much to learn, but I'm enjoying every step of the way.

Thank you Gordon for providing me with such cool toys :mrgreen: :mrgreen: :mrgreen:

Re: fgarci03's Impressioning Quest

PostPosted: Fri Jul 05, 2013 7:07 am
by Oldfast
Excellent! The laminated Masters can also serve as a good way to gage how level you're keeping
your file with each stroke. If you're doing pretty good, the key should work in both directions.

Re: fgarci03's Impressioning Quest

PostPosted: Fri Jul 05, 2013 7:43 am
by fgarci03
Oldfast wrote:Excellent! The laminated Masters can also serve as a good way to gage how level you're keeping
your file with each stroke. If you're doing pretty good, the key should work in both directions.


What? It turns both ways? Need to correct the key then :mrgreen:
Thanks!

Re: fgarci03's Impressioning Quest

PostPosted: Fri Jul 05, 2013 8:06 am
by rai
notice, that the key shoulder has that high area, I usually cut that off, as it hits the outer lamination, and I think it interfers with the impressioning since the cylinder is just loose in there,
Look at your finished key and look at the top of that shoulder bump, are there heavy impressions there? if so, those resulted in lighter impressions on the key. or so I think

Re: fgarci03's Impressioning Quest

PostPosted: Fri Jul 05, 2013 8:13 am
by fgarci03
@Rai, where do you say it is?

Image
Should I cut the blue circle or the green one?
The only marking I see looks to be actually in between them lol

Re: fgarci03's Impressioning Quest

PostPosted: Sat Jul 06, 2013 7:20 am
by rai
I see a red circle and the green one, no blue one
the green one is the one that strikes the cap lamination when you bump it to make a mark on the key blank.
if you look at how it fits in the lock, you will probably see this happening, there have been a lot of master locks and their key blanks over the years and perhaps this is not the issue that it once was, but I am in the habit of cutting down that hump to get it out of the way. If it is striking the lamination, it will affect the ability to make a mark in the cylinder which is loose in a larger hole under that lamination