OldddffAASSTT the Spin Master Extraordinaire and American Lock Slayer

Posts: 4412
Joined: Thu Mar 31, 2011 9:16 am
Location: Michigan
![]() Sun Sep 09, 2012 7:58 pm
Sun Sep 09, 2012 7:58 pm
Electrolytic Rust Removal
First off, this is by no means a how-to tutorial. Instead, I just wanted to share with you some of the
amazing results this process can produce and why this summer time project meant so much to me.
I first came across some info on electrolysis a couple years ago when looking into options for bringing old locks back to life.
It wasn't until recently though that I was inspired to give it a shot. I acquired a decent amount of hand tools that belonged
to my grandfather. We were very close, and I was blessed to have worked side by side with him for about five years. He
died nearly six years ago... his house has been empty for almost twice that. Early this summer I went into his garage and
slowly gathered up all his tools... and said, "I'm going to put them to use grandpa." It was a very sentimental moment.
I'm not a chemist or an electrician... and I know very little about metals. But here's the jest of it:
A direct current supply is passed through a conductive solution. Our rusted piece is submerged & suspended in this
solution and is connected to the negative lead. Sacrificial anode(s) are positioned to surround the piece... our positive
current will be set up to flow through these. This process is known as electrolysis. It allows us to gently remove rust,
and to some extent, will return some of the surface rust back to iron. When an iron object is exposed to air and moisture
it undergoes an electrochemical process... rusting. With electrolysis we're able to, in essence, reverse this process.
Now obviously ..lol.. anytime we decide to mix electricity and water, there in lies some inherent danger.
I may be able to help with any fairly general questions you may have. But for the most part, I'd be more comfortable
and you'd be much safer to refer to one of the articles I've included. Also, the byproduct created from this process is
hydrogen and oxygen. When mixed, these gasses can become highly volatile - especially if allowed to build up in a
confined area. I alleviated this risk altogether by simply bringing the entire project outside on my front porch.
I've seen this process downsized to a small drinking glass. I've also heard of it being upsized to such an extent
that an entire truck frame is de-rusted in a swimming pool while using an arc welder for the power source! lol
I thought I'd start out with something just a bit more.... simplistic. lol
Once I knew I had contructed this properly and everything was in working order,
I wasted no time in adding additional leads so I could do multiple pieces at once.

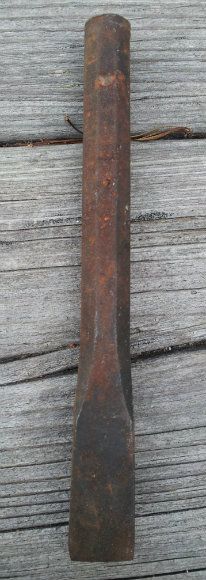
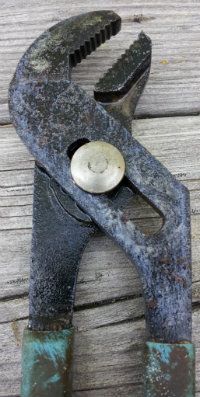
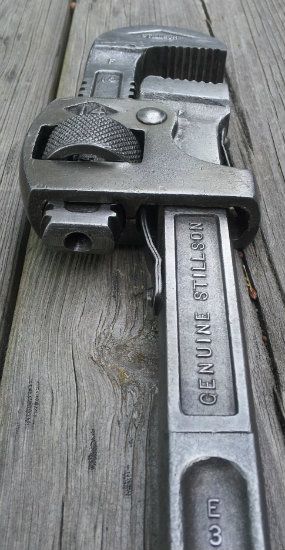
Though the results are amazing, this isn't a "magical bath". There's still a good deal of work to be had after the piece is taken out.
This process simply changes the chemical composition of the rust to a softer state. A wire brush will remove
a good majority, followed up with some steel wool to bring it to a finished product.
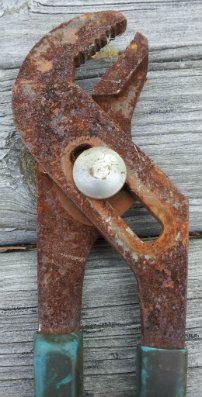
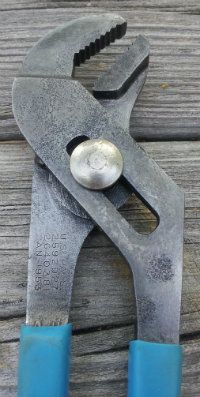
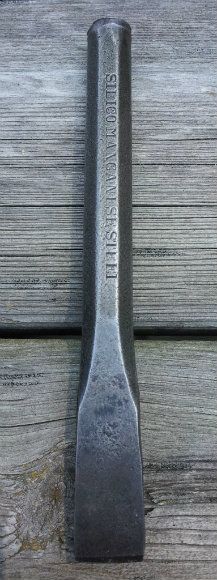
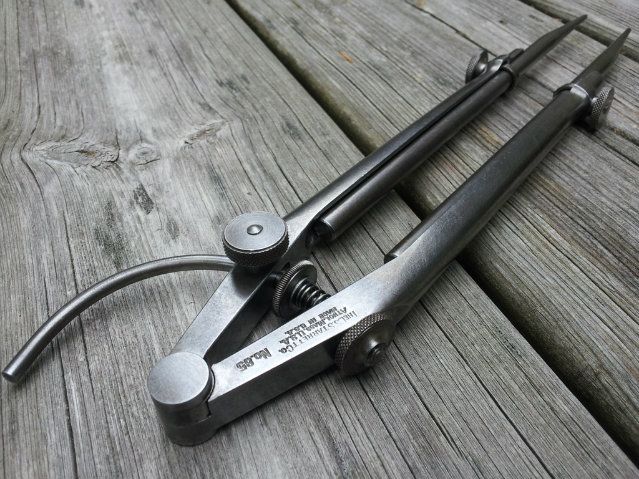
As the weeks went by, hundreds of dollars worth of tools began to emerge. What started out as fun & interesting,
quickly become tedious and time consuming work. Worth FAR more than the dollar value though, or the deep
satisfaction of bringing something back to life, was the sentimental value these tools hold... priceless!
Worthwhile notes:
This process works through line of site, so every area of the piece must be exposed to the anode(s).
Turning and/or re-hanging the piece periodically throughout the process may be in order.
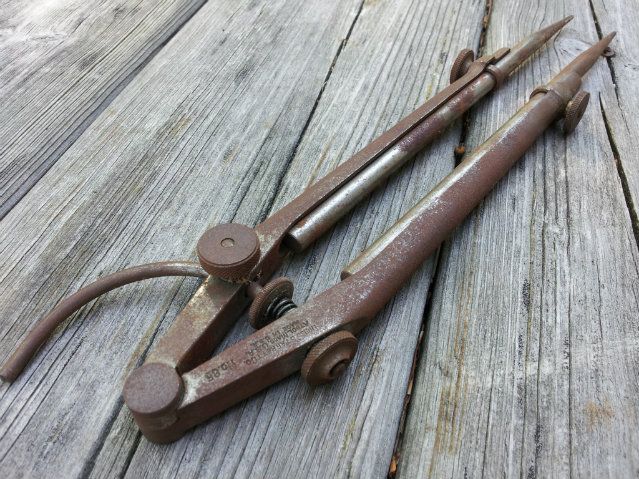
Some tools consist of multiple parts (ie pliers, channel locks, pipe wrench). You cannot assume there'll
be good conductivity simply because they're in contact with each other. At the very least, connect a
lead to each piece. Ideally though, the parts should be seperated and done individually.
The amount of time required to complete the process will obviously vary depending on both the size of
the piece and the amount of electricity you're running. I was running 2 amps from a battery charger
for the majority of tools I cleaned. On average, 3-5 hours was more than sufficient.
One of the most important things to know, lest your hard work is undone in just a short time;
Electrolysis leaves the piece particularly vulnerable to rust when initially taken out of the solution.
Each piece should be thoroughly dried immediately after cleaning. Then, either paint the piece or apply
a coating of light oil as soon as possible. From my experience, 3-IN-1 oil WAS NOT sufficient. Small rust spots
began forming within just a week or two. Instead, you might want to take a look at TC-11 Initially I thought it to be a
bit pricey for the amount you get. But I found it takes very little to coat each tool & the results are sound and long lasting.
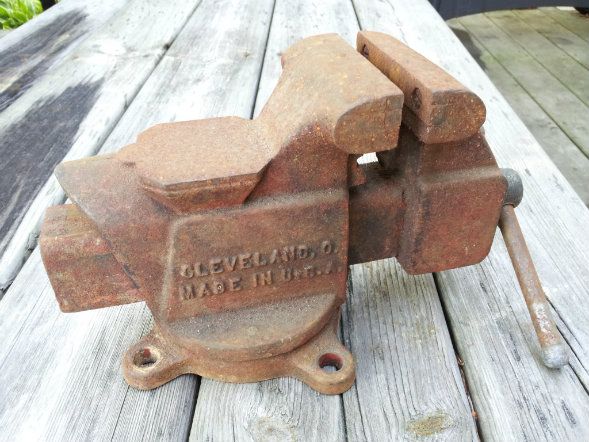
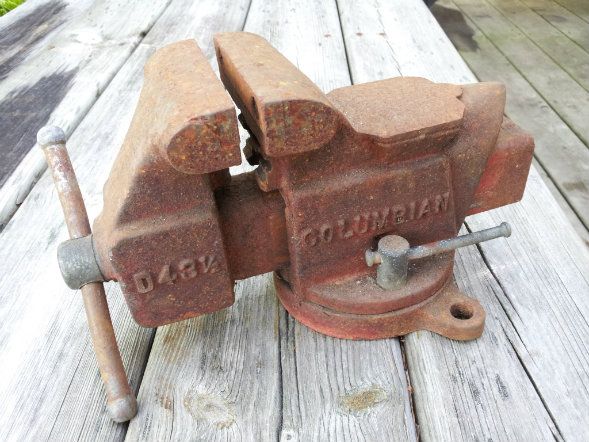
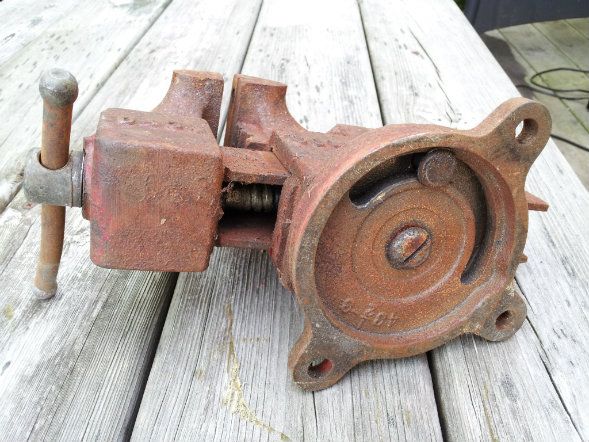
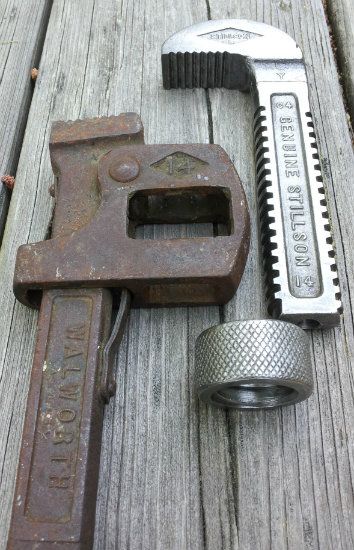
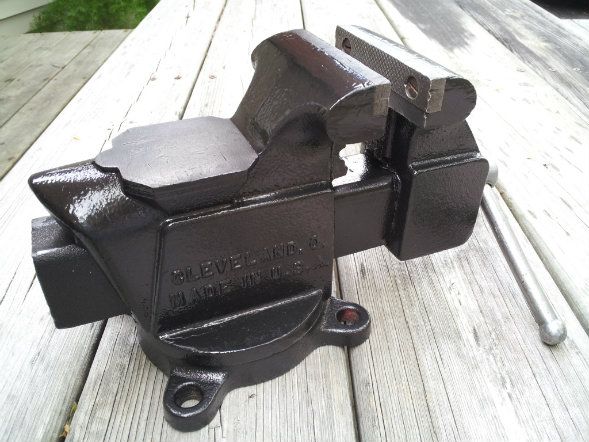
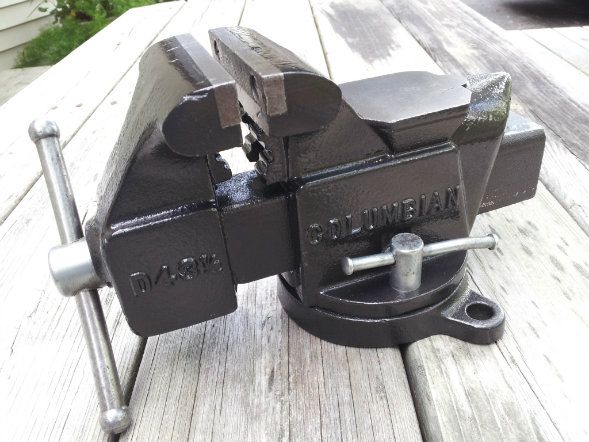
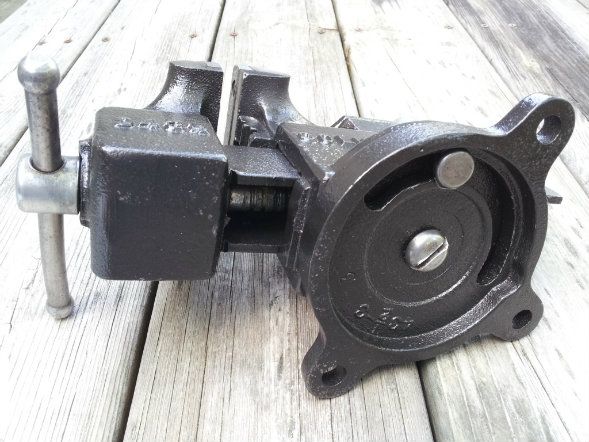
This was my final piece. She put up one hell of a good fight. lol
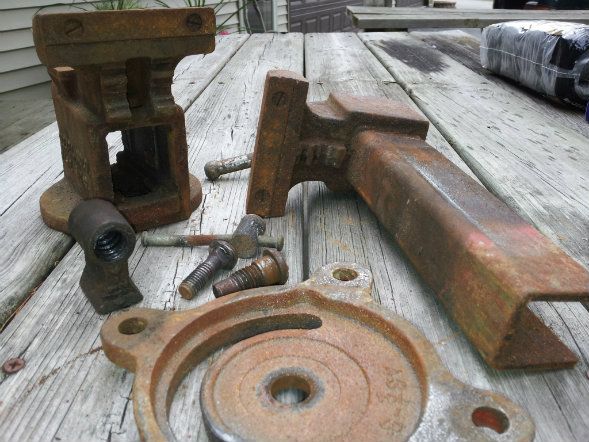
After disassembling, I degreased any parts that needed it prior to de-rusting.
The three major pieces each took 12-14 hours in my 'electro-monster'.
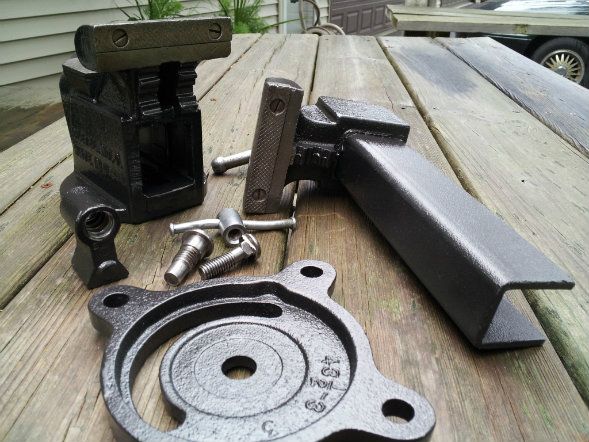
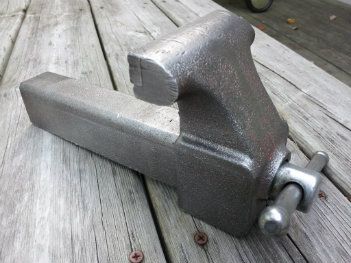
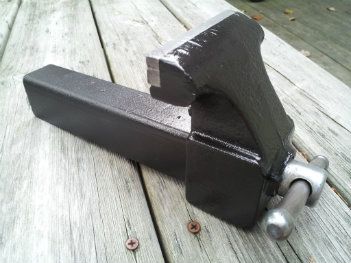
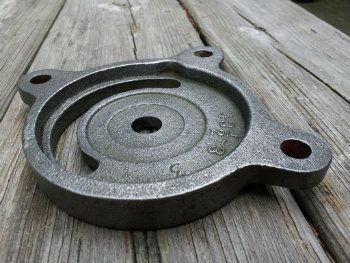
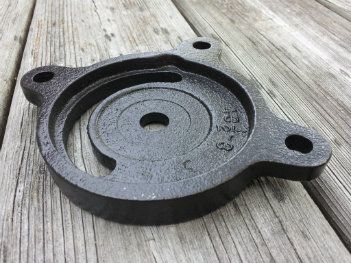
She's now ready for many more years of service
After reading many articles online, I found these two the most useful and reliable:
THIS one I found to be the most practical in terms of the actual construction of what I now call my 'electro-monster'.
And the author of THIS one seemed by far to have the most experience. As an archaeologist, his approach
is more subtle in an effort to preserve as much of the piece as possible. Less power and more time.
Also, more in-depth detail can be found here in regards to the chemical aspect of all this.
In memory of my Grandfather, William: An amazing & wonderful man, husband, dad, and navy man.
(respectful nod)....... I love you Grandpa
amazing results this process can produce and why this summer time project meant so much to me.
I first came across some info on electrolysis a couple years ago when looking into options for bringing old locks back to life.
It wasn't until recently though that I was inspired to give it a shot. I acquired a decent amount of hand tools that belonged
to my grandfather. We were very close, and I was blessed to have worked side by side with him for about five years. He
died nearly six years ago... his house has been empty for almost twice that. Early this summer I went into his garage and
slowly gathered up all his tools... and said, "I'm going to put them to use grandpa." It was a very sentimental moment.
I'm not a chemist or an electrician... and I know very little about metals. But here's the jest of it:
A direct current supply is passed through a conductive solution. Our rusted piece is submerged & suspended in this
solution and is connected to the negative lead. Sacrificial anode(s) are positioned to surround the piece... our positive
current will be set up to flow through these. This process is known as electrolysis. It allows us to gently remove rust,
and to some extent, will return some of the surface rust back to iron. When an iron object is exposed to air and moisture
it undergoes an electrochemical process... rusting. With electrolysis we're able to, in essence, reverse this process.
Now obviously ..lol.. anytime we decide to mix electricity and water, there in lies some inherent danger.
I may be able to help with any fairly general questions you may have. But for the most part, I'd be more comfortable
and you'd be much safer to refer to one of the articles I've included. Also, the byproduct created from this process is
hydrogen and oxygen. When mixed, these gasses can become highly volatile - especially if allowed to build up in a
confined area. I alleviated this risk altogether by simply bringing the entire project outside on my front porch.
I've seen this process downsized to a small drinking glass. I've also heard of it being upsized to such an extent
that an entire truck frame is de-rusted in a swimming pool while using an arc welder for the power source! lol
I thought I'd start out with something just a bit more.... simplistic. lol
Once I knew I had contructed this properly and everything was in working order,
I wasted no time in adding additional leads so I could do multiple pieces at once.
Though the results are amazing, this isn't a "magical bath". There's still a good deal of work to be had after the piece is taken out.
This process simply changes the chemical composition of the rust to a softer state. A wire brush will remove
a good majority, followed up with some steel wool to bring it to a finished product.
As the weeks went by, hundreds of dollars worth of tools began to emerge. What started out as fun & interesting,
quickly become tedious and time consuming work. Worth FAR more than the dollar value though, or the deep
satisfaction of bringing something back to life, was the sentimental value these tools hold... priceless!
Worthwhile notes:
This process works through line of site, so every area of the piece must be exposed to the anode(s).
Turning and/or re-hanging the piece periodically throughout the process may be in order.
Some tools consist of multiple parts (ie pliers, channel locks, pipe wrench). You cannot assume there'll
be good conductivity simply because they're in contact with each other. At the very least, connect a
lead to each piece. Ideally though, the parts should be seperated and done individually.
The amount of time required to complete the process will obviously vary depending on both the size of
the piece and the amount of electricity you're running. I was running 2 amps from a battery charger
for the majority of tools I cleaned. On average, 3-5 hours was more than sufficient.
One of the most important things to know, lest your hard work is undone in just a short time;
Electrolysis leaves the piece particularly vulnerable to rust when initially taken out of the solution.
Each piece should be thoroughly dried immediately after cleaning. Then, either paint the piece or apply
a coating of light oil as soon as possible. From my experience, 3-IN-1 oil WAS NOT sufficient. Small rust spots
began forming within just a week or two. Instead, you might want to take a look at TC-11 Initially I thought it to be a
bit pricey for the amount you get. But I found it takes very little to coat each tool & the results are sound and long lasting.
This was my final piece. She put up one hell of a good fight. lol
After disassembling, I degreased any parts that needed it prior to de-rusting.
The three major pieces each took 12-14 hours in my 'electro-monster'.
She's now ready for many more years of service
After reading many articles online, I found these two the most useful and reliable:
THIS one I found to be the most practical in terms of the actual construction of what I now call my 'electro-monster'.
And the author of THIS one seemed by far to have the most experience. As an archaeologist, his approach
is more subtle in an effort to preserve as much of the piece as possible. Less power and more time.
Also, more in-depth detail can be found here in regards to the chemical aspect of all this.
In memory of my Grandfather, William: An amazing & wonderful man, husband, dad, and navy man.
(respectful nod)....... I love you Grandpa
" Enjoy the journey AS MUCH as the destination."