FAQ  •  Register  •  Login
UKLockpickers.co.uk Lockpicking supplies such as Lockpicks, tools, and more! COMMANDOLOCK.COM Military grade padlock systems lockpickshop.com A source for lockpicking supplies such as lockpicks, locksmith tools, and more!

LocksportSouth's Stash

<<

Papa Gleb

User avatar

Contributor
Contributor

Posts: 1108

Joined: Fri Sep 05, 2014 11:10 am

Location: Brooklyn, NY

Post Mon Jul 18, 2016 1:37 pm

Re: LocksportSouth's Stash

Loving this thread man. I check KP for many reason but this thread is one of them. Keep it rolling.

Sucks to see the roll pin bringing the gut to a halt. I know there are chemicals that can remove broken taps and bits, perhaps that may be an option. I dont remember of hand but I know they are safe on some metals and not others which is how they are used otherwise they would just burn a huge hole into the unwanted parts or worse burn down the entire object lol. If you want, I can send you a link to the guy who I saw try several of these chemicals with success I might add. Just PM or email me.
<<

LocksportSouth

User avatar

Active Member

Posts: 369

Joined: Wed Dec 02, 2015 6:51 pm

Location: UK

Post Mon Jul 18, 2016 3:06 pm

Re: LocksportSouth's Stash

Papa Gleb wrote:Loving this thread man. I check KP for many reason but this thread is one of them. Keep it rolling.

Sucks to see the roll pin bringing the gut to a halt. I know there are chemicals that can remove broken taps and bits, perhaps that may be an option. I dont remember of hand but I know they are safe on some metals and not others which is how they are used otherwise they would just burn a huge hole into the unwanted parts or worse burn down the entire object lol. If you want, I can send you a link to the guy who I saw try several of these chemicals with success I might add. Just PM or email me.


Thanks! I aim to entertain :)

Thanks for the offer with the chemicals - honestly I barely trust myself with power tools lol so I should probably stay clear of thermite or the like! I ordered a couple of carbide bits which should fit (one small enough to fit inside the roll pin, to drill out the tool metal, and one bit enough to take out the roll pin completely) so I'll give those a shot next when they arrive - fingers crossed! I'm not bothered about totally destroying the roll pin if required as to keep the lock easy-access I probably won't put another one back in anyway, so if that's what it takes - well, I'll try not to damage the lock body or finish any more :).
<<

LocksportSouth

User avatar

Active Member

Posts: 369

Joined: Wed Dec 02, 2015 6:51 pm

Location: UK

Post Fri Jul 22, 2016 11:01 am

Re: LocksportSouth's Stash

To conclude my two new Chubb locks, today we’re looking at a new-in-box Chubb 1K57A, AKA the Hercules:

Image

Image

Image

Image

Quite an odd shape, no? I assume it’s a kind of container lock, designed to fit on specific kinds of hasps – the bolt is at the rear of the device and is locked with a fairly simple operation. Due to the shackle being at the back it’s totally hidden from view – moreso than even the most well-shouldered “closed shackle” padlocks, making it totally impossible to cut.

Image

I learnt about these locks a while back and managed to find an auction selling six of them for £30 each, but they were in pretty bad condition so I let that one pass by. Since then, I’ve seen those same locks being sold off individually by buyers who picked them up for cheap and were looking to sell them on or a profit, but nothing “new” until this. Like the other Chubb that we looked at the other day, Union still makes these to the same Chubb standards but under the Union brand, but I was really keen to find a Chubb original as it’s a brand that I remember from when I was young. I was very lucky to see this auction pop up for a nearly new Hercules, still in its original box!

Here’s that shackle I was talking about:

Image

Due to its thickness and recessed nature I can imagine that this would only work with specific hasps designed for locks like this. You can see a screw at the bottom:

Image

I assume that’s for disassembly – we’ll soon see!

Here you can see the end of the locking unit:

Image

It’s in really nice condition! The paint looks a little flaky but that’s about it. Keyway:

Image

Unusual keyway, you may notice. We’ll get to that! You can see down inside it a bit here:

Image

Here’re the keys:

Image

The Hercules comes with two options for locking cylinder – a regular 6 pin tumbler, and the Chubb AVA. I never disassembled one myself, but from reading Graham Pulford’s “High Security Mechanical Locks” (Pg. 394-398) the operation is somewhere between a lever lock and a wafer lock, although the key makes it seem like it will be a disc detainer. I believe that it’s generally more secure than regular pin tumblers so I’m not sure why Chubb offer both options, honestly. I feel like this one will stand up better to rain and dirt too, due to the spring-less design and solid parts.

Close-up of the bitting:

Image

The backs of the keys look like they have been filed away and are a bit rough – I’m not sure if this is how they come from the factory or whether these have been sanded to remove Gov’t or commercial ID codes or something of that sort:

Image

Looks nice though!

Operation couldn’t be simpler. Insert the key:

Image

Rotate clockwise until it stops:

Image

And pull the key. The entire unit comes out:

Image

You can see how the bolt retracts:

Image

You can push it out or in any amount of the distance, it’s not spring loaded:

Image

Quite simply, the locking unit is attached directly to the locking bolt (shackle) which retracts when you pull the locking cylinder back.

To disassemble, remove the screw:

Image

And pull it out!*

Image

*= It’s not quite that simple, you’ll need to jiggle the keys around a bit due to part of the mechanism with which the lock keeps itself in when locked, which I didn’t realise until after the picture-taking was done.

The empty shell of the padlock is really just a carefully hollowed-out hunk of metal – nothing fancy to it (and there doesn’t need to be):

Image

Image

(the cylinder stops at the main “back” of this hole, whereas the bolt travels through the smaller hole at the bottom).

Image

Let’s look closer at the locking unit / cylinder. On the “top” (for lack of a better term), we can see the locking bolt/shackle, a ball bearing (used in the locking process), and a cut-out groove (this is where the small screw sits, which stops the cylinder falling out when the lock is unlocked):

Image

On the “bottom” (180° reverse side), two BBs sit:

Image

Image

With the BB removed, you can see down inside the hole. The actuator is the silver part on the left, which has a cutout for the BB and a non-cut-out edge to allow the BB to slip in flush with the outer cylinder, or not. On the right is the end of the cylinder which actuates the actuator:

Image

All three BBs come out fairly easily, held in only with the grease:

Image

Here’s the part of the actuator with the BB cutout showing:

Image

On the other side, we can see the “locked” or “closed” part of the actuator, and also a brass back to the smaller hole, stopping the BB retracting:

Image

This is where I started trying to disassemble the cylinder further, but after rotating all the keys back and forth, twisting, pulling and levering on the front plate and hunting inside the holes at various positions for a screw to remove – I’m honestly not sure how to disassemble this further, or how it was assembled. The bolt is fixed permanently to the main cylinder housing, and there doesn’t seem to be a way to lever the front off.

However, whilst fiddling with it I did notice that the front plate rotates. I thought that this would allow it to be unscrewed, but it only seems to move less than one turn in either direction. Then I realised that as I turned it, the insides changed. For example, here’s the smaller hole now exposed with a deeper cutout – this isn’t exposed by turning the key, but by turning the front plate:

Image

Here it is in the “half-closed” position to illustrate my point:

Image

I decided that it would be easier to just make a video of me demonstrating the possible positions and corresponding layout of the internals rather than to try and explain or describe it, so here it is:

https://youtu.be/UW6pdAFPqsE

However (as you can see), whatever the position of the holes, there appears to be no screws or methods for undoing the cylinder further – it doesn’t appear to rotate more than the edges of those two extremes so I’m not sure how they put it together as there aren’t any rivet or weld marks. I later figured out that the various BBs and position of the front plate are to do with holding in the cylinder when in the locked position, to stop it being removed from the lock when the disassembly screw is removed. However I don’t believe that they can be used in the further disassembly of the lock.

I’ve not been able to find anyone else disassembling a Chubb Hercules or Chubb Ava in this format so unless anyone has any idea of how this might be disassembled, it looks like the lock stripping will have to end here – which is a shame, as I was hoping to strip down the AVA cylinder and take a look at the internals!

A bit more lube and some fiddling with getting the position of the front plate correct and we’re re-assembled:

Image

Hope you enjoyed reading!

Image
<<

LocksportSouth

User avatar

Active Member

Posts: 369

Joined: Wed Dec 02, 2015 6:51 pm

Location: UK

Post Tue Jul 26, 2016 2:27 pm

Re: LocksportSouth's Stash

A new day, and a new locks post! So, what’s in the pipeline today, you may ask?

Image

Another Rotalok – this one of the closed shackle variety!

You may recall my trials and tribulations trying to fit a cylinder into my original Rotalok, which is a semi-closed shackle. I then tracked down and analysed an open-shackle, which I found on eBay also. It was interesting comparing the “black accent” Rotalok to the all-silver, semi-closed one that I already had, and since then I’ve struggled with finding appropriate cylinders for them, with the semi-closed currently housing (precariously) an EVVA MCS and the open shackle still being fitted with the original Cisa Astral that came with it, with plans for an EVVA 3KS replacement in the works.

During my investigation, I found a company in the UK that sells Rotas, called Insight. They actually sell all three and interestingly the semi-closed is the only all-silver one they sell, with their open and fully-closed shackle variants being the black-accent type. This is interesting as I know that there are many varieties of Rotas out there – at least one other in the wild with black “insides”, as well as the post-takeover versions since Rotalok was taken over by Pickersgill-Kaye, where the locks are branded as “Kaye-Rota”.

So, when this lock popped up on my eBay watched list the other day I did a bit of a double-take – it’s a fully closed (also called extra-closed) – kind-of; that is, it doesn’t seem quite as “closed” as the one from Insight (that may just be a difference in the colour of the collar – Take a look yourself and tell me what you think). In addition to that, whereas the locks from Insight are supplied with either Enfield or Ankerslot, and the ones from LocksOnline (who Also sell them retail come sans-cylinder, and ones being sold on eBay seem to either have the Abus E60 or Cisa Astral fitted, this one appeared to come with an ASSA Twin. That was my first hint that maybe this came from a production environment – military, prison or Gov’t maybe – rather than a re-selling individual. Finally, it’s actually an all-silver body lock, the same as my semi-closed shackle – I haven’t seen one in this design before and the main distributor here (Insight) only shows black-accent for the fully closed shackle. So it’s an interesting lock all around!

Now, the lock listing said that the lock is working but that the cylinder is a bit stiff, and it also looked pretty dirty and beat up, and only came with one key. But for the price, I couldn’t resist – especially since it’ll complete my Rotalok trifecta (Open shackle, Semi-closed shackle and Extra-closed shackle variants) and hey, cleaning it up is part of the fun :).

And thus, here we are. Let’s take a look!

Image

Image

Image

As you can see, it’s a bit scratched and beat-up, more than I can fix with Gunk – but that’s ok. I’ll take “a bit beat up” and over 6x cheaper than retail! It’s also pretty dirty looking – seems to have black gunky stuff stuck in the various holes and in the ROTALOK / MADE IN ENGLAND etching – we’ll see if we can take care of that!

Here’s the lock with the key in:

Image

This photo somehow makes the lock look tiny but trust me, these things are HEAVY!
There seems to be something stuck in one of the screw holes:

Image

And dirt in the other one:

Image

The key grooves look a bit filthy too. Seems to be an ASSA Twin Combi, similar to my ASSA Twin V-10 Mogul:

Image

The key also has a lot of numbers etched onto it, I assume related to both the bitting / blind code as well as organisational codes:

Image

Yeesh, look at that keyway:

Image

Notice also the ring of black gunk connecting the outer shell to the inner body (if you’re not aware of Rotalok’s design features, the round outer skin rotates freely to help prevent attacks with gripping and wrenching tools such as pipe wrenches.) The outer “skin” is, as far as I’m aware, not removable and glides on ball bearings, and is internally lubricated, making it a paint to clean or re-lubricate, and as we’ll soon see, a lot of gross black gunk is leaking from there which will make cleanup a bit of a pain!

Let’s unlock and remove the shackle:

Image

Like most extra-closed shackle locks, the shackle is fully removable as it wouldn’t be practical to be able to remove it far enough to rotate to unlock. Rotaloks kinda have this feature anyway, since the shackle is held in place by a steel pin which is held into the body simply with a small hex screw. In this lock’s case, the rod is missing and the shackle comes out completely, although with the shackle-retaining notch (on the bottom-right hand side in the photo above) and the still-present hex screws indicate that maybe a rod can be added to gain shackle-retention functionality – although I don’t think you’d be able to operate the lock without removing the shackle due to the design.

Here’s a shot of (attempting to be) down inside the shackle holes – couldn’t seem to get the lighting right for this one but hay ho, when you’ve seen one you’ve seen em all!

Image

Ok, let’s compare the Closed-shackle side by side with the others:

Image

From the left, we have the Rotalok Open Shackle (fitted with CISA Astral core – the default one that came with it). This is the black-accent variant and has Euro and Oval cylinder cutouts including in the (black-accent) bottom plate base, and uses a cam interface. Next, in the middle we have the Rotalok Semi-closed (or just “closed”) shackle fitted with the EVVA MCS core. This was the first Rota that I owned and is the all-silver variant, and the one that has caused me the most hassle with its non-cut-out bottom plate and disagreeable interconnectivity between the cylinder cams and lock actuator. This one doesn’t use a cam interface by default and came pre-fitted with a modified (shaved down) Abus E60, which after much finangaling I managed to replace with an EVVA MCS – however I may attempt to modify this more in the future as even this cylinder doesn’t perfectly fit, leaving small gaps between the rounded cylinder front and the edges of the bottom plate cutout as well as preventing fully-tightening of the bottom plate securing screws due to pressure of the bottom plate on the plug front preventing the cylinder from turning.

And finally, on the far right, we have the ‘new’ one – the all-silver, extra-closed shackle variant fitted with an Assa Twin core. Another shot:

Image

Let’s compare the semi-closed and extra-closed’s shackle guard (shoulders) height:

Image

All three:

Image

It’s definitely higher and different to the semi-closed! It also doesn’t have that partial cutaway (see the upper portion of the shoulder on the right hand side of the semi-closed) on any of its four corners so it’s definitely intended to act as a fully-closed shackle lock.

Okay, cleanup time! I started off with the easiest part – the key. For this project we’ll be using WD-40 spray and kitchen towel / microfiber cloths to start, and dunking in Gunk later. I forgot to photo the progress as I went along but this whole thing was an absolute mess, leaking ‘orrible black gloop from every orifice and muddy stuff out of all the external holes. Hell knows where this thing was being used!

Image

Image

Shiny and clean :).

And now for the shackle:

Image

Less shiny (chipped paint and scratches) but at least it’s clean.

One of the screws from the shackle retaining hole:

Image

There was a screw on both sides, but one side led to a “blocked off” wall where nothing is actually inside that screw hole – I had this on my semi-closed shackle and I still don’t know what it’s for. The other side was the standard shackle-retaining-pole-hole, sans retaining pole. Gave that all a good squirt out with WD-40 too, it was thick with mud stuff. The blue tool you can see in the background is part of a soldering kit which contains a load of sharp-pointed pokers and scrapers which I used extensively to dig out dirt and, a bit later, to clean out the engraved lettering!

After cleaning out the shackle retaining hole, I struggled with finding a hex key to fit into the bottom plate retaining screws but they came out surprisingly easy once found – must have been all that WD-40! (trying to avoid getting it under the outer skin though since it’s unremovable and would be hard to re-lube). Here’s the result:

Image

The yellow stuff at the back near the lock body is WD-40, the black gritty stuff is whatever is seeping out from inside the lock body and is coated on all parts. Sure glad I used gloves for this one! You can see both locking ball bearings and the actuator there as well as the bottom plate and cylinder.

After some time and a LOT of paper towels, here are most of the parts (except the cylinder) cleaned up:

Image

That’s phase one, anyway. I’m still gonna Gunk ‘em, just to be sure.

Now it’s time to tackle our little Assa friend!

Image

Look at that thick chunky C-clip! Thankfully it was pretty bendy as it looked tough to removed with its thickness and small gap.

Core and sidebar with springs:

Image

Key pins pre-cleaning:

Image

Note the master wafers (even the long, driver-pin-length things on the right seem to be a kind of master wafers since they come from within the plug and are necessary to get the plug to shear).

Bible ready to strip:

Image

The back of it has been filed down, so it looks like another modification job to fit the bottom plate and actuator. Hmm. More and more evidence that Rotaloks seems to not be compatible with much off-the-shelf:

Image

All the pins including the drivers:

Image

I forgot to photo at the time, but with all the keypins inserted as received there seem to be some huge gaps and over-extendedness (not sure of the proper term) of the pins in the plug. I.e. with the key inserted, some pin stacks are sunken into the plug and some sit proud. I guess that’s why the key felt “sticky” and hard to turn – as described in the eBay auction, the lock is a little tough to turn but I assumed when reading that that it’s due to the grease and dirt clogging up the cylinder, but when I received and tried to actuate the lock there’s that unmistakable feel of a key kinda “catching” the pins in the cylinder. I believe that I bought some ASSA pins a while back so maybe I’ll be able to re-pin the cylinder to fit better – we’ll have to see later!

With that, all the major parts (sans pins, main lock body*, tiny sidebar springs and bible **) were placed into Gunk overnight as is my norm. That’s where we’re up to right now, so I’ll update this more tomorrow with the rest of the progress!

* I did debate on totally sinking the body in gunk to try to clean out the black, err, gunk, but ultimately decided against it since there would be no way to re-lube the lock or replace any damaged washers or whatever might be inside helping the rotation. I know that Gunk kills washers from that last Ingersoll, oops!

** The bible is silver-metal-covered-brass as I discovered when WD-40ing it and the coating started coming off. I decided to give it a thorough WD-40 treatment rather than Gunking it, just in case all the coating came off.

And we’re back again, now the next day, ready to continue the clean-up! Just a couple of things that I forgot to mention yesterday first, regarding comparing this Rotalok to my original (semi-closed shackle) one; essentially they’re the same design, and quite different from the black accent ones. For a start, it doesn’t use a cam interface and just has the standard shape Euro cutout inside (silver only) like so:

Image

The bottom plate has no Euro cutout marks and four screw points, same as my other one:

Image

And the standard actuator fits into the bottom hole to be directly interacted with by the cylinder:

Image

In a way, this is the more “troublesome” of the types; thankfully this cylinder is quite happy, stock, to work with this lock (except for the filing away that has already been applied to the cylinder).

Something else that I noticed yesterday but forgot to mention is that despite using an Assa Twin cylinder with side-pins and sidebar, no side pins actually came with this lock:

Image

Just the standard 6, plus the sidebar. I wonder if they were removed by the original owner before selling? Hopefully one day I can source an Assa pinning kit with compatible sidebars and pin it up to work with my key!

Here’s the plug after cleaning:

Image

And all the pins on a new tray:

Image

I think that I mentioned yesterday that the plug seems “sticky” because the pins aren’t flush. However I think somewhere along the line I mixed up the orders because when I replaced them in order into the plug, I got this:

Image

Oops! After some jiggling around and testing different combos I managed to get this:

Image

Still not perfect (and probably the reason for the slight hang-up) but better than it was before, and I assume this is how it was originally pinned when I got it. Removing the pins again, this is how they stack up:

Image

Four master pins! Yeesh, must have been a complex set-up. After that, lubing and re-assembly was a simple matter:

Image

And here it is, fully assembled:

Image

All in all, a pretty lucky find and a nice lil Rota! Thanks for reading along and if you have any questions about the Rotalok comparisons etc just ask :)
<<

LocksportSouth

User avatar

Active Member

Posts: 369

Joined: Wed Dec 02, 2015 6:51 pm

Location: UK

Post Fri Aug 05, 2016 2:45 pm

Re: LocksportSouth's Stash

Rotaloks have been on my mind and in my posts a bit lately – you may recall my extra-closed Rota the other day, which is currently out of service awaiting repinning. However you might also recall that my open-shackle Rota, whilst working, was pre-fitted with a Cisa Astral cylinder and I’ve been looking to upgrade that for a while. You may recall that I had a lot of issues finding cylinders that will work with Rotaloks, due to the odd design of the bottom plate and the need for cam interface parts. You may also remember that I attempted to fit a DOM Diamant, with zero luck, but then found that the EVVA MCS could be made to fit.

In addition to this, I did actually manage to track down a cam interface kit for the open-shackle Rotalok that I have (remember that the black-accented open shackle is significantly different inside from the all-silver locks, with the Euro cutout in the bottom plate and need for cam interface parts, which the silver ones do not use). I attempted to use it (the cam interface kit) to work with the DOM Diamant but had no luck so I never posted it. However after getting the MCS (mostly) working in the semi-closed, all-silver-bodied Rotalok I decided that the next stop should be to try and get the EVVA 3KS and see if that is also successful.

I had to hold off for some time though, due to finances and time constraints, but finally today is the day:

Image

The EVVA 3KS, like the MCS, is quite an unusual design. Whereas the MCS uses rotating magnets that are spun by magnets on the key to a correct alignment, the 3KS (short for 3 Kurven System, or Curve system, which describes the odd wavey curves (laser tracks) cut into the key) uses sliders which travel along tracks cut into the key and, when sitting at the final position on the correct key, allow sidebars to slot into place and the plug to rotate. I’ve seen other disassemblies of this cylinder and honestly it’s not something I’d want to approach right now as it’s pretty complicated and easy to get wrong, in addition to the odd removal method (unlike in traditional pin tumbler locks where you just enter the key, rotate the plug and pull the plug out, in the 3KS the key can’t be in the cylinder – the sliders must be centralised and the plug should slide out forward, but I didn’t have any luck with mine despite trying some tricks that I’ve read). You’ll need to google for a breakdown if that’s what you’re looking for :).

That said, this story of installation is anything but a short one.

Image

You can see the key cut tracks in the pic above. You’ll also notice the easy-disassembly hardened connecting bar that attaches the main part of the cylinder to the back, which in turn keeps the Euro cam in place:

Image

This particular lock is stated as 41mm overall length, half Euro, however bear in mind that includes the 5mm for the Euro cam and 2-3mm for the back plate, so the actual cylinder is about 32-35mm.

Here’s the front. Notice that it’s only 1 star (BS standard) but it does have the kitemark:

Image

I’m not sure if they make hardened (anti-drilling) or anti-pulling variants like other locks such as the DOM Diamant which have a higher 2 or 3-star rating, or whether it’s simple classed as “lower” security due to the mechanism.

Other side of the cylinder:

Image

And the back:

Image

Let’s take a quick detour to look at the keys:

Image

These ones are actually stamped with the company name, I assume they’re an authorised cutter for these locks:

Image

The key code is stamped on the backs:

Image

The curve system cuts to look very cool, I think! Just be careful not to get grit and dirt stuck in them. The straight line at the top of where the curve cuts is where the key “clicks” into the cylinder, engaging it and the plug can turn at that point.

Getting back to the cylinder - on the bottom, the connector rod is held on by a security screw – which, like the MCS, is a pentalobe:

Image

Remember all the hassle I had trying to remove that darn screw on my MCS? Well, after that incident, I planned ahead:

Image

Image

Here’s the parts semi-disassembled (and in the wrong order) (note that he Euro cam parts do disassemble further but I don’t need to do that for this project):

Image

Back of the cylinder with the Euro cam removed:

Image

Ah, a cross-shape cutout in the back of the plug – should make it easier to get it to work with the Rotalok (with another cylinder, I found that due to the way the cam and cam interface work, I had to file a horizontal cut into the back of the plug for it to work).

Righty-o, let’s start prepping the Rotalok for the new cylinder!
You haven’t seen the new cam interface parts yet (I got them ages ago but my first project with them didn’t work out) so let’s take a tour of the parts. First, here’s the actuator that fits at the back of the lock (this is one part that’s the same on both the all-silver Rotas and also the black-accent one that I have), in a depression in between both ball bearings and acts to physically release or secure the BBs as well as interact with the (cylinder for the all silver body Rotaloks, cam interface for the black accent ones). On the left is the default actuator that comes with the Rotalok, on the right is the replacement one that comes with the cam interface kit:

Image

(sharp-eyes viewers will also notice a stray cam interface part in the background too!).
The differences aren’t just in height – let’s look at the top:

Image

Whereas the left (original) actuator has a sticking-up nub on the top that allows it to slot directly into the back of the cylinder, the one that came with the kit has a cross-shaped indent – this connects to a cross-shaped nub (actually four individual nubs) that are on one side of the cam interface parts to allow them to turn together. The cam interfaces then connect to the cam of the cylinder as usual.

Here’s the new actuator in the lock body:

Image

Four cam interfaces are supplied with the kit, all of different sizes. It’s not just the height of each cam interface that differs – so does the width of the “circle” on the top (which slots into the back of the plug) and the thickness of the cross-bar that goes across it:

Image

Here’s the core with the cam interfaces next to it:

Image

Despite being the longest cam interface, #4 also has the smallest central circle and thus is the best match for the plug (note the small width of the gap in the back of the plug).

Even so, the cam interface don’t quite fit in the back of the 3KS cylinder:

Image

Let’s start off by checking that the cylinder does actually fit into the lock body:

Image

And that the bottom plate can be fitted on:

Image

Looking good! What we’ll need to do is file down the horizontal cutout to accept the thicker cam interface bars:

Image

While filing away, I stuff blu-tack into the gaps as it does a good job of keeping the metal filings out without needing to strip the cylinder:

Image

The main bulk of the story, though is in the hassle I had trying to get the cam interface to fit. After a while of filing down the 3KS, checking thicknesses, blowing out metal dust and re-applying blu-tack, and doing the same thing again, I decided to give filing down the cam interface a shot, too:

Image

However that’s easier said than done as the length of the “sides” is quite small and I ended up filing the round middle section more often than not. After working on both parts for a while, I found that it wasn’t actually the edge sides that were too thick, but that the middle round section is too large for the centre cutout in the EVVA cylinder, even though it’s the smallest diameter cam interface. Bugger. I eventually decided (after trying to file away the vertical portion of the 3KS for a while, trying to widen the central hole) to just remove the central round portion of the cam interface entirely:

Image

Along with the widened horizontal gap on the cylinder:

Image

This actually worked, more or less:

Image

Notice that the horizontal bar is leaving a bit of a gap now in the back of the cylinder, oops. The lock wobbles around but does now fit:

Image

However, I discovered after putting it together that is has the MCS problem – the cylinder is a little too deep, and when the bottom plate is screwed on it jams the front up, preventing it from turning. Bugger.

Well, despite a disastrous attempt with the DOM Diamant (long story short, I had the same problem, filed off too much from the back of the plug and left the cylinder “loose” in the Euro cutout an unable to actuate the lock) I decided to try also taking a bit of material from the back of the plug on the 3KS, taking off just a little at a time until it fit:

Image

I did get it ALMOST there first time, but it was a smidgen too tight so I had to go and file off a little bit more. Really tearing through blu-tack here!

Final assembly parts. Sponsored (not) by Relentless energy drinks!

Image

Cylinder and key:

Image

Aaand it works! Ever so slightly tight, and I also can’t tighten the bottom plate screws fully (although still tighter than I could with the MCS Rotalok). I did also use some Threadlock blue to keep the screws in place. With the key tagging done, we’re finally complete with this lock:

Image

Image

A *slight* bodge job but I’m happy to have it finally done! So now we have:

* Open shackle Rotalok with EVVA 3KS cylinder (Silver-and-black design)(Finished!)
* Semi-closed shackle Rotalok with EVVA MCS cylinder (All-silver design) (Finished!)
* Extra-closed shackle Rotalok with ASSA Twin Combi cylinder(All-silver design) (Currently out of service)

Thanks for reading!
<<

LocksportSouth

User avatar

Active Member

Posts: 369

Joined: Wed Dec 02, 2015 6:51 pm

Location: UK

Post Sat Aug 06, 2016 12:27 pm

Re: LocksportSouth's Stash

If there’s any one specific lock that has bugged me for a while, it’s the Abloy 341. The majority of Abloys that I have were bought second-hand, often without the code cards or original box but at a more reasonable price than new, but the 341 never showed up on eBay or other second hand places or cheaper lock shops. So, when I made my Lock Board™, I left a gap between the Abloy 342 and 340 for the 341 that I knew was out there. So I kept my eyes out, and waited, and waited... But none ever popped up. I’ve always been a bit reticent to buy new, but the gap in my board was bugging me too much, so a couple of weeks ago I decided to finally bite the bullet:

Image

Just turned up today! I won’t be stripping it down because I’ve already partially disassembled most of my Abloys, and fully disassembled one of them, so there’s no need to retreat old ground. Let’s take a look at the photos:

Image

I paid the modest upgrade from the Sentry keyway (default) to a Protec2, my preference.

Image

341! The 341 is the same size as the 340 (remember that the 342 is a closed-shackle lock), but is made from (I believe) brass with a chrome coating rather than being all-steel like the 340 (odd how the “higher number” lock is the brass lock?).

Abloy Protec2 (note the interactive element) key:

Image

Image

Image

As normal, the lock can be disassembled by removing the grub screw from the side hole when the shackle is removed:

Image

The bottom plate is then unscrewed and the cylinder removed – but we’re not doing that with this lock.

Image

Tagged up and ready to go!

Since this was a quite short post, I want to spend some time to address some other stuff that I’ve forgotten or left behind...
(Note: ITT LocksportSouth generally fails at everything)...

1. The disassembly of the Chubb 1K12C
You might recall that after unpacking the Chubb 1K12C recently, and find that disassembly was halted by a roll pin in a “blind hole”, I vowed to find a way to extract or drill it out. First, I ordered a set of carbide and diamond-tipped drill bits in 2mm, 2.5mm and 3mm sizes. I may have posted this before:

Image

Image

Unfortunately, I only succeeded in snapping off bits of carbide drill bits into the hole. After that incident, I ordered a new set of bits – 10x2mm, 10x2.5mm and 10x3mm all in diamond-tipped (since the carbide ones just snapped off instantly):

Image

All seemed to go well at first – I managed to clear out much of the hole and get fairly deep:

Image

But the shackle still wouldn’t come out, and I couldn’t drill any deeper – no more material would come out, no matter how many bits I tried or however hard I pressed. Eventually I ended up snapping off more and more bits inside the hole, succeeding only in drilling a few fragments of the old bit out and then snapping a new bit. Eventually, after much blood, sweat and tears and many snapped bits I decided to just give up. At the current time, the hole is pretty much full of snapped off bits, compacted down. D’oh!

2. The ill-fated attempt and fitting a DOM Diamant into the Rotalok body
I mentioned this briefly in my last post about the Rotalok and EVVA 3KS cylinder that I recently fitted. You may remember the post where I got a DOM Diamant and tried to fit it into the lock:

Image

When the new cam interface parts arrived a couple of months ago, I tried to get it to work with the DOM Diamant but a few issues stopped me: the back of the cylinder doesn’t have horizontal cutouts, the cylinder is too long to fit into the Rotalok body without jamming up when screwing on the bottom plate, and the key gets stuck in the cutouts on the bottom plate. I did try filing some of the back of the plug off in order to make it fit:

Image

But unlike the relative success I had recently with the 3KS, I filed off too much of this cylinder and it went loose and floppy in the body, not able to properly interface with the cam as it slid too far forward even with the bottom plate fully closed. In addition, I filed so much off the back that the long-and-pointy back of the key stuck all the way into the vertical clearing:

Image

Preventing the nub in the actuator or cam interface from fitting in. I tried to cut off the end of one key to make it shorter (since it didn’t have any bitting on it and thus didn’t seem vital) and succeeded only in preventing that key from entering the lock entirely. All in all, a total disaster! Hence why I never posted about it at the time and deleted all photos I took – these photos were taken recently.

However, since this cylinder is now useless I might take some time to strip it down to its parts, since I’m not too worried about not being able to re-assemble it. Let me know if you’d be interested in reading a DOM Diamant breakdown and I might do that!

3. New Vice
For ages I’ve been working with a sub-standard out-of-the-house vice which is rusty and ends up damaging or marking locks. This came to a head when I was trying to drill out the roll pin in the Chubb 1K12C padlock and I had to carefully wrap the edges with cloth to prevent the rust from damaging the body. That ends today, with an upgrade to an, uhm, much-bigger-than-expected vice:

Image

It’s an Irwin Record 6” jaw width vice. Didn’t realise how big it was until I arrived at the store and they brought it out (click and collect). I figured 6” jaw width meant how far it would open, not how “long” (or “wide”, I guess) the actual clampy-parts were. Was wondering why they made 1”, 2”, 3” etc ones – who needs a vice that only opens by 1”? Silly me. Ah well, this should do me for every need I might have in the future!

4. Updated Lock Board photo
You might remember that a few months back I posted a teaser photo of a new project:

Image

And followed it up some time later with a shot of the finished project, my Lock Board:

Image

I took the paper locks down quite quickly, and the board has remained mostly the same, a little hole-y, ever since. Now seems like a good time for an updated photo to see how things have changed...

Image

Quite a few changes as you can see! Let’s start with the left hand side of the board:

Image

In the top left, two locks in (the brass Abloy) – this was meant to be a space for the Abloy 358, however I haven’t gotten around to buying one of these yet as you can only find them on SecuritySnobs and the price plus shipping and import fees to the UK are pretty high. But I found this nice Abloy 656 and put that in the 358’s spot for now, until such times as I get my hands on a 358!

Next, a bit further along the line, after the 342 (smaller Abloy closed-shackle lock), the 340 has been moved one space forwards (to the new staple) and the new 341 that arrived earlier today has been put directly after the 342, closing up that gap totally.

In-between the Abloy line and S&G line you can also see two new locks which have been “snuck in” towards the right hand side of the Abloys, taking advantage of the space gained under the smaller Abloy locks. Those are the Bramah BP-17 padlocks (long and short) and have found a nice home next to the equally-shiny Abloys!

Down to the S&G line now, and there have been quite a few changes! In the old photo, you can see a printed picture of the Sargent and Greenleaf 826C two locks in from the far left end (with the furthest-left one being the 826A and the next lock in line, 3 from the end, being the 826D). That space has now been filled with a real 826C.

After the 826D are two printed photos (in the old pic) – an S&G 831A and an 831B, before the 831B-M-1 which I already had. I did manage to get an 831B, which is now installed next to the B-M-1, but I’ve still been unable to find an 831A. In order to keep the line from having any holes, I added another 826C in the 831A’s gap, temporarily, until I can find an 831A. So the line currently looks like this:
826A – 826C – 826D – 826C – 831B – 831B-M-1 – 833 – 951 – Hi-Shear

You’ll also notice (a little bit out of shot in new photo – to the right hand side of the Hi-Shear) that I took down the photo of the NAPEC DCP but haven’t added anything new there as I don’t know what kind of staple or fixing the NAPEC will need. Still, I don’t have any delusions about finding that one soon!

Finally, on the bottom row in the old photo you can see, next to the two Chubbs (Battleship and Cruiser), the S&G combination padlocks – the 8088, 8065, two gaps, then the 8077AB, then two more gaps. Now you can see I have the 8088, 8065, gap (for the 8077, which I haven’t found yet), then the 8077A, 8077AB, another gap for the 8077AC which I don’t yet have, and finally the 8077AD.

Now let’s move over to the right-hand side!

Image

The top line is the same. On the second line, whereas originally there were two Rotaloks and a picture of the third, I currently have the same two currently mounted (albeit with the new cores – the EVVA MCS and EVVA 3KS) but also a new staple ready for the final third Rotalok (which is currently out of commission awaiting re-pinning). Moving along a bit, we can see on the old photo a gap between the first and “third” (then second) Ingersoll ready for the lock that is now mounted there – the larger “Silo” padlock from both Ingersoll and S&G.

Finally, the bottom row. The CISAs are exactly the same, on the far right. However you’ll now notice two new Chubbs mounted which I received recently – the Chubb 1K12C (discussed above – the one I was trying to drill out. The roll pin hole is on the back side so it doesn’t blemish the appearance when mounted) and the Chubb 1K57A, aka the Chubb Hercules.

Whilst finding the right staple-on-plate to fit these locks has been a struggle at times (trying not to have too many different types to make it look “messy”, but some require longer staples so as not to be “pulled out” from the board by their large bodies, etc), finding a staple that was both deep enough to fit in into the recess in the Hercules plus wide enough to fit the massive shackle was a real pain. None of my existing staples were deep enough, and whilst I found a solution with chain links and D-links (similar to how I mount the Rotaloks and S&G padlocks, due to much the same problems), the shape of the Hercules means that it would have “hung down” really far, with the bottom of the lock acting as a pivot and the front of the lock facing right down.

In the end, I actually used an odd “double” staple that I’ve had lying around for ages (like Link) and dremaled off one of the loops (the loops are wide and deep enough to fit into the recess, but two of them are two wide to fit its thickness). Like so:

Image

Next to lock for reference / comparison:

Image

And that’s about it for this update! Thanks for reading :)
<<

LocksportSouth

User avatar

Active Member

Posts: 369

Joined: Wed Dec 02, 2015 6:51 pm

Location: UK

Post Sat Aug 27, 2016 3:35 am

Re: LocksportSouth's Stash

As you know, recently has been the “season of the Rotalok” for me, with changes abound. Currently, I have three Rotaloks – an all-silver body, semi-closed shackle (which was my first Rotalok) which came with the Abus E60 core and is currently fitted with the EVVA MCS core, a silver-and-black-accent Rotalok which is open shackle and came with the CISA Astral core (now fitted with the EVVA 3KS), which was the second Rotalok that I bought, and finally an all-silver-body fully-closed shackle which came with an ASSA Twin Combi core and is currently in parts awaiting a final core.

However, there due to some changes I have planned, I need to check whether the EVVA MCS core that I have in the semi-closed will fit into the fully-closed. First though, remember that the MCS Rotalok was always a bit stiff when the screws were fully screwed up? The solution I had was to only tighten them loosely and use lots of Threadlock Blue on the retaining screws (the issue is that, when fully tightened, the bottom plate presses on the bottom of the core, jamming it up). Well, in light of my recent core-modifying successes with the 3KS, I decided to take another crack at getting the MCS fully working in the semi-closed Rotalok (in that, with the bottom plate fully tightened, the core will still rotate fine. Let’s see how that went!

Image

First off, here’s the MCS core, stripped from the Rota, and after today’s modifications. Like the 3KS, I jammed some blu-tack in the hole to prevent metal dust from getting inside (even more important with magnets and delicate micro-components at work!) and then gently filed down both edges of the horizontal hole. I forgot to photo the core “before” shots, but basically the nub on the actuator (at the rear of the lock, which sits into the horizontal cutout in the core) was really tight, and the grooves cut into the core were a kind of V shape, narrowing as it got further towards the front of the core – a side effect from working without any kind of guides, totally hand-done work. I have managed to get the cutout to sit much more loosely with the back of the actuator:

Image

Image

You can see it still isn’t perfect, but now with the actuator able to sit slightly deeper into the back of the core, it frees up just that little bit extra that’s needed to be able to tighten the bottom plate and still have the core turn. Success!

Image

Well, that’s one problem down! And since both the Rotalok semi-closed and extra-closed that I have are both all-silver-body and mostly identical, clearly the core should work as well in the other (extra-closed) lock as it does in the current one! So, I stripped them both, tested it, aaaand....

Nope. For some reason, the core is still jammed up tight when I tighten the screws in the extra-closed, but not in the semi-closed. But why? Well, let’s start taking a look at the components and see if we can figure it out...

Image

Well, the bottom plates look identical to me, seem to be the same dimensions and all. Let’s have a look inside the locks...

Image

Image


Hmm... Is it just me, or does the actuator in the right-hand lock body (the extra-closed) look slightly higher than the one of the left? Or maybe the hole is deeper on the left? Let’s take a look at the actuators.

Image

Yup. For some reason, the right-hand-side actuator (from the extra-closed Rotalok) is ever-so-slightly longer than the left hand one. Not by much, but enough to make that difference when tightening up the screws. My guess is that since these all-silver bodied Rotaloks don’t use cam interface parts like the silver-and-black ones do, the variability is introduced with different length actuators at the back to fit different cylinders. Unfortunately these seem to be the older models (since my source got me the cam interface parts NEW from the silver-and-black ones) so it’s unlikely I’d be able to find differently sized replacement actuators, but at least in a worst-case scenario I can manually file the one on the right down to be the same height as the one on the left.

To test my theory, I switched the actuators and tested the MCS cylinder in both locks again – and as predicted, it’s now tight in the semi-closed and fine in the fully closed. Out of curiosity, I also tested the previous cylinders that came from these Rotaloks – the Abus E60 and Cisa Astral – with the long actuator to see if they would fit, but no luck with both (too long with the E60, and way too short with the Cisa, which was originally from the silver/black Rotalok that also uses cam interface parts). No worries, now we know what the possible issues are and can plan for the future :).
<<

LocksportSouth

User avatar

Active Member

Posts: 369

Joined: Wed Dec 02, 2015 6:51 pm

Location: UK

Post Sat Aug 27, 2016 3:38 am

Re: LocksportSouth's Stash

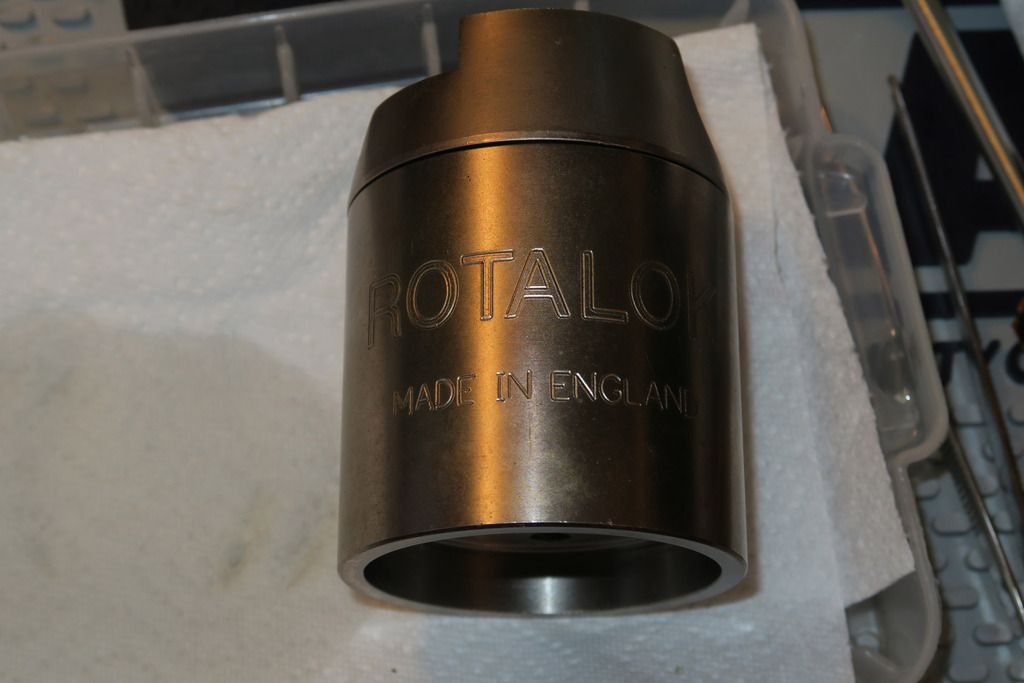
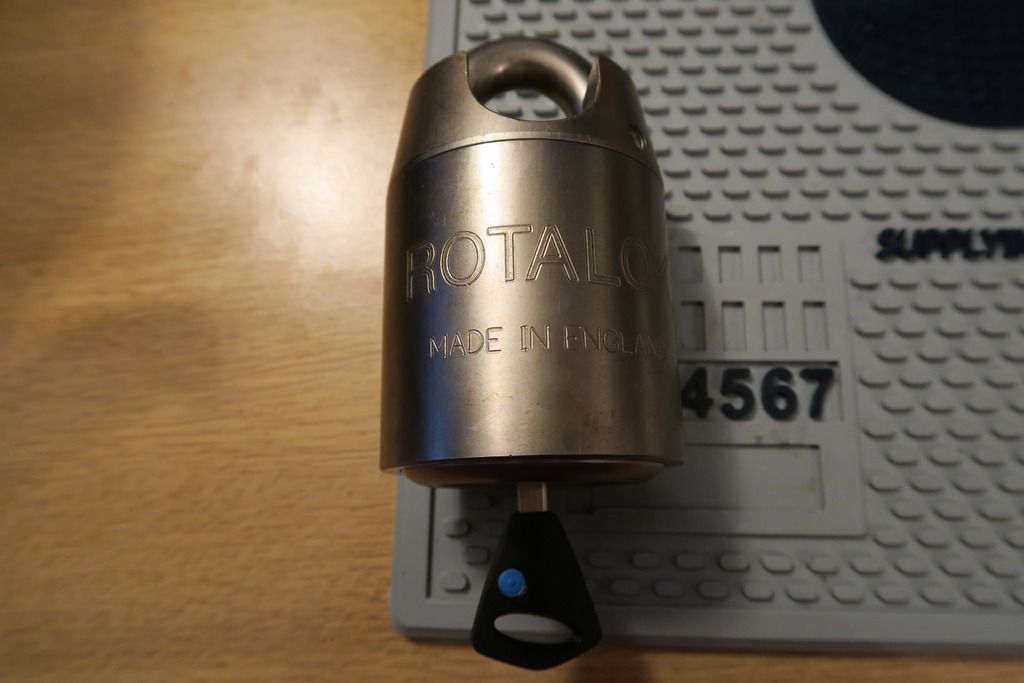
The following is (yawn, I know) ANOTHER Rotalok post. However, this is a Rotalok post with a difference – it’s an entirely new lock. I didn’t especially plan on this purchase but when I saw it pop up on eBay, considering how unusual it is, I *had* to have it. Why, you may ask? Well, what Rotalok cores have we seen so far? Abus E60, Cisa Astral and Assa Twin Combi. And we’ve fitted the Rotas with an EVVA MCS, an EVVA 3KS and also another random Evva that I had. And what do those cores have in common? Well, they are all “slot” shape keys that utilise the same keyway cutout pattern on the Rotalok – that kinda Z shape that allows rotation of an oblong key. So imagine my surprise when I saw this pop up on eBay:

Image

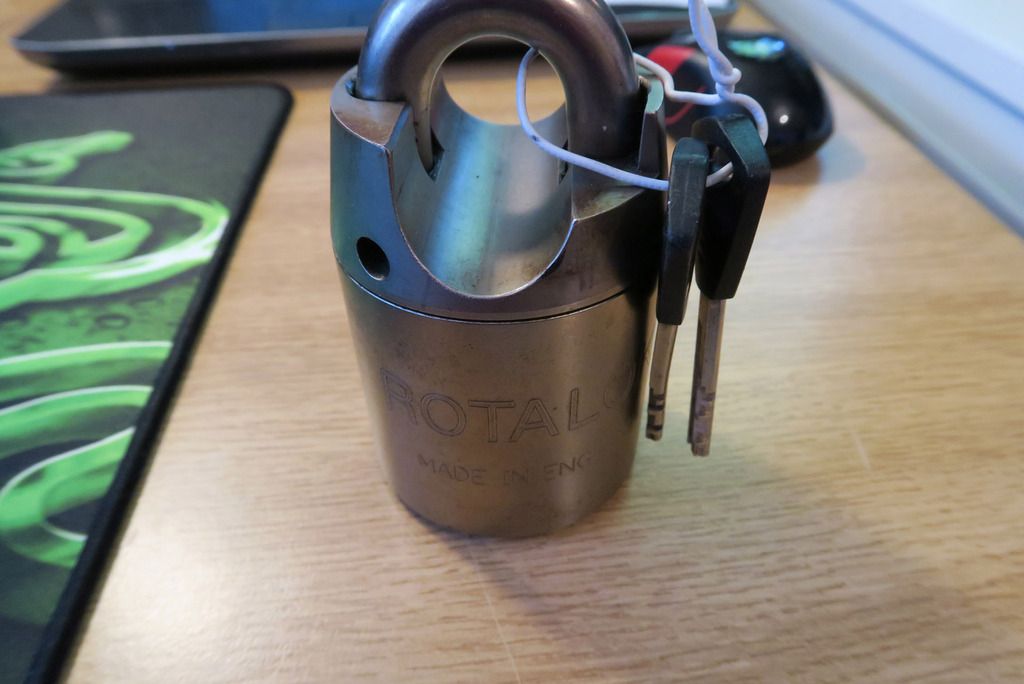
Is... Is that what I think it is?

Image

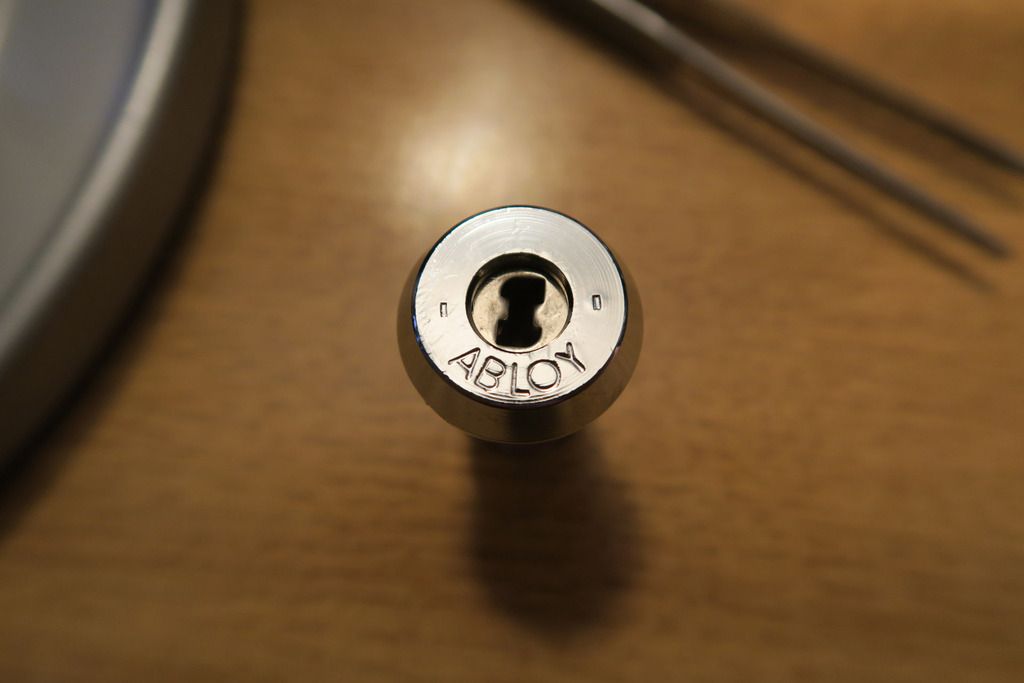
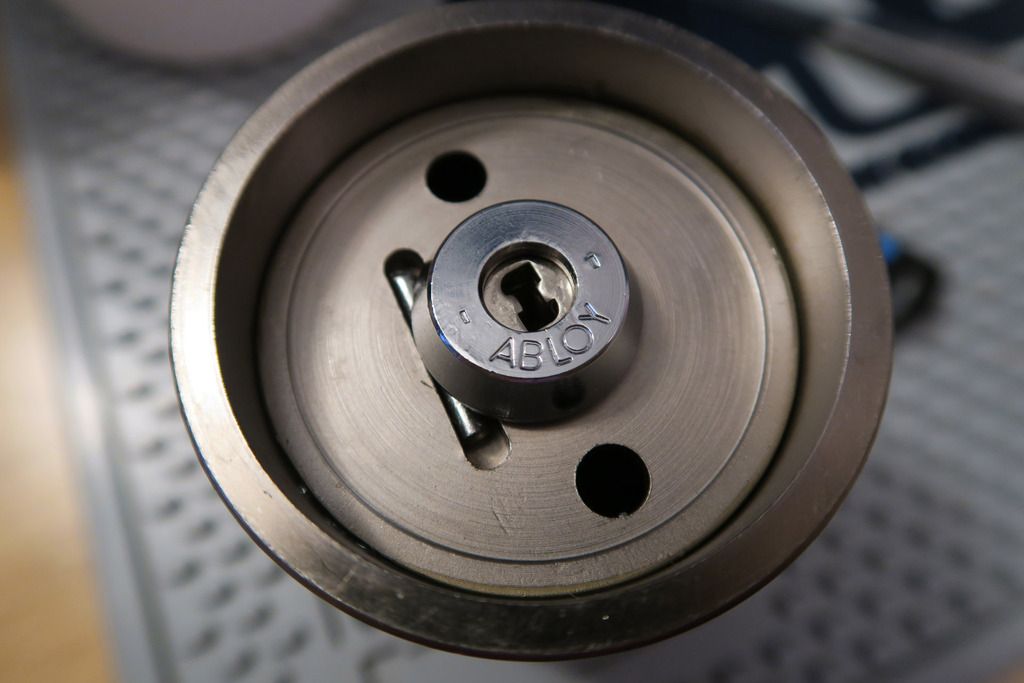
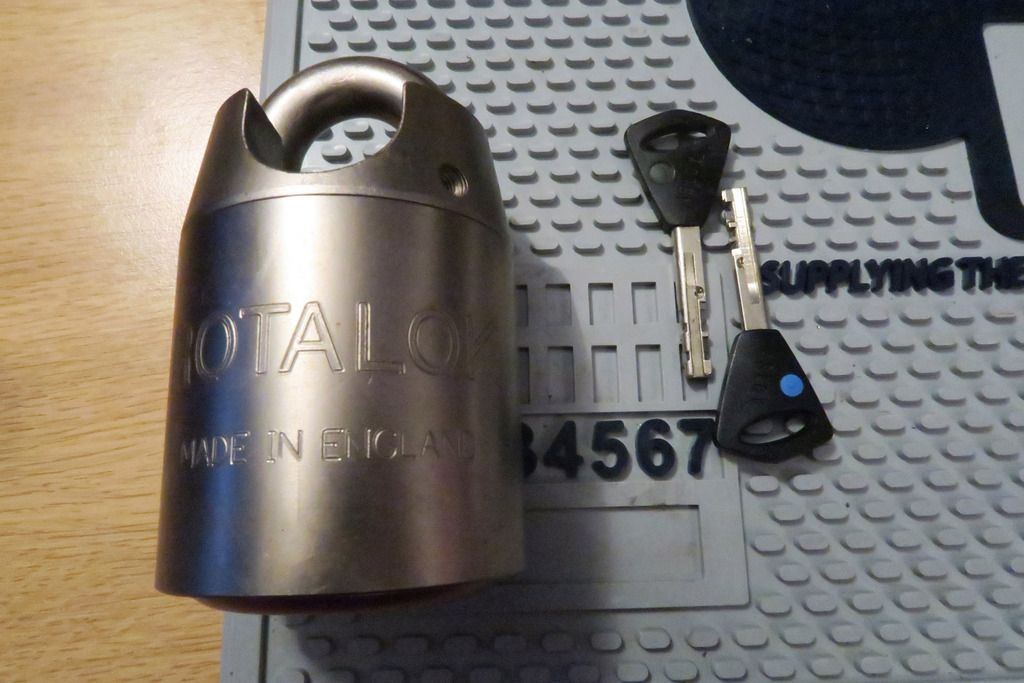
Oh boy! It’s an Abloy cylinder – but not only that, it’s an Abloy Exec (as far as I can tell, based on the key bow shape and distinguishing features on the key). You don’t see those around very much – mostly either the Classic/Profile/High Profile on the “old” end, or Sentry/Protec/Protec 2 on the “new” etc. So that would be reason enough to pay attention to this lock. But that’s not the only surprise in store...

Image

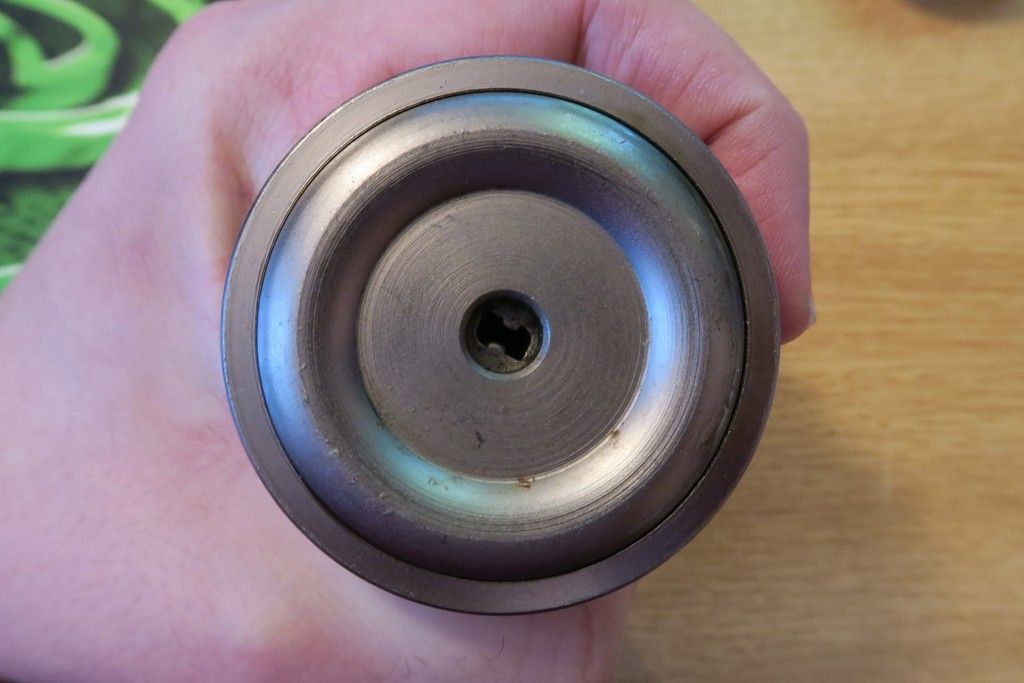
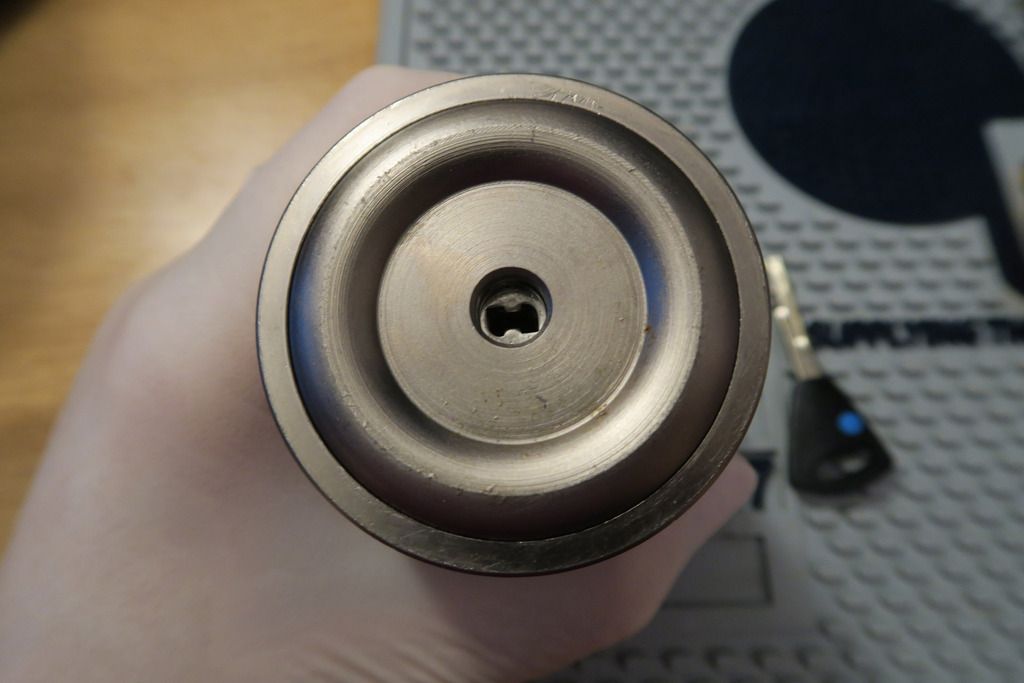
Holy moly! A perfectly round keyway cutout on the bottom plate, shaped for central-access cores like the Abloy, Anchor Las and DOM Diamant ranges. This is the first time I’ve ever seen this kind of bottom plate (and it took a careful eye to notice it on the auction listing) so I dunno if this is a special order for some company or government, or just a variation that is rarely seen, but yeah... Wow! So, does this use an Abloy ½ Euro cylinder? Well, let’s crack it open and find out! Not literally of course.. All I’d achieve is to break my hammer :D.

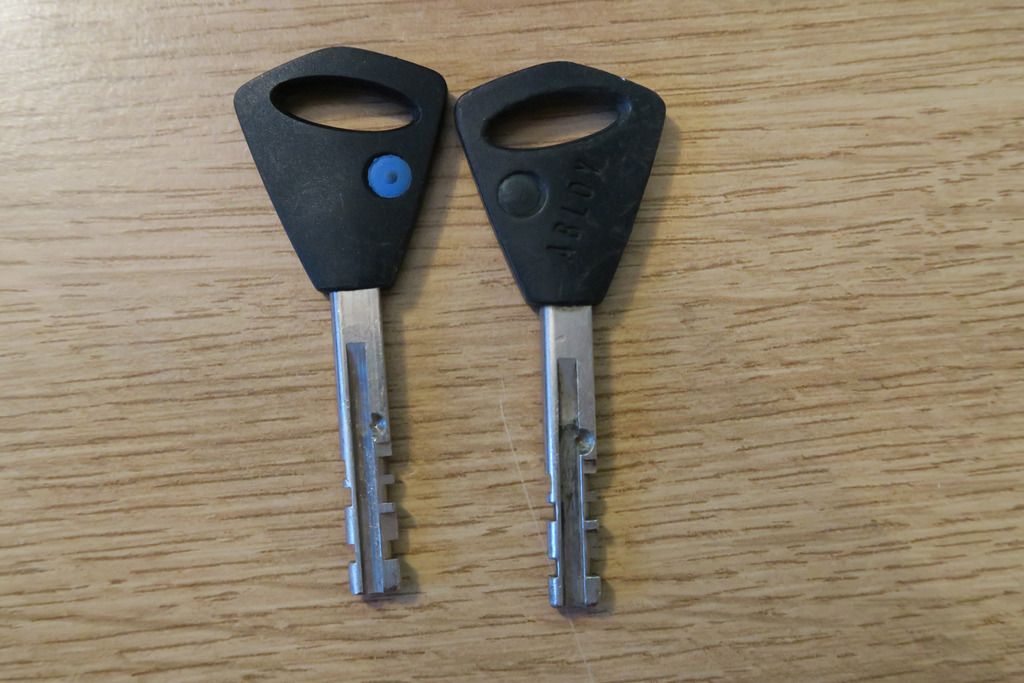
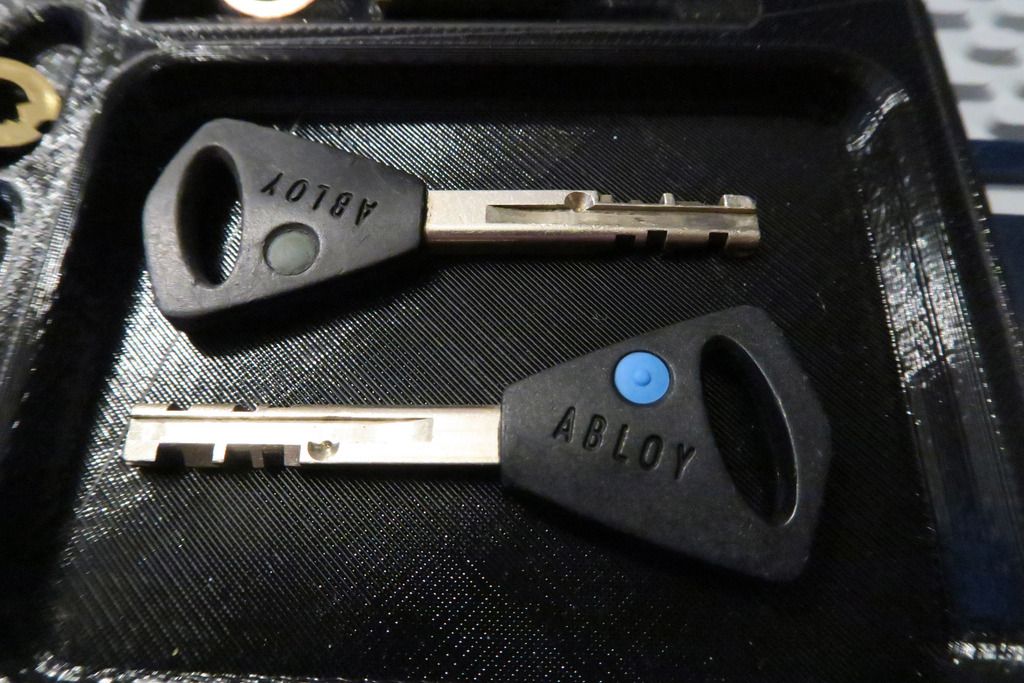
Let’s start with another look at the keys:

Image

I’m of the belief that the black plastic handles with the slanted oval cutout shape (where the keyring goes) signifies that these are Abloy Exec keys. I believe that these are a direct successor to the High Profile range, and preceded the modern era Protec/Sentry keys (though I’m of conflicting info about the exact dates for the production of these as well as the Disklock range since different sources say different things) but I do know the Exec system is “one-way” and was designed as a replacement for the High Profile specifically for applications such as padlocks, cam locks and furniture locks. Exec can use 11 (standard) or 9 (short) disks, and uses a “Disk Steering System” to ensure that the key is fully inserted before it’s allowed to turn – I’ll explain this in further details when we get to the relevant photos :).

Image

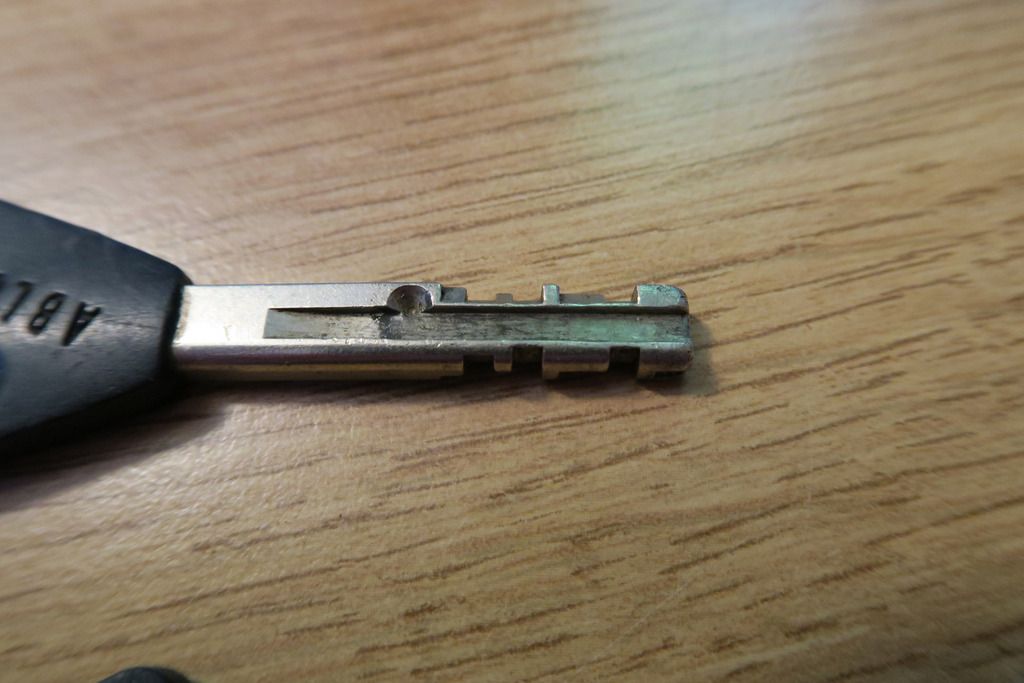
In this close-up, you can see the slanted-cut bitting that is ubiquitous in Abloy locks, as well as a single dimple cut – this is for the aforementioned Disk Steering System (Hereafter referred to as DSS).

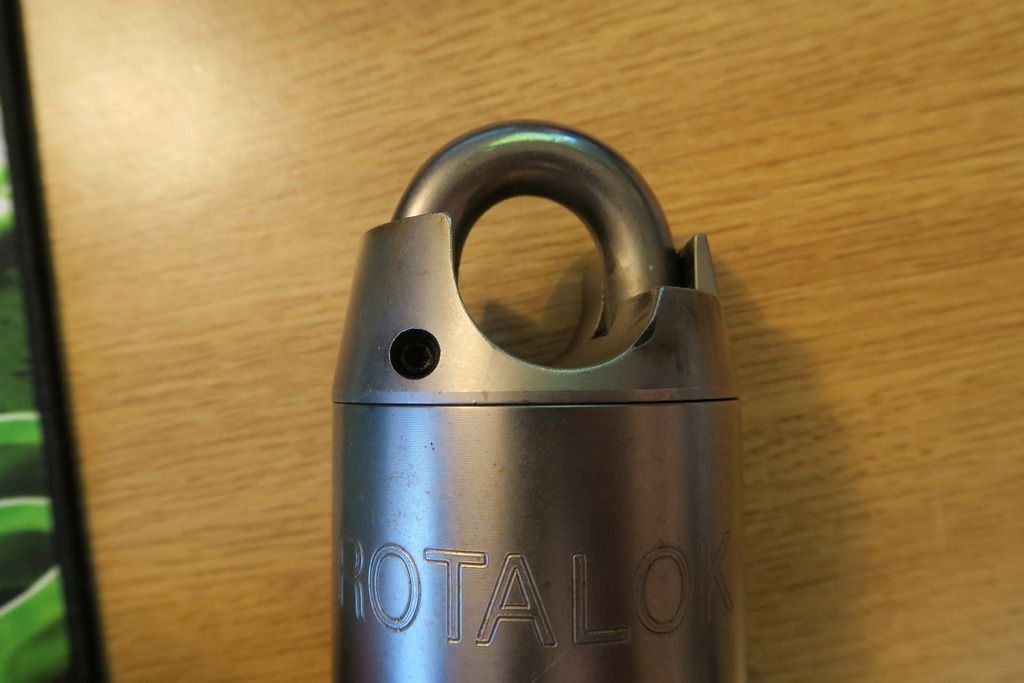
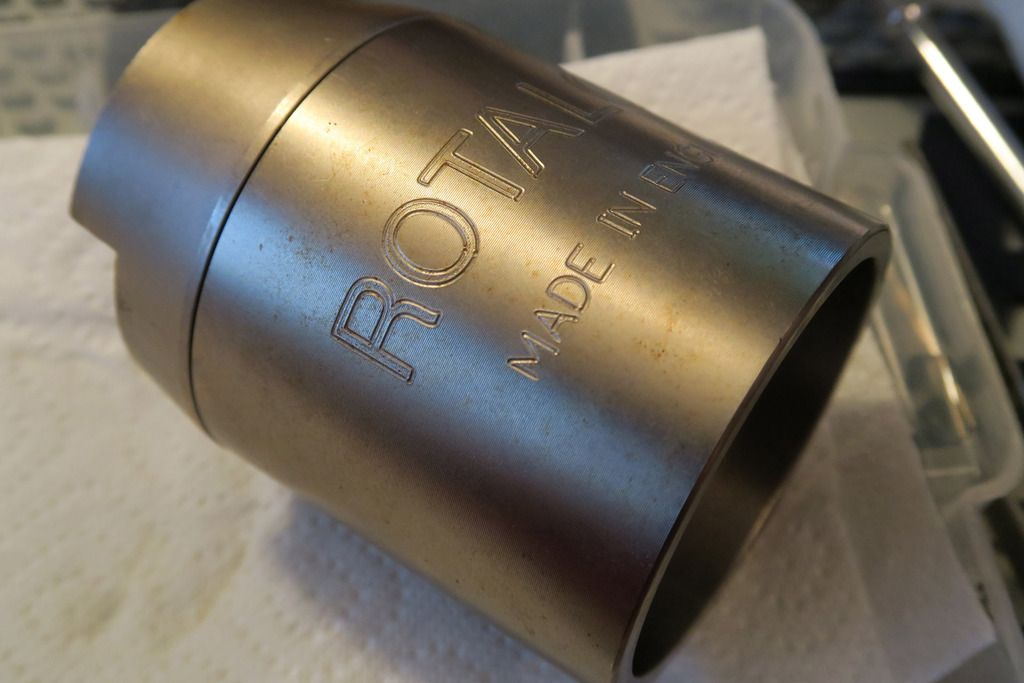
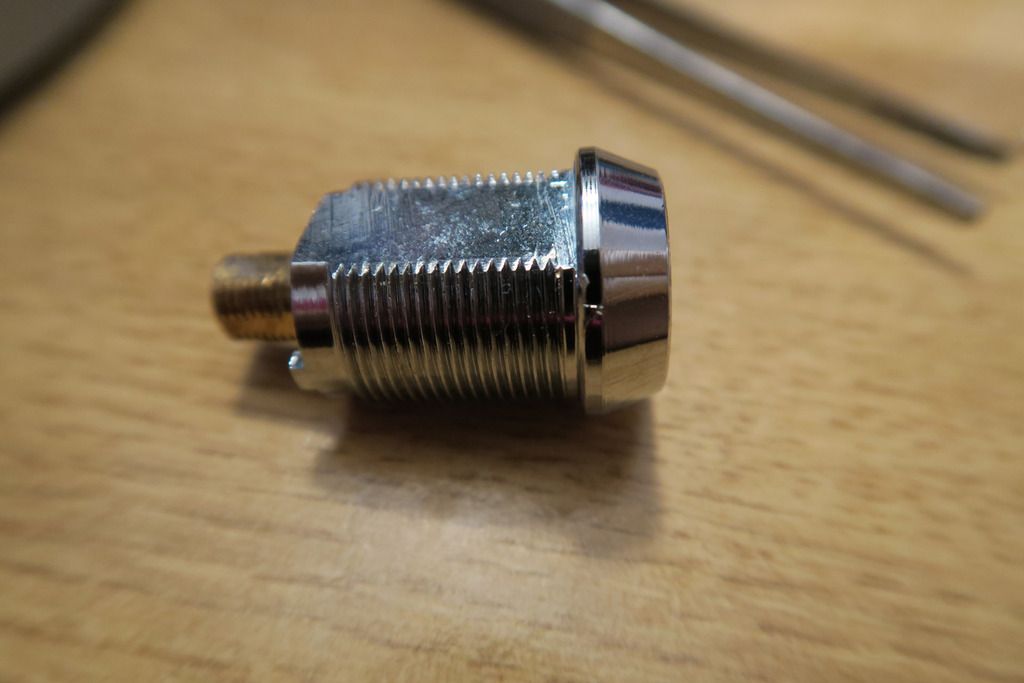
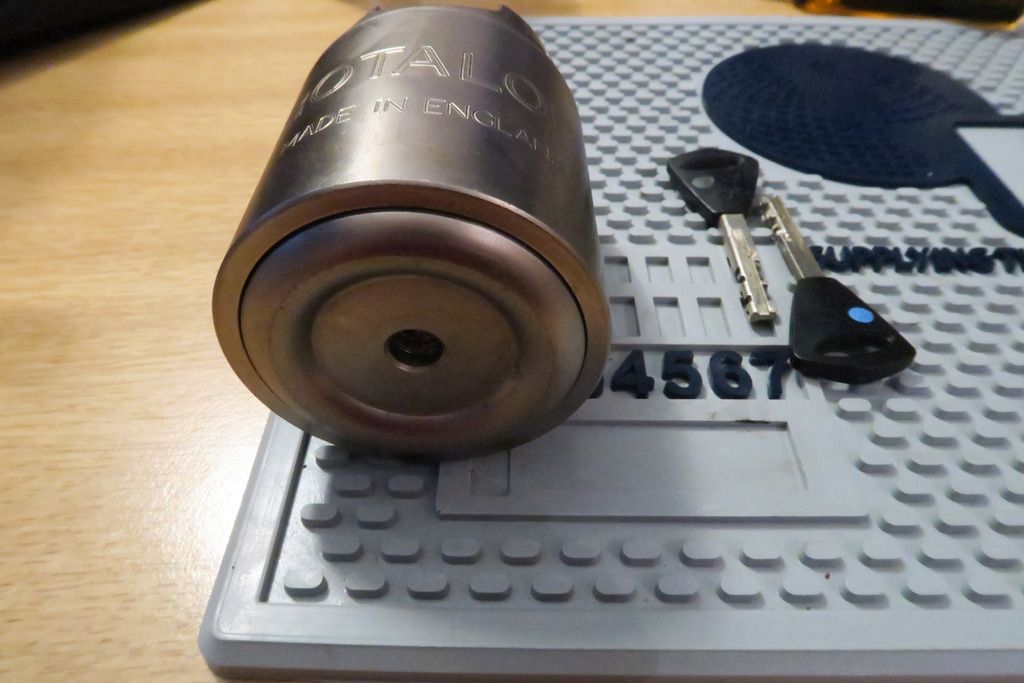
The majority of the body of this Rotalok is just like my other all-silver-body semi-closed Rota:

Image

Image

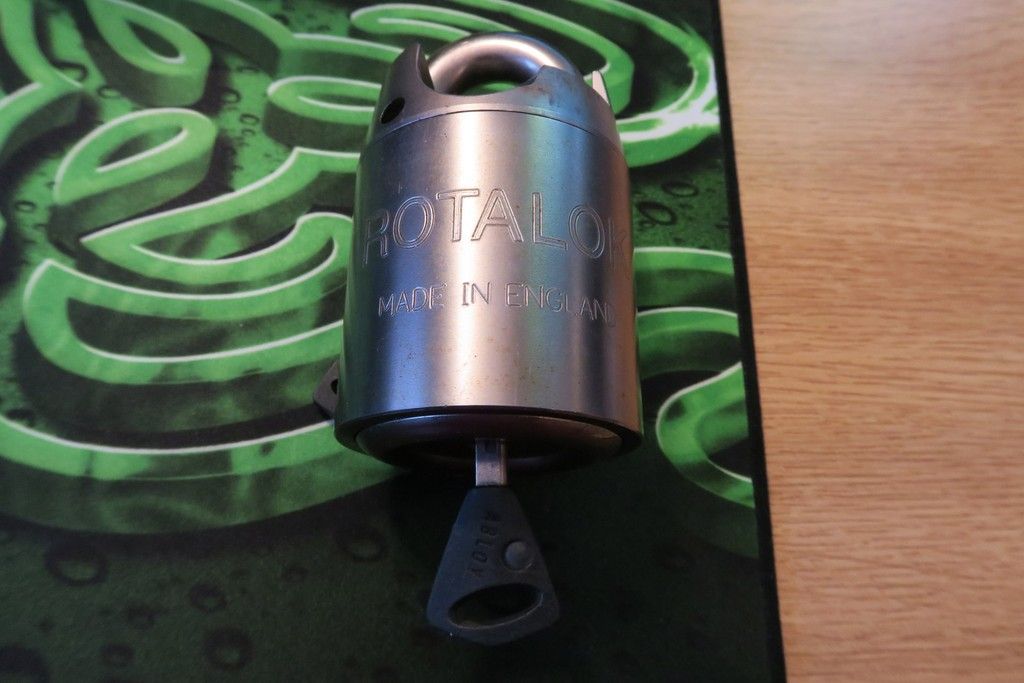
And it’s the exact same operation to open:

Image

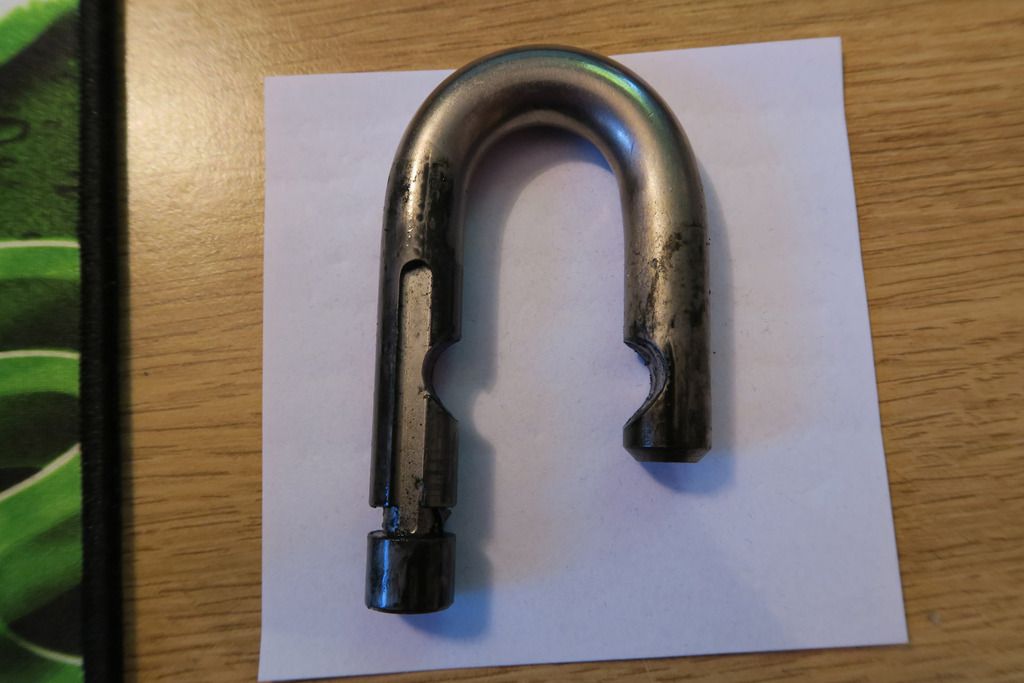
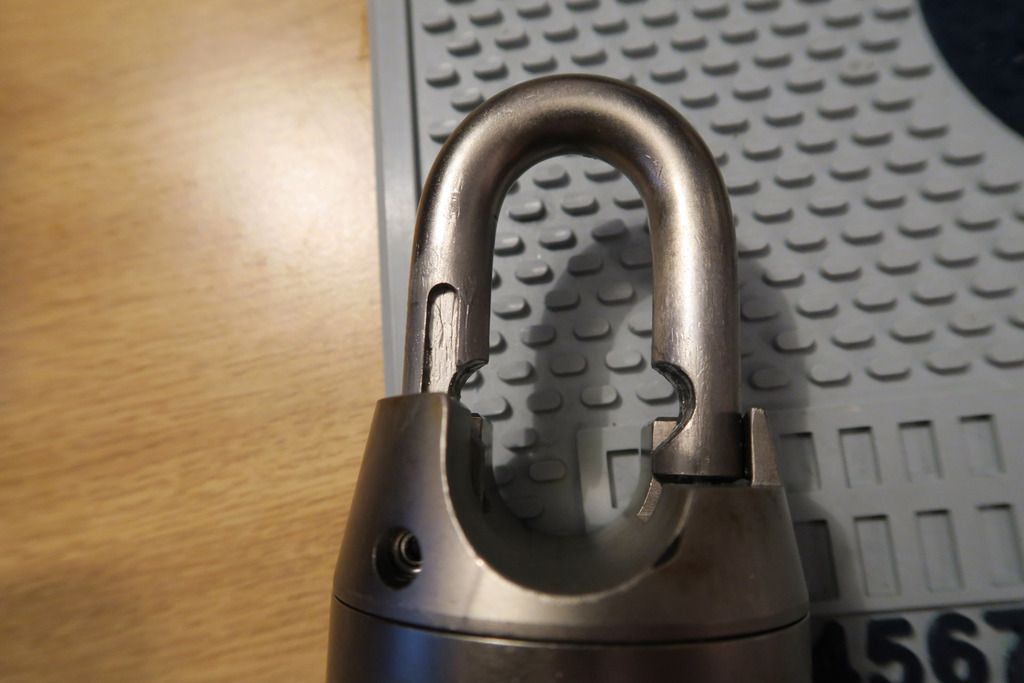
This particular lock uses a different method for shackle retention though – at this point in taking the photos the shackle came all the way out and I thought that the shackle retaining bar was missing, but in face I’d already loosened its retention screw, and we’ll get to that in a bit:

Image

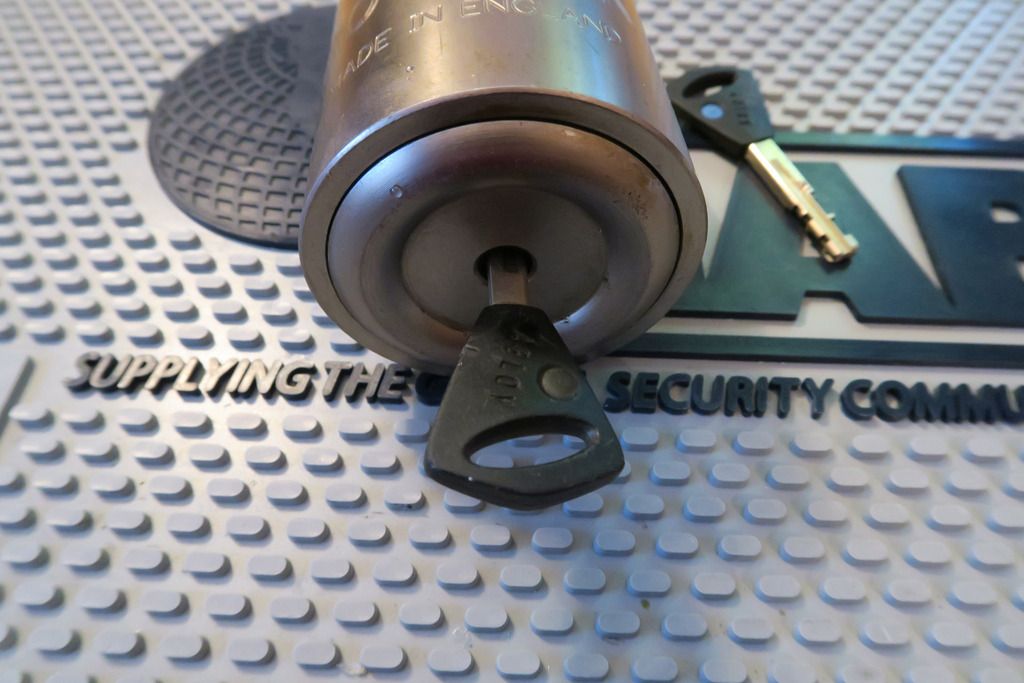
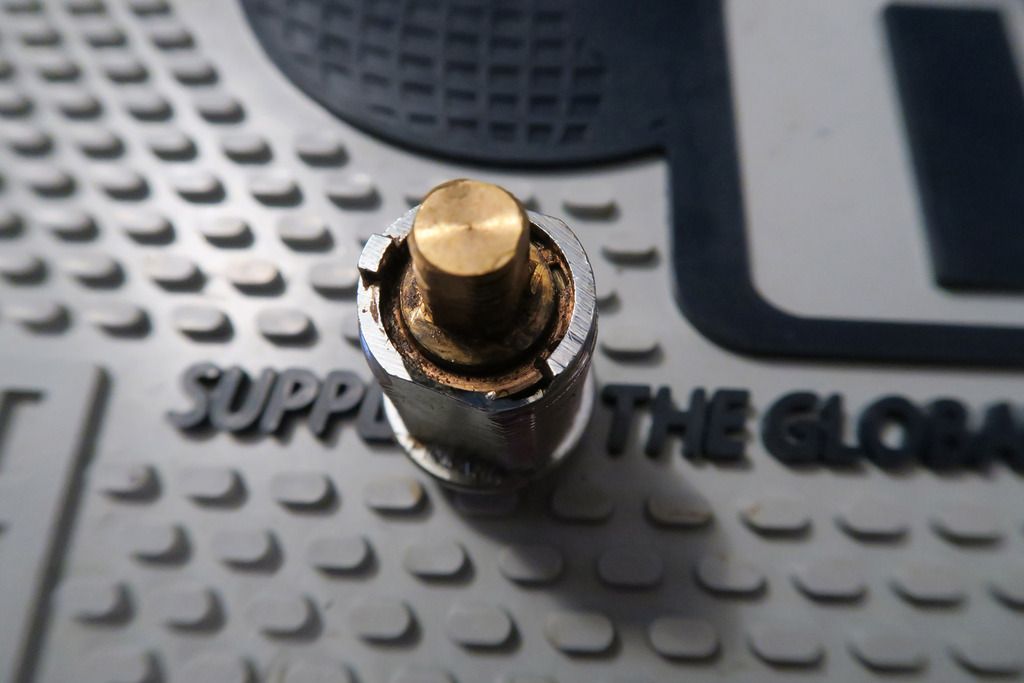
Top of the lock – it’s a bit rusty:

Image

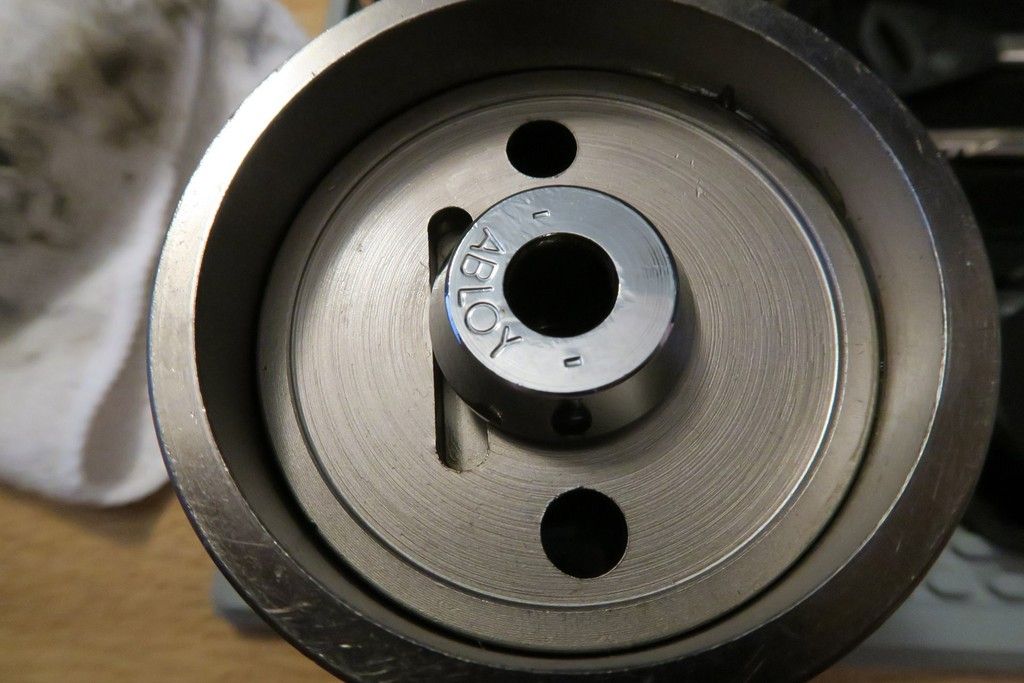
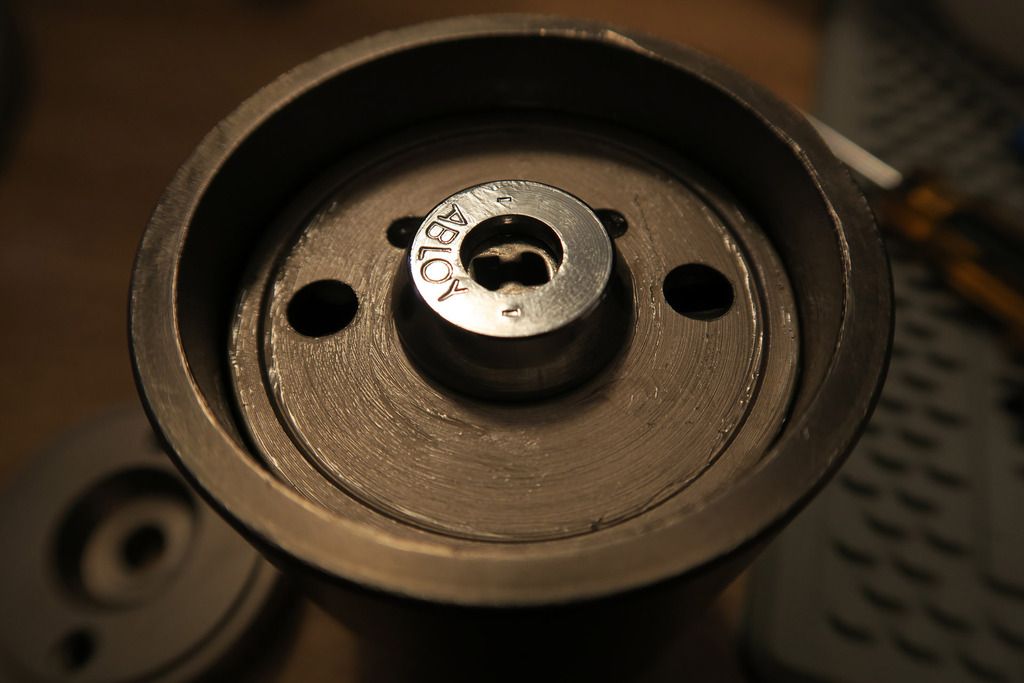
Showing the key in the body. Love that central-hole bottom plate:

Image

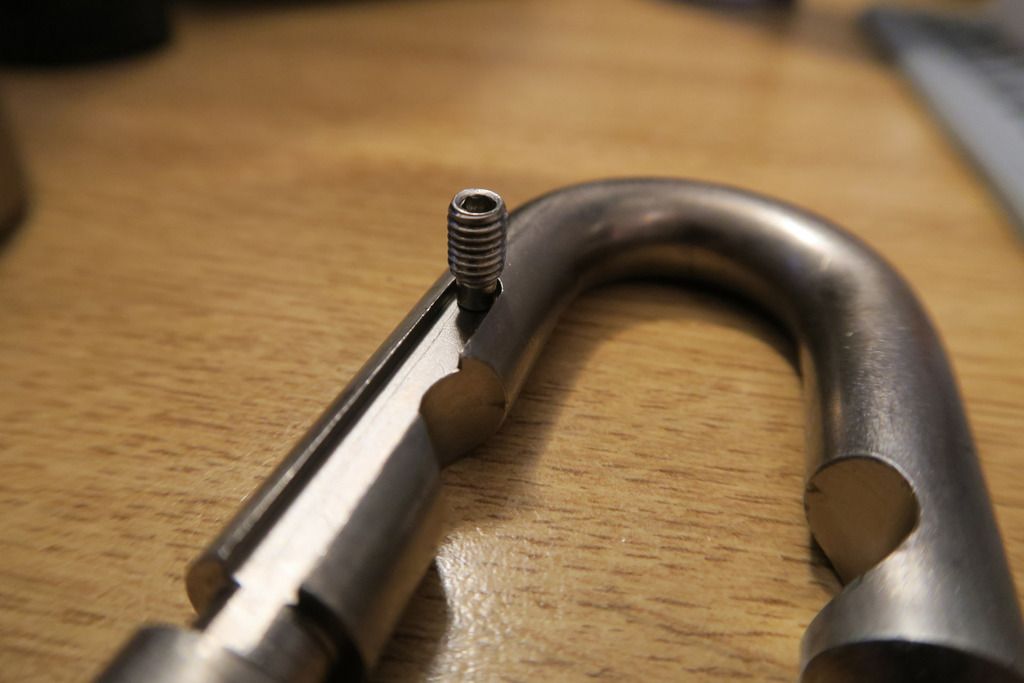
This is the screw that came out of the shackle retention hole – where I thought the bar would go:

Image

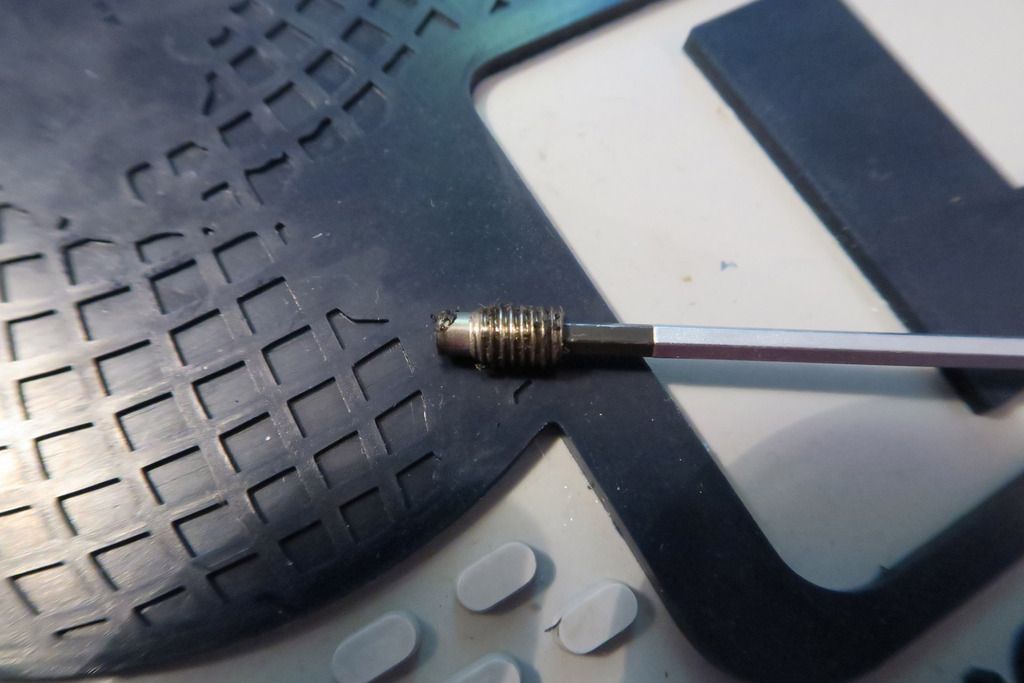
In fact, the nub at the end of the screw interfaces with a slot cut into the side of the shackle to hold it in place. You can go back and look at the shackle photo to see how that might work, or wait until the end of this post where I realise what’s going on and demonstrate it :)

Two main (bottom plate) retaining screws removed:

Image

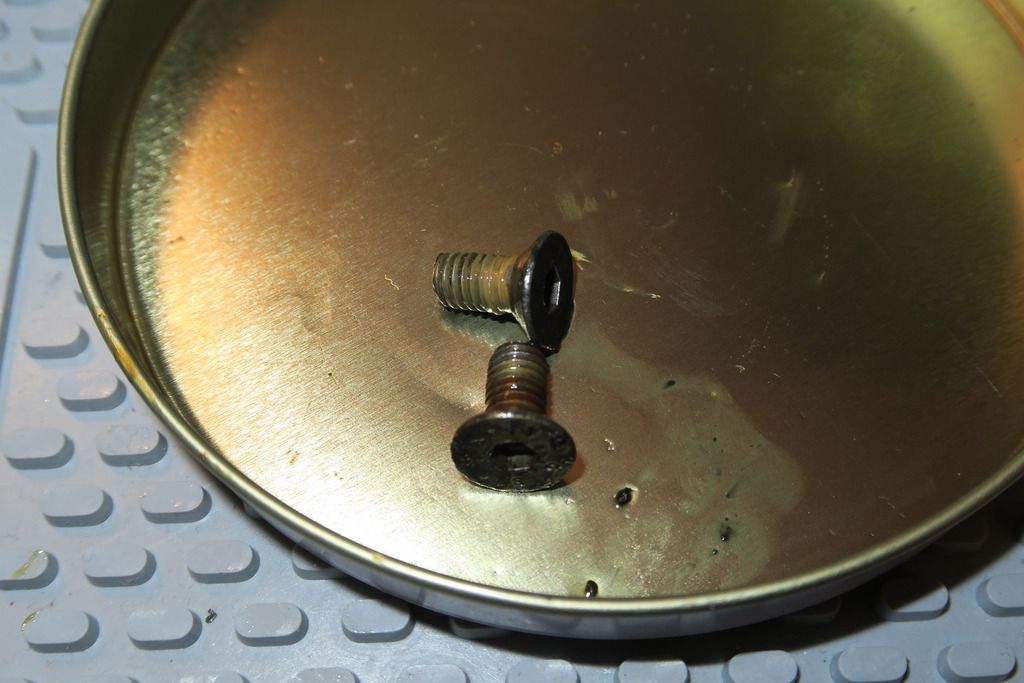
Rusty and blurgh – looks like this lock is going to need a good clean!
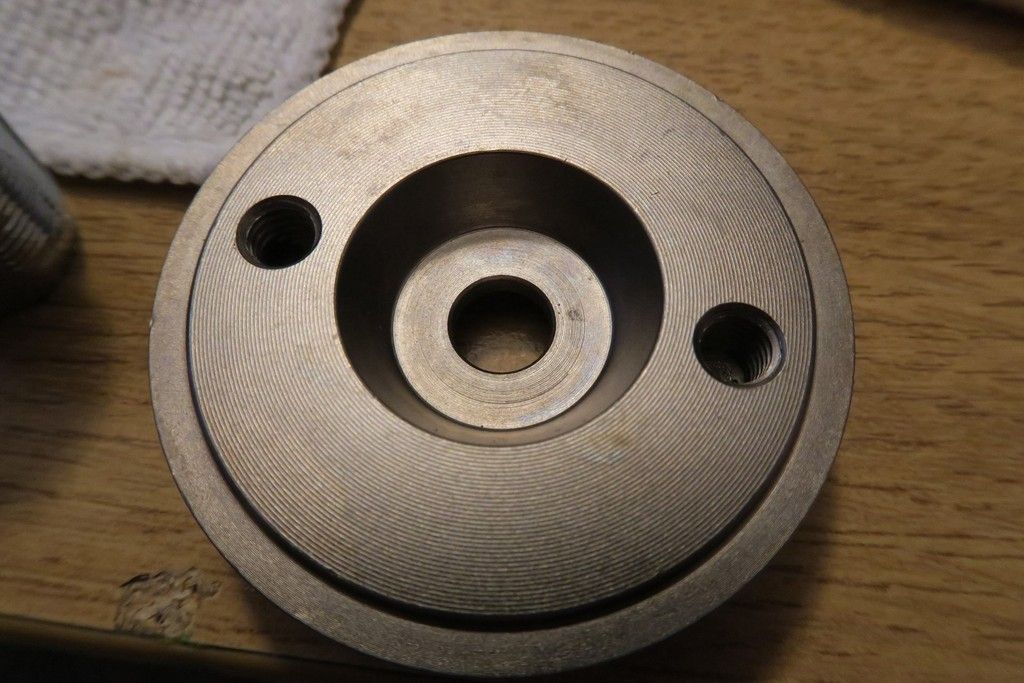
Here’s the bottom plate:

Image

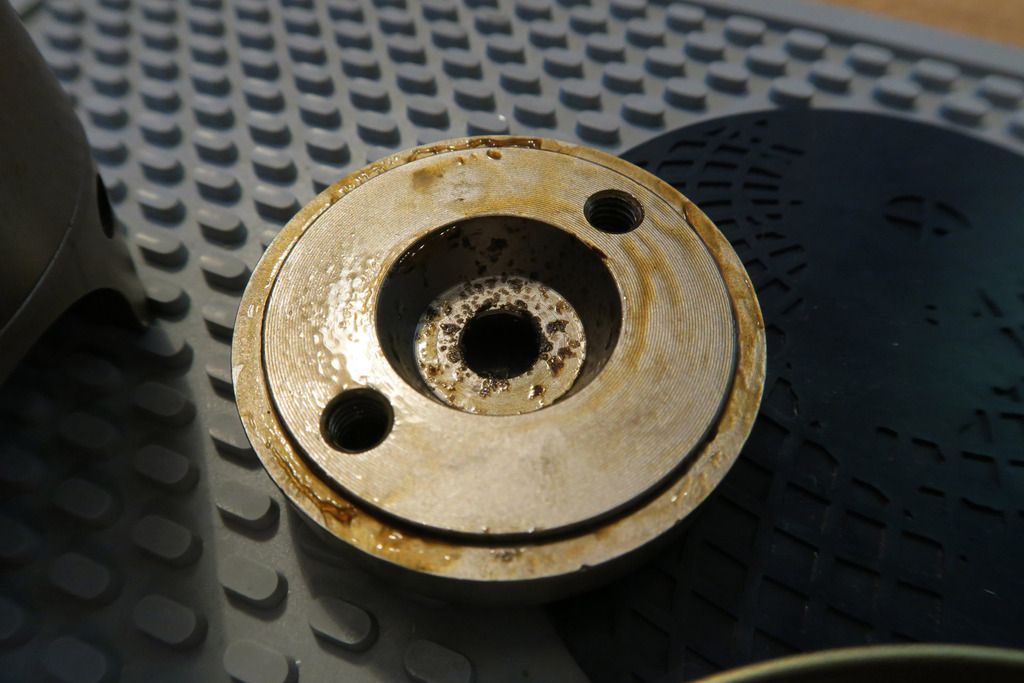
Unlike all of my other Rotaloks, this one did NOT fall off when the screws were removed, and couldn’t even be “shaken” out – I had to jam long hex drivers through the upper body hole and punch the bottom plate off! By looking at it, you can probably see why – thick with oil and grease.

Let’s take a look at the bottom plate cleaned up a little:

Image

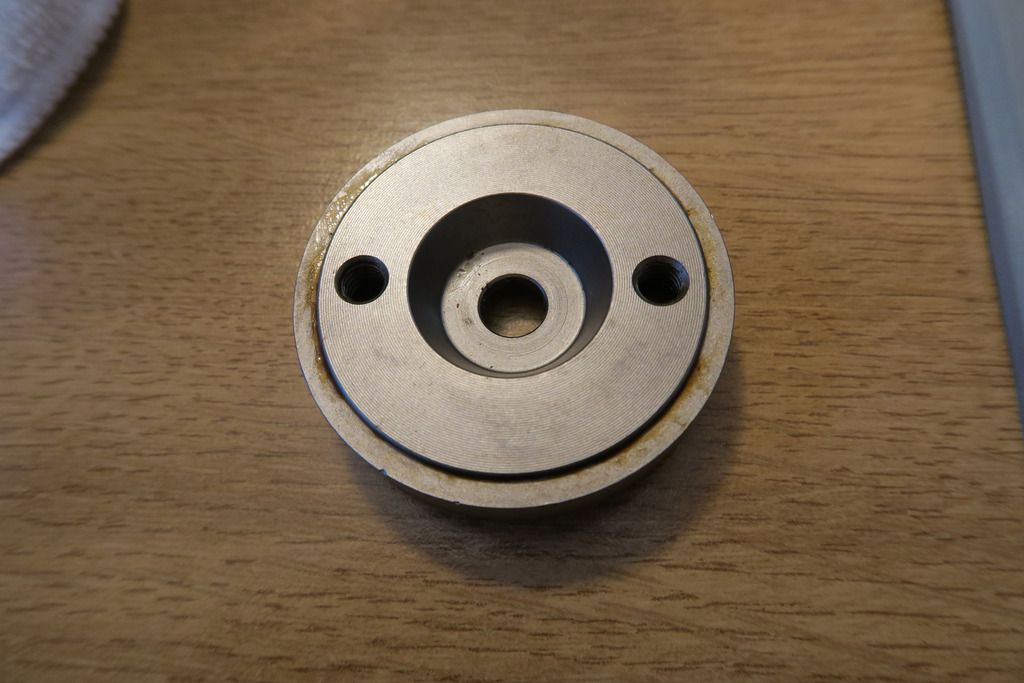
Now we can see much better how it’s formed – and looking at the odd core inside the lock body, we can see where that outer core body would sit inside this cutout, with the hole in the middle. I especially like this because it somehow feels more closed-off and protected than the by-necessity Z-style bottom plate cutouts.

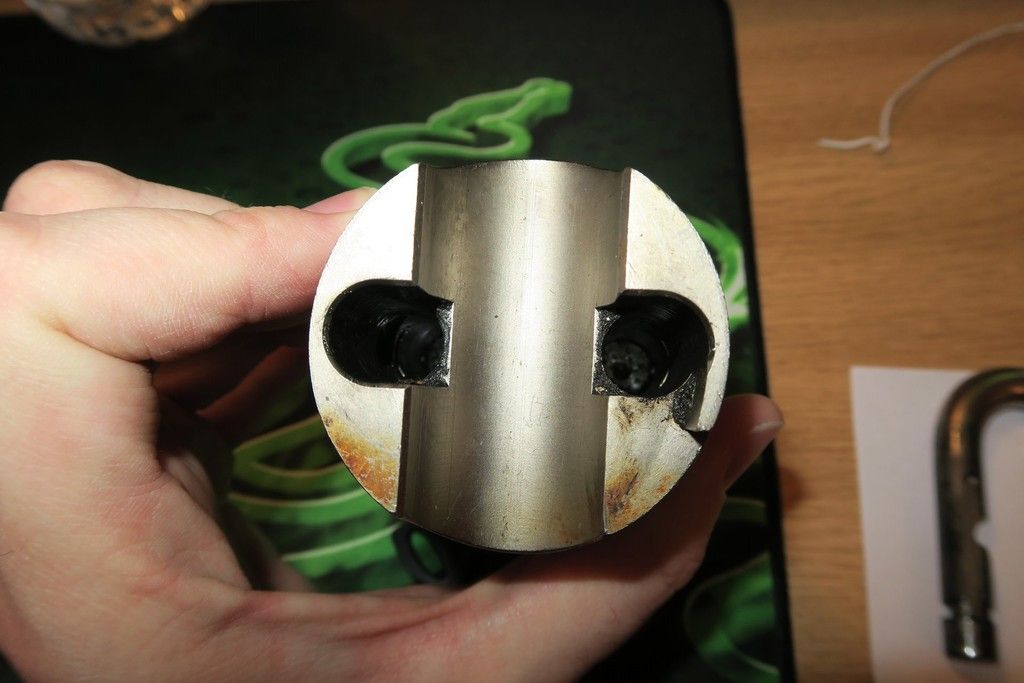
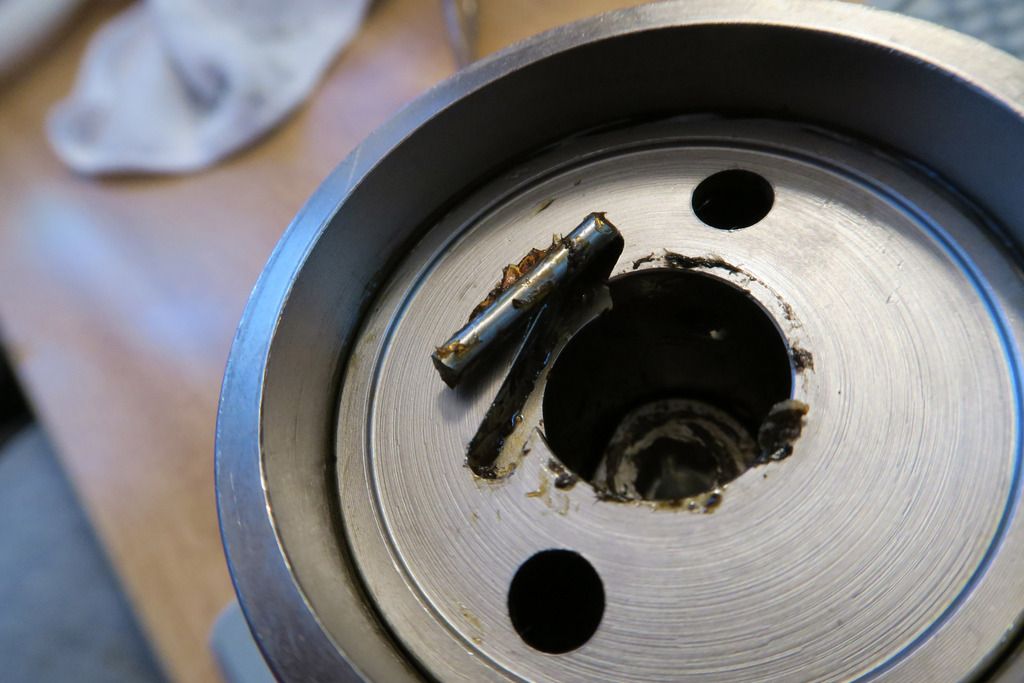
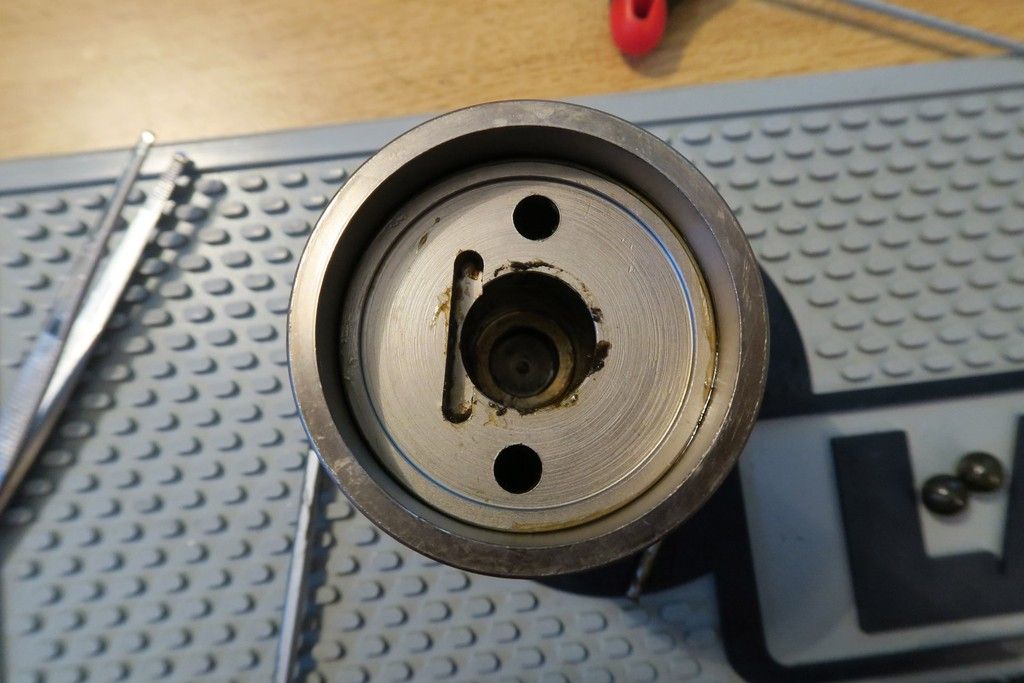
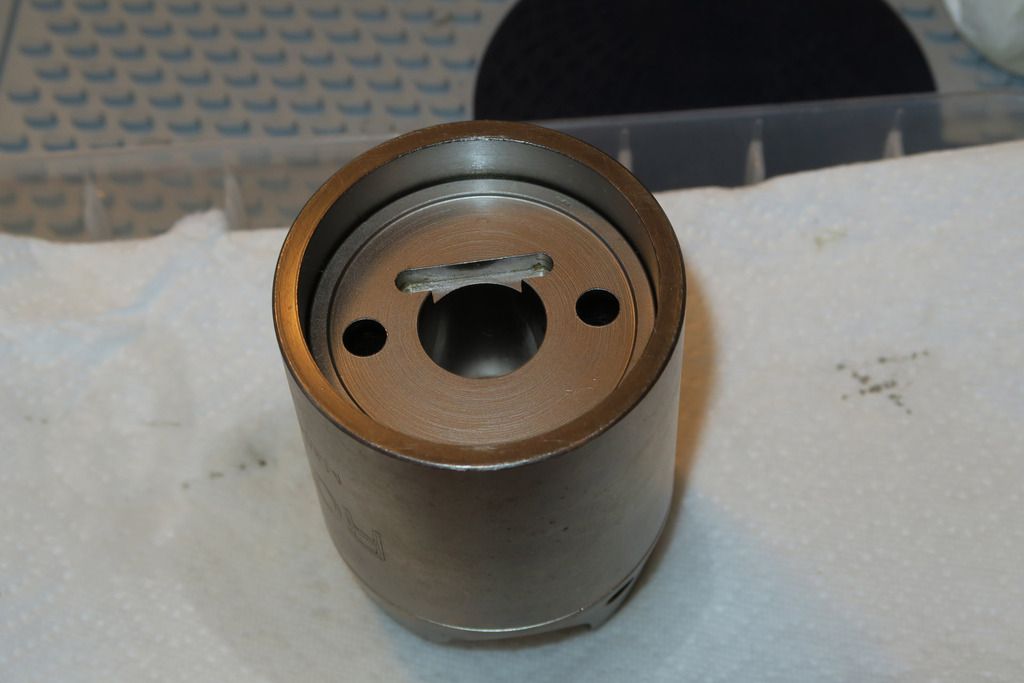
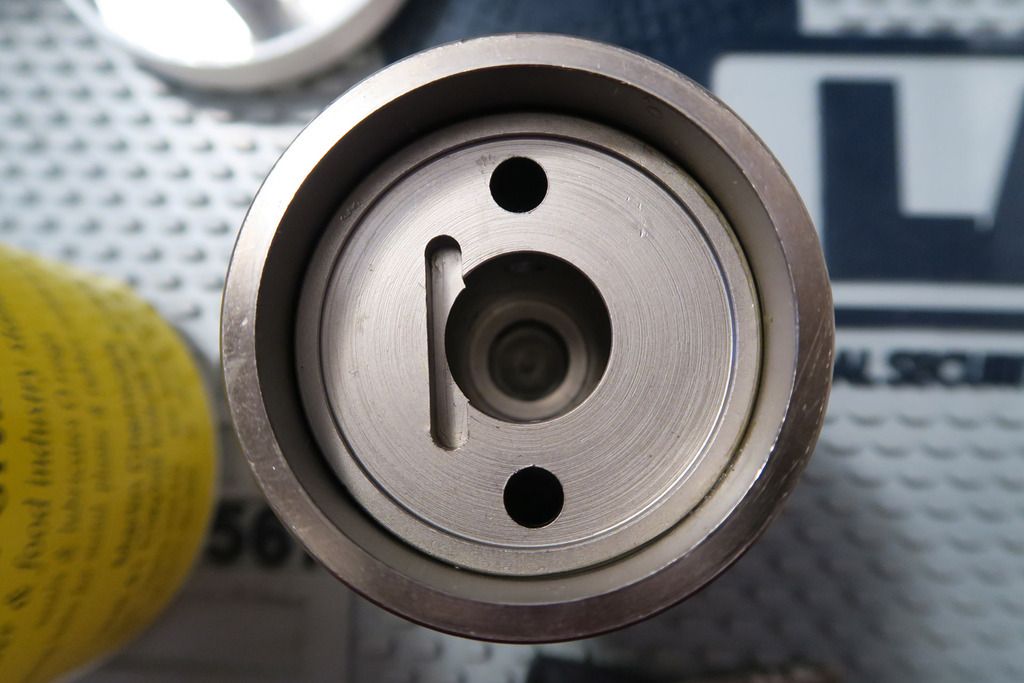
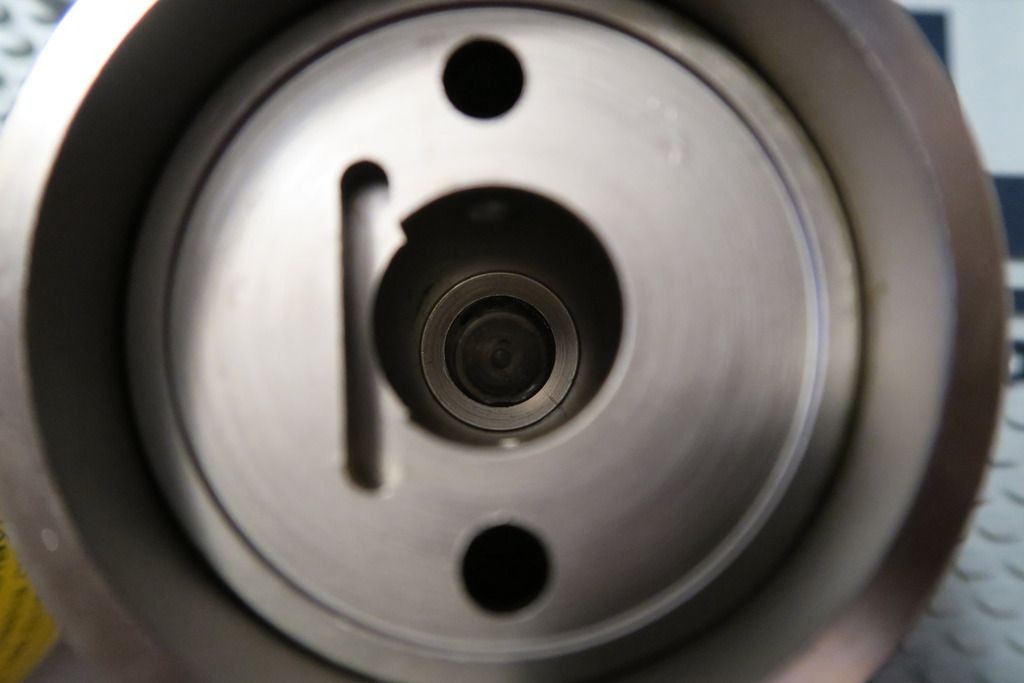
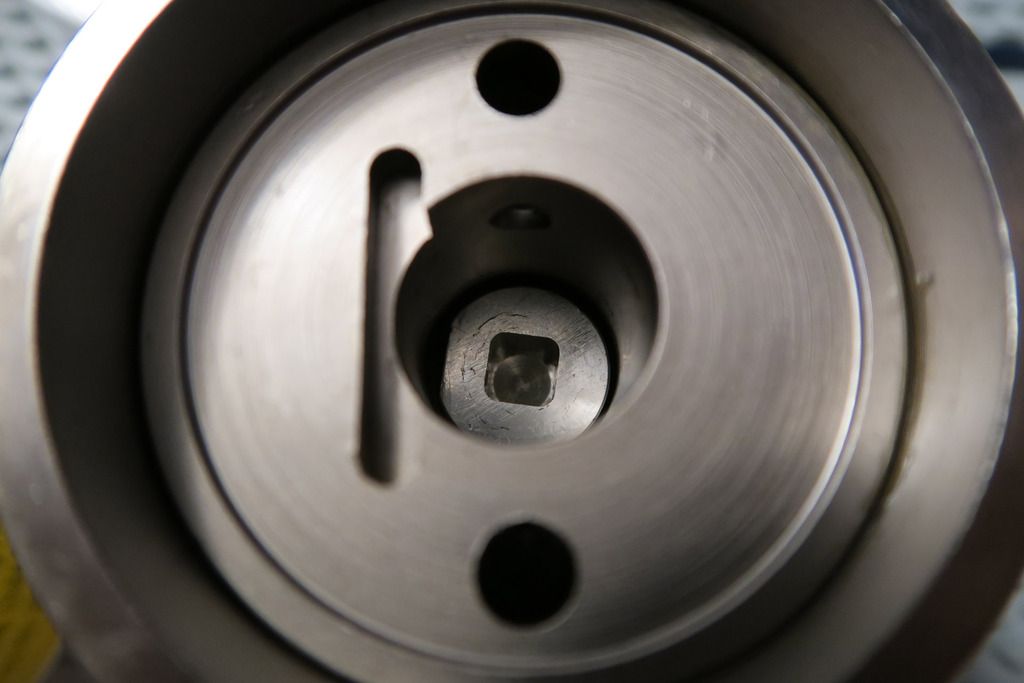
Minus the bottom plate, the underside of the Rotalok looks.... Unusual.

Image

Image

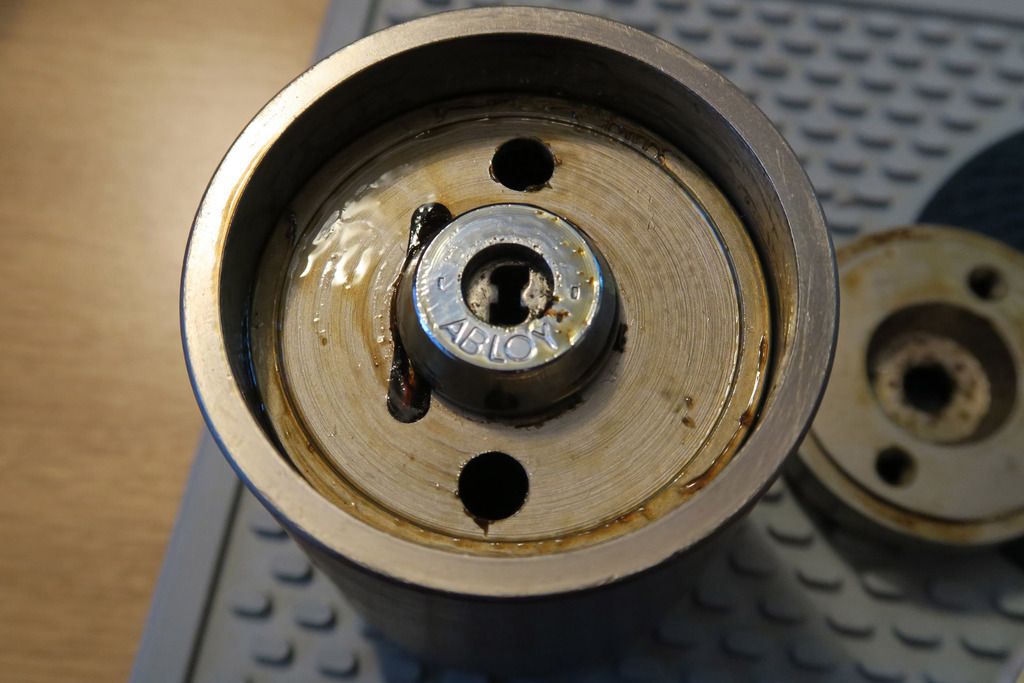
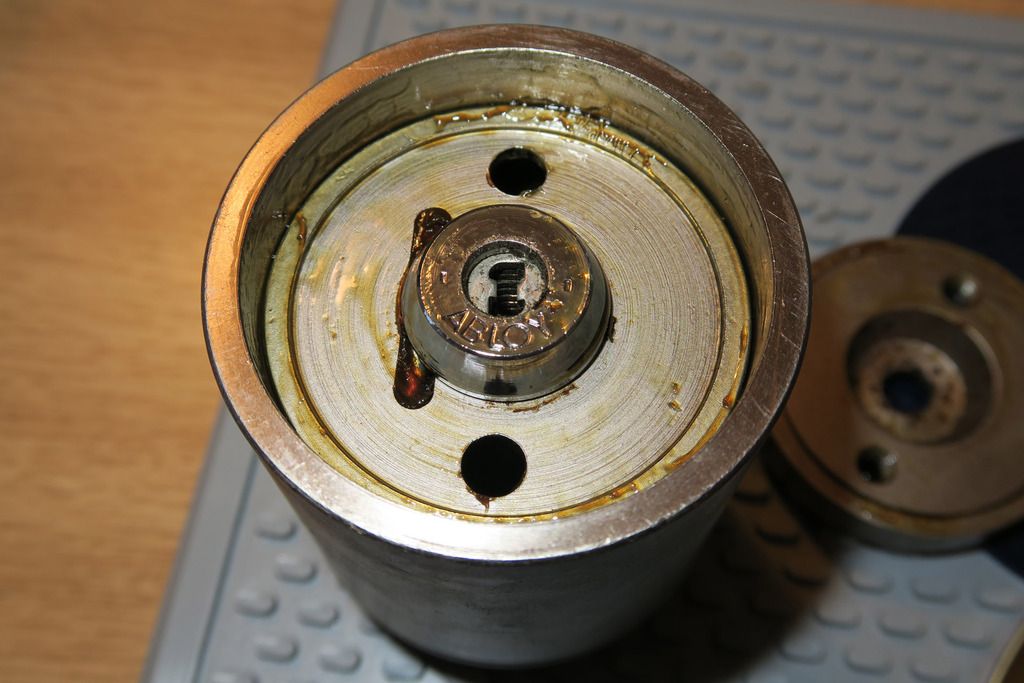
Yes, you have the typical “inner-bottom-plate” and connecting side-sleeve that forms the basis of the Rotalok body, as well as the familiar retention holes... But what’s with that vertical cut-out next to the core? And speaking of the core... That sure doesn’t look like a Euro cylinder! Time to investigate further...

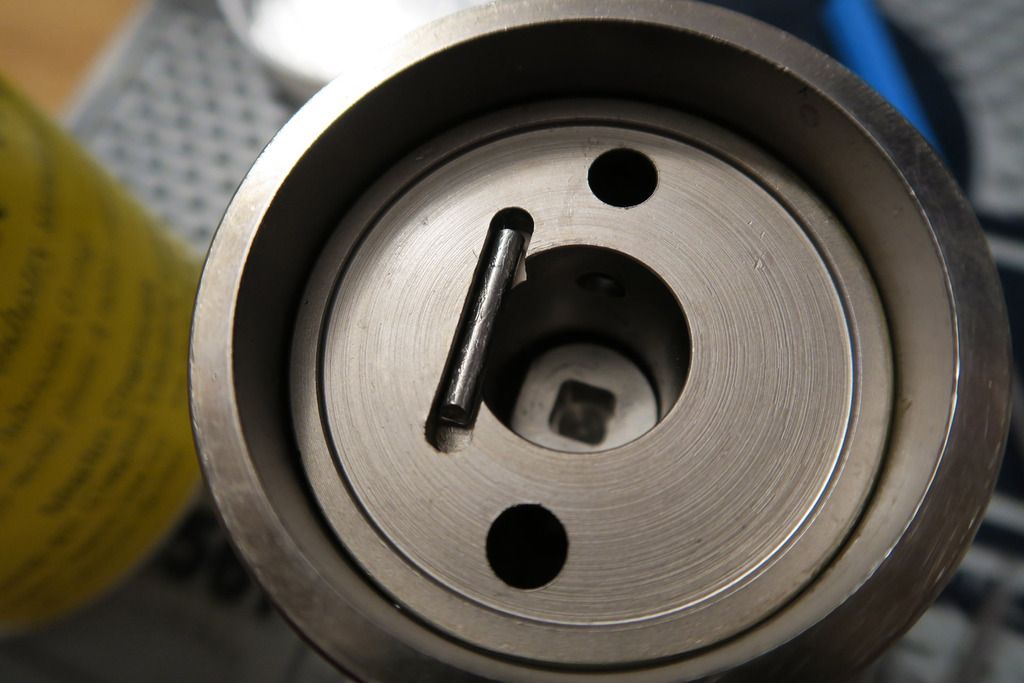
I actually forgot to take pictures of the removal but inside that vertical cut-out next to the core is a rod – partly to hold the core in and partly I assume as an anti-drill feature. It was a royal pain to get it out as the core would not move with the rod in place, and the rod was a nightmare to get access to with the core in place – I had to kind-of-shove the rod “up” along the cutout until it was clear enough to pull up the core bit-at-a-time and finally grab the rod and pull it out with pliers. Phew!

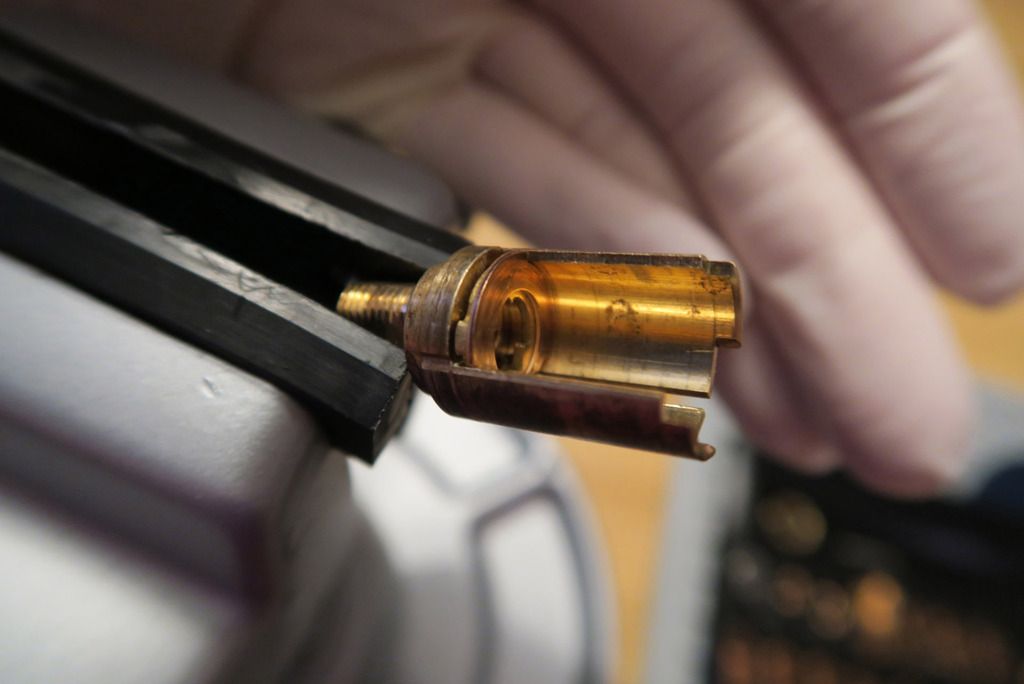
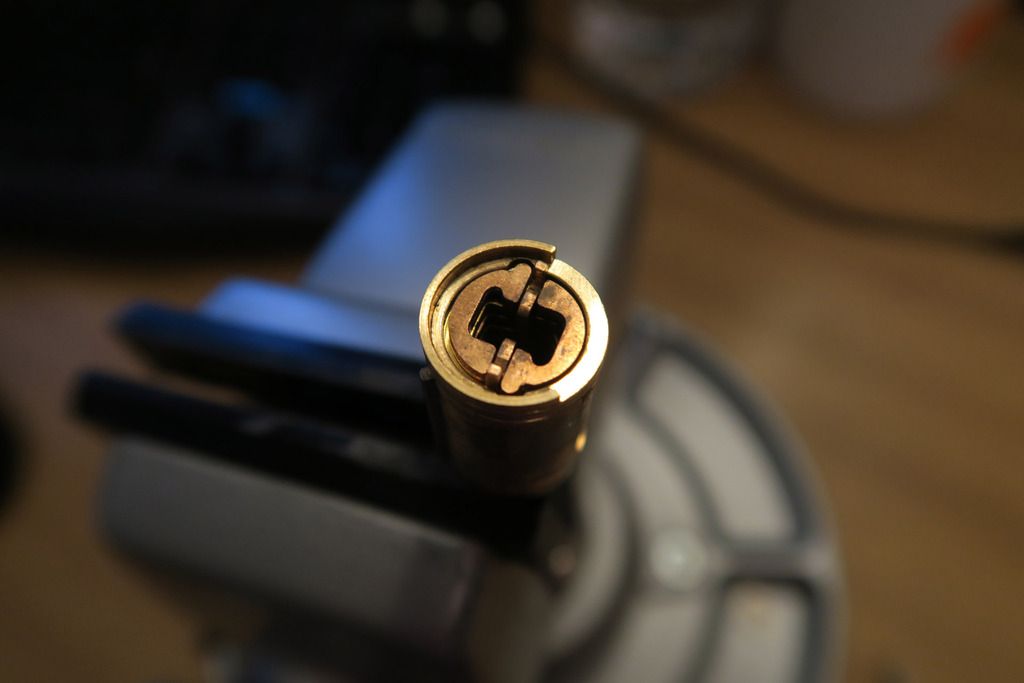
With that bit of drama over with, I was able to freely remove the core – and I was NOT expecting THIS:

Image

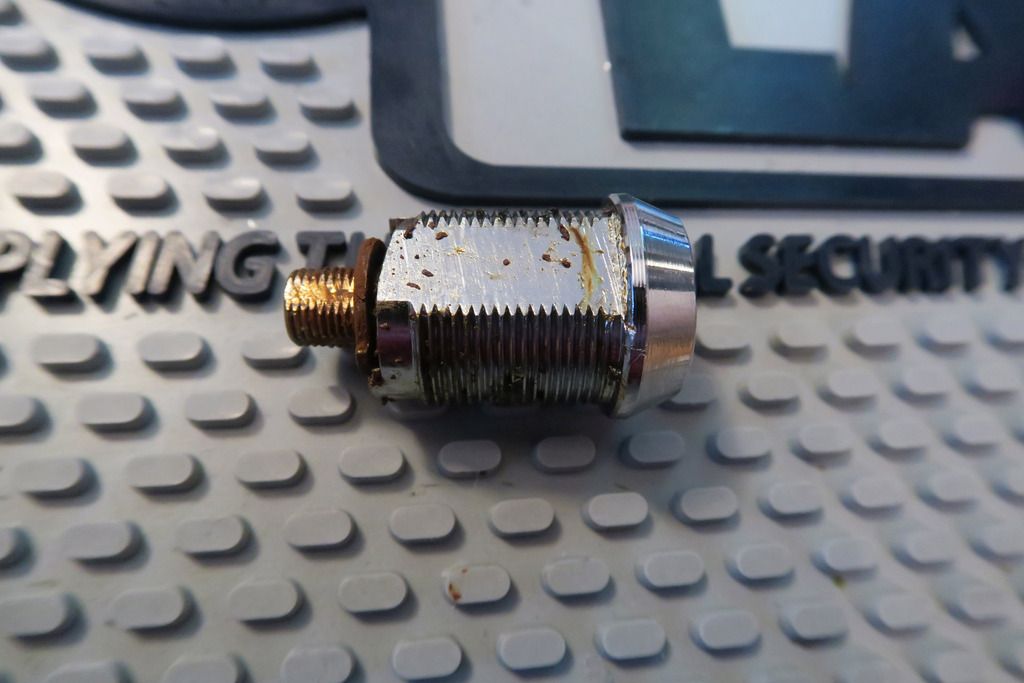
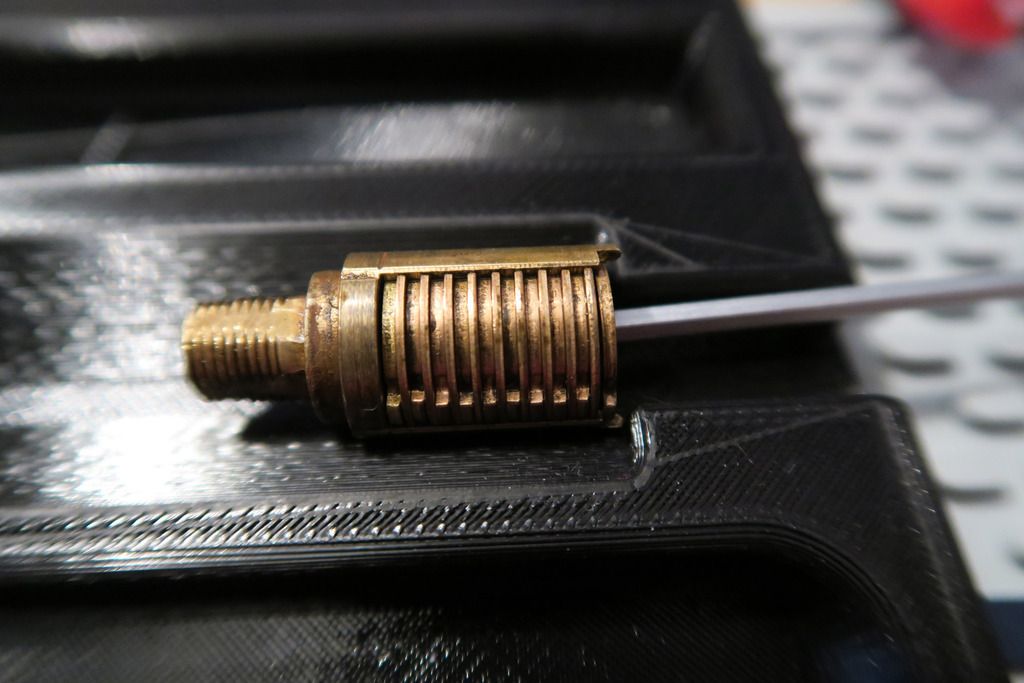
A cam lock! In retrospect, I should have expected this since I learnt (albeit afterwards) that the Exec core is designed for “padlocks and cam locks” and since the Rota is usually built for a Euro core, I assume they figured it was easier to shove a cam lock in there with an (I assume) specially-designed actuator. Another shot of that bad boy:

Image

And a quick shot of the retaining rod next to the hole it came out of:

Image

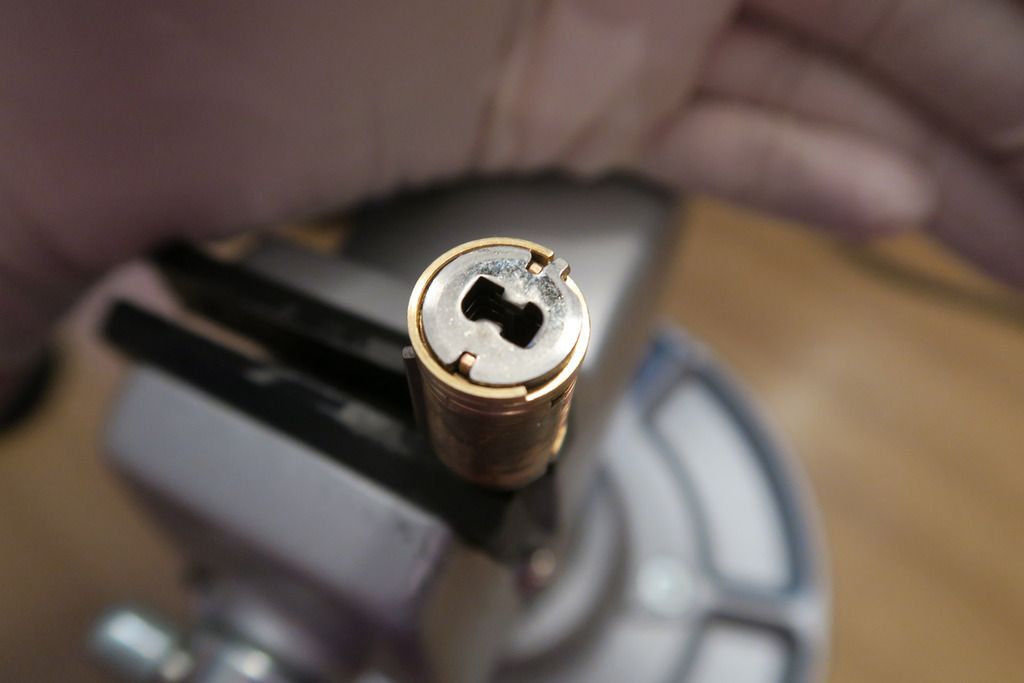
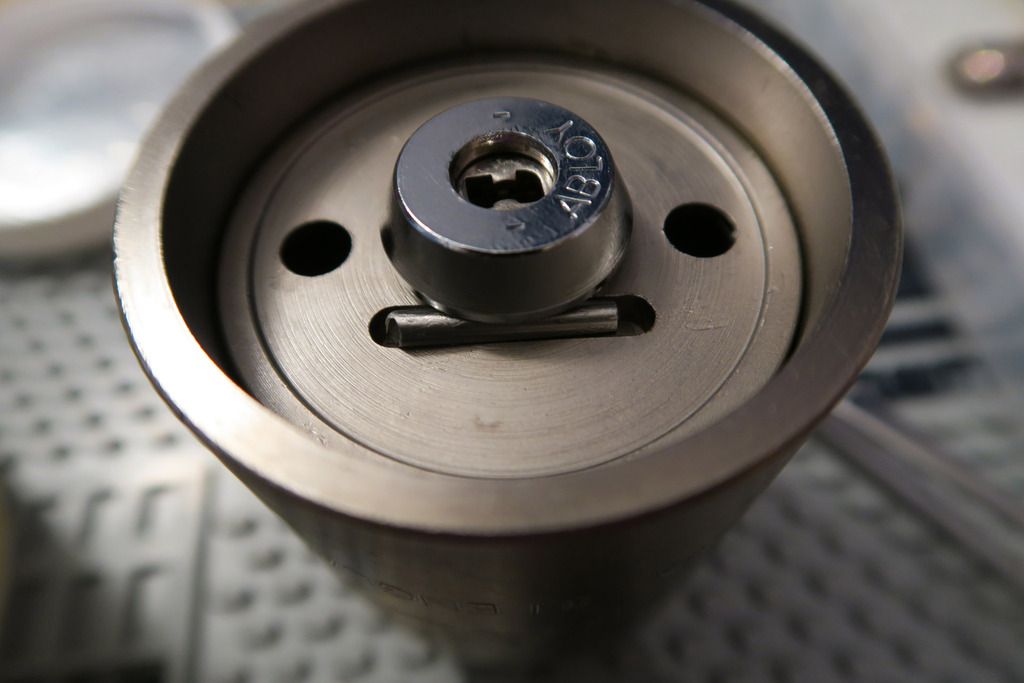
At the bottom of the lock body cutout you can see a big round thing with a square hole cut into it – that’s the special actuator:

Image

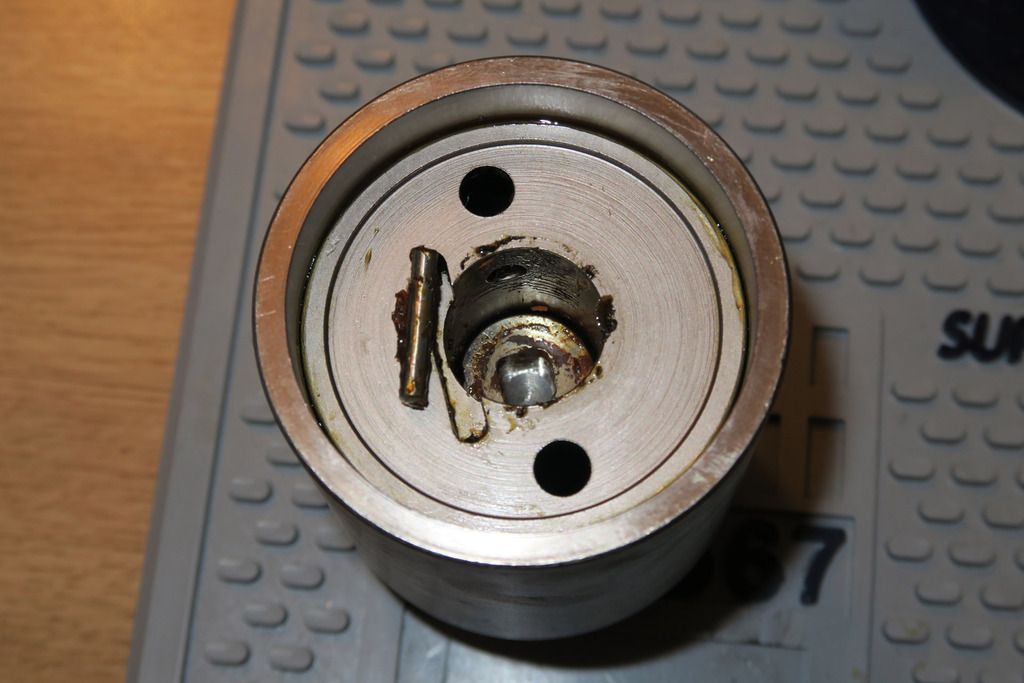
Also of note – you’ll notice that they didn’t just take a Euro-style body cutout and slap a cam lock in the round hole – the entire body is actually designed with the cam lock in mind, meaning that this lock isn’t just a bodge-together by a company or military – it was either designed as a special-order design direct from the Rotalok people (whether that’s Pickersgill-Kaye, the current owner of Rotalok, or an older owner, remains to be seen) or was at some time an actual production model – but I’ve never seen this variant before. Given that these locks are usually used in sensitive areas such as prisons, military bases and government buildings I guess that makes sense – they’re probably stored or destroyed when no longer needed to protect the security!

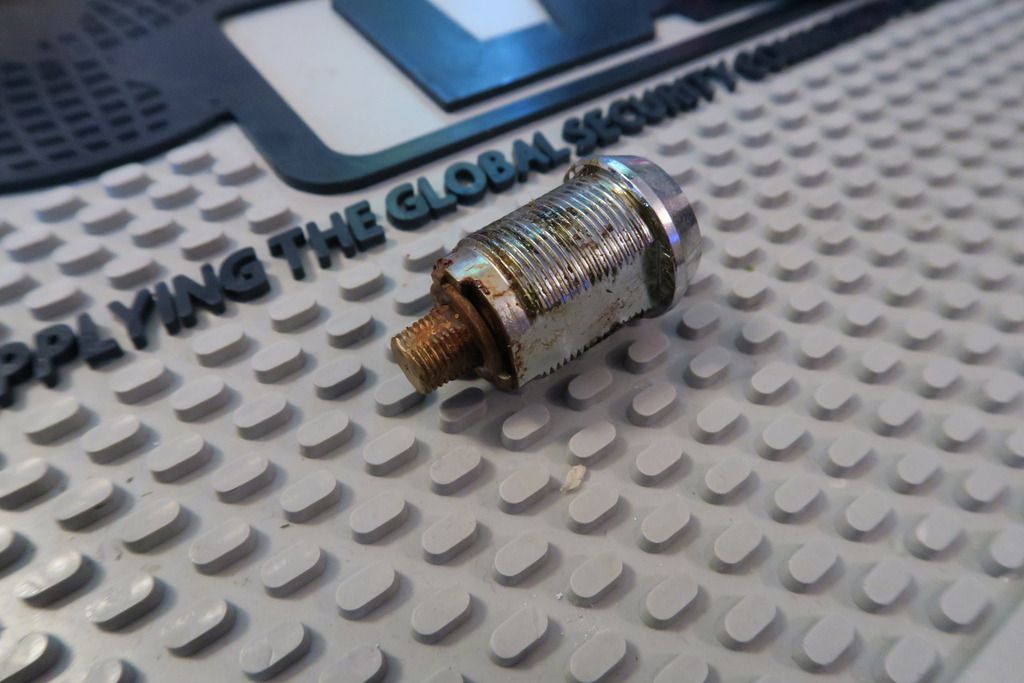
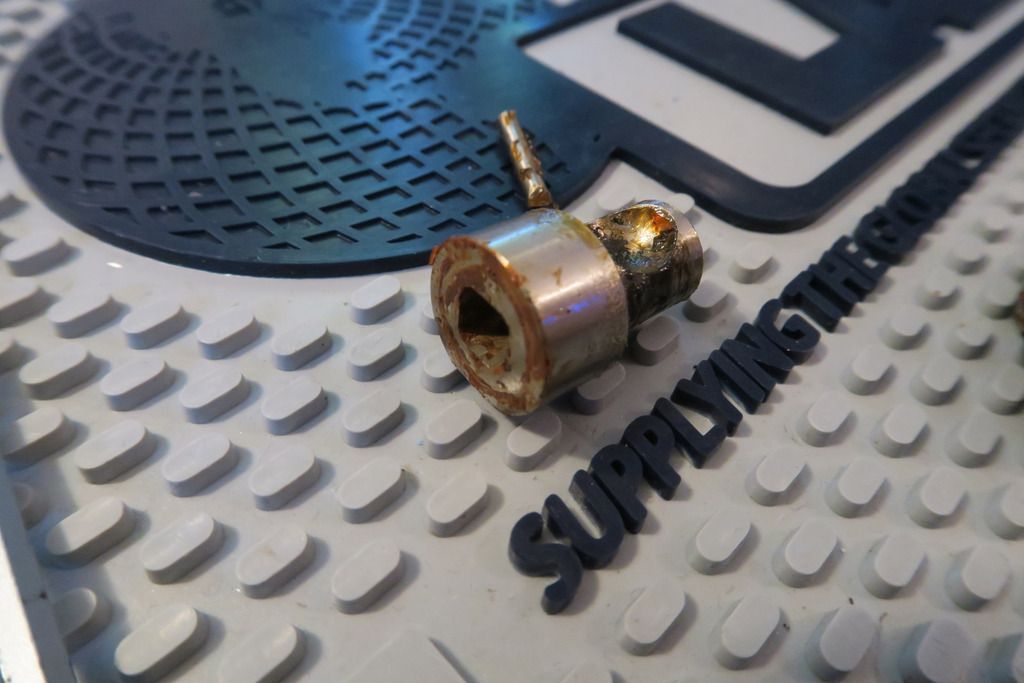
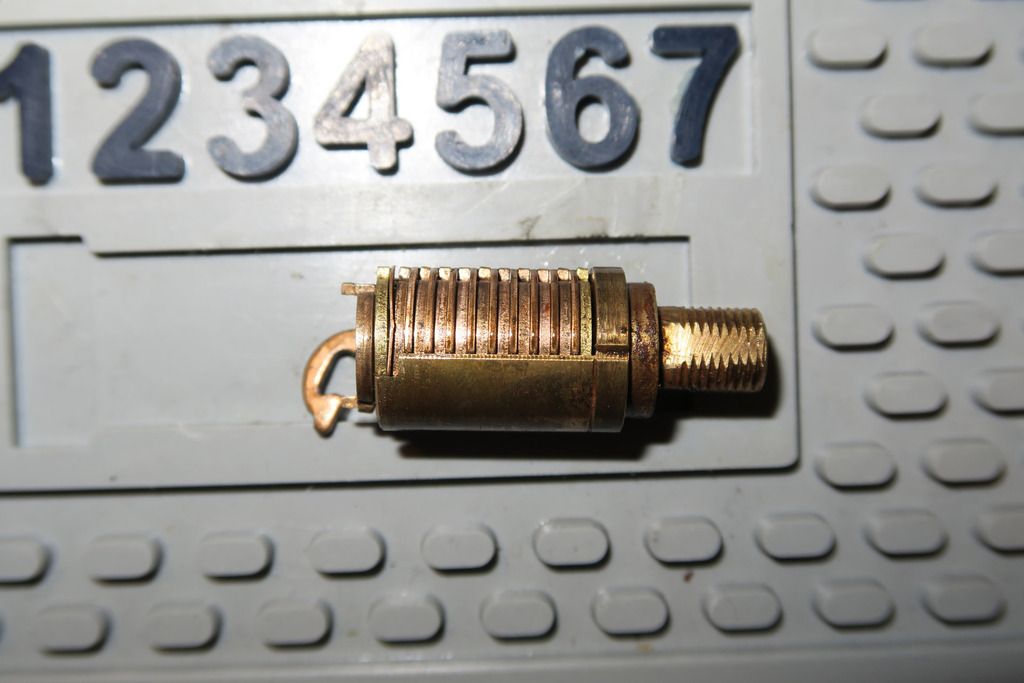
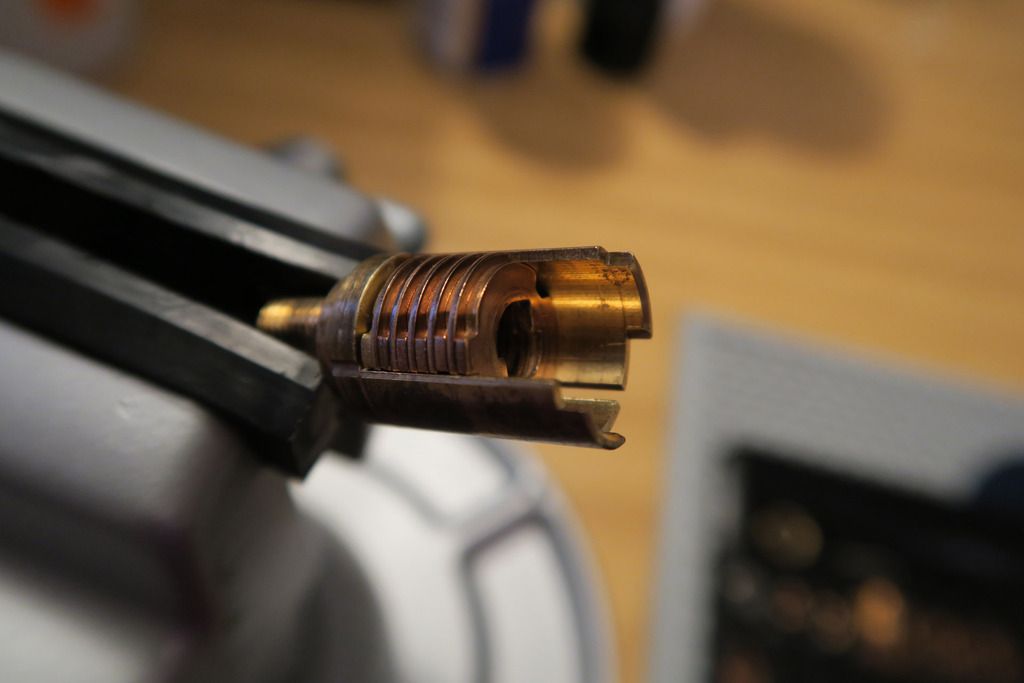
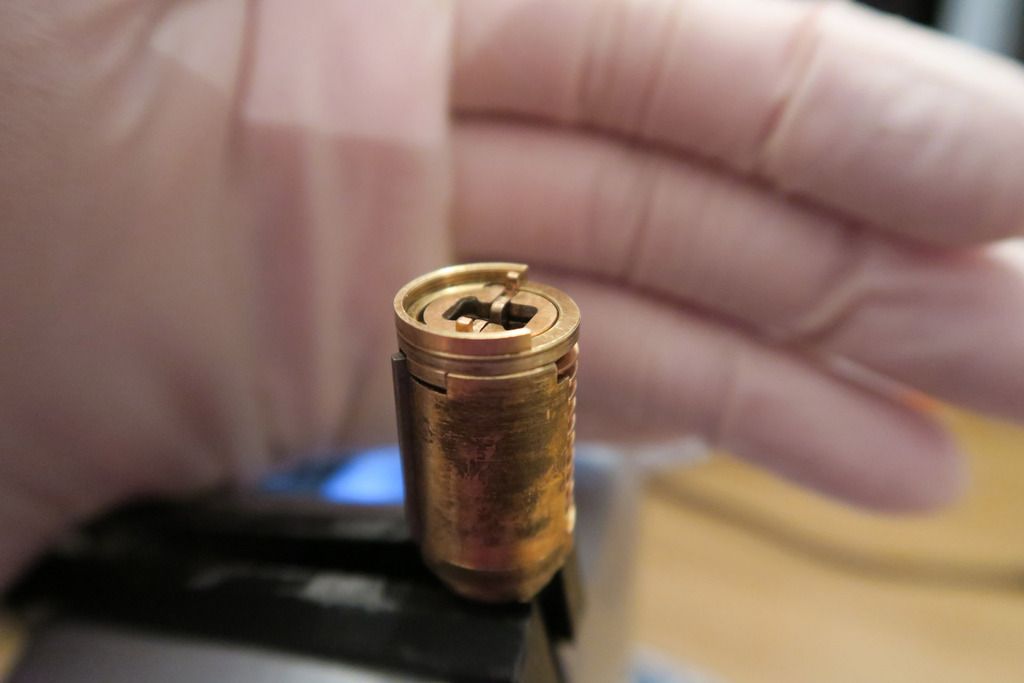
Here’s the actuator, removed from the lock:

Image

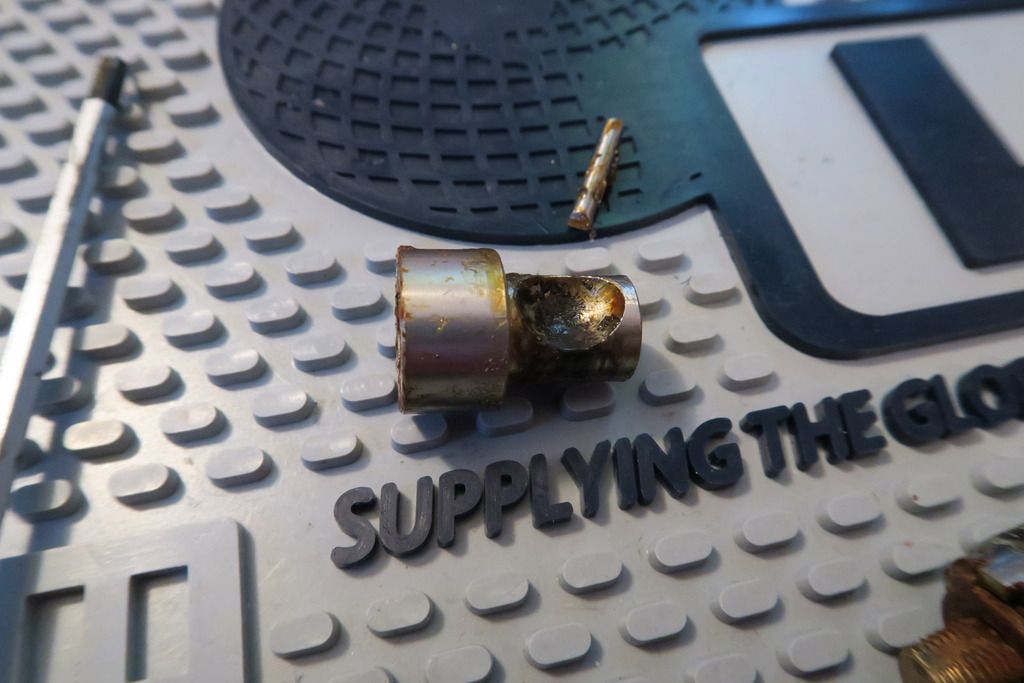
The wide part on the left hand side is what you saw when looking down into the lock – in other words, the end of that part has the square hole that interacts with a bolt at the end of the cylinder. The right side, as you can see, has the usual cutouts for the ball bearings and ends in a smooth surface at the back of the lock:

Image

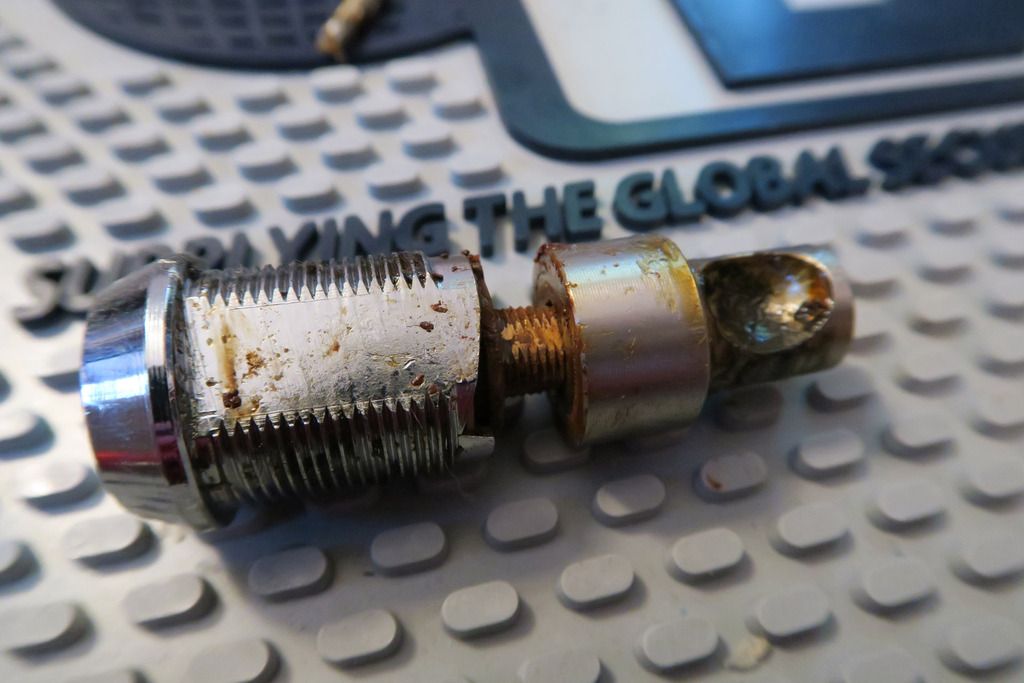
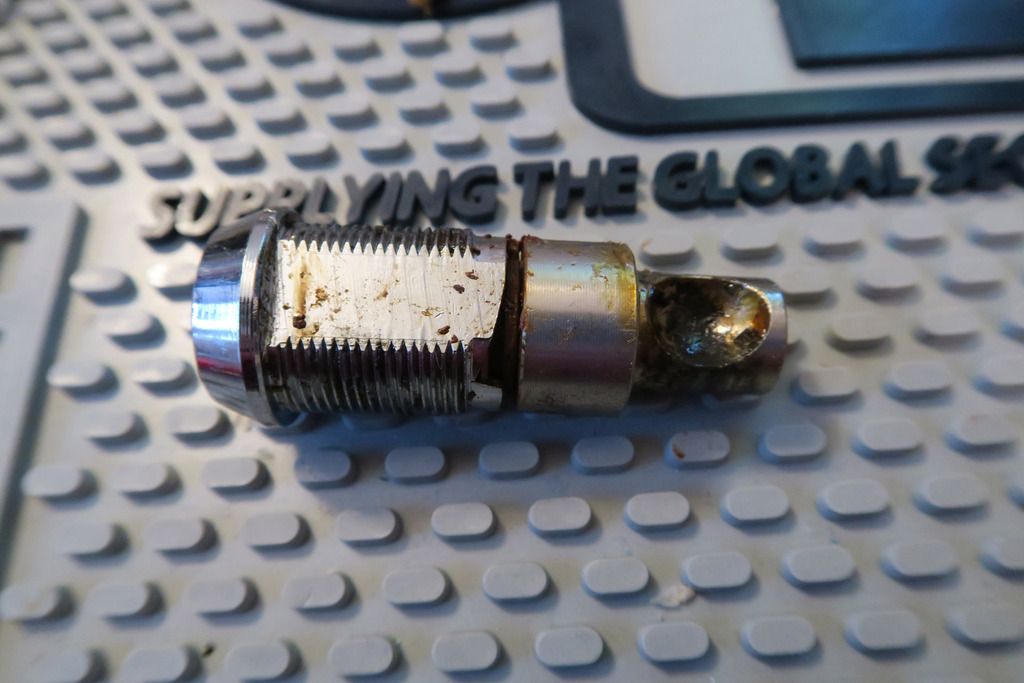
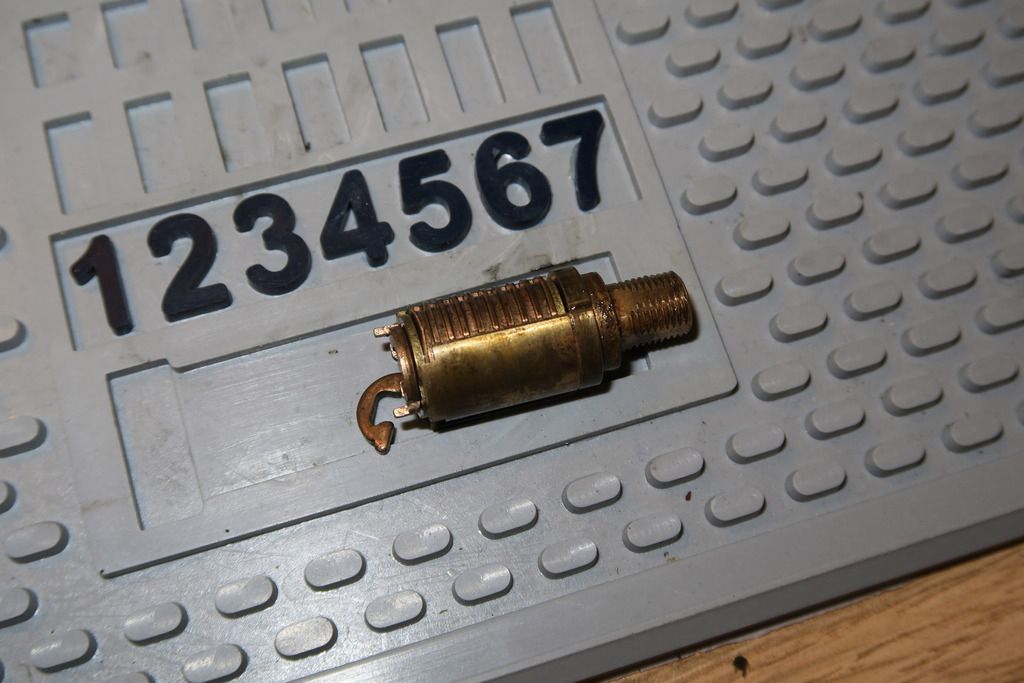
The bolt at the back of the cylinder slots into the actuator like so:

Image

Image

Despite the round external body on the cam lock, the outer body does not turn, but instead when the key is inserted it interacts with the disks held inside a disc carrier – this carrier is attached to the rearmost square bolt, and when the disk carrier turns (which is enabled by clearing the sidebar into a slot in the disks and disk carrier, from a cutout in the inside of the outer body), so too does the attached bolt, which rotates the cam, freeing the ball bearings in the usual fashion.

Here’re the ball bearings from inside the body, after removing the cam:

Image

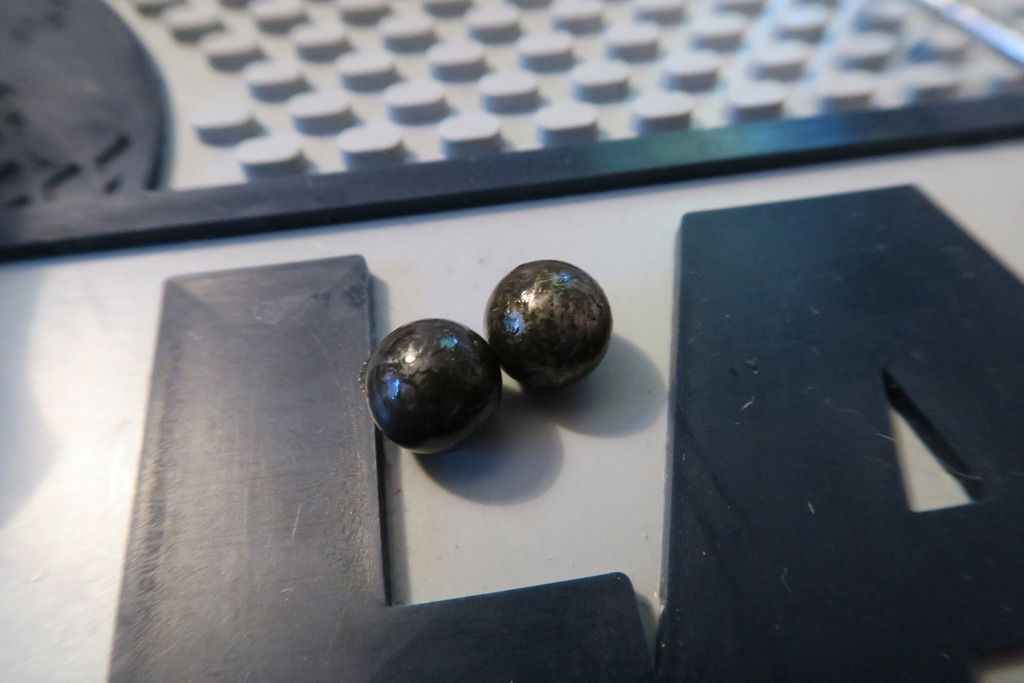
As you can see, they’re covered in some kind of oily black stuff. I’m not sure if this is the natural colour of the lube used here, or just a combination of the lube plus atmospheric contaminants (or even just dirt and grime with no lube used at all formally – shudder!), but this inky black stuff covered everything inside the lock and was a real pain to clean off! The oil coming from between the outer skin and the body (you can usually “generate” some by spinning the outer skin back and forth a bit until some oozes out from the gap between both in the inner body, against the bottom plate attaches) is an orangey colour – still not nice, but not the black stuff you see here, so luckily it didn’t intrude into the impossible-to-disassemble-or-clean (seriously – how DO they put these things together?) area between the outer sheath and inner body).

Bottom of the lock cleaned a little – just with some tissue paper like I did with the bottom plate. It’s not a full clean but it helps us see what we’re doing:

Image

You can also see the orange lube stuff leaking through on the right hand edge.

I didn’t show the cleaning process for the body as it wasn’t especially interesting, unless you count mountains of cloth/paper towels, GUNK, WD-40 and swearing as interesting! We got there in the end though – here’s the finished results for the body:

Image

Looking down inside:

Image

Outer body (light clean with WD-40 and a cloth):

Image

Rust spots – can’t clean those easily unfortunately:

Image

Rust on the top – I did manage to scrape it away a little but don’t want to risk using Jenolite and turning the whole thing pink!!

Image

Looking much cleaner overall though:

Image

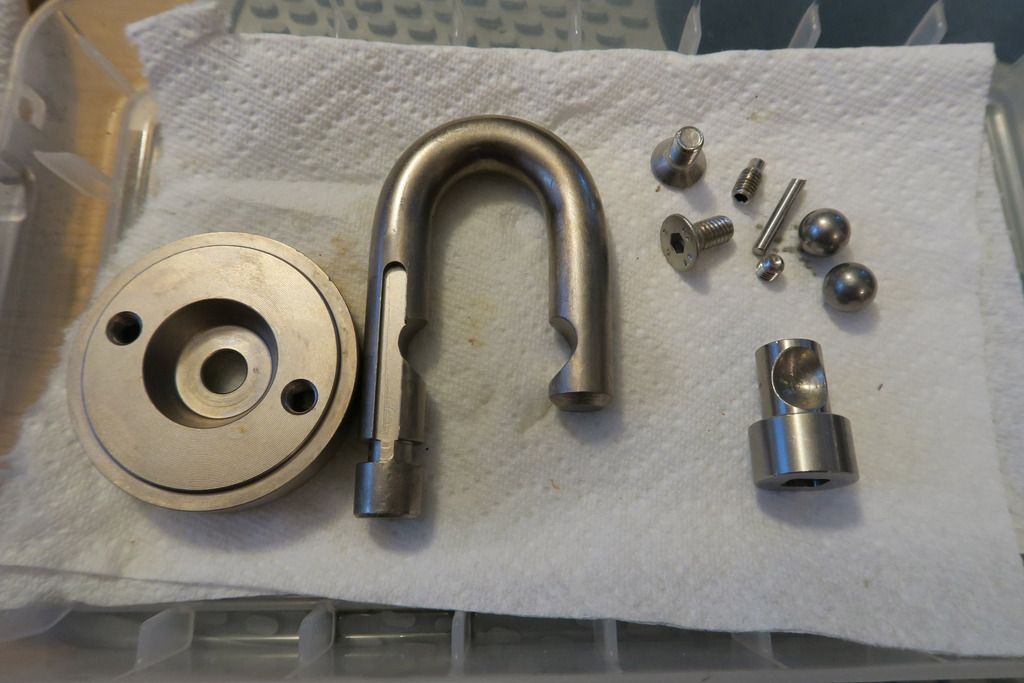
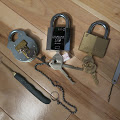
Bottom plate, shackle, bottom plate retaining screws, shackle retention screw, cylinder-lodging bar, other outer body screw, ball bearings and actuator cleaned (in roughly left-to-right, up-to-down order):

Image

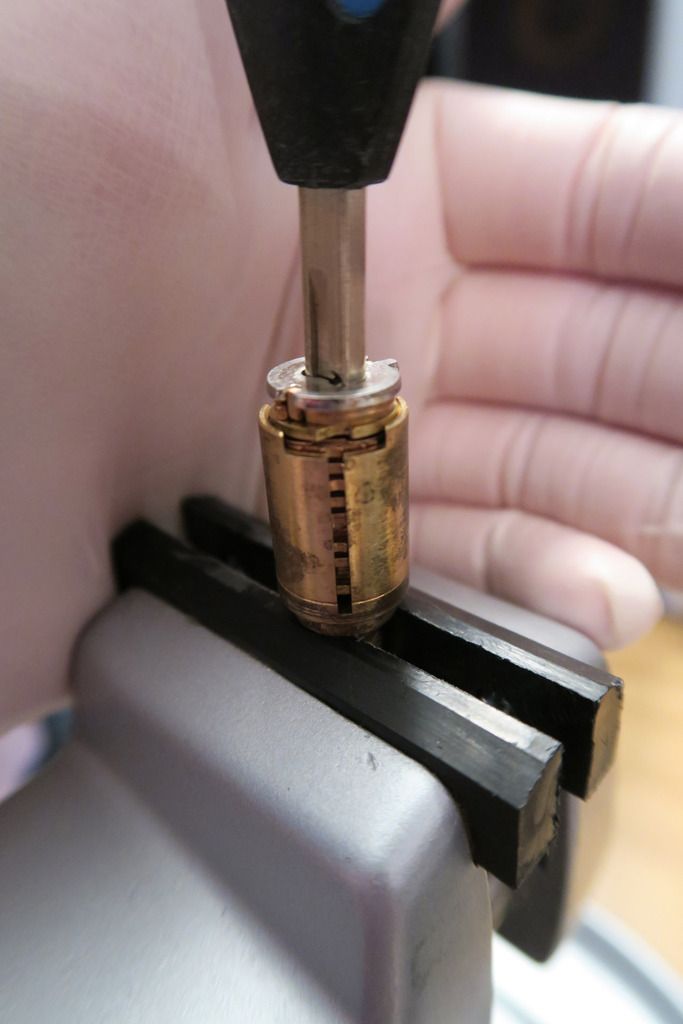
Time to tackle this beast – with this much grime, there’s no getting away from it – we have to strip and clean the core!

Image

Should be a fun exercise as I’ve only stripped one other Abloy core – the 656, which I believe was a High Profile (the predecessor to the Exec), and that was an interesting case by itself – so it’ll be cool to see how this one compares!

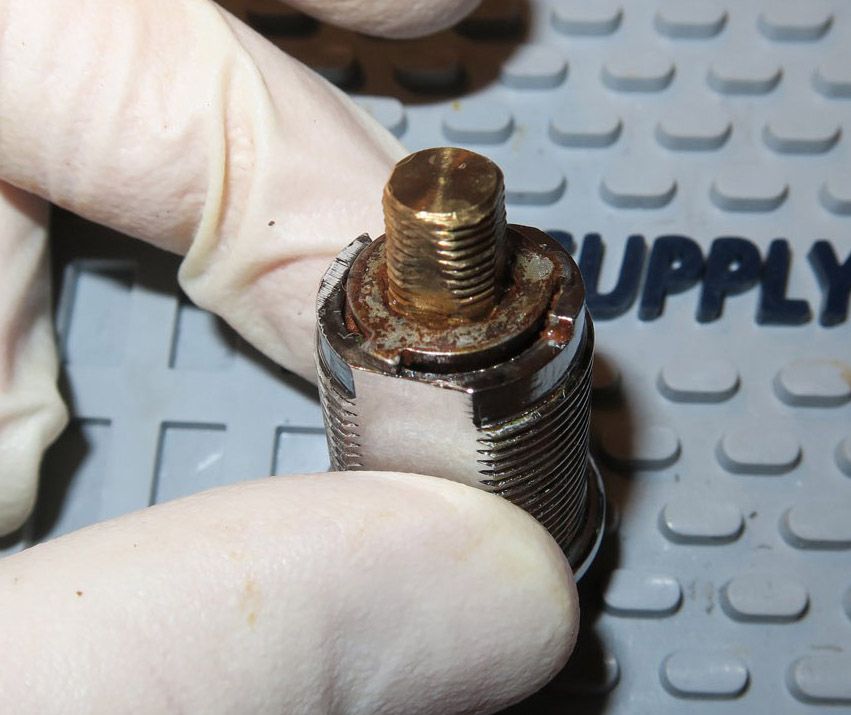
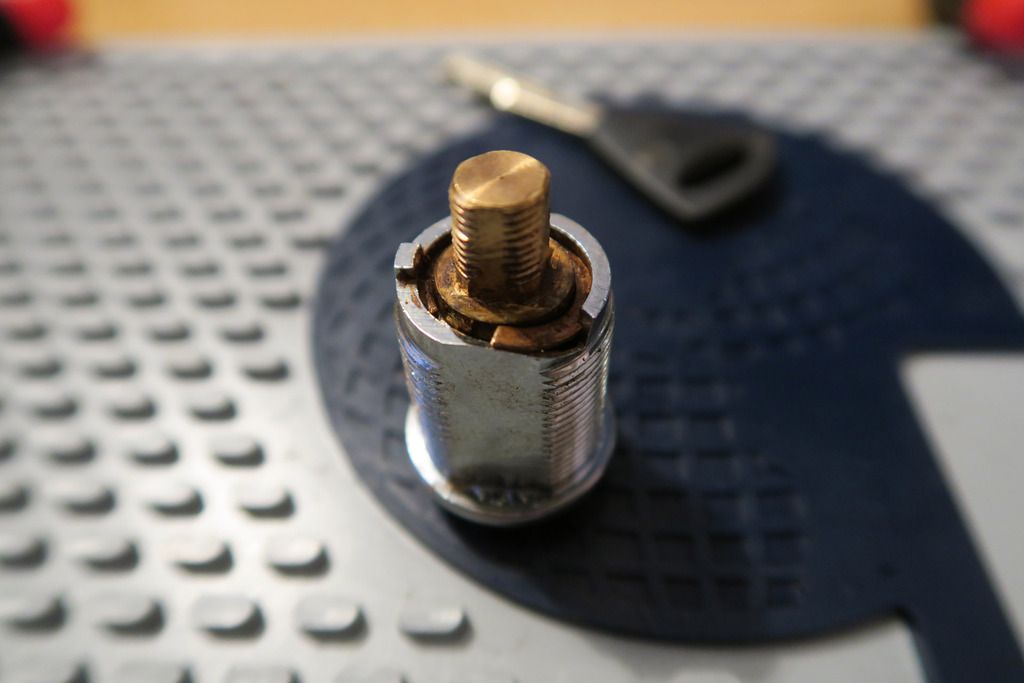
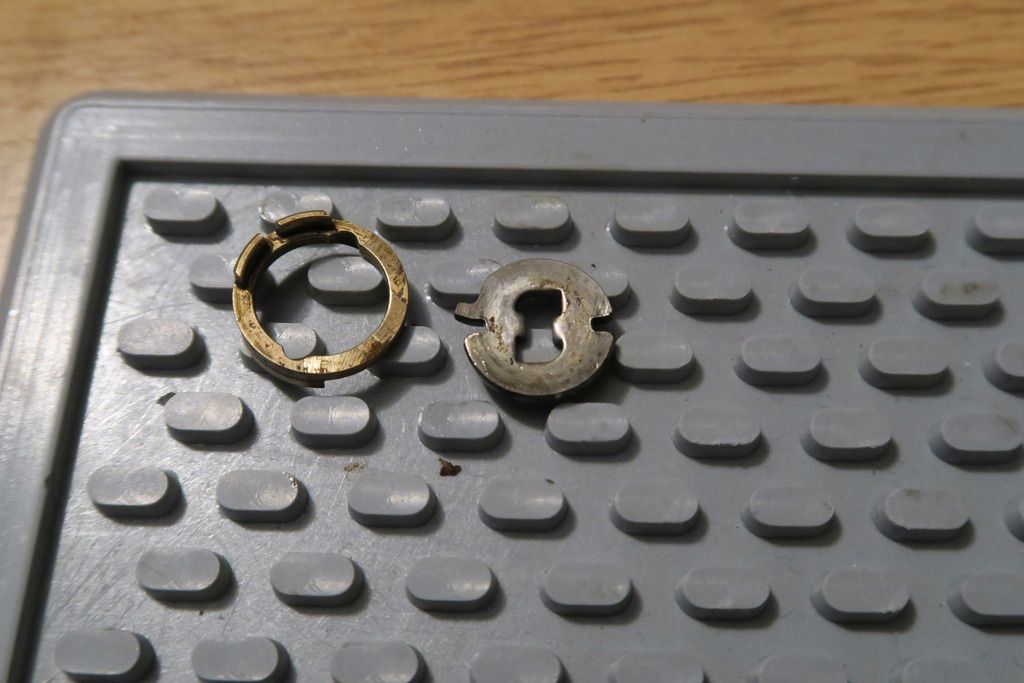
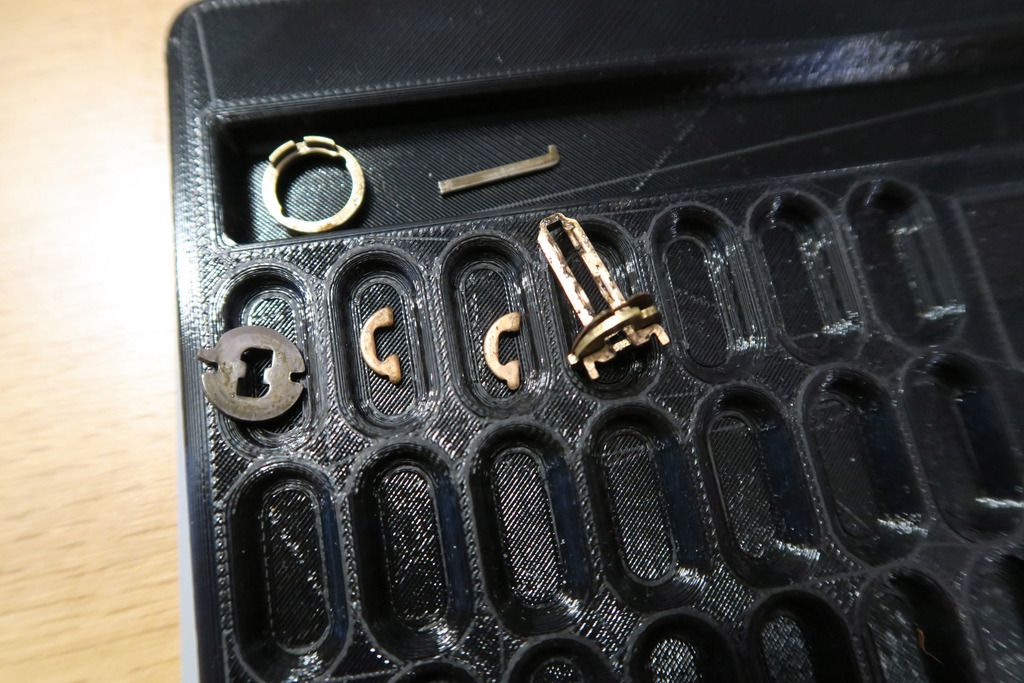
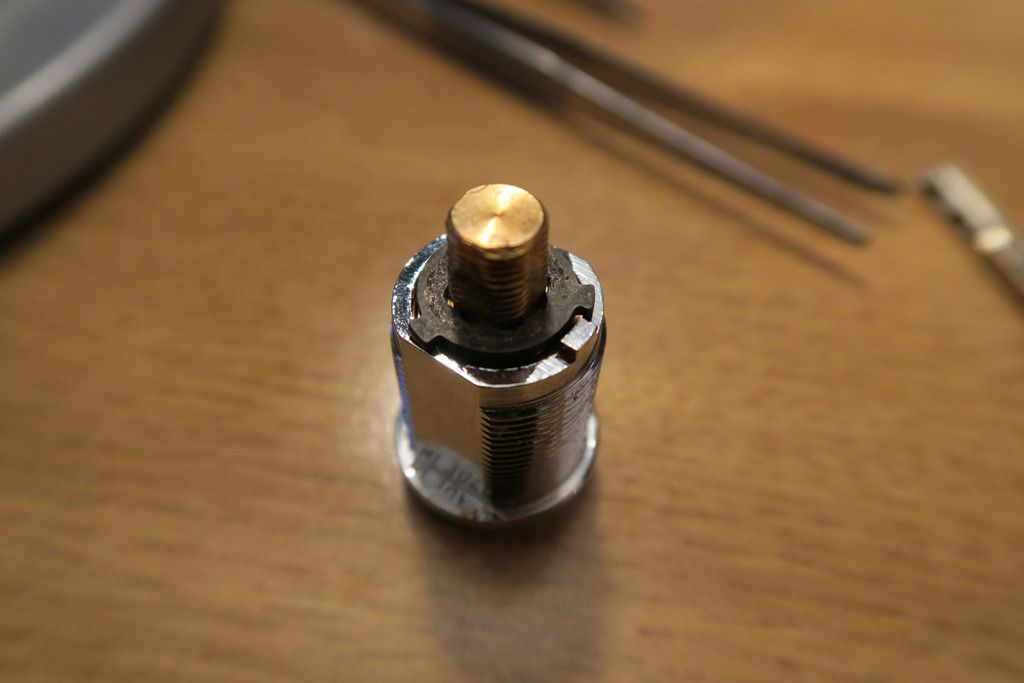
First off, on the previous picture, note the brass bolt sticking out of the top (which turns the actuator), and the rusty disk that’s the first thing at the back of the core – sharp-eyes readers will notice two nubs sticking out of this ring, and a nub sticking out of the back of the cylinder housing at the 3 o’clock position – that ensemble is what controls the range of motion for the cylinder, as the disks turn the nut on the bottom left with rotate counter-clockwise and jam on the cylinder housing nub after approx 90°, preventing further rotation.

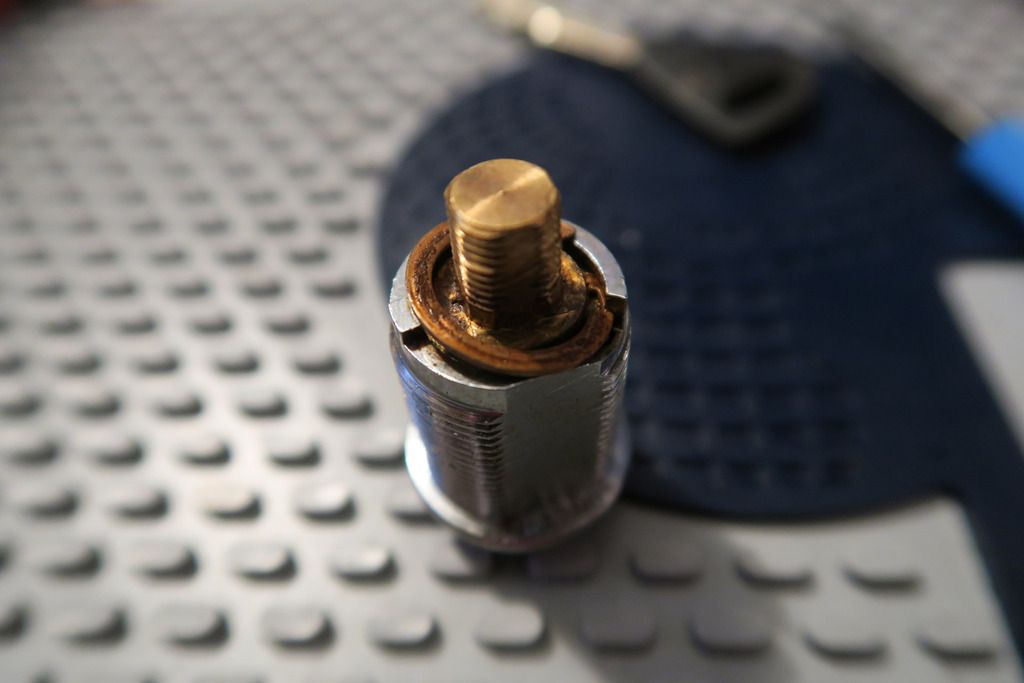
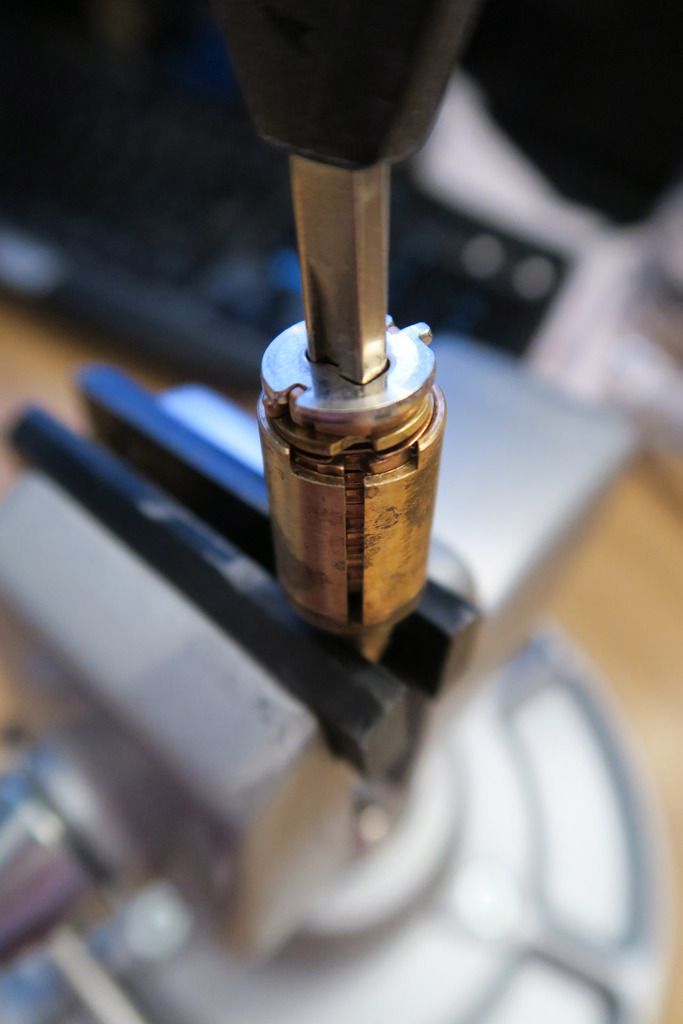
With that disk removed from the cylinder, it’s easier to see the nubs on it – and the rust, sheesh!

Image

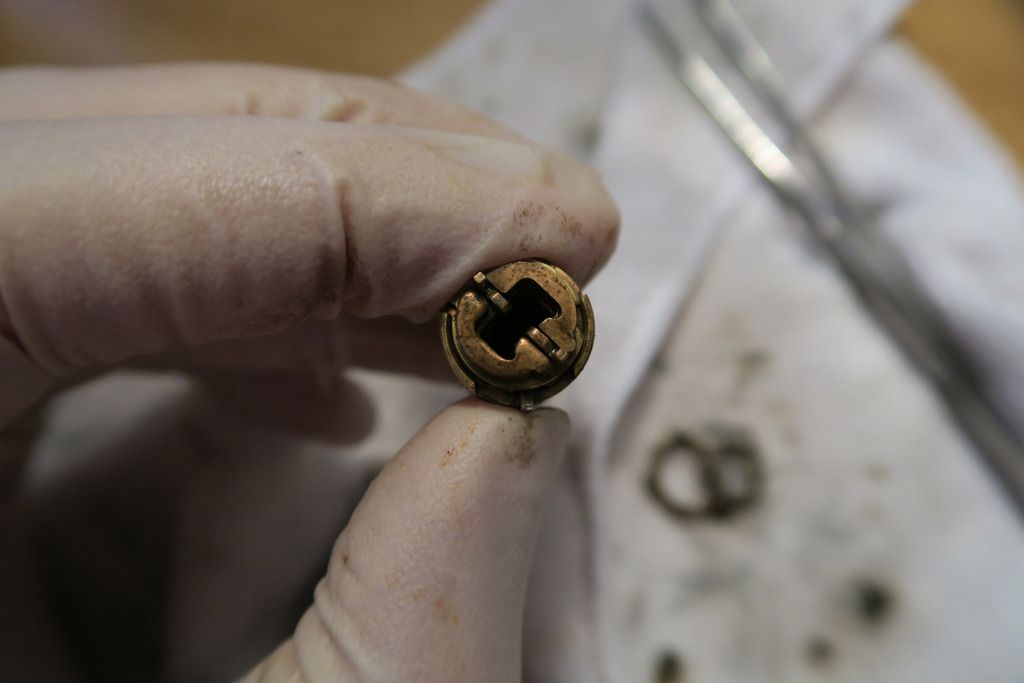
The flower-pattern cutout inside is to allow it to fit in multiple positions on the bolt (no matter where you insert it, there will always be a “square shape” of cutout notches to allow the bolt to slide in. Pretty clever!)

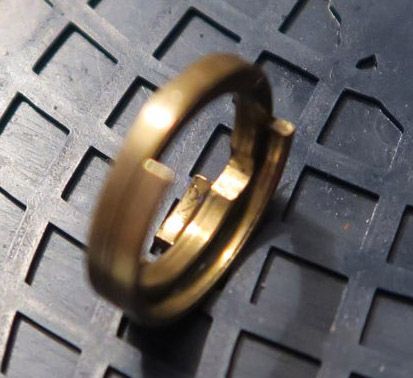
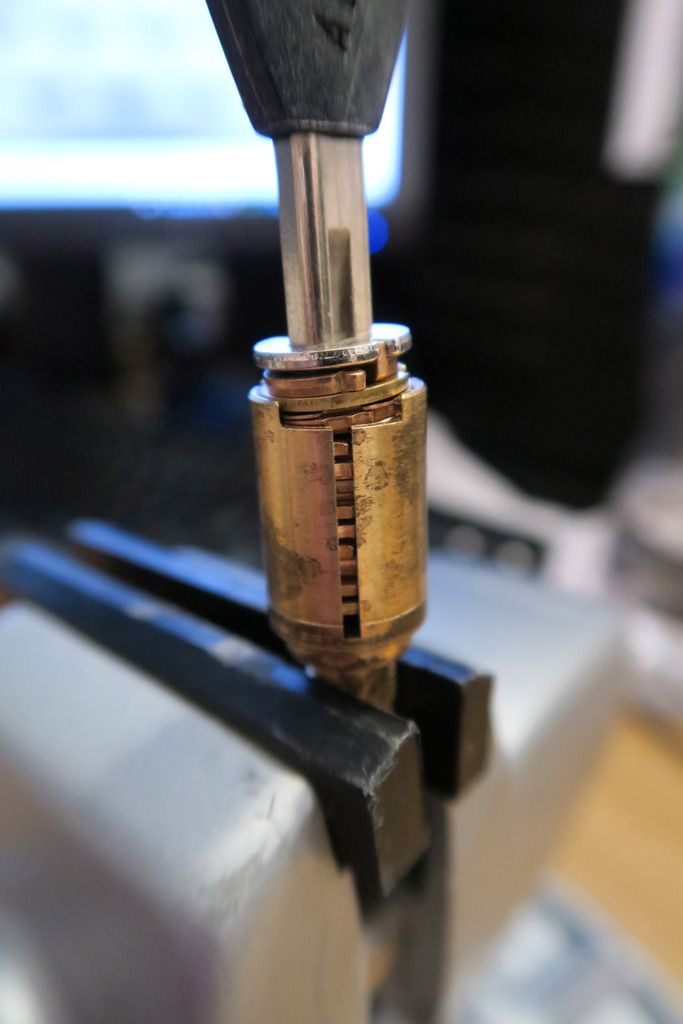
Back of the cylinder with the rotation-blocking disk removed:

Image

The especially eagle-eyed will notice the next disk down – it’s one of those rotating C-clips (note the little notch in the disk at about the 1 o’clock position). To remove this, we rotate it (with a small spike or screwdriver) until the square end lines up with a slope cut into the outer body and then kind of lift/rotate it until it starts to slide up the ramp:

Image

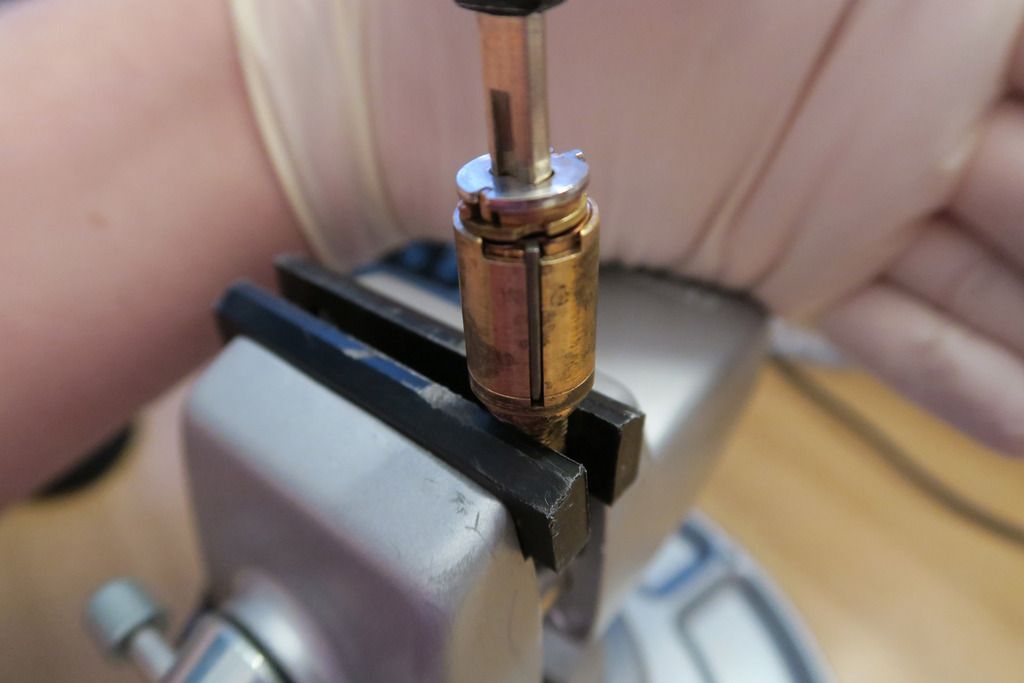
And keep rotating until it’s off:

Image

With that removed, we can just tip the disk carrier out – here’s the front plate (mostly – it left a couple of disks behind, leaving me scratching my head a little as I’ll explain later!):

Image

This disk:

Image

Is part of the DSS mechanism, to prevent the cylinder from turning when the key isn’t fully inserted. It sits at the front of the disk pack and... Well, we’ll get there :)

The next disk in line is the front alignment disk, which aligns the key so that it will fit properly into the disk stack – it also interacts with the side-rod-thingies, I assume to rotate all the disks at once (so this is where the lock tensions? I’m not 100% sure about this yet).:

Image

Here’s the rest of the disk stack, inside the carrier (the two half-parts, which are for the DSS, have fallen off here):

Image

On the stack, you can see the key disks (the lower ones) and the spacer washers inbetween (the higher-up, more copper coloured ones) which prevent each key disk from pushing and rotating the others.

Another shot of the cylinder – you can see the half-piece that fell off more clearly here. There are two of these:

Image

Front of the disk pack with the profile disk and two half-pieces removed:

Image

The next step is to pull out that long rod (you can see the end of it and the two sticking-out nubs in the last pic). When I did this, the last key disk and washer came with it and I couldn’t convince them to leave so I just left them there!

Image

You can also see the front DSS ring (top left), sidebar (Top second-left), profile disk (second line, position 1), left and right ½ disk (next to the profile disk), and the rod thingy :).

With all that stuff out of the way, here’s the rest of the disk pack – just the essential stuff!

Image

(Holding it on with a hex driver in case they all decide to fall out and go everywhere, hahah!)

Then, carefully, we remove each disk-and-washer pair and lay them out (in this case going from left to right, up to down as they come out of the stack from the front, meaning the “last” disk (bottom right) was at the back of the cylinder, nearest to the bolt):

Image

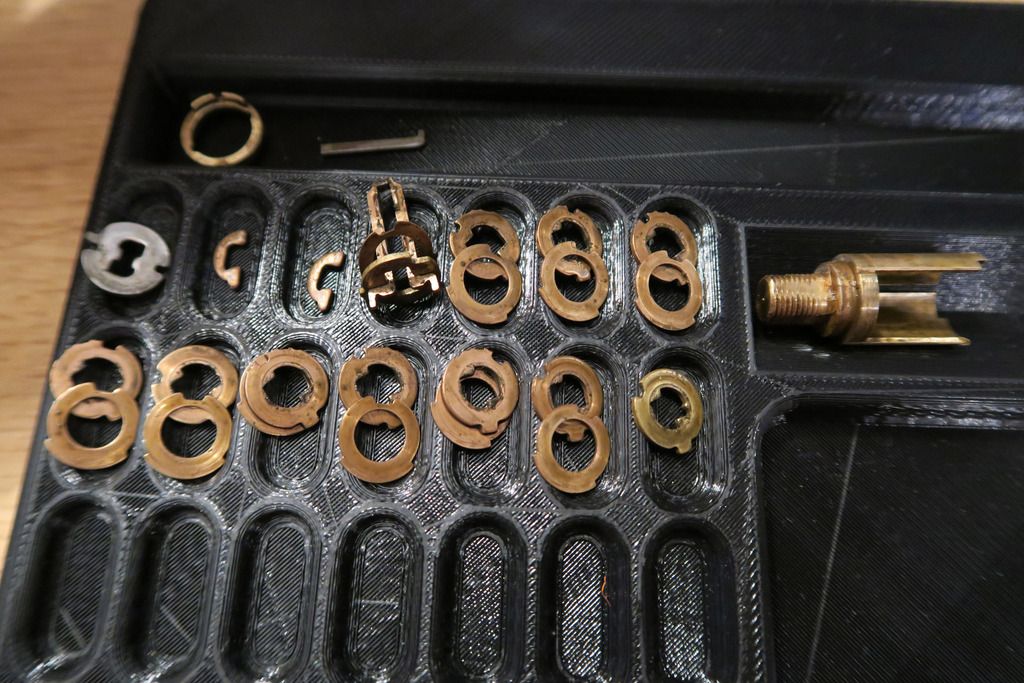
Closeup of some disks:

Image

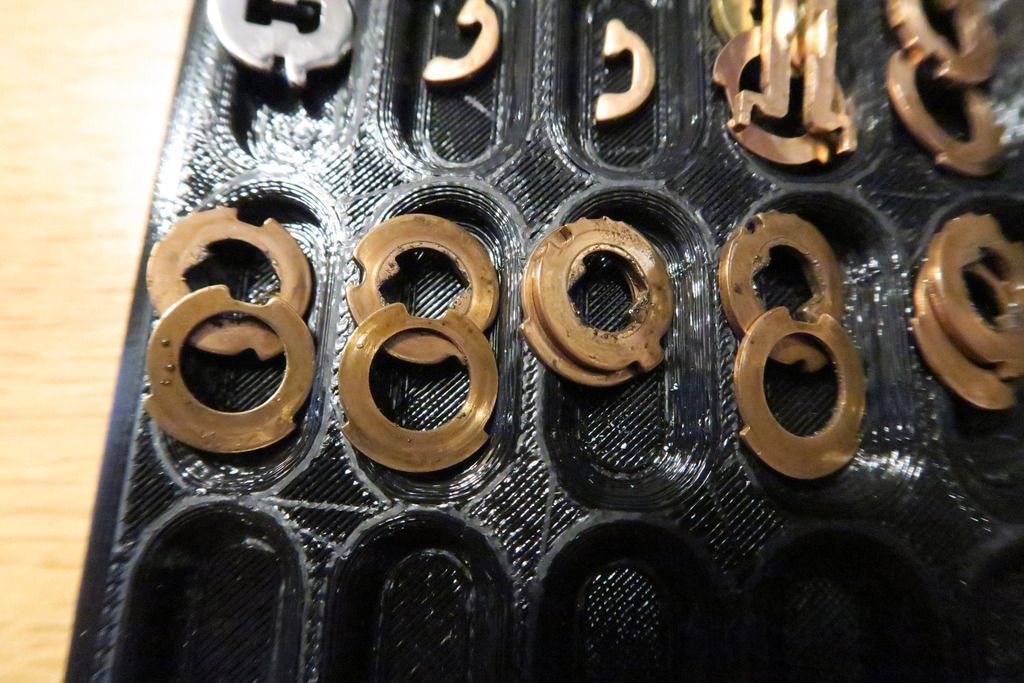
You can see the black grime – you can also see the false and true gates on the key disks (the little “nibbles” on the outside of the disk in one position, and one “big” nibble for the true gate), as well as the nub that sits just in the cutout gap in the disk carrier body and stops the disks rotating more than they’re supposed to. The cutout in the spacer disks (washers) is to allow the sidebar to slot in properly.

I then set up a little workstation – four small pots with WD-40 in, each to take a key disk and washer pair (to keep them separated from each other and also in the correct order). After having a dunk in that I’d give them a preliminary wipe off, then dunk them again and repeat that 3-4 times until they’re clean, then return them to the pinning tray. After all four pots are done (to avoid confusion), I’d add the next 4 sets and continue:

Image

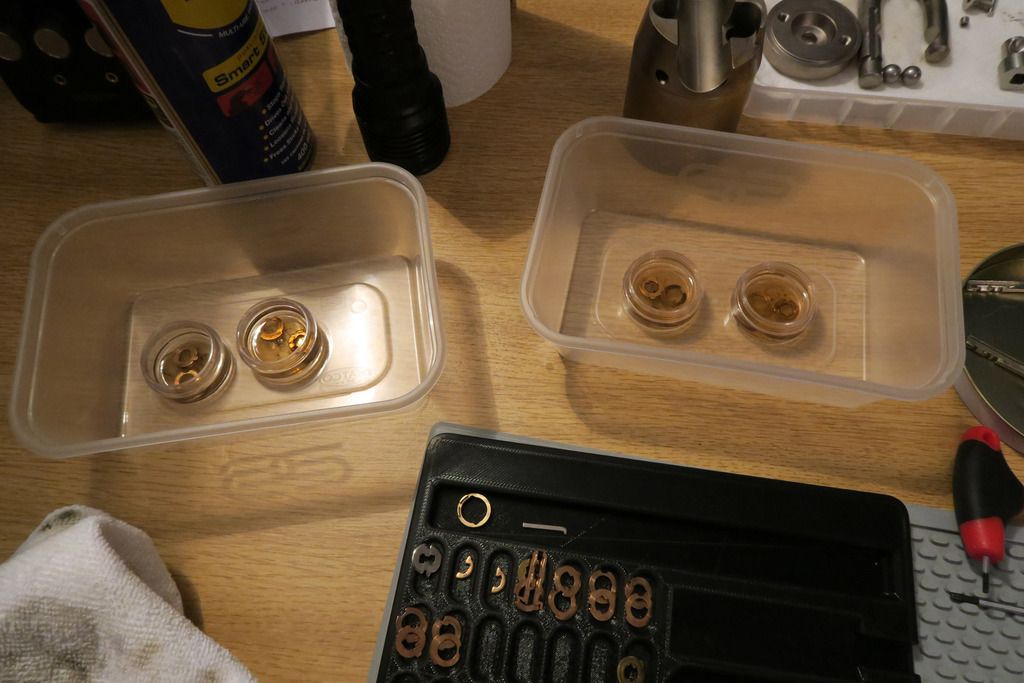
...Until all the disks are clean – along with the other parts (cam lock body, disk carrier, c-clip, DSS ring, sidebar, disk rod and all the disks and washers):

Image

Oh, and the keys. Can’t forget those or we’ll just end up introducing all the grime back into the lock!

Image

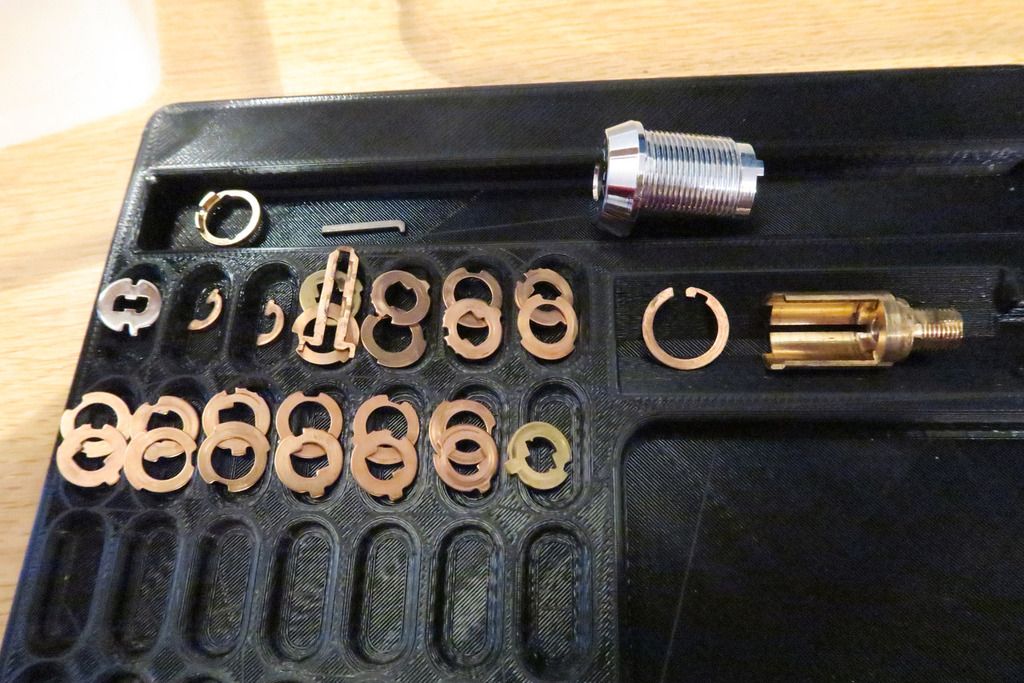
All the parts cleaned:

Image

(obviously the body was also cleaned using the usual methods – spray in some WD-40 carefully, use a cloth mounted on a screwdriver to shove into all the holes and wiggle about, remove, pick a new bit of cloth and repeat ad nauseum.. heh!)

Just for fun, looking at how the cam lock front fits into the bottom plate:

Image

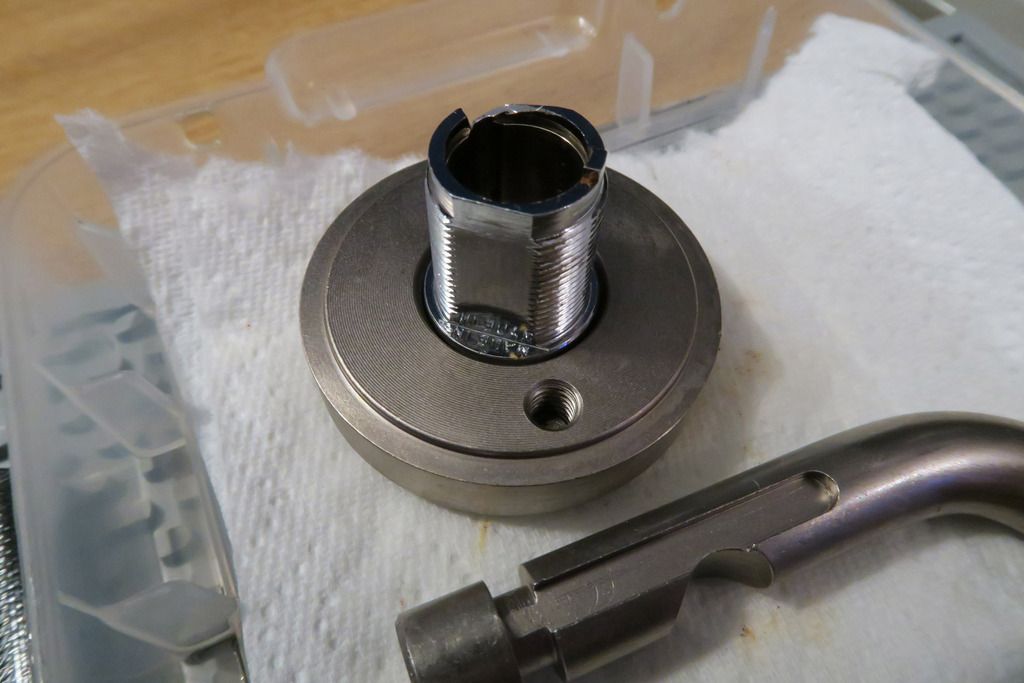
Oh, with the bottom plate properly cleaned we can see the manufacturing rings cut into it, pretty cool looking IMO:

Image

Also for fun, looking at the cylinder in the body (no disks in it yet):

Image

You can also see where the side rod would go, and if you can imagine how it’d bind up on the outside of those screw-like rings on the outside of the cam body – yeah, fun times!

Okay, time to start cylinder re-assembly!

Image

Like with the disassembly, we put the disk carrier in a vice to make it easier to add the disks with the help of gravity. The rearmost disk (already inserted) is actually not a key disk at all (i.e, it’s not cut to a certain bitting and the key doesn’t have a unique cut to actuate it) – instead, it’s used to guide the tip of the key and also for the disk controller.

Image

Filling up the disk stack!

Disk pack fully assembled:

Image

This includes the front profile disk, which, along with guiding the key in correctly, is used for key profile purposes, so that unique key profiles can be developed (for higher/differentiated security tiers and military use etc). If the key profile is incorrect, it won’t be able to enter the front cutout. You can also see the “arms” from that rod sticking out of the left and right side at 3 o’clock and 9 o’clock positions (I assume this is used to help the entire stack rotate together).

Now we just insert the key in the locked position:

Image

And rotate it until it stops, and then the sidebar gap will be empty!:

Image

Or... Not. Seems that while cleaning I got some disks flipped upside down, and whilst the key will still fit into them, they now don’t align correctly. Gah!

So, down the stack we go, taking the disks out and placing the back on the pinning tray. Reassembly this time involved adding a disk (rotated furthest anti-clockwise to the “locked” position”), inserting the key, rotating to stop and checking the sidebar cutout. If it isn’t clear, remove and flip the disk and check it again. I’m sure there must be an easier way to tell but I couldn’t figure it out!

Eventually, after lots of checking:

Image

Woot! We have a clear sidebar slot :).

Add the sidebar to be sure:

Image

Okay, now it’s time to explain the operation of the DSS. First we need to add the DSS outer ring, and the two half-parts:

Image

Notice how the outer ring has two small indents cut out of it (roughly 12 o’clock and 6 o’clock positions), and that the ½ disks have little hammerhead ends on one end, which had a nub that sticks into that cutout? Remember how the key had a dimple-cut near the bow? When the key is inserted and rotational pressure is exerted, the DSS ring will push on the rounded edges of the two inner ½ disks and try to push their outer nubs down and into the cylinder space. If the key is inserted correctly (all the way in), the inner part of that hammerhead nub will slip into the dimple cut on the key, the outer nubs will clear the cutout hole in the outer DSS disk, and the cylinder can turn. If the key isn’t inserted properly, the inner nubs of the hammerhead parts of the ½ disks will jam on the key metal, preventing them from falling in and thus preventing the outer nubs from clearing the DSS disk, stopping the cylinder turning. Simple but ingenious!

Disks from an angle:

Image

When I was first re-assembling this, I forgot to add that outer DSS ring and whilst it went together, I couldn’t figure out why the ½ disks were flopping around into the keyway. I first encountered these ½ disks on the Abloy 656 that I stripped and never really figured out what they did until today after I read Han Fey’s useful guide and found the outer disk again, and put two and two together! Got there in the end :).

Then we just pop the profile disk on (making sure that it’s the right way round!):

Image

And slot the carrier back into the cam lock body (with the sidebar positioned in the sidebar cutout of the body, forgot to photo that!):

Image

Looking shiny and clean!

Image

We then reverse the steps with the c-clip, sliding it back into place, and replace the limiter ring:

Image

Note that you’ll want to take careful note (maybe a photo) of the position that the ring is in relative to the back of the lock body before you disassemble, so you can re-assemble the same way – I suspect you’ll have problems if you put it on in the wrong position!)

Notice also how this is the one ring that didn’t really clean up. It was super rusty so I bathed it in Jenolite for a while – didn’t turn the disk pink, and it DID get rid of the rust, but left an ugly grey exposed metal surface underneath. Bah!

Oh, one final note – when I was first testing this, I forgot to put the limiter disk on the back as well as the c-clip whilst testing that the lock worked, but found that I couldn’t remove the key. After AGES of fiddling, I figured out how to get the key out – the limiter must be in place (to stop the key from endlessly spinning and not being stopped at the removable point (where the sidebar aligns with the cutout in the body)), and without the c-clip in place the disks were shifting around and I had to actually pull the core body manually back whilst pulling the key forward – totally unintuitive and also my fault since I should have put both parts back on before testing (although putting the C-clip back on is a pain especially if you aren’t yet sure whether it’s going to work). Just remember if you get stuck in the same situation – drop the limiter disk back in the right position and pull the core body back whilst pulling the key forward (out). Neat trick!

With that over and done, it’s time to re-assemble the body!

Image

You can see where the core fits and how the side-bar (not the sidebar!) will jam up against the edge of it, cutting across that hole. I am assuming that the main reason for this is to stop the core jiggling around and also to protect from the bottom plate being drilled out around the core’s edge and then it being pulled out?

Better shot of the back of the lock – fairly normal from what I remember of the other Rotaloks, apart from being round rather than Euro-shaped. The lip at the back is where the break in the middle of the actuator fits, between the rear part (which interacts with the ball bearings) and the front part which connects to the rear of the core:

Image

Pop in the ball bearings, slide the actuator in:

Image

Pop in the sidebar:

Image

Side the core down.....

Image

Ahaha no, of course it’s not that simple. See how it doesn’t quite fit? Basically you need to put the core in most of the way, then start to slide the bar in from the side, then kind of ram-jam both parts bit-at-a-time until the core is in all the way and the bar is in the right place. Oh, and don’t forget to make sure the core isn’t in upside down, and that the actuator is in the right position of 4 possible ones (the hole is square – although possibly 2 of 4 positions would work, untested), and that the bolt is going into the core properly – a fun challenge ¬_¬.

Finally in!:

Image

Lube up the inner lock body/bottom plate area:

Image

Now we’ll demonstrate the shackle retention mechanism that I mentioned earlier. In previous Rotaloks, a small grub screw held in place a long metal rod that went through the body. This rod will slide along a squared-off edge of the shackle but will jam on the fully rounded part at the bottom, preventing removal.

In this lock, the shackle instead has a slot cut into it, and when the grub screw (no rod this time) is fully screwed in, a nub on the end of the screw will sit in the groove and prevent it from coming out:

Image

(Obviously, the groove doesn’t go all the way to the end!). As far as I know, this is an older lock (due to the older Exec cylinder) so maybe they had a problem with the screw loosening and the shackle falling out? Or maybe they’re just two totally different designs and not influenced by any failing of one or the other. Or possible a patent issue – who knows!

With the cylinder in place, all we need to do now is screw on the bottom plate* via the inside screws and attach the shackle, securing it with the grub screw as described:

Image

(* unlike the other Rotaloks, which use a Euro cylinder, this Rota doesn’t have any issues with screwing the bottom plate on too tightly. This is because with Euro cylinders, the entire front of the core rotates, and since this parts contacts the bottom plate, if screwed on too tightly (or the core or actuator are too long) the front of the core will jam up on the bottom plate and not move, squashed between the bottom plate and the actuator / back of the lock cut-out. However because cam locks have a solid main body and it’s only the disk carrier inside that moves, even if the front of the cam lock body is jammed tight up against the bottom plate, it doesn’t matter as that part doesn’t rotate anyway).

Lock re-assembled:

Image

Bottom plate and cylinder front after cleaning:

Image

Lock and keys:

Image

Image

Tagged and ready for the lock board:

Image

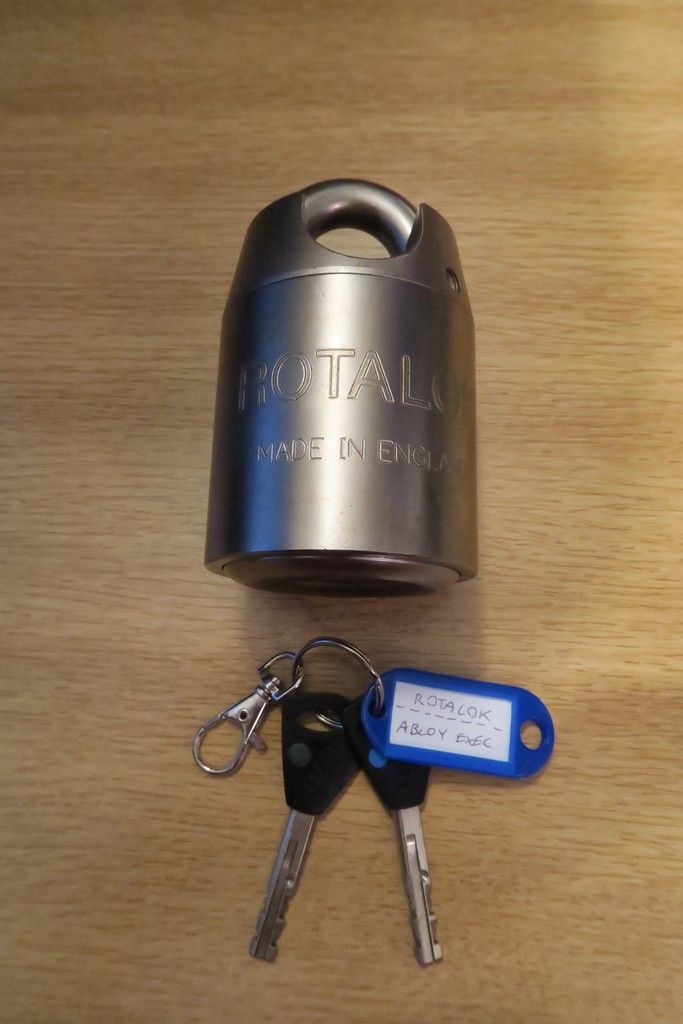
And that about does it for this write-up! I was super excited to see this for sale and even more excited (and bewildered) once I got it apart so I hope you enjoyed reading along!
<<

Riyame

Keeper of the Bests / Supreme Overlord of Small Format Interchangeable Picking Nightmares

Posts: 2164

Joined: Sun Jul 24, 2011 11:16 am

Location: Canada

Post Sat Aug 27, 2016 5:00 am

Re: LocksportSouth's Stash

Very interesting Rotalock post. I never would have guessed a cam lock would have been in there. For rust removal have your tried looking for a product called Evapo-Rust? It works quite well.

And I noticed that you had a picture of one of these on your board :lol:
Image
PhoneMan: I always knew I'd say something stupid and it would be someone's sig
macgng: i am an equal opportunity pervert
macgng: aww fuck thats goin in someone sig :-(

If life gives you melons, you might be dyslexic.
<<

LocksportSouth

User avatar

Active Member

Posts: 369

Joined: Wed Dec 02, 2015 6:51 pm

Location: UK

Post Sat Aug 27, 2016 5:32 am

Re: LocksportSouth's Stash

Riyame wrote:Very interesting Rotalock post. I never would have guessed a cam lock would have been in there. For rust removal have your tried looking for a product called Evapo-Rust? It works quite well.

And I noticed that you had a picture of one of these on your board :lol:
Image


I know - it was a total shock to me also, was expecting a 1/2 Euro, though I've not seen a 1/2 Euro Exec before either. Very cool find!
Thanks for the tip about Evapo-Rust - I'll give it a look over, see if I can find a non-valuable rusty lock to test it on!

Aaaaah! Yes, something like that! Your NAPEC looks squarer and smaller than the other one I've seen (Pinned post on LP101 by CheerIO), IIRC that one was the "Style 3" so I'm guessing there are a few variants? I'd be happy with either, hah! Only two people I know who own one... Though that pic you linked is on Gordon's bucket... Interesting!

Quick edit: Just realised that that one is open shackle whereas CheerIO's one is closed, not sure if that's the only difference. I'd give my right arm for a NAPEC.. And all the other limbs, lmao!
<<

Riyame

Keeper of the Bests / Supreme Overlord of Small Format Interchangeable Picking Nightmares

Posts: 2164

Joined: Sun Jul 24, 2011 11:16 am

Location: Canada

Post Sat Aug 27, 2016 6:31 am

Re: LocksportSouth's Stash

Yes, Gordon has it in his possession at the moment, it is missing one of the cylinders and pawls? so he was going to try and get one made up. I just asked him to take a funny picture for Macgng :D

I used to have a document showing the different styles, I believe there was a non shrouded, a half shrouded and a full shrouded version.
PhoneMan: I always knew I'd say something stupid and it would be someone's sig
macgng: i am an equal opportunity pervert
macgng: aww fuck thats goin in someone sig :-(

If life gives you melons, you might be dyslexic.
<<

LocksportSouth

User avatar

Active Member

Posts: 369

Joined: Wed Dec 02, 2015 6:51 pm

Location: UK

Post Sat Aug 27, 2016 6:46 am

Re: LocksportSouth's Stash

Riyame wrote:Yes, Gordon has it in his possession at the moment, it is missing one of the cylinders and pawls? so he was going to try and get one made up. I just asked him to take a funny picture for Macgng :D

I used to have a document showing the different styles, I believe there was a non shrouded, a half shrouded and a full shrouded version.


Ahh fair play. Good luck getting the parts you need! Love the pic :mrgreen:

Interesting that they made this one in three varieties, I figured since these had a specific purpose they'd be made for a specific hasp. But that's a good thing since there should be more of them out there than I expected... And more to collect, hah! One day.... :whip:
<<

huxleypig

User avatar

The Prestigious and Powerful Porcine Prelate

Posts: 954

Joined: Wed Jul 14, 2010 4:59 am

Location: West Mids, UK

Post Sat Aug 27, 2016 3:37 pm

Re: LocksportSouth's Stash

Great Exec pics LSS, I never seen one properly exposed. Very interesting that the DSS is there, I always presumed that Exec was around before Disklock but the original Disklock has no DSS. I am thinking that Exec profile came in the middle of Disklock and Disklock Pro?

Those washers - 2 different sizes, correct? What thickness are they?

**EDIT** No, the Exec was 1994, after both Disklocks *EDIT**
<<

macgng

User avatar

Contributor / I Fought Tooth and Nail to Acquire BO...

Posts: 991

Joined: Sat Jan 22, 2011 9:38 pm

Location: MD, USA

Post Sat Aug 27, 2016 5:28 pm

Re: LocksportSouth's Stash

Looks like you are missing a few S&Gs on that board .... ;) :) (i really like that board idea, probably gonna steal the idea ;) and maybe add some shelves)

Image

Image

Image

Image

Image


i also have a chrome 831 and a postal 826, but i don't have a pic of those right now... so i'll take a few.
Nibbler: The poop-eradication is but one aspect of your importance.
<<

LocksportSouth

User avatar

Active Member

Posts: 369

Joined: Wed Dec 02, 2015 6:51 pm

Location: UK

Post Sat Aug 27, 2016 6:21 pm

Re: LocksportSouth's Stash

huxleypig - Thanks! It was fun taking a look at something different. I've seen conflicting info on the various dates (for example there's a pic on SecuritySnobs showing each core type and a date, but that conflicts with info from.. I think maybe LockWiki? I've forgotton where I found in my research now). But yeah it does have the DSS, pretty cool.

Which washers do you mean? The spacers between the disks? I think they're all the same thickness but I could be wrong. I didn't measure any of the thicknesses I'm afraid and after the hassle of stripping that down I don't really want to to it again - but I'm planning on stripping all of my locks for YouTube some time so when I do that I'll take measurements :).

macgng - damn yooooooou! Haha, well I don't have space for many more but I *DO* have a slot for either an 831A or an 844, whichever I find first. And a NAPEC of course :D. Yeah the board idea worked out quite well, I thought about a lot of options but either it didn't really work (display cabinet - locks with a chain loop on the bottom or without a flat bottom won't stand up) or would require fixing to the wall (such as a pegboard). This way I've actually been able to set up the board freestanding but fixed to the desk surface and pinned behind - the next plan is to get a display cabinet to keep some of the other stuff that's building up, such as cutaways :).

Oh and hey, if you ever find yourself with an 831A or 844 spare... Or any S&G I don't currently have for that matter... :P
PreviousNext

Return to Your Lock Collections

Who is online

Users browsing this forum: No registered users

cron
Don't forget to visit our sponsors for all of your lockpicking needs!
Powered by phpBB © 2000, 2002, 2005, 2007 phpBB Grop
"CA Black" theme designed by stsoftware