
![]() Mon Jun 29, 2015 4:32 pm
Mon Jun 29, 2015 4:32 pm
Antique Miller 6 Lever Padlock Saved! PICTURE HEAVY
Antique Miller 6 levers Double Bitted Padlock
I won an ebay lot for under $20 shipped. When the box arrived, the Miller 6 lever stood out like a sore thumb. After cleaning the lock free of the gunk and dirt, it was apparent that all of the springs were broken/damages as the lock would open just by shacking it side to side (Just for the record, I never aimed to remove the patina. I have now improved my rust removing techniques which have no effect on the beautiful patina).
I used a Dremel with a HSS cutter to grind down the sides of the rivets just enough to clear the hole so that I can reuse the same rivets. Keep in mind that the Dremel HSS cutter has cutting blades on the sides and on the bottom which cut into the body cover. I filed that bottom part of the cutter so that issue was resolved but you can see which rivet was the first and which was the last. I popped the body cover open and all of the broken springs were confirmed and now the fun begins.
Buying new springs is probably not even possible so I saved myself the time from search. After speaking to Lauren, he advised that he uses springs from other similar locks however this wasn’t an option for me as I did not have any other spare locks with springs similar to these. After looking at them closer, they are nothing more than flat piece of spring steel bent in 5 places so I decided to make my own.
I collected the broken spring piece I had and put together a complete spring for comparison. Taking the smallest wind shield wiper inserts, I measured and marked them for the right thickness and width and cut them to estimated lengths. I then drew up a little template as to where the bend points should be and marked each bend point on the new to be springs. Enough playing around, so I clamped the first one in my vise and started to bend using a bigger piece of metal to make sure I would get a good bend. I first bent the middle to also server as my guide point making sure each other bent was equal in length. Repeat to the other 2 and I was done.. almost.
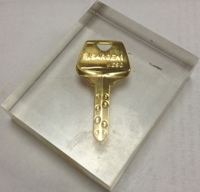
They needed some last tweaks but they worked. I just made springs for a lock about 100 years old lol. For the shackle spring, I took a short cut and purchased a ready spring in the correct thickness which I bent into shape. The shackle spring required much more tweaking but at the end, it took works great. I assembled the padlock back together to make sure everything works and in fact it does. I did not crimp the rivets yet as I plan to make a key (or maybe a cut-away) for this lock but I am very happy with the end results and that I brought a dead old lock back to life and probably stronger then it originally was from the factory
Hope you enjoy this and pictures for your viewing pleasures are below.
I won an ebay lot for under $20 shipped. When the box arrived, the Miller 6 lever stood out like a sore thumb. After cleaning the lock free of the gunk and dirt, it was apparent that all of the springs were broken/damages as the lock would open just by shacking it side to side (Just for the record, I never aimed to remove the patina. I have now improved my rust removing techniques which have no effect on the beautiful patina).
I used a Dremel with a HSS cutter to grind down the sides of the rivets just enough to clear the hole so that I can reuse the same rivets. Keep in mind that the Dremel HSS cutter has cutting blades on the sides and on the bottom which cut into the body cover. I filed that bottom part of the cutter so that issue was resolved but you can see which rivet was the first and which was the last. I popped the body cover open and all of the broken springs were confirmed and now the fun begins.
Buying new springs is probably not even possible so I saved myself the time from search. After speaking to Lauren, he advised that he uses springs from other similar locks however this wasn’t an option for me as I did not have any other spare locks with springs similar to these. After looking at them closer, they are nothing more than flat piece of spring steel bent in 5 places so I decided to make my own.
I collected the broken spring piece I had and put together a complete spring for comparison. Taking the smallest wind shield wiper inserts, I measured and marked them for the right thickness and width and cut them to estimated lengths. I then drew up a little template as to where the bend points should be and marked each bend point on the new to be springs. Enough playing around, so I clamped the first one in my vise and started to bend using a bigger piece of metal to make sure I would get a good bend. I first bent the middle to also server as my guide point making sure each other bent was equal in length. Repeat to the other 2 and I was done.. almost.
They needed some last tweaks but they worked. I just made springs for a lock about 100 years old lol. For the shackle spring, I took a short cut and purchased a ready spring in the correct thickness which I bent into shape. The shackle spring required much more tweaking but at the end, it took works great. I assembled the padlock back together to make sure everything works and in fact it does. I did not crimp the rivets yet as I plan to make a key (or maybe a cut-away) for this lock but I am very happy with the end results and that I brought a dead old lock back to life and probably stronger then it originally was from the factory
Hope you enjoy this and pictures for your viewing pleasures are below.
You do not have the required permissions to view the files attached to this post.